Each year, iPhones are capable of taking better photos. Some of these upgrades are made through the camera app and are available to existing iPhone owners. Others get built into the next generation of phones.
We've pulled together tips to help you take the best photos possible with your iPhone, whether you're composing portraits or group shots, capturing fast-action sports or creating artistic photo effects.
Create beautiful portraits
The camera doesn’t look at photo subjects with kindness or love. It treats everything equally. To create beautiful portraits, you want to keep the viewer’s eye on the subject rather than allowing the focus to wander to other elements. The key is to isolate the person in the photo with strategies like these.
Move in close enough so the background isn’t visible.

Either physically move closer to the person, or use the zoom mode. (See below for tips on zooming while maintaining good image quality.) Don’t be afraid to fill the frame with the person’s face. If you do move that close, keep the phone upright and near eye level, because tilting the lens can cause unflattering distortions.
Use a wall or other nondistracting background.
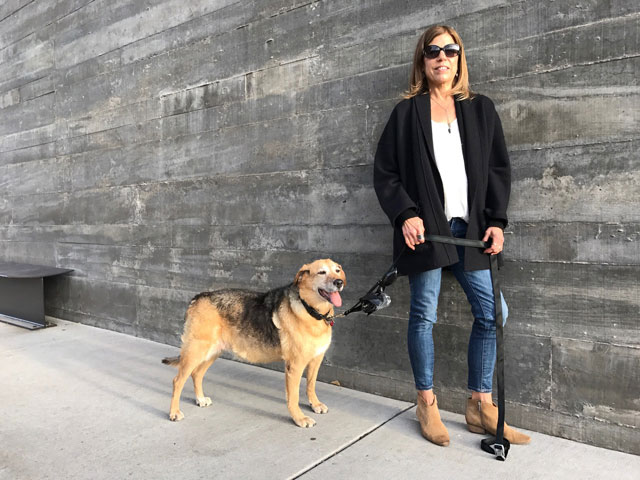
If you want a full-body photo to show off a pretty prom dress, have your subject stand in front of a wall so only the person and the wall is visible in the photo. Consider shooting from an angle rather than straight on. When shooting outdoors, use a sunlit, light-colored wall to reflect light onto your subject and help fill unattractive shadows.
Create distance between a background and your subject.
If you can’t simplify a busy background, have your subject walk closer to the camera, away from distracting objects. A sign, doorway, car or other object will be less prominent if it’s half a block away rather than close to the subject.
Blur the background.
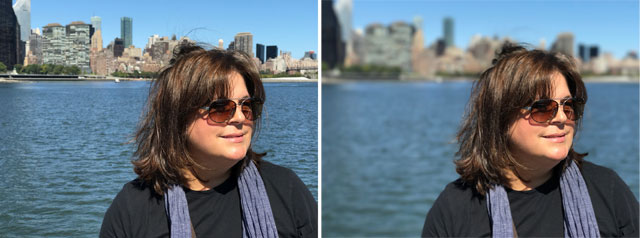
Until recently, blurring the background in portraits was a technique reserved for photographers using DSLR cameras with a manually adjustable lens opening. With its dual camera system (one wide-angle lens and one telephoto lens), the iPhone 7 Plus can create this effect in Portrait Mode, available to users of iOS 10.1 and newer. The camera saves two photos, one with the depth effect applied to blur the background and another without any effect. Annoying background objects such as sign posts or strangers are blurred away in an effect called “bokeh,” leaving blobs of color or indistinguishable shapes. The result is a photo that keeps the viewer’s eye on the subject.
Capturing close-ups
The zoom feature on most iPhones is digital rather than a true zoom. The camera uses the center of the image and enlarges it onscreen, essentially cropping it. The more you zoom in, the more "noisy" and unclear the image becomes. Minimize those quality issues with these techniques.
Step closer to the subject instead of zooming in.
Whenever possible, move closer to your subject to reduce the amount of zooming required to make the subject larger in the photo. If there is room in front of you, walk forward.
Crop the photo using the photo editor.

A photo with no zoom will maintain brightness and clarity. If you can’t get closer to the subject, take the photo, then edit it. Use the crop tool in the iPhone’s camera app editing mode to cut away the distracting background. Unless you are trying to crop to a small part of the photo, this will result in a clearer photo than using the digital zoom.
Use the optical zoom instead of a digital zoom.
Unlike a digital zoom that loses quality, an optical zoom uses lenses that can physically move to make an object appear larger in a photo. A photo taken using an optical zoom will retain better picture quality. The iPhone 7 Plus telephoto lens uses optical zoom when you choose 2x zoom (with low-light exceptions noted below).
Capturing the details in low light
Taking photos in low light (at night or indoors) is a challenge for phone cameras. Low-light sensitivity on iPhones continues to improve. The iPhone 7 models have a f 1.8 aperture on the wide-angle lens to let in more light. More light results in a better photo.
Still, don’t expect miracles. Photos taken indoors may not be as grainy and noisy as those taken with previous iPhone cameras, but photos taken in dark rooms can still be blurry and grainy.
Move your subject closer to a light source.
When shooting indoors, try to move your subject near a window or bright lamp for better illumination. Don’t move the subject so close to a light that there are “hot spots” where the light washes out the details in the highlight areas. If you have an adjustable lamp, aim it at a white or beige wall to bounce light onto your subject.
Use a longer exposure for stationary objects.
Along with using a wider aperture, keeping the shutter open longer will bring in more light. The iPhone camera doesn’t let you change the shutter speed, but other camera apps like Slow Shutter (see more below) can be set to keep the shutter open for 1/8 second to 60 seconds or more. When the shutter is open longer than 1/60 second, anything that moves in the photo will be blurred. The whole photo will blur if you move the camera.
Use an iPhone tripod and a remote control or self-timer so the camera doesn’t shake while the shutter stays open. If you are serious about shooting indoors, consider the MeFoto BackPacker Air ($125 on Amazon). It can sit on a tabletop or on the ground, and it comes with a Bluetooth remote control for your phone.
Use the phone’s flash carefully.
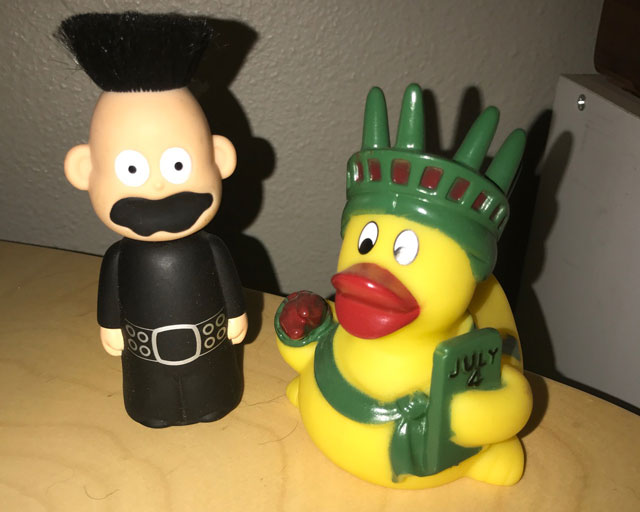
Used correctly, your phone’s flash can help you preserve image quality in low-light situations. The iPhone 7 has four LED flashes to give you 50 percent more light. Now, friends sitting at the end of a long table at a restaurant may get illuminated and not fall into a black abyss.
Be sure not to use a flash on objects closer than 4 feet or your photo will be too bright. Pay attention to anything that might reflect the light of the flash: metal, window glass, glass over framed artwork or even the shiny fur of your black Labrador retriever. If you see a bright area, try changing the angle of the phone by moving left, right, up or down until you don’t see the flash reflection.
Don’t zoom in when it’s dark.
The adverse effects of zooming into a subject become worse when zooming in low light. Move closer to the subject rather than zooming.
This holds true for the iPhone 7 Plus because the phone defaults to using the wide-angle lens in low light. Instead of using the 2x telephoto, as it does in bright light, the phone uses a digital zoom when it’s dark. In low light, consider using a third-party camera app like ProCamera ($4.99) to manually choose the telephoto lens.
Catching sports and fast-action photos
Trying to capture that perfect moment during sports and fast-action can be frustrating. Here’s how to better your odds of getting the perfect shot.
Use Burst mode.
To take several photos in succession, simply hold your finger on the shutter (either the onscreen dot or the volume button). After shooting the burst photos, select and save only the ones you want.
Be ready for the shot.
When shooting photos of a race, focus on the ground over which the bike, car or horse will pass. Frame the photo, and hold your finger on the spot on the screen to lock focus and exposure. Then wait until the subject enters the frame, and press burst mode. You won’t risk missing the moment while the camera takes time to focus and meter.
The Burst Mode—high speed camera app ($1.99) gives you more control by letting you choose how many shots you want to take and the intervals between shots. This is great for ski jumping, figure skating and other fast-action sports. The app's continuous light mode keeps the iPhone’s flash lit. When I chose 250 frames with the light, I was able to catch the splash of an ice cube being dropped into a soda.
Blur a photo on purpose

The Slow Shutter app ($1.99) is one of my favorites for creating artsy, blurred effects in a photo. Choose Light Trail to blur car lights zooming by or Motion Blur for the satiny look of flowing water. A slider lets you choose the amount of blur.
Any time you use a slow shutter, use an iPhone tripod to keep your camera still, isolate blurring and give you an otherwise in-focus photo. Go into the settings to choose a short self-timer so you won’t jar the phone camera when it takes the photo.
Follow composition rules
A great photo is one in which the viewer’s eye is directed to an object or follows a line through the picture. Whether the subject of your photo is an object or a person, use the tips in the portraits section above to simplify your photo.
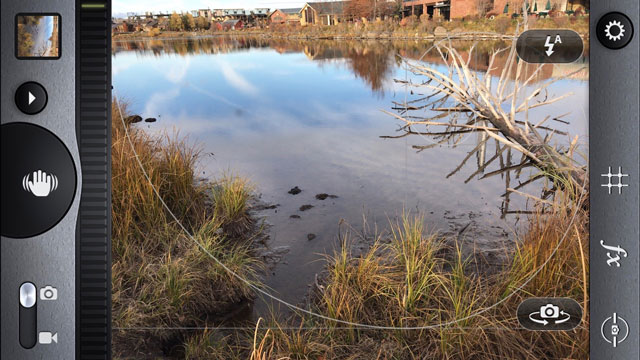
Create better composition by turning on the thirds grid. Place the subject off to the side where the lines intersect. The Camera Awesome app (free) offers the option to overlay a golden spiral pattern to help you place an object where the viewer's eye will naturally spiral to it.
When taking photos, review each shot right away. If it’s not right, make adjustments and take another shot. That quick check may be the difference between a snapshot that never makes it off your phone and a great photo you can enlarge into a print to hang on your wall.
[Image credit: girl sitting over the city via BigStockPhoto, all other photos: Barb Gonzalez/Techlicious]


From facebook10203035299440559 on May 05, 2017 :: 11:42 am
I’m so glad I hung onto this article in my email. I was searching back through emails…after a very busy winter/spring…and found this one. When I saved this article, I still owned iPhone 6. At Christmas, my husband gave me my iPhone 7 Plus. I forgot I even saved this article. So, so much wonderful information here. I especially appreciate your tip on using portrait mode (to blur out busy or unwanted background) for taking close ups. I do a lot of crafting and cooking and often post my photos. This is a huge tip. Thanks. I’ll be saving this article for future reference!
Reply