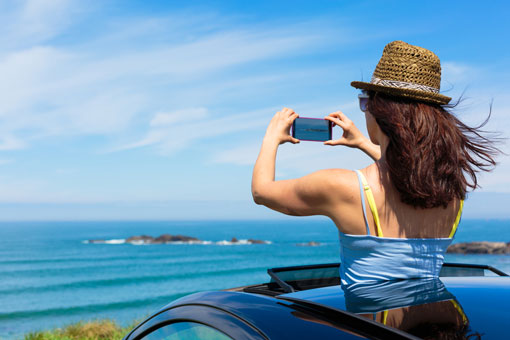
The truism about the best camera being the one you have with you has never been more relevant.
Seventy million photos are posted to Instagram every day, while over on Flickr -- 92 million users strong as of last year -- the most popular camera for photo uploads is the iPhone.
While most smartphones don't have the large sensors, fast lenses and long zooms of stand-alone cameras, there are ways to get around these shortcomings to take fantastic shots. There's plenty you can do when it comes to setting up your shot and picking the right lighting and settings.
Whether it's a selfie, proof that your cat can ride a skateboard, or an awe-inspiring mountain range in France, these 15 easy tips that will help you get the best pictures out of your smartphone
 Composition
Before snapping, take a second to set up your image. “Treat it like a camera,” says Gary Arndt, travel photographer and founder of Everything Everywhere. “Framing a picture on a smartphone is no different than doing it on an SLR.”
1. Don't put your subject dead center
“That's the mistake a lot of people make,” Arndt says. “If you're taking a picture of a person and they're standing on a beach, place the person so they're off to the right or left with the beach as background.”
Not sure you've nailed the balance? Turn on the grid view (in the camera settings menu for Windows Phone, BlackBerry, and Android; in the general settings menu for iPhone), which demarcates the camera view into nine squares according to the rule of thirds.
2. Landscape shot? Look for lines
A line in a photograph, such as a street, a horizon or a mountain range, leads the eye to a point in the image, giving it a kind of story or narrative. For example, the curve of a sand dune might draw the eye towards the dune itself. “Sometimes you could look for symmetry or a pattern that ends in something that breaks the pattern,” Arndt says.
3. Fill the frame
If you're snapping a picture of a friend in front of a landmark or gorgeous scenery, get it all in. “I want a wide shot to show how small they are with respect to surroundings,” Arndt says. So turn that smartphone sideways and get snapping.
4. Use burst mode for action
Smartphones aren't ideal for action shots, as you often can't get close enough to, say, a sports game. But if you want to capture someone in motion, turning on burst mode means your phone can shoot from 10 frames per second (iPhone 5S and up) to around 20 frames per second (HTC One M9), increasing your likelihood of getting clear shots of the scene.
Hold down the shutter button to start burst-mode shooting (as in the iPhone and Samsung Galaxy, for example), or check in the camera settings if you need to switch to this mode.
If your phone's camera doesn't support burst mode, download an app such as Burst Mode (iOS). Full-featured camera apps such as Camera+ (Windows, iOS, Android) also include it as a setting.
5. Posting straight to Instagram?
Instead of cropping an image that's perfectly composed for a rectangular frame, iPhone users on iOS 7 or newer can shoot in square mode by swiping right on the viewfinder. Android, BlackBerry, and Windows Phones don't natively have the feature – instead, take square pics directly from within the Instagram app.
 Lighting
Smartphone cameras have tiny sensors compared to DSLRs, so they capture less light and, therefore, less detail. It's not as noticeable on the smartphone screen, but you may see some blurriness when blown up on a computer monitor. Bottom line? You need good lighting to get good pictures on a smartphone – or a good app.
6. Shoot In the morning or late afternoon
Good lighting is paramount to capturing images with good color and clarity. “The harsh light in the middle of the day isn't the best, though,” Arndt says. He recommends choosing the softer light of morning and late afternoon.
7. Adjust the exposure setting
Of course, life doesn't always hand us perfect natural lighting. If a scene is too dim, increase the exposure to allow more light into the sensor; if the scene is too bright, decrease the exposure.
Here's how:
- Android: Tap the sun icon and adjust the slider between -2 and +2.
- iPhone: Tap and hold on a particular area of the image until a yellow square appears, then tap the sun icon at its right and drag the slider until the image brightness is to your liking.
- Windows Phone: Tap Settings in camera mode and select Brightness.
- BlackBerry 10: You can pick different preset exposure levels, such as Action or Night.
8. In low light use HDR mode
Twilight or candlelight may be most flattering, but it probably won't translate to your smartphone portraits. “Smartphones don't handle as well in low light due to their small sensors,” Arndt says. But iPhones, BlackBerry 10 and Android devices have an HDR (high dynamic range) mode, which means your camera will take three shots at three different exposure settings when you press the shutter, then combine them to get the best level of detail in each area of the shot. Windows Phone users can download HDR Photo Camera. (Didn't work? Check out our tips for shooting in low light.)
9. Illuminate your portraits
If you prefer taking pictures of your friends, be sure there's light falling on their faces. “Our eyes are better than cameras, so if someone is in the shade, we can see them just fine, but with a camera, it'll come out really dark,” Arndt says. It's as simple as asking your subject to step forward out of the shadows.
10. Download an app for long exposures
Those motion blurs or light trails in photos are often due to snapping a moving scene using a long exposure – in photography lingo, when the shutter speed is slow, and the shutter is open for longer. “This means you're taking the photo for, say, two seconds, so you have to keep the phone absolutely still,” says Arndt.
The LG G4 is one phone that allows users to tweak shutter speed, but for users of other smartphones, there are several camera apps that give you similar control, such as Long Exposure Camera 2 (Android), Long Expo (iPhone) or Pro Shot (Windows Phone). Check out more tips for long-exposure shots here.
 Focus
Focus
The area that your camera focuses on is related to the size of aperture, which is adjustable on DSLR cameras but isn't adjustable on the vast majority of smartphones. This means that for most smartphones, the default setting is a small sensor with a small aperture, meaning the camera focuses on a wide area where all objects in the frame are as in focus as each other.
11. Use Auto-Focus to create depth-of-field
A narrow depth-of-field – that trick of perspective where a foreground object is in sharp focus while the background is an artsy blur – is tough to achieve on a smartphone due to its fixed aperture.
But there's a mini-trick: If the scene you're shooting has many subjects at different distances, tap on an object in the background (or foreground) and the phone's auto-focus should cause the rest to fade slightly out of focus. (This doesn't work as well if everything is at a similar distance, though.)
12. Use Auto-Focus Lock for more control
Auto-focus comes with auto-exposure, however: Tapping on a particular area of the screen makes the camera assume that the area should be perfectly lit and it will adjust the rest of the image accordingly. If you've auto-focused on a white object, for example, the rest of the image may go dark; while if it's dark, the rest of the image may get overly bright.
If your phone supports auto-focus/auto-exposure lock (the Samsung Galaxy S6, iPhone 6, and HTC One M9 do), tap and hold on an area until a square (or circle) with "AE/AF Lock" appears. Now the camera is locked to that particular light balance and focus, and you can move your phone and recompose your shot.
13. Don't bother zooming
If you're trying to zoom in on an object at a distance, stop now. “You can't really zoom on a phone,” Arndt says. That thing where you pinch to zoom is digital zooming: “You're just blowing up the image, which hurts quality,” Arndt says.
For distant pictures of sunsets or buildings, leave the zoom where it is and focus on filling the frame with a backdrop that illustrates what you're trying to get across about that fascinating landmark or natural wonder.
14. Foodies: Nix the straight-down view
“Try to shoot on a bit of an angle. Get down to the level of the food,” Arndt says. If you're sitting at the table, looking square at your meal, you can snap from above, but try turning the camera to a 45-degree angle.
“Restaurants are often dimly lit, so one thing you could try is to turn on the flash. But cover a bit of it with a white napkin to diffuse the light,” Arndt says. Otherwise, the flash can massively overexpose a single area.
Finally...
15. Edit, edit, edit.
“Take a few seconds in an app such as Snapseed (free on iTunes or Google Play) or Photoshop Express (available for iOS, Android and Windows phones and tablets). It really makes a big difference, especially when adjusting highlights and shadows,” says Arndt. Even if you don't consider yourself a dab hand at photo editing, auto-fix can be a godsend while your phone's built-in editing apps can easily (and automatically) iron out any tiny glitches in color, brightness, or red-eyed friends.


From bret on May 06, 2015 :: 2:37 pm
If the scene’s dark enough to require flash and you’re accompanied by someone with a flashlight-app equipped phone (or you have a second device with a flashlight app), try using the flashlight-app on the second phone to light the subject while you take the photo. The steady light will help with composition and focus, it can usually be maneuvered to provide more complementary lighting than flash, and by avoiding the flash (plus any autofocus assist/red-eye reduction pre-flash), it will usually (but not always) be less annoying to those around you.
Reply