We have a huge amount of data across various apps and services on our Android phones. This can include everything from device settings, call history, contacts, and messages to documents, files downloaded from the internet, photos and videos, and data for apps like WhatsApp and Signal. Backing up this data is essential to avoid losing it even in worst-case scenarios, such as when the phone gets accidentally broken, stolen, or lost.
The easiest way to back up your Android phone data is to use the built-in backup service. However, relying on this method alone isn't always a good idea. Here's why and the alternative methods you should use to back up everything on your Android phone.
Quick Links
What Google's Built-In Backup Covers (and What It Misses)
How to Back Up the Data Left Out of Google's Backup
What Google's Built-In Backup Covers (and What It Misses)
Google's built-in backup does a lot more than most people realize, and for the majority of Android owners, it quietly handles almost everything that matters. More than 90 percent of apps support Google's backup framework, including most games. Even when a game isn't included in the general backup, it's typically saved through Google Play Games or the developer's own servers when you're signed in. In practice, that means most people can switch phones or reset a device and find their apps, settings, and progress largely intact.
When you turn on all available backup options, Google saves:
- app data (when developers allow it)
- call history, contacts
- device settings such as Wi-Fi networks and passwords
- text messages (RCS, SMS, and MMS)
- and your photos and videos through Google Photos
That covers the core of your digital life, the things you'd immediately notice if they disappeared.
But there are important gaps that can catch you off guard. Encrypted messaging apps such as WhatsApp, Telegram, and Signal are excluded from the standard system backup because of their security models. Anything you download manually – files from email, PDFs, photos saved from the web – isn't included either. And if an app stores photos or videos outside of Google Photos, those won't be backed up automatically.
There are also technical limits. Some large app data sets (generally over 25MB per app), certain game saves that don't tie into Google's ecosystem, and files stored directly on your phone's internal storage or SD card are skipped. System-level files aren't backed up at all. The result is that while Google Backup is excellent for restoring a phone to a familiar state, it isn't a complete archive of everything on your device.
How to Use Google's Backup
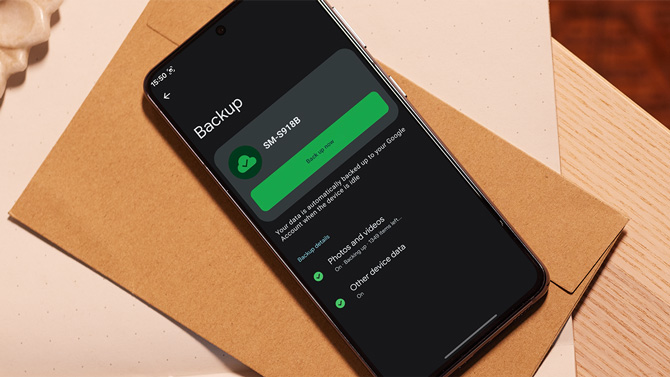
Backing up your Android phone data with Google's built-in backup service is easy. You go to the Google services page by opening the "Settings" app and tapping your profile at the top (on a Pixel phone) or via Settings > Google (on non-Pixel phones), then head to the "All services" tab, select "Backup," tap "Turn on," and finally select the type of data you want to back up and turn it on.
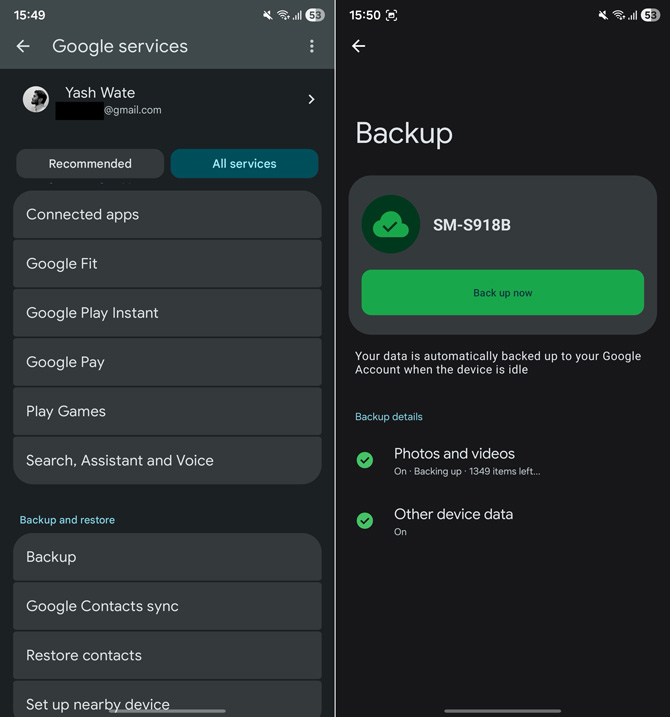
Once done, it automatically backs up the selected data to your Google Drive. Usage counts toward your 15GB of data, which can be expanded with a Google One subscription. What's nice about this method is that it lets you select the type of data you want to save and skip what you don't need.
How to Back Up the Data Left Out of Google's Backup
Backing up data left out by Google's built-in backup service requires following different instructions depending on the type of data. Let's go over the different types of leftover data and the best ways to back them up.
Photos and Videos
By default, the built-in backup system can save photos and videos only from the DCIM/Camera folder. However, it skips other folders, such as those containing your wallpapers, WhatsApp media, or photos and videos someone shared with you. Thankfully, backing up these folders to the cloud is easy.
- Go to the "Backup" page.
- Tap "Photos and videos" and select "Back up device folders."
- Flip the toggle next to the folders you want to back up.
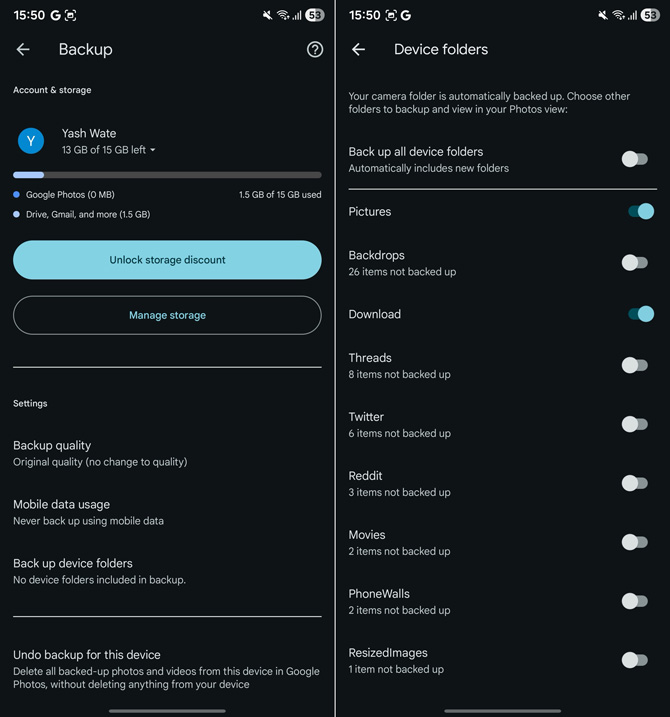
Keep in mind, though, that you may need to buy more storage space to store these files. Google One subscriptions, which you can share with up to 5 people, start at $1.99/month for 100 GB, $2.99/month for 200 GB, and $9.99/month for 2 TB.
If you're on a tight budget or prefer to keep your photos and videos locally, you can make a local backup on your computer or an external drive (HDD or SSD).
To back up to your computer, first connect the Android phone to your Mac or Windows PC. Then, follow these instructions:
On a Windows PC
- Open "File Explorer" and go to the connected device.
- Navigate to the folder containing the photos and videos you want to back up. This could be folders like "Pictures," "Screenshots," or a custom folder you created. You may also want to look inside the "Downloads" folder.
- Copy the files.
- Go to the folder on your PC where you want to save them.
- Paste the copied files.
On a Mac
For Mac, you'll need a third-party app like OpenMTP or MacDroid since you can't access your phone inside Finder. Download and set up the app, then access and transfer files from your Android phone to your Mac.
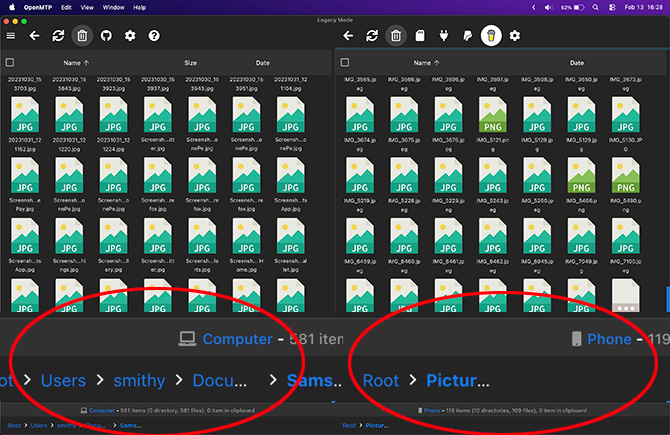
Using OpenMTP app on a Mac to copy files (on the left) from a Samsung phone (on the right).
Using an external drive
If you want to save your photos and videos to an external drive, you can do so directly from your Android phone. We recommend the TeamGroup X1 Max flash drive and the Samsung T9, which received the Techlicious Editor's Choice award in our guide to the best flash drives and SSDs for backing up your phone.
Here's how to transfer files to your drive:
- Plug the external drive into your phone's USB port; you may need to use an adapter if your drive or its cable has an older connector.
- Open the file manager app, and you should see the connected drive pop up.
- Navigate to the folder on your phone containing the files you want to move.
- Select the files and copy or cut them.
- Go to the destination folder on the connected drive and paste the copied files.
Eject the drive by tapping the eject disc next to the drive's name in your file manager.
Documents and Other Files
In addition to photos and videos, you likely have other files on your phone you want to back up. These could be music, voice recordings, documents (PDF, DOCX, CSV), archives (ZIP, RAR, TAR), or app packages and bundles (APK, XAPK) that you downloaded online or received from someone. Backing up your important files among these is critical.
Backing up files locally is as simple as connecting the phone to a computer or external drive, accessing its files, and moving them over (as shown in the previous section). If you prefer keeping your data in the cloud, you can use Google Drive, Dropbox, or OneDrive. Google Drive is a natural choice if you already pay for a Google One subscription.
When backing up files to your preferred cloud storage service, you can do it through either one-time uploads or automated syncing. The former approach is fine for bulk transfers, when you want to copy all files in a single step. But it has a drawback: every time you have a new file, you'll need to upload it manually to the cloud.
Setting up automatic sync saves you this hassle, as it syncs the changes as they happen. For instance, if you add a new file to the shared folder on your Android phone, it'll automatically be uploaded to the cloud storage.
For automated syncing, you need a cloud sync app. Among the options available, FolderSync is a solid choice. It's free, easy to set up, and works with most cloud storage services. The free plan displays ads, though; you can upgrade to FolderSync Pro for $6.99 if that bothers you.
Before you begin setting up auto-syncing, there's one important step: creating dedicated folders for the files you want to back up. This is required because most of the time, the individual files you want to back up are scattered across multiple folders on your phone's local storage or SD card, and syncing the entire folder will back up everything inside them, including files you don't want to back up.
Head to your phone's internal storage or SD card, create a new folder, and move all the files you want to back up into it. You can create multiple folders to segregate files based on their type, such as Invoice for all your invoices, Music for all your downloaded tracks, and so on.
After this, download Google Drive and FolderSync on your phone. Then, open FolderSync, and follow the on-screen instructions to grant the requested permissions.
Once you're done, follow these steps:
- Hit the "Add account" button, select "Google Drive" (or any other service), and sign in to your account. If you don't see the prompt after setup, tap the account tab in the middle, then hit "Add account" and follow the same steps.
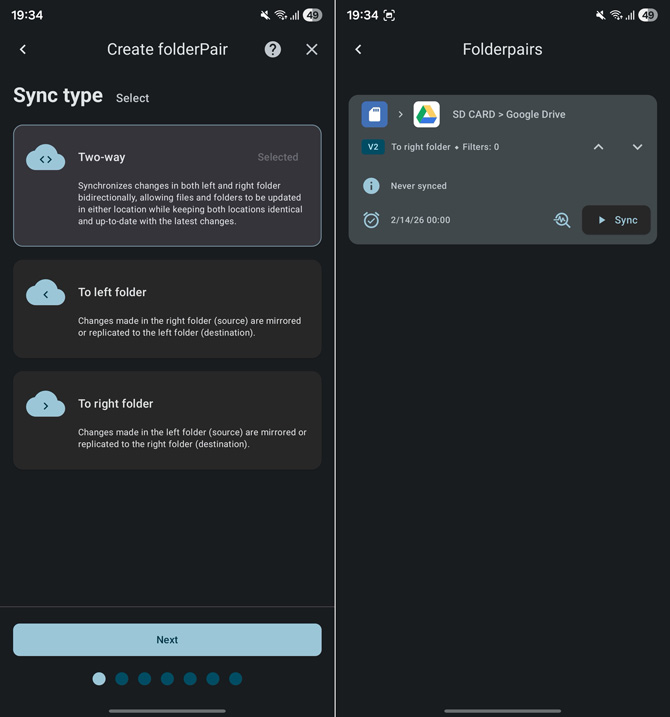
- Hit "Folderpair," choose the "To right folder" option, and tap "Next." This syncs changes made in the left folder (local folder) to the right folder (cloud storage folder).
- Go to the "Device storage" tab, choose internal storage or SD card, hit "Next," and then select the folder from which you want to sync files and tap "Next."
- To select the right account, go to the "Cloud services" tab, tap "Drive," and hit "Next." Choose the folder where you want to sync the changes and hit "Next".
- Then, configure the sync schedule. Tap the dropdown under "Schedule" and pick your preferred schedule. Hit the dropdown for "Repeat every" and set the frequency. Tap "Next."
- Go to the Connection tab and choose the type of connection you want to use for syncing changes. Use Wi-Fi if you're using a cellular plan with limited data.
- Similarly, go to the Notifications tab and enable all the notifications, so you're notified when changes happen, when they're synced, and when they run into an error.
- Tap "Next," and hit "Save" on the following screen.
WhatsApp and Signal App Data
While Android's built-in backup service backs up your SMS and RCS messages, third-party message apps like WhatsApp, Telegram, and Signal aren't covered. This wouldn't be a problem if you only use Telegram, since your chats are stored on Telegram's servers and synced across any device you log in to with your registered phone number.
However, if you use WhatsApp or Signal, you'll need to back up your chats to a cloud service to ensure you don't lose them and can easily restore them on another device when needed. Your cloud service option is limited to Google Drive on WhatsApp, whereas for Signal, you can use any service since there's no direct integration.
To back up your WhatsApp chats:
- Open the app, tap the three-dot menu in the top-right corner, then select Settings > Chats > Chat backup.
- If you want to encrypt your backup to secure it behind a password or encryption key and limit its access, from the "Chat backup" page, tap "End-to-end encrypted backup," then set up a passkey, password, or encryption key by tapping the appropriate button, per your preference. We recommend using a passkey and storing it in a password manager. Techlicious Editors use and recommend 1Password or Dashlane. Or, for the most secure backup, use a security key.
- Now, tap "Google Account" and select your preferred Google account where you want to save your backup.
- Hit the "Back up" button to instantly save your chats.
- To do this automatically, tap "Automatic backups" and choose your preferred backup frequency.
Read more: How to Use a Hardware Security Key to Protect Your Accounts
Here, you'll see a couple of other backup options. Toggle on the "Include videos" button to include videos in your backup. Similarly, if you want to back up data even when you're on cellular data, flip the toggle next to "Back up using cellular."
Signal
Unlike WhatsApp, Signal doesn't offer a built-in integration to save chats to the cloud storage service of your choice. Instead, it offers its own backup service, Signal Secure Backups (currently in beta) that stores your chats and media on its own servers in an encrypted format. Signal offers two backup tiers: free and paid. The free plan saves your text messages along with the last 45 days of media. Meanwhile, the paid plan, available for $1.99 per month, lets you store up to 100 gigabytes of media.
To use Signal's native backup:
- Tap the three-dot menu in the top-right corner and select "Settings."
- Go to "Backups," tap on "Signal Secure Backups," and then follow the on-screen instructions to set it up.
Alternatively, if you don't want to rely on Signal's backup service, you can back up your chats to a local folder on your phone and then sync them to your preferred cloud storage service (as shown above).
To do this:
- From the "Backups" page, tap "On-device backups," under the "Other ways to backup" section and hit the "Turn On" button.
- Tap Choose folder and select the folder where you want to save the backup locally.
Once this is done, use an app like FolderSync to sync this folder to your preferred cloud storage service.
Games Data
Game data isn't a part of Google's built-in backups. As such, most games handle it themselves. To do this, they rely on Google Play Games integration, which automatically backs up your progress and other game data. The data then gets restored when you switch to another phone and log in with your Google account.
However, there are exceptions: some games rely on their own cloud service to back up data. These games require you to set up an account when you install the game, and data gets backed up when you're logged into the game with your account. To recover your game data, all you need to do is log in to the account you use. Alternatively, you can manually back up data for such games if you want.
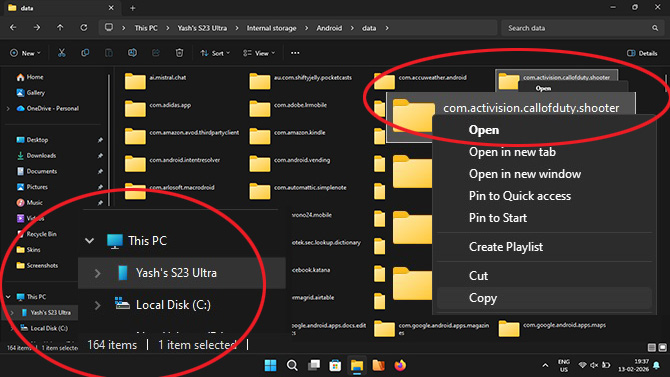
- Connect your phone to a Mac or PC.
- Access the device via "File Explorer" (on a Windows PC) or a third-party app (on a Mac), select internal storage, and navigate to Android > data.
- Find the package for your game and copy it. This will copy all the files and folders inside this folder.
- Navigate to the location on your computer where you want to save this file, then paste it there.
For some games, you'll also need to copy data under the obb folder. Go back to the Android folder, select obb, locate and copy the game's folder, and copy it to your computer.
Never Lose Important Data on Your Android Phone
Having taken a complete backup of all your important data, you've now safeguarded yourself against unexpected tech hiccups that come your way. When things go awry, you should be able to restore the data to your Android phone and retain access to all the critical data that matters.
No matter whether you've set up automatic or manual backup methods for different data, be sure to check their status regularly. That way, you can be sure that your data is being backed up regularly and will be available when needed.
[Image credit: Screenshots via Yash Wate/Techlicious, phone mockup via Canva]