We may earn commissions when you buy from links on our site. Why you can trust us.
The Best Tripods Under $200
Stop at any popular landscape overlook, and you’ll see a line of photographers with their cameras on tripods. Before I started relying on the three-legged steadiness, I always wondered why I should use one, and now I find myself pulling it out at least once a day when I’m shooting. Tripods are used to hold cameras (and smartphones) steady, which is important when the light is low and the shutter speed slow — where camera shake would cause the picture to be blurry. But they can also come in handy in the bright sun and daylight. Here's when and how to use a tripod, as well as our top picks.
When to use a tripod
Self-timers
If you like to be in the photo with that lovely landscape in the background, you can place your camera or phone on a tripod with the self-timer set to 10 seconds. This gives you enough time to get into the shot before the camera takes the picture. Or, choose a smartphone tripod that comes with a Bluetooth remote so you can take the shot when you’re ready.
Time-lapse photography
Many smartphones and cameras now can create time-lapse movies. When set up for time-lapse, the camera shoots a photo at chosen intervals — seconds or minutes. The associated software on your computer or app on your phone assembles the photos into a movie where time passes quickly — clouds fly by, a tent is set up, etc. For best results, use a tripod, as the camera must remain in the exact same position for a period of time.
HDR photos
When a landscape has bright areas of sun and dark areas of shade, a camera may have a limited exposure range (called “dynamic range”) where the darks go black; highlights blow into white and details disappear. The High Dynamic Range (HDR) feature takes a series of photos — one to expose for the shadows, one to expose for the highlights, and one normal photo — then combines the three so you can see the beauty throughout the scene, including the lightest and darkest areas. It’s important that the camera's in the same position for each of the three shots, which is why a tripod is key.
Landscapes
Photos that are going to be enlarged for poster-sized prints have to be really sharp. To get the maximum amount of foreground and background in focus, use a small aperture opening (f-stop above 13). Plus, you want to use the lowest ISO setting, so you don’t see any grainy “noise” that becomes more obvious when you enlarge the photo. This may require using a slower shutter speed even in the middle of the day. Using a tripod to keep the camera still is essential to prevent blur.
Moving water photos
To shoot a waterfall, flowing river or ocean photo where the water blurs silky smooth, you need to have a long exposure: The shutter has to stay open more than 1/15th of a second. It’s near impossible to hold the camera still for that long, and moving it will blur the whole shot. With a tripod, even a smartphone will achieve this beautiful effect.
City lights and starry night photos
To get beautiful city lights photos requires a longer exposure so you can see details of the buildings and streets, rather than just dots of light. The camera needs to remain steady. Star photos require exposures of 15 seconds or more, so a tripod is an absolute necessity.
Sunset, sunrise, twilight
Although you can hold a camera when you want to take sunset photos with the foreground in silhouette, if you want to see the landscape details, you’ll need a longer exposure. Again, longer exposures require a steady camera, best held by a tripod.
Indoor photos
Taking photos indoors without a flash can create a dramatic effect of shadows and light. To shoot a picture of a room, you’ll want to expose so you can see detail in the darker areas. Shooting indoors requires a longer exposure, so a tripod would be best.
Wildlife and sports
There are times when you have to wait for the action before you can take a photo. Perhaps you want to be ready when deer come to a stream every evening, or when birds come to the feeder. You might want to set up at a dramatic corner for the runner/car/bike to speed by during a race or focus on your daughter, the goalie in a soccer game. Holding a camera ready for long periods of time while you wait for the right moment can tire your muscles. With a tripod, you can compose the photo, change the settings and be ready to shoot when the action happens. This can also be good during a performance or graduation ceremony (just be sure to set up the tripod in the side aisles, so you don’t block anyone’s view).
How to buy a tripod
Many stores offer a package deal that includes a bag and a tripod to customers buying a camera. These tripods are often flimsy and heavy for their size. If it’s bulky, there’s a good chance that you won’t want to bring it with you or use it. There are a number of tripods on the market for well under $200 that will work with everything from a smartphone to a DSLR.
Carrying weight and size
Unless you have a special need (for example, video), get a lightweight tripod that can fold up to make it easy to bring with you.
Weight capacity
If you have a heavy DSLR with a telephoto lens, pay attention to how much the tripod can hold. If your camera's too heavy for the tripod, the legs won’t support it and will start to slip at the joints.
Height
Think about where you'll be using it. Look for a tripod that gives you the height you need to raise the camera above guard rails at lookouts. Check the specifications to determine the height of the tripod without the center pole extended (see the tip below about the instability of center poles). Conversely, check how low the tripod can go. Some have a center pole that can be reversed to shoot straight down. Look for legs with angle adjustments to get the best bracing and stability.
Ball heads
Better-quality tripods have a head that screws onto the legs. A ball head lets you adjust the camera to many different angles while holding the body tightly in place. These heads often use a plate that attaches to the camera and can be quickly screwed onto the tripod. Many brands use an “Arca-Swiss” compatible plate that works with aftermarket camera and lens attachments.
Don't forget a smartphone adapter, so you can use your tripod with your phone.
Traditional tripods
Best Tripod for DSLRs with Heavy Lens: Davis and Sanford TR654C-36 Traverse
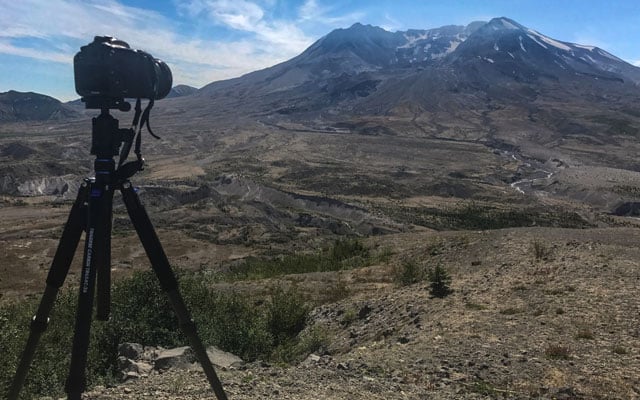
I need a sturdy tripod for wildlife photography. Whether I’m transporting the tripod to a location or hiking in to find wildlife or a waterfall, if a tripod is too heavy or too big, I’ll leave it home (or curse each step of a hike). The Traverse has Carbon fiber legs making it extremely light — 3.25 pounds — but strong enough to hold 12 pounds of camera and lens (in my experience, the legs can hold more than that). The tripod can extend up to 65 inches. This is my go-to tripod. It can hold my full-frame Canon 5D Mark III with a huge 150–600 mm telephoto lens for wildlife photography. It has a bubble level and a hook on the center column yet folds up to fit on the side of my camera bag.
Price: $166 on Amazon
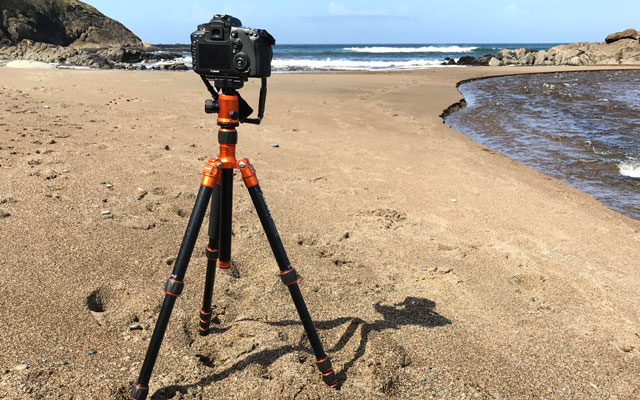
Best Tripod/Monopod for DSLRs with Lightweight Lens: MeFoto Roadtrip Classic A1350
I used this tripod for almost a year, taking it to the Grand Canyon, and hiking throughout the northwest. It served me well for landscape and waterfall photos, but could not steady my heavier Canon and 600 mm telephoto combination that I use on the Davis and Sanford model.
The MeFoto Roadtrip tripod can extend to 61.6 inches and weighs 3.6 pounds in aluminum or 3.1 in carbon fiber. It's lightweight but sturdy enough to hold a full frame DSLR with a 200mm telephoto lens. It has the added benefit of converting to a monopod when you need mobility and want to steady the camera, but don’t need stillness for a long exposure. The monopod came in handy when I was shooting a bike race as I didn’t have to hold up the camera for long periods of time. It comes in your choice of 12 colors, including hot pink, orange, blue and gold.
Price: from $190 for aluminum; $300 for carbon fiber on Amazon
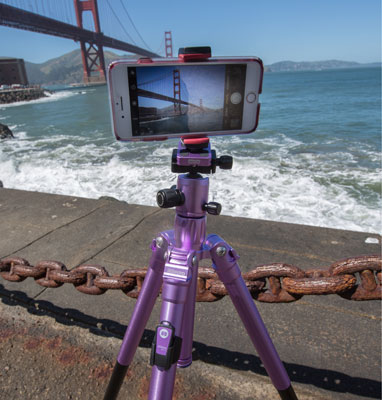
Best Tripod for Smartphones: MeFoto BackPacker Air
The BackPacker Air is the ultimate tripod for smartphone photographers. While it can be used for lightweight DSLRs, this tripod's focus is on phones: It comes with a smartphone adapter and Bluetooth remote control, and the center column can be removed and turned into a selfie stick. Because the legs are extended and nested (rather than having leg locks), this tripod can't handle a full-frame camera with a telephoto lens. Still, it’s small and weighs only 2 pounds. It’s great for taking selfies, time-lapse and night photos on your phone, and it comes in seven colors.
Price: $125 Amazon
Specialty tripods
When hiking or shooting outdoors, you may need to steady your camera on less-than-ideal surfaces. These alternative tripods can be steadied on uneven ground and will hold your camera still. It’s better than placing the camera on a rock, and they're so lightweight and compact that you'll hardly know you're carrying them.
Best Tripod for Hiking and Backpacking: Pakpod
When hiking, there are times when the best angle for the shot is hanging off the side of a cliff or on uneven ground. This "adventure" tripod has plastic legs that can be lengthened and angled into any position to hold a camera on rocks, cliffs, fences, etc. Spikes at the bottom of each leg can be pushed into soil, sand, snow or wood to hold it in place. It weighs less than a pound but can hold a full-size DSLR with a regular-size lens making it the perfect choice for hiking and backpacking. Pakpod offers a Universal Smartphone and GoPro Adapter Kit (from $12) to hold any other you bring with you on your adventures.
Price: $89 Amazon
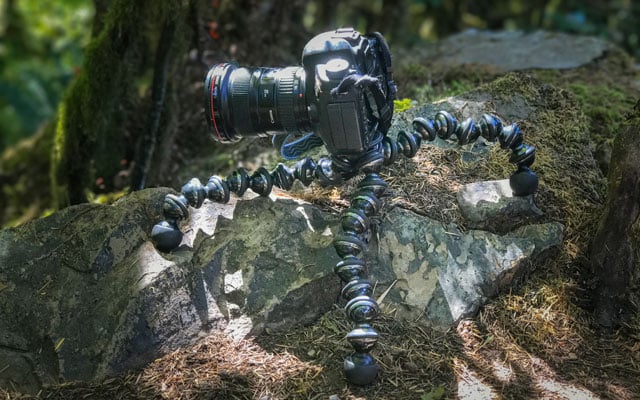
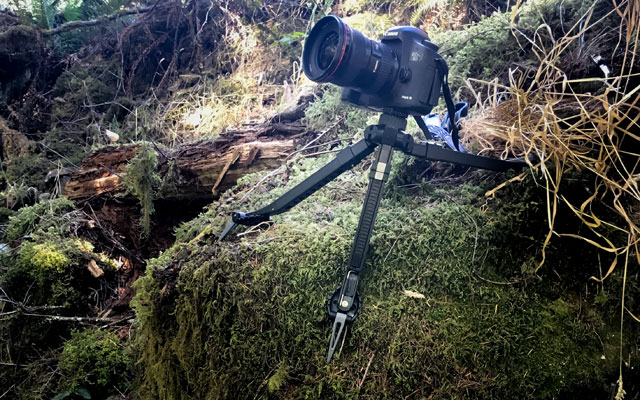
Best Tripod for Uneven Ground: Joby GorillaPod Focus with Ballhead X
Joby GorillaPods are the best choice when you have to hold your camera steady on uneven ground. The round sections can be bent and shaped to hold a camera steady over almost any surface. GorillaPods come in a variety of sizes, from the original that was designed for a smartphone or point-and-shoot camera to this large version, the GorillaPod Focus, made for a full-frame DSLR with a telephoto lens. While the GorillaPods aren’t tall, you can put them on a table or shape them to hold onto a fence post or branch (not recommended for heavier cameras). This model weighs 1.7 pounds with the ball head. It can be screwed directly into the camera if you don’t want to carry the bullhead that weights an extra .7 pounds.
Price: GorillaPod with Griptight smartphone mount and remote: $27 on Amazon, GorillaPod Focus with Ballhead X bundle: $102 on Amazon
9 Important tips when using a tripod
1. Turn OFF the stabilizer on your camera
This may be counterintuitive. Yes, you want the shot to be steady, but a stabilizer works against you when the camera's on a tripod. Stabilizers work when there's camera movement. When the camera's steady, a stabilizer creates movement of its own. Check your camera or lens manual to learn how to turn off optical stabilization or vibration reduction, so your photo isn’t slightly blurred.
2. Use the 2-second self-timer or a remote
Pressing the shutter button can shake your camera. For longer exposures where you need it steady, set the self-timer. This way you can press the shutter button, and the camera has time to settle before it takes the photo. A remote control is even better, as you don’t need to touch the camera at all to take the shot.
3. Use the camera’s LCD screen to frame the photo
Then use the following good practices to set up the tripod.
4. Only extend the center pole as a last resort
Many tripods have a center pole that extends to raise your camera higher — but the single pole can wobble when extended. For extra height, extend the legs of the tripod, or find higher ground — place the tripod on top of a picnic table, a wall or steps. If you need to use the middle pole for height, be sure it’s not windy and wait for the camera to settle before you shoot. Exposures longer than 1/10th of a second will likely be blurry with the center pole extended fully.
5. Point one tripod leg toward the subject.
This is important when using a longer, heavy lens, as it gives more support in front of the camera.
6. Level your camera
Either use the bubble level on the head of the tripod or check if your camera has level indicators to keep the horizon straight. Adjust the legs to make sure the center post is perpendicular to the ground.
7. Stabilize your tripod
If the center post of the tripod has a hook on the bottom, hang your camera bag from it to weigh down and steady your tripod. This is particularly helpful with lightweight tripods that can move around easily.
8. Don’t leave your camera unattended
With tripods, it’s easy to “set it and forget it,” and start chatting with your friends. Always stand near your camera/tripod, so others don’t bump or trip on the legs and send your equipment crashing to the ground. It’s happened to me before.
9. Attach long lenses to the tripod
When using an extremely heavy or long telephoto lens, attach the connector plate to the lens — not the camera — to distribute the weight evenly.
[Image credit: taking photos at twilight with a tripod via Graham Aldridge, Barb Gonzalez/Techlicious]