Sabra Krock, a Manhattan-based child photographer, shares some easy tips you can follow to consistently get amazing “keeper” shots of your infant, toddler, or young child.
Tip #1: Turn Your Flash Off and Use Natural Light
When you begin experimenting with natural light, you will appreciate how much it flatters people–and they will appreciate this too! What’s more, turning off your flash will make your camera less conspicuous in public and open up more opportunities for candid situations.
Look for indirect natural light—the shade of a tree or an awning, or diffused by your window. When light shines beside your child, you will notice interesting soft shadows adding dimensionality to your composition. Facing your child straight on, light from the front creates a very soft, shadow-less portrait. Behind your child, backlight enhances colors and creates a bright backdrop.
The three photographs, below, of my almost 8-month-old son, Max, illustrate the three different effects you can expect with diffused window light from the side, front, and back.

Notice the dimensionality in this image, where light is coming from a window at left.

In this shot, soft, shadowless light is coming from the window straight on.

The color really pops here, thanks to the strong backlight and plain white background.
Tip #2: Get to Know Your Camera
Point-and-shoot cameras make picture-taking a fully automated process, but the automatic settings don’t always allow you to make the most out of a shoot. Getting to know a few things about your camera will enable you to get more creative with your shots. Here are some tips for things to research in your camera manual.
1. Learn how to turn the flash off your camera. I’ve said it already and I’ll say it again. Natural, available light is far superior to flashbulb light, so make use of it as often as you can.
2. Learn whether your camera will allow you to manually change its aperture setting. The wider the aperture, which is the size of the opening in the lens, the shallower the depth of field will be in your image. You have probably noticed and admired professional photos that have a softly blurred background and focus only on the primary subject. You can achieve this technique too by experimenting with your aperture setting.
3. Learn how to change the shutter speed of your camera. A fast shutter speed (1/250th of a second) will freeze even the fastest-moving child, while a slow shutter speed may create some pleasing motion blur that gives you visual clues about how the subject moving. Play around and see what happens!
4. Learn how to adjust the ISO of your camera (the sensitivity of your camera to light). You can often bump up the ISO of your camera to compensate for low-light conditions and avoid using a flash even in dim light.
I captured this image late in the day when the sun had faded. But because I bumped up the
ISO of the camera and widened the aperture, I was able to get a well-exposed and tack-sharp
image anyway. Notice how the depth of field is relatively shallow due to the aperture setting.
This has a very pleasing effect of focusing attention on the sharp areas of the photograph.
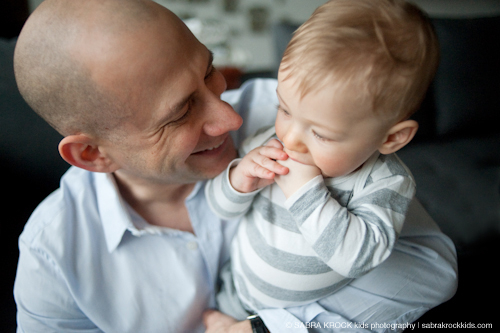
Tip #3: Get Candid
Posed photos may have their time and place, but candid shots that capture your child unselfconsciously at play are often the ones you’ll treasure the most. I love taking pictures of my child looking directly into the camera, but I always look for opportunities to photograph him unaware. Either way, I almost never ask my subjects to say cheese.
Be patient and wait for genuine smiles. Try talking and engaging with your subject from behind the lens or sitting down with your camera during playtime. After a while, babies and children – and even adults -- will forget the camera and return to whatever they’re doing. You will capture some precious moments that encapsulate the spirit of your child and your family.
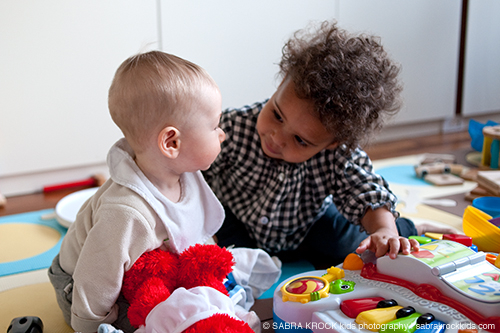
This is a photo of Max and his slightly older friend Bea playing in the afternoon. I love the
sweet innocence of this scene.
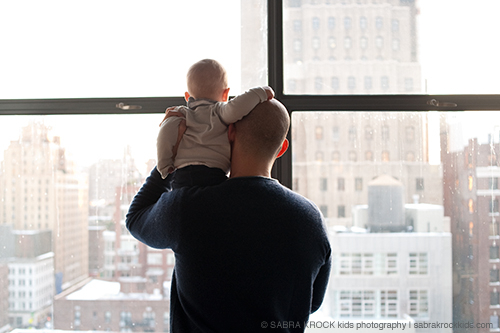
This is a shot of my husband and Max looking out at the first snowfall of the winter. I had to
race to get my camera before the moment was lost.
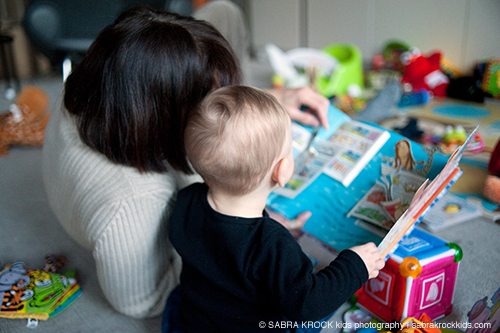
And here is Max reading with his great aunt. Sometimes the view from behind tells the story!
Tip #4: Don't Forget Yourself
In our house, I’m the family documentarian, which means that I am not often in the frame. While I enjoy (OK, I won’t say prefer) being behind the camera, I know that I will regret not having some images with me in them.
I bought a point-and-shoot camera so my husband and other family members can confidently shoot pictures too. I’ve also mastered the art of self-timers and taking photos in mirrors. Obviously, getting a professional to take some family photos is an even better option, but you can’t do that all the time.
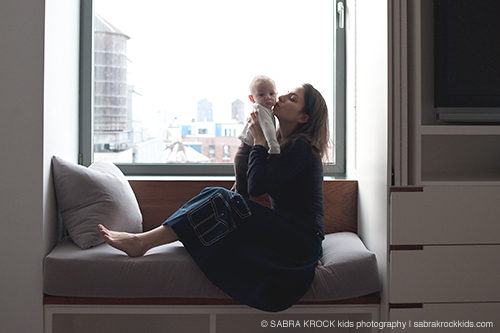
However you shoot pictures, don’t forget to make regular cameo appearances in your family
album, experiment and have fun. I am the master of the self-timer. Above, Max and I are hanging
out the in afternoon, only a couple months after he was born.
Tip #5: Don’t Leave Home Without It
No amount of camera tips can make up for no camera at all. Remember to carry your camera with you as often as you can so you don’t miss out on unexpected photo opportunities. Even though many cell phones now have reasonably good cameras built in, they are usually too low resolution to generate a decent print, making them poor substitutes for a dedicated camera.

This was Max on his first swing ride. I'm glad I had my camera with me!

This is Max, me and his dad watching fireworks on the fourth of July, when Max was only a
few weeks old. It was certainly inconvenient to carry my tripod up to the roof, but I love this little
vignette and am so glad I have it. It was obviously completely dark out besides the fireworks
when the above photo was taken. Nevertheless, I was able to use available light with a long
shutter speed. It’s not a perfect image, but for me it worked more beautifully with the painted sky
as backlight than with a flash.
Tip #6: Hire a Pro
There is no substitute for professional photos. I know this sounds self-serving, but it’s true. Think about it: that’s why you hired a photographer for your wedding day. There’s a big difference between a casual snapshot and a carefully composed and executed image. Beautiful photos are worth their weight in gold: they become family treasures for generations.
Some of the best times to hire a child photographer are along these junctures:
Newborn
This phase passes so quickly, and is often preoccupied with many adjustments and distractions that make it nearly impossible to capture this time well on your own. The ideal time to have your newborn photographed is within this first two weeks of life, when they are at their sleepiest and most cooperative and can be curled into beautiful poses. Your child will never be so small and pliable again. It’s wonderful to have this time captured forever.

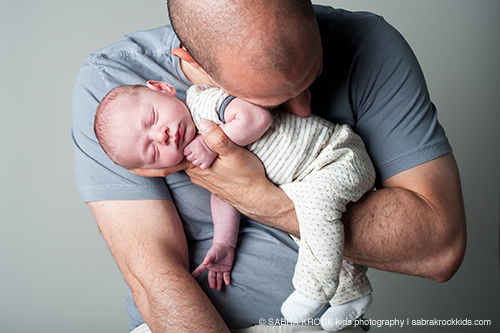
This is Max in a pose typical of my newborn work, held by his dad at two weeks old.
This is another of Max early on. I usually photograph newborns unclothed but this is one of
my favorite outfits from Estella, a Manhattan-based children's clothing store.
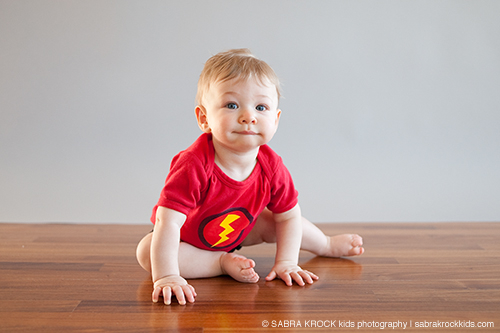
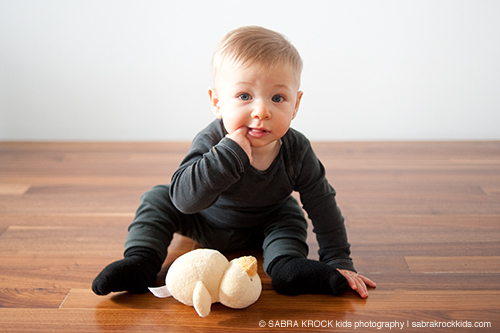
Six to Eight Months
The next great juncture for adorable professional photographs is when your child is sitting up. They no longer need to be propped up for the camera and are quite curious and alert.
One Year
This is the perfect time to capture new walkers. It can be a challenge, as toddlers are often looking down at their feet and scooting away from the camera. However, this phase of new discovery offers a great opportunity for serendipitous shots of your child in action.
Three to Four Years/With Sibling
This is one of my favorite ages. Your child is now full of personality and sometimes there’s a new baby in the family, too. It’s a great time to get both children photographed together.
‘Tween/Older Children
Full of personality and independence, kids of this age are a lot of fun to work with. The opportunities for creativity are almost endless.
Luckily for me, I was able to take many of the types of shots of my son that I like to take for newborn clients. Still, I don’t necessarily have all of the shots I would be able to get in a dedicated newborn sitting because even as a photographer, it is hard to dedicate the time, attention and patience required to work with a newborn.
Tip # 7: Get in Close
Don’t be afraid to scoot in as close as you can when photographing your child, especially down on the ground at eye-level. Many amateur shots are taken so far back that you lose the best details: your child’s eye lashes, toes, the light in his or her eyes. Mix it up and come in close on some shots. You will love having an archive of all those little details later on.
Getting down on the ground to take photos will also change your perspective and help you see your child’s world from their vantage. You will have a better chance of getting your child to look straight into the camera and the surroundings you capture will reflect their universe.

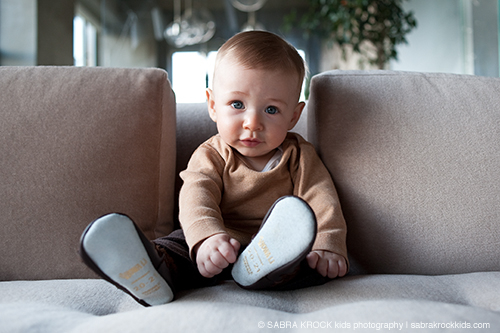
Here are couple of Max, close up and on his level. I love making eye contact with my subjects.
It’s a cliché, I know, but the eyes are truly the windows to the soul.
I also vary my perspective and take wider-angle environmental shots where possible. But moms
always love close-ups where they can really see the detail of their child’s face!
Tip #8: Click, Click, Click
Over-shoot. Digital photography is free and unlimited. Pretend your child is a fashion model on a runway or magazine shoot set. Children are fast-moving and the tiniest details – whether their eyes are open or at half-mast, whether their face is well-lit or in the shadows, the position of a hand or foot – can make or break a shot. I find that it often takes 10 frames or more to get one great one. You’ll be happy to have choices when it comes time to edit your photos.
This shot of Max looking right at me seems easy enough, but as you know, little ones rarely
hold your gaze, particularly when there is a camera in your face! I had to take many shots to
get just the right one.
Tip #9: Pay Attention to the Background
Have you ever shot something brilliantly only to notice later that there’s an ugly Kleenex box or some other distracting element lurking in the background? I have done this more times than I can count and I always wish that I had noticed it in the moment. Luckily, if there is something small and pesky in a favorite photo, you can usually eliminate it or lessen its impact in the frame using Photoshop. An easier technique is to get in the habit of quickly taking stock of what’s in your camera frame before starting a shoot. Push the dirty laundry and homely toys out of the way before you begin a session. Afterwards, you can push it all back.
This photo was taken of Max with a plain white wall behind that serves as a nice, neutral
backdrop. At other times my home is the backdrop but I blur the busy background with my
aperture setting to make distractions fade away.
Tip # 10: Experiment With Framing Your Shot
Our instinct is to frame our subject in the center of the lens and start shooting. There are all sorts of professional rules about composing a photo, but the basic idea is this: framing your subject in the dead center of the shot time after time is boring.
Instead, experiment with the composition of your shot. If your child is looking at something, include the thing he or she is looking at in the frame, even if it means your child is off-center. If your child is running, create space in the composition for your child to run into. Think about whether your shot is best composed horizontally or vertically.
If your camera has different focal points, learn how to adjust your focal point so that it moves out of the center position to the area filled by your subject. If you cannot do this, you may need to push your shutter half way down to lock the focus on your child before adjusting your composition and pushing all the way down to take the shot.

Here's Max, just a couple of weeks old, with his doggie sibling, Zulu. We were all taking advantage
of a rare quiet moment to nap. The framing of the photo tells the story.
This article comes courtesy of the Adorama Learning Center and first appeared on the Estella-nyc.com blog.
 Sabra Krock is a Manhattan-based photographer specializing in two of the best things in life: food and children. She loves the challenge and diversity of both subjects, but most enjoys the pleasure her images -- whether they're tender portraits of newborn babies or mouth-watering shots of delicious dishes -- bring to her clients.


From lexica on December 20, 2010 :: 12:53 pm
There are all sorts of professional rules about composing a photo, but the basic idea is this: framing your subject in the dead center of the shot time after time is boring.
Reply