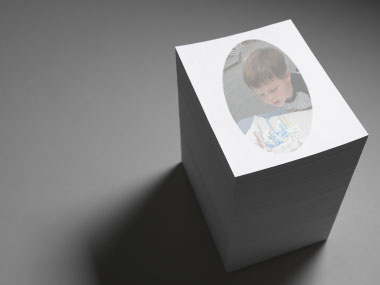
 Whether you run a small business and are looking for professional note paper or want to create unique party favors for your kid, custom memo pads are fun and easy to make.
What You Will Need:
- One 4x6 chipboard sheet
(or cardboard cut to size)
- 4x6 memo sheets
- Rubber cement or padding compound
How to Assemble Your Memo Pad
First you'll want to create your memo pad sheets–adding borders and watermarks. Below you'll find instructions for Microsoft Word 2007 and Microsoft Word 2003. Once you've designed your sheets and printed them out, it's time to assemble your memo pad.
- Stack your memo sheets and chipboard together, knocking them on a hard surface so they're perfectly aligned.
- Clamp the stack together near the top of one end with a couple of clips to ensure the sheets are held tightly together with the cardboard. A heavy book would do as well.
- Take the rubber cement or padding compound and apply a thin coat along the edge that's being compressed by the clips.
- Let it dry.
- Apply a second coating, or more, if needed.
Microsoft Word 2007
To add a border:
- On the Page Layout tab, in the Page Background group, click Page Borders.
- Click one of the border options under Settings.
- Select the style, color, and width of the border. To specify an artistic border, such as trees, select an option in the Art box.
- To specify a particular page or section for the border to appear in, click the option that you want under Apply to.
To add a watermarked picture background:
- On the Page Layout tab, in the Page Background group, click Watermark.
- Click Printed Watermark.
- Click Picture watermark, and then click Select Picture.
- Select the picture that you want, and then click Insert.
- Select a percentage under Scale to insert the picture at a particular size
- Select the Washout check box to lighten the picture so that it doesn't interfere with text. The picture that you selected is applied as a watermark to the entire document.
Microsoft Word 2003
To add a border:
- On the Format menu, click Borders and Shading, and then click the Page Border tab.
- To specify an artistic border, such as trees, select an option in the Art box.
- Click one of the border options under Settings.
- To specify that the border appears on a particular side of a page, such as only at the top, click Custom under Setting. Under Preview, click where you want the border to appear.
- To specify a particular page or section for the border to appear in, click the option you want under Apply to.
- To specify the exact position of the border on the page, click Options, and then select the options you want.
To add a watermarked picture background:
- On the Format menu, point to Background, and then click Printed Watermark.
- In the Printed Watermark dialog box, click Picture watermark.
- Click Select Picture.
- Browse to select the picture that you want, and then click Insert.
- In the Scale box, click Auto.
- Click to select the Washout check box (default setting).
- Click OK. The watermark that you just created is visible on the document sheet.