We may earn commissions when you buy from links on our site. Why you can trust us.
SwitchBot Lock: A Smart Lock for Renters with a Big Flaw
by Suzanne Kantra on October 31, 2022
![]()
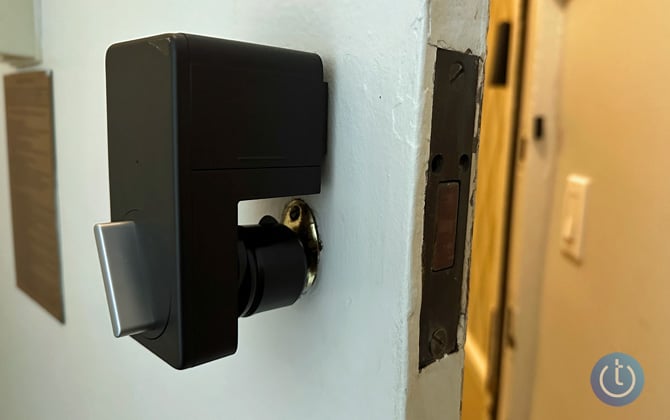
Most landlords won't let you update your existing lock with a smart lock if you rent your apartment or home because you need to replace part of the lock during installation. However, the SwitchBot Lock ($99.99) doesn't require you to replace anything, it simply mounts over your existing thumb turn to lock and unlock your door. In that regard, it is a very clever design. But it proved to have a fatal mounting flaw in our testing that makes it hard to recommend.
I used to keep a Masterlock Key Lockbox on the front door of our New York City apartment because my kids were always forgetting their keys. It was practical solution to the key problem, but the lockbox was a bulky eyesore hanging off the doorknob. So when SwitchBot launched its Lock this summer, I was eager to try it out.
SwitchBot sent me the Lock for testing and included their Hub Mini ($39.00) and Keypad Touch ($59.99) fingerprint reader and keypad combo. On its own, the Lock uses Bluetooth to communicate with your phone or Apple Watch for locking and unlocking. The Hub Mini connects to WiFi so you can unlock your door remotely and receive email and text notifications. The Keypad Touch mounts outside your door for phone-free entry with a code or enrolled fingerprint.
After spending a month of extensively testing the SwitchBot Lock with my extended family, we came to love it – until it fell off our door without any warning. The 3M mounting tape used to hold the lock to my door failed, taking a layer of door paint with it. Fortunately, this happened when we were in the apartment. Had we been outside and not taken our keys (relying on the lock for entry), we would have been locked out. For us, that would have meant a call to our building security (not a big deal), but for others it could have resulted in an expensive call to a locksmith.
I wish I could recommend the SwitchBot Lock; it could have been the perfect solution for rental situations if it worked. And perhaps your door won't have the same issues ours did, but there's no way to know for sure. While these failures seem rare based on user reviews, they do happen. SwitchBot may need to rethink the design and create additional mounting support to stabilize the lock from the constant torque of locking and unlocking so less pressure is put on a single mounting pad.
|
+ Pros |
– Cons |
|
|
Installation and setup
Everything you need to set up the SwitchBot Lock comes in the box. And if you manage to get it positioned the first time correctly, the installation takes just a few minutes.
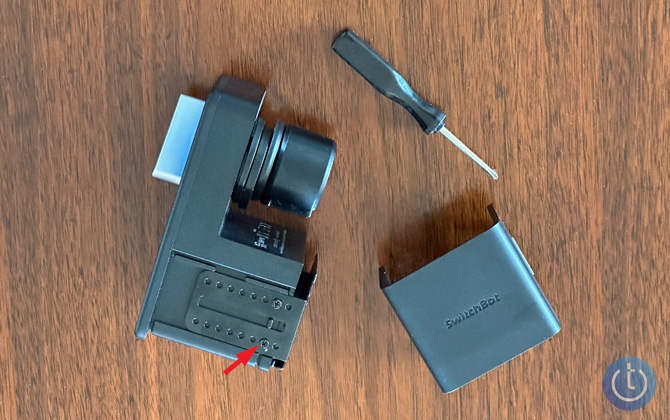
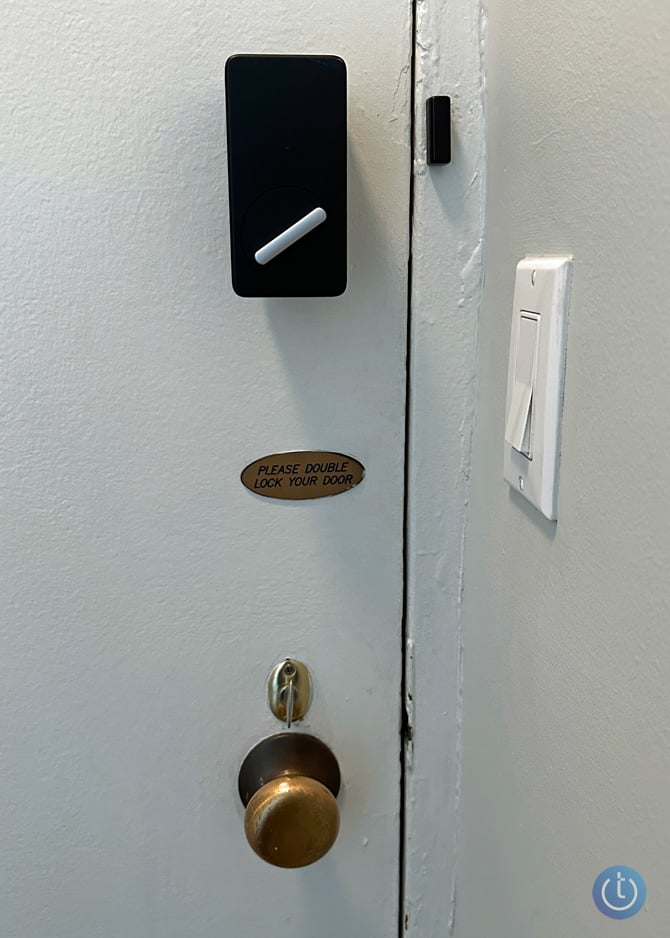
The most important thing about installing the SwitchBot Lock is placement. You can place the lock so that the bulk of it is to the side, on top, or below the thumb turn. Whichever orientation you choose, the Lock has to move the thumb turn easily on its own. You may need to increase the depth of the Lock if you have a bulky deadbolt. There's an internal plate that you can adjust to give you more than an additional inch clearance (you can see in the photo below that my thumb turn required a little extra depth). There's a screwdriver in the box to adjust the Lock's plate, if needed – the only time you may need a tool during installation.
The first time I installed the Lock, I didn't test it with the Lock moving the thumb turn (I moved the thumb turn manually) and the placement wasn't quite right. The result was a jammed lock. The Lock installs with 3M tape, so removal is easy. And an extra tape square comes in the box for people like me who make an error in placement.
Unfortunately, the 3M tape is its Achilles heel. If the tape can't maintain its grip on the surface of your door under the torque of locking and unlocking, it will fail and leave you locked out.
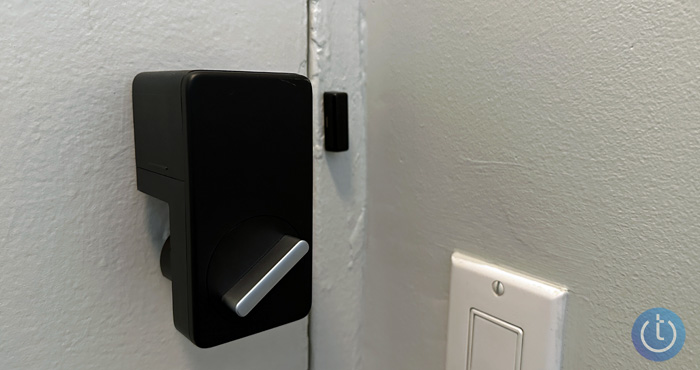
Once you have the Lock installed, you also mount a magnet on the door frame that acts as an open/close sensor. If your door frame is made of metal, like mine, you may not even need the mounting tape.
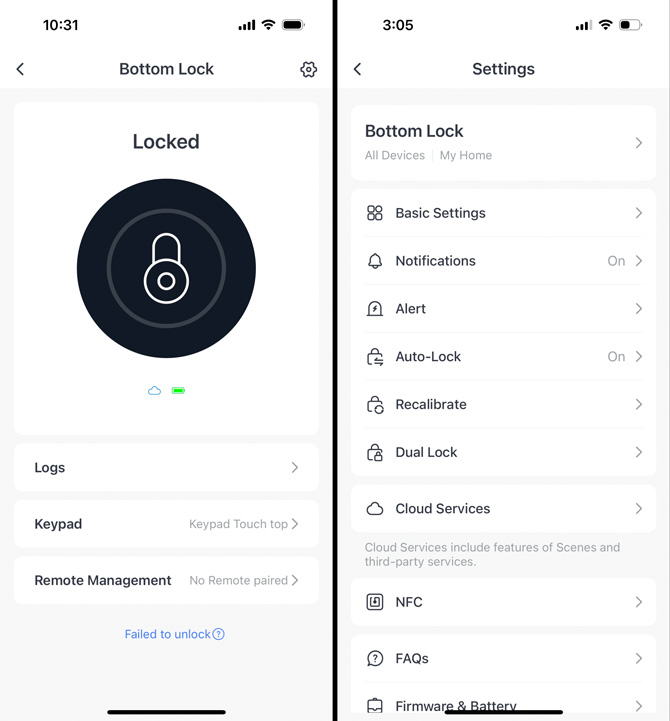
Setting up the Lock with the SwitchBot App is simple, especially if you're using the Lock on its own, without the Hub or Keypad. You just create an account and then pair the Lock with your phone. That's it. If you have an Apple Watch, you can load the SwitchBot App onto your watch and use it to lock and unlock your door. Unfortunately, it doesn't work with any other smartwatches.
The app also lets you turn on auto-lock – set a time delay and the door will re-lock itself if it's open. You can also set up audible alerts to let you know if you left the door ajar or unlocked.
As the "Owner" of the Lock, you can send invitations to family members so they can access the Lock with their phones through the SwitchBot app. They receive an email with a link to the app and a code that they can use to set up "Member" access to the Lock. Only "Owners" can add "Members" to the Lock.
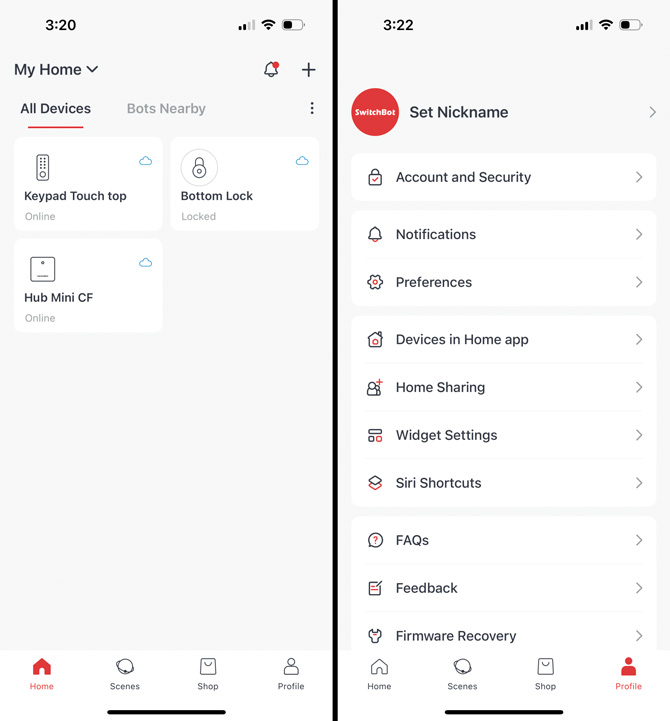
The Mini Hub ($39.00) connects to WiFi, enabling you to communicate with your Lock when you're away from home. Through its connection to your Lock, the Mini Hub adds remote unlocking capabilities and notifications. The Mini Hub also lets you control your lock using Google Assistant, Alexa, or Siri. You just need to connect your SwitchBot account with Google or Alexa and set a code to unlock your door. Once connected to your Google or Amazon account, you can add SwitchBot into routines. For instance, you could add locking your door to your bedtime routine. For Siri, oddly, you can only lock your door, not unlock it.
The Keypad ($29.99) or Keypad Touch ($59.99) adds phone-free control of your Lock. As the "Owner" of the Lock, you can assign up to 100 codes or fingerprints, which can be time-based (from one hour to five years), one-time (passcode only), or permanent. You can then use those discrete codes and fingerprints to track when people use the Lock.
Using the SwitchBot Lock
The SwitchBot Lock takes about five seconds to unlock or lock, whether you're using your phone, Apple Watch, or a Keypad. The Keypad also provides animation of the door unlocking or locking and a beep to let you know you can open the door. None of the six people who enrolled their fingerprints had trouble opening the door with the reader.
The audible Lock alerts for door ajar and door unlocked worked every time. However, the sound is not loud. I'd recommend using a short alert interval if you're not likely to be near your Lock after coming in the door.
There are two ways to use auto-lock, but only one works. There is regular auto-lock, which locks the door after you open and close it, and there is re-lock, which locks the door regardless of whether you have opened and closed the door. Only the re-lock feature worked during my testing. And I had to have both auto-lock and re-lock functions turned on for re-lock to work. While not ideal, the re-lock feature is the one that's important and it works.
If you're concerned about someone watching you enter your code on the keypad, you can hide your code by entering extra numbers. As long as you enter your code, you can add numbers before and/or after to confuse anyone watching. For instance, if your code was "865923," you could enter "164 865923 072," and the door would unlock. I tried various combinations with my code and it worked every time.
The Keypad will lock after five unsuccessful attempts, whether with a fingerprint or a code. The more unsuccessful attempts, the longer the keypad will lock – up to 24 hours. And the Keypad will be disabled if someone tampers with it or removes it until you enter the correct passcode or use an enrolled fingerprint. You'll still be able to use your phone or Apple Watch to unlock. I'd highly recommend giving a friend or family member access to your Lock, like you would a spare key, so they can let you in.
If you have a Mini Hub, you'll receive email and text notifications when someone opens the door, the door is left ajar, the door is left unlocked, there is an unsuccessful attempt to use your Keypad, or the Keypad has been disabled. All except the door ajar notifications all came through reliably. When I had door-ajar notifications turned on, I would receive a notification every time the door opened, which was overwhelming. I turned those notifications off because I found the audible door-ajar alert to be sufficient. Also, when you receive the notification that the door was opened, you don't see who opened it. Instead, you'll need to go into the SwitchBot app and look at the Logs for your Lock.
Using Google Assistant and Alexa to lock and unlock the door and Siri to lock the door worked every time. It was also easy to include locking the door into Google Home and Alexa routines to ensure the door was locked when I went to bed at night.
Design
The SwitchBot Lock is a big, black box that attaches to the back of your front door. If your door is a light color like mine, it's quite noticeable, but not ugly.
The Lock measures 4.4 by 2.3 by 2.9 inches in its most compact form. But, if you have a bulky deadbolt, the box may stick out even further than 2.9 inches.
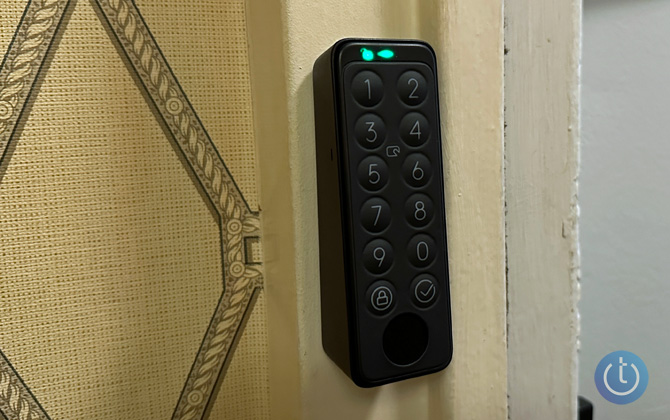
The Keypad Touch isn't much bigger than a doorbell, measuring 4.4 by 1.5 by 1.4 inches. When you use the fingerprint sensor or input your code, the tiny display at the top shows the door unlocking, and there is an audible beep signifying the door has fully unlocked.
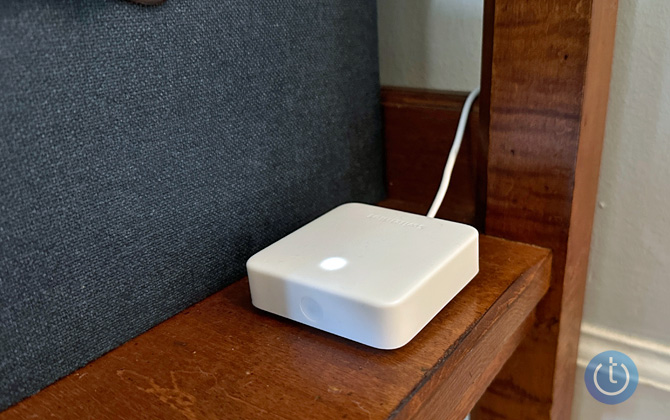
The Hub Mini is a tiny white box measuring 2.6 by 2.6 by 0.8 inches. You'll need to find a place where it can access WiFi and be within Bluetooth range of your Lock and Keypad. However, it's small enough to easily hide or mount with 3M tape.
The bottom line
The SwitchBot Lock could have been a great solution for anyone who needs to keep their existing lock intact. When used with the Mini Hub and Keypad Touch, the Lock provides all the smart lock functionality you need without having to change any part of your lock. And the basic functions of the Lock on its own work reliably and are easy to use. However, due to the SwitchBot Lock falling off our door after a month of testing, I can't recommend it.
Price: $99.99 for the SwitchBot Lock, $139.99 for the Lock, Keypad, and Mini Hub, $169.99 for the Lock, Keypad Touch, and Mini Hub


[Image credit: Suzanne Kantra/Techlicious]
For the past 20+ years, Techlicious founder Suzanne Kantra has been exploring and writing about the world’s most exciting and important science and technology issues. Prior to Techlicious, Suzanne was the Technology Editor for Martha Stewart Living Omnimedia and the Senior Technology Editor for Popular Science. Suzanne has been featured on CNN, CBS, and NBC.
From Gregg on October 15, 2023 :: 2:42 am
I know this article is almost a year old but I just got a Switchbot lock and I’m loving it so far. I am slightly worried about adhesion but I’d just like to point out that what you describe in your article is actually the paint failing, not the adhesive. And Switchbot even recommends against installing on painted doors.
My door is painted like yours, but if the Switchbot pulls paint off I’m planning to re-adhere it to the bare patch. That will hopefully keep it stuck to the door, and I will worry about patching the paint only after I remove the Switchbot permanently or move apartments, whichever comes first.
Just wanted to comment on that - thanks for the helpful review.
Reply