If you work from home or follow a hybrid work schedule, chances are you've been confronted with slow internet connection speeds, especially now that the kids are home from school. There are two main reasons why your WiFi could be slow: your ISP isn't delivering a speedy connection to the internet, or your home router isn't reaching your devices with enough throughput.
A recent HighSpeedInternet.com survey found that the median internet speed for U.S. households is 90.96Mbps. That should be plenty of bandwidth, even if your family is streaming video, playing an online game, and on a video call simultaneously. So, the first step is to check whether the problem is with your ISP or home network. If your ISP is delivering the speed they promised (it's easy to check), the problem is likely your router.
There are several reasons why your router may be impacting your connection speed – its age, the quality of its processor and antenna, its placement, its ability to pick up wireless signals, and the number of devices using it. Newer routers may support faster WiFi technology that can prioritize specific traffic streams, such as video calls or work devices, over the kids' tablets and gaming consoles.
Follow the steps below to troubleshoot your connection problems and boost your WiFi speed.
1. Reboot the router
Like most electronic devices, your router can get bogged down over time. The IP connection between your device and the router or between the router and the internet can get hung up. A restart of the router reboots all its systems, including the network processor and wireless radios.
If your router has a reset button, hold it down for a few seconds. If not, restart it by unplugging it, waiting half a minute, and then plugging it in again.
2. Run a speed test to see if your ISP is the problem
Now that you have a freshly rebooted router it's time to determine whether the internet from your service provider is slow or it's a WiFi problem.
For testing, use the best connection you have to your router. If your computer has an Ethernet jack, plug your computer into your router. That way you're getting a direct connection into your computer without any potential WiFi interference. If you don't have an Ethernet jack, set up right next to your WiFi router to minimize interference.
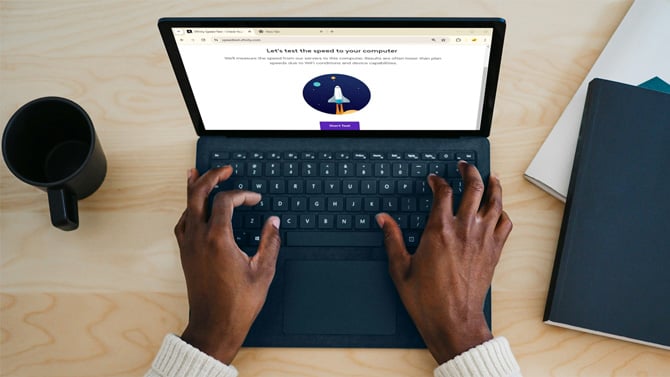
Test the internet connection from a site such as SpeedTest.net at different times during the day (There can be confusing ads on this page, so don't click on anything but the big "Go" button). If you're doing video conferencing and other tasks that require sending a lot of data, you'll want to check upload and download speeds – video calling has comparatively high demands for both.
The speed should be at least 80 percent of what your service provider promises. If it is, your ISP may be the issue and you should contact them to troubleshoot the problem. If you're getting solid speed in your tests when connected or next to the router, it's a WiFi issue and one of the tips below should fix your problem.
Take note of your upload and download numbers before you start testing our tips for boosting your WiFi – you'll want to check whether your connection improves and what does the trick.
3. Turn off Eco mode
Some routers have a power-saving or Eco mode that helps save energy. However, the eco mode can slow down WiFi and reduce the coverage area, and the power savings are minimal. In your router's settings, look for Eco mode or power-saving mode and turn it off. Also, check to see if your router has an Automatic transmission setting and ensure it's at 100 percent.
4. Check how many other devices are connected
Intensive activities like streaming 4K video or file sharing can affect Internet speed for everyone on your home network. Routers can support hundreds of devices connecting, but it's more about what each device is doing online. For example, if someone is streaming Netflix, another person is working over Zoom, and two others are gaming, that will undoubtedly increase congestion – and latency – on your internet connection.
5. Check for interference from a nearby cordless device
Baby monitors, older cordless phones, microwave ovens, and wireless speakers are just some of the common household gadgets that can interfere with the wireless signal from your router.
Deal with the conflict by moving the router away from these devices and ensuring that no devices that could potentially interfere lie in a straight line between your router and the gadget you're trying to get online with.
6. Move the router
You may be able to increase the speed of your connection by choosing a better location for your router. While a WiFi signal can travel hundreds of feet in an unobstructed space, walls and floors can cut that distance by half or more.
The most important thing is to place the router in a central location with plenty of open space, near where you and your family use your devices the most. If you can, put it in a high place to minimize obstructions to all devices connecting to the router.
The materials surrounding the router matter as well. Metal interferes with WiFi signals, while wood does not. Try not to place your router behind a wall with a large mirror (like your bathroom), as the mirror can reflect the signal waves. Even water, such as in a large fish tank, can interfere with the WiFi signal.
And if your router has external antennas, play with those sticks. Positioning the router's antenna vertically rather than horizontally can also increase signal strength.
7. Use the right WiFi frequency
Today's WiFi routers support up to three frequencies: 2.4GHz, 5GHz, and 6GHz. The 2.4GHz band tends to reach farther but can be more congested than the 5GHz and 6Ghz bands because it is used by more types of devices, including smart home devices and baby monitors. On the other hand, the 5GHz and 6Ghz bands have faster throughput – but can't travel as far because their shorter waves are less able to move through walls and floors.
If you have a router that supports two or more bands, it may have automatically created multiple networks when you set it up. In this case, on a computer (or other device) that requires a strong internet connection, try switching to the 5Ghz or 6Ghz network from the wireless network icon in your toolbar.
Here's how you can check what frequency your network is on:
- On a Mac, hold down Option and tap the WiFi icon to see details about the network you're currently connected to, including the frequency and channel.
- On a PC, head to Settings > Network & Internet, and you'll see the band under the WiFi network name in the "Properties" section.
8. Use an uncrowded WiFi channel
Within the 2.4GHz, 5GHz, and 6GHz bands, there are multiple channels through which a signal can travel. Slow speeds can be down to interference from your neighbors trying to connect via the same WiFi channel.
Many routers default to channel 6, which means your neighbors' routers might also be running on the same channel, causing bandwidth congestion that impacts your internet speed. You can try to increase your WiFi speed by switching to a less busy channel.
Some routers automatically change channels depending on internet traffic. Still, you might want to check for a better channel. We recommend the free WiFi Analyzer app (Android and Windows) to identify which router channel has the best bandwidth, allowing faster connections and better calls. Currently, the Windows WiFi Analyzer doesn't support 6Ghz channels, but the feature is expected to be available later this year.
Although there's no free equivalent for iOS, Mac users can take advantage of a built-in tool to scan for the best channels. Hold down the Option key and click on the wireless icon to open Wireless Diagnostics. Ignoring the window that opens, click "Window" in the toolbar, then select "Scan." You'll see a summary that notes the best channel for 2.4GHz and the best channel for the 5GHz band. (Your router should be able to switch between both automatically to access all available channels.)
Once you've identified whether there's a better channel you can use, head to your router admin page by entering your router's IP address in your browser toolbar. You can find this address in your manual, on the back of the router, or by googling the router brand and model (it will look something like 192.168.1.1), then enter your credentials. If it's your first time, these may be the default login and password (again, findable online – which makes an excellent case for changing it ASAP to prevent others from accessing your router).
Read more: How to Avoid Terrible Passwords
Select wireless settings to see what channel you're on. You should be able to change to the optimal channel found by your WiFi scan – though if your router was set to choose the best channel automatically, it might already be using the optimal one.
Note: Avoid tampering with settings here unless you know what you're doing, as changing the basic configuration, such as the SSID (network name), can affect how other household devices connect to the internet.
9. Change your DNS settings
When you browse the web, the URL you type in must be translated into the website's IP address to see the page. A Domain Name System (DNS) serves as that translator. Each time you connect to the internet, your ISP assigns you to DNS servers in its infrastructure, but if those servers aren't fast and stable, it could bog down your internet experience.
Switching to a third-party DNS server might boost your internet speed. Many third-party DNS providers exist, but Google Public DNS is one of the most popular free options. You can use its address (8.8.8.8 or 8.8.4.4) to update your DNS settings.
To change your DNS settings, log back into your router admin. Then, open the LAN or DHCP server settings, look for a DNS field, and fill in the address of your new DNS server.
10. Get a WiFi extender
In homes larger than 3,000 square feet, getting a good WiFi signal from one corner to another can be a challenge. Multistory houses also pose an obstacle if the router isn't plugged into the broadband line somewhere in the middle. In these cases, you could benefit from using a wireless extender. A signal extender plugs into any outlet to rebroadcast and boost your WiFi signal across the home, from your garage to the front garden.
When choosing an extender, you'll want to match your router's WiFi protocol and speed. You will likely have a WiFi 5 (802.11ac), WiFi 6 (802.11ax), or WiFi 6E (802.11ax) router. (If you have a WiFi 4 router (802.11n), see our recommendations below on investing in a new router.) You'll see the speed listed as AC (for WiFi 5), AX (for WiFi 6), AXE (for 6E models), or BE (for WiFi 7 models), followed by numbers. The numbers indicate the theoretical maximum throughput across all router bands, so AC750 would be 750Mbps, and AXE3000 would be 3000Mbps.
We recommend Netgear's Nighthawk EAX15 dual-band AX1800 WiFi 6 Extender ($139.99). It is easy to set up and plugs directly into a wall outlet for easy placement. For a higher-speed model, our pick is the Netgear Nighthawk EAX80 dual-band AX6000 WiFi 6 Extender ($249.99). If you have a mesh WiFi system, our pick is the TP-Link RE715X AXE5400 Mesh Wi-Fi 6E Range Extender ($199.99). If you're on a budget, the dual-band TP-Link RE215 provides a much more modest maximum AC750 connection speed but costs just $29.99.
If you bought a router or rented it through your internet service provider, you'll want to see if they offer an extender. For instance, Comcast offers Xfinity xFi Pods extenders ($119 for one) which are configured for its routers.
Or, you can use a pair of powerline adapters, which plug into wall electrical sockets and transmit signals through your home’s existing wiring, allowing for wireless and wired connections to devices. The adapters must be on the same electrical circuit to work. Our pick for a powerline adapter solution is the TP-Link AV1300 Powerline WiFi Extender Kit ($119.99, on sale for $107.99) with AC1200 dual-band WiFi and three 1GB ethernet ports.
11. Start fresh with a new router (or mesh WiFi system)
If you're experiencing slow internet speeds, it may be time to consider upgrading your router. Older routers or those provided by your Internet Service Provider (ISP) may not support the latest WiFi protocols and can limit your internet speeds. For example, older routers may only support 802.11a/b/g/n protocols, which are slower than the newer WiFi 6 (802.11ac), WiFi 6E (802.11ax) or WiFi 7 (802.11be) protocols.
By upgrading to a router that supports WiFi 6E or WiFi 7, you can take advantage of additional spectrum, including the 6GHz band, which is not available on older standards. This can significantly reduce signal interference and increase your home network's capacity, making it suitable for high-load activities like gaming or virtual reality apps. We recommend a router with speeds of at least 5,400Mbps or higher (AXE5400) for most people, but you should consider your internet needs and household size before purchasing.
With more than a decade of router testing experience, we recommend investing in a router that can be part of a mesh WiFi system. Mesh WiFi routers work with extender nodes that piggyback on one another using an internal mesh network that blankets the home for better coverage than if you added standalone extenders. In addition, a mesh-compatible router doesn't cost more, and you'll be future-proofing your purchase.
We have tested a variety of WiFi mesh systems, and we like and use the Eero Pro 6E, which offers AXE5400 connection speeds, easy setup, the newer WPA3 security protocol (which is compatible with older WPA2 devices), and a built-in smart home hub for controlling compatible Thread and Zigbee devices if you own Alexa devices. You can start with a single unit that covers up to 2000 sq ft. ($159.99), or if you have a larger home, a two-pack ($399.99) will cover up to 4,000 sq ft. If you're interested in parental controls, we recommend the TP-Link Deco XE75 two-pack (AXE54000, $299.99 for two), which covers homes up to 5,400 sq ft. While we haven't used this model, we've used and liked other TP-Link routers in the line, and it receives high marks from professional reviewers and consumers.
For a standalone router that can be used in a mesh system, we like the TP-Link Archer AXE75 (AXE5400, $199.99). It's works with TP-Link OneMesh-compatible extender nodes, comes with free anti-malware and parental control software, and supports WPA3 security. Reviewers and consumer like the fact that it's easy to set up and affordable. If you want to max out, go for the ASUS ROG Rapture GT-BE98 PRO (BE300000, $799.99), which works with AiMesh extender nodes and provides tons of network controls, including security, parental controls, VPN, and traffic control. Tom's Hardware called it "a performance monster" in their testing and PCMag cites its "blazing throughput performance." For small spaces, our budget pick is the TP-Link Archer AX55 (AX3000, $129.99), with its easy setup and support for WPA3 security.
Note: Before upgrading to a WiFi 6E or WiFi 7 router, be aware that your devices need to support WiFi 6E or WiFi 7 to take advantage of the higher speeds.
12. Buy a USB WiFi adapter for your computer
If you want to work on your computer in a location that doesn't get good WiFi, you can invest in a USB WiFi adapter to increase your reception range. These plug into a laptop or desktop USB port, overriding the computer’s in-built wireless function, and can increase the speed and stability of the connection, especially for older computers that might not support newer WiFi standards.
We recommend the Netgear Nighthawk A8000 ($79.00), which is a tri-band AXE3000 WiFi 6E adapter. You can plug the adapter directly into a USB 3.0 Type-A port or use the included dock to place it for better reception.
Updated on 7/17/2024 with information on 6Ghz channels and WiFi 7 and new product recommendations.
[Screenshot via Techlicious, laptop mockup via Canva]
Natasha Stokes has been a technology writer for more than 10 years covering consumer tech issues, digital privacy and cybersecurity. As the features editor at TOP10VPN, she covered online censorship and surveillance that impact the lives of people around the world. Her work has also appeared on NBC News, BBC Worldwide, CNN, Time and Travel+Leisure.







From Alexander Innes on March 24, 2015 :: 11:44 am
You may want to move to Europe or Asia as both have much better internet speeds then the US.
Reply
From Josh Kirschner on March 24, 2015 :: 11:59 am
Tip #10: Move home to South Korea
Though the issues we’re addressing here are not about your raw Internet speed, but about the ways your Wi-Fi can get slowed down within your house. I get 50Mbps wired in my bedroom, but have real issues streaming video wirelessly from my living room.
Reply
From Steve Gilbert on April 14, 2016 :: 10:13 am
Advising people to press the reset button is not a good idea. The reset button on the router usually returns all settings to factory defaults. This would change their SSID’s, passwords and possibly their IP network which is not usually what the user wants. Unplugging the power cord and waiting 5 seconds before plugging it back in is the best method for ‘resetting’ the router.
Reply
From David Sharpe on April 23, 2016 :: 9:58 am
You are absolutely right. I was very surprised to see this suggestion. A tech-phobic, or even some tech-savvy people could find themselves in a pickle, having to go into the router and set all the custom setups over.
Reply