If you’re interested in hiding photos saved on your iPhone from prying eyes, Apple makes it easy with a Hidden folder in the Photos app. When you move pictures and videos to the Hidden folder, they won’t appear in your Photos Library or albums when you hand your phone over for someone to see your latest vacation photos. But you’ll still have easy access to them.
In the past, the Hidden folder was just a separate place to store your photos – it wasn’t locked. With iOS 16 and higher, your Hidden folder is protected by Face ID, Touch ID, or your passcode. (Check to see if your iPhone can run iOS 16 or higher.) And you can further protect your photos by hiding your Hidden folder from the Photos app.
How to move photos into the Hidden Album in Photos
Follow these steps to keep your photos hidden from prying eyes.
- Launch the Photos app.
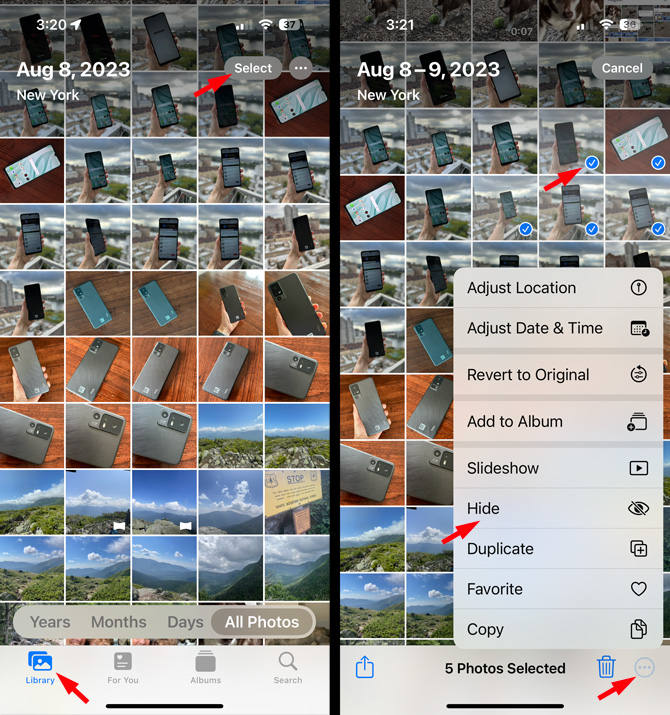
- Ensure you are viewing the Library tab, and then tap Select at the top right of the app screen.
- Select all of the photos you’d like to hide. Then, tap the Menu button (triple dots in the circle) at the bottom right of the display.
- From the pop-up menu, select Hide (the eye icon with a line struck through it).
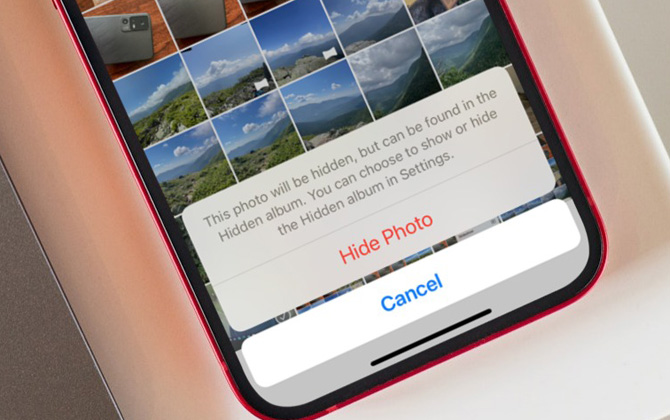
- Another pop-up menu will appear that prompts you to confirm the action of hiding away your images. Tap the Hide Photo option.
All the photos you selected will move to the Hidden album and not appear in the Library or any of your albums.
Next, make sure access to your Hidden album is protected by your Face ID, Touch ID, or your passcode
- In the Photos app, select Albums.
- Scroll down and select Hidden album. If you're prompted to use Face ID, Touch ID, or your passcode to gain access to your photos, you're protected. If not, continue with these instructions.
- Go to your iPhone Settings.
- Scroll down to Photos. Tap to open it.
- Under the Albums section, toggle the option to Use Face ID/Touch ID.
How to hide your Hidden album in Photos
If locking your private photos in the Hidden folder isn’t enough, you can take an extra step to hide the Hidden album from the Photos app.
- Go to your iPhone Settings.
- Scroll down to Photos. Tap to open it.
- Under the Albums section, toggle off the option to Show Hidden Album (it’s enabled by default).
Now the Hidden album will not appear as an option in Albums under the Utilities section, and you won't have access to it until you unhide the Hidden album.
How to unhide photos stored in your Hidden Album
It’s simple to unhide photos and have them appear in the Library and any albums where they were previously stored.
- Go to the Hidden Album under the Utilities section of the Photos app.
- Tap Select at the top right of the app screen and choose the photos you want to unhide.
- Tap Menu (3 dots visible at the bottom right), and select Unhide from the list of options displayed.
Also, check out our instructions on how to hide photos on Android phones.
Updated on 8/2/2024 with additional instructions of viewing a Hidden Album.
[Image credit: Screenshots via Techlicious, iPhone mockup via Canva]
As a lifelong tech enthusiast, Hemant Saxena is always looking for the latest gadgets that intersect with his hobbies. For more than a decade, he has been writing about consumer gadgets, popular apps, and social media tips for publications, including Windows Club and Techmate Tricks.