Microsoft Excel makes it easy to analyze and organize large datasets. However, when working with large spreadsheets, you can lose track of what each column or row represents. And scrolling back to the top or side to check the headings is both a pain and causes you to lose your place in the main dataset. The simple solution to this is to freeze cells to keep that header information and other important data always in view.
In simple terms, when you freeze a cell, that cell will continue to display on the window even when you scroll up and down, as well as left and right. Freezing cells does not lock the cell data (see our story on protecting data by locking it); it just keeps the cells in view. That makes it easy to visually keep track of your data and to compare data between cells.
You can freeze single or multiple rows or columns, as well as freeze rows and columns together. This guide will explain the steps for each scenario.
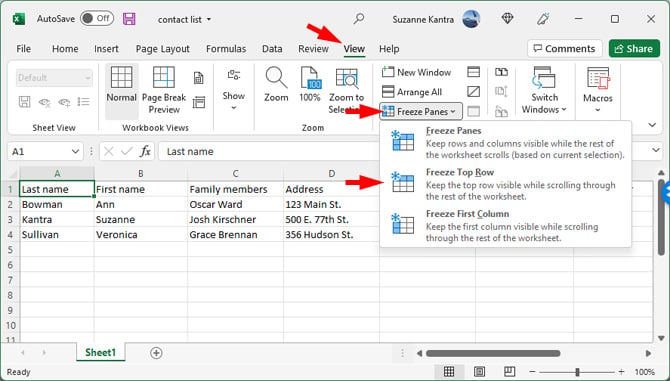
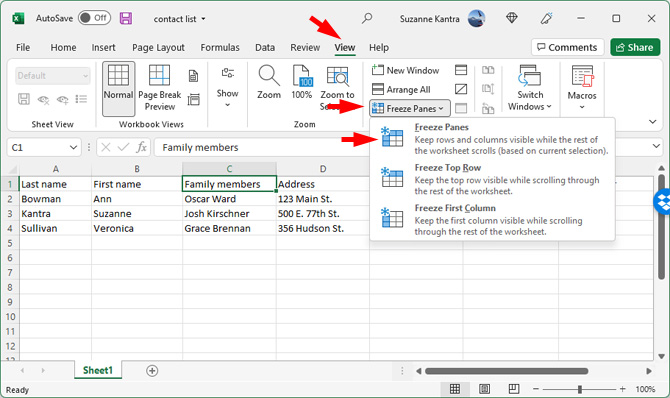
Steps to freeze a single row in Excel
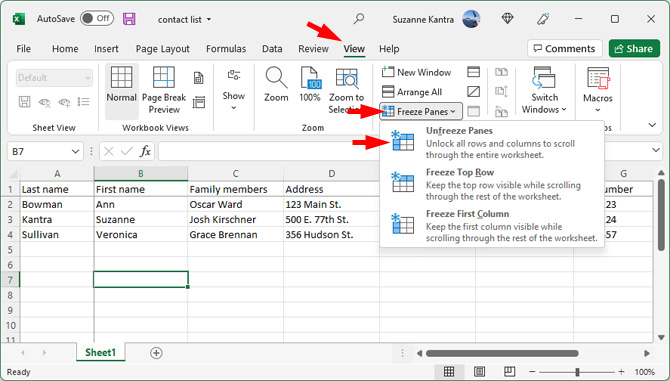
- Click on the View tab on the top Menu bar.
- Select the Freeze Panes option.
- Select Freeze Top Row.
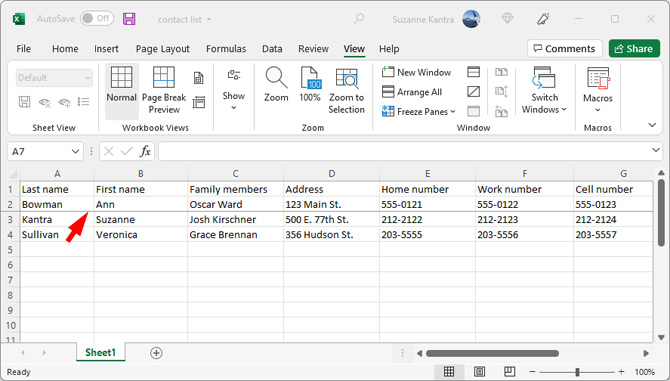
You will notice that the frozen row will be highlighted with a grey line below it.

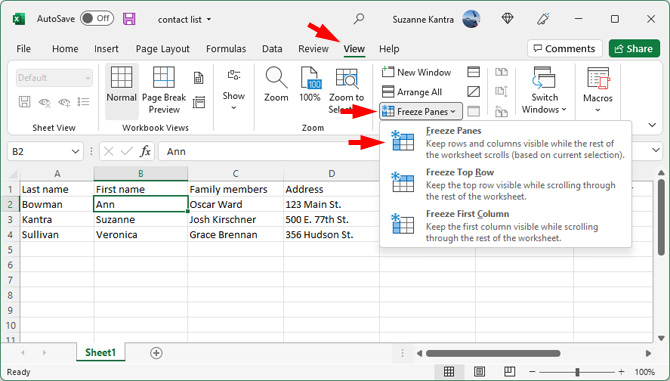
Steps to freeze multiple rows in Excel
- Click on the cell in column A of the row immediately below the rows you want to lock. For example, if you wish to lock rows 1 and 2, you should click on Cell A3.
- Click on the View tab on the top Menu bar.
- Select the Freeze Panes option.
- From the dropdown menu that appears, select the Freeze Panes option.

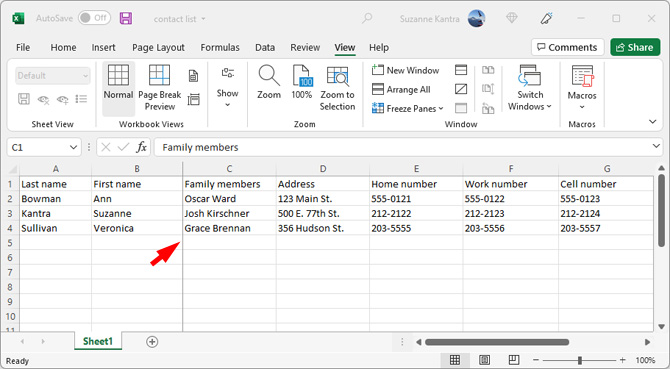
Excel will automatically insert a thin line to show the separation between locked and unlocked rows.
Note: An important point to keep in mind when freezing rows is that you cannot freeze or lock rows in the middle of a spreadsheet. Microsoft Excel only allows you to freeze rows at the top of the workbook.
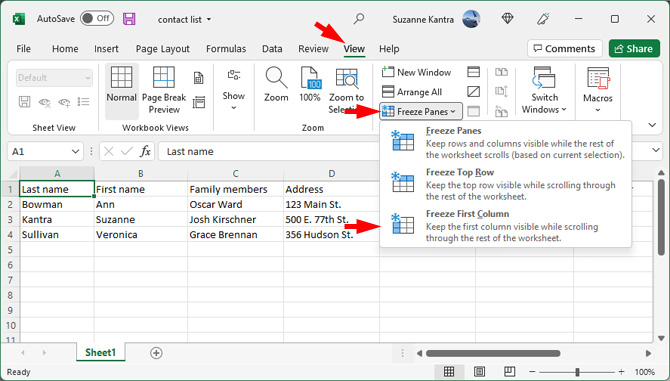
Steps to freeze a single column in Excel
- Select the columns that you wish to freeze.
- Click on the View tab on the top Menu bar.
- Select Freeze Panes.
- Select Freeze First Column.
A thin line will separate the frozen column from the unfrozen columns.
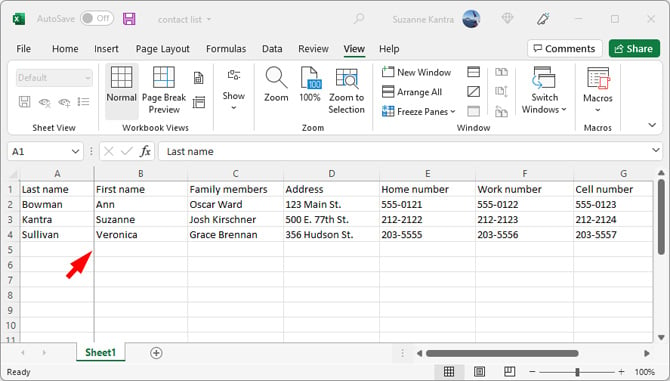
Steps to freeze multiple columns in Excel
- Click on the cell in row 1 in the column to the right of the columns you want to lock. For example, if you wish to freeze till column B, then click on cell C1.
- After selecting the appropriate cell, select the View tab.
- Click on Freeze Panes.
- From the dropdown menu that appears, click on the Freeze Panes option.
A thin line will separate the frozen columns from the unfrozen columns.
Note: Just like rows, you need to remember that you cannot freeze a column in the middle of a workbook. You can only freeze columns on the left side of the sheet.
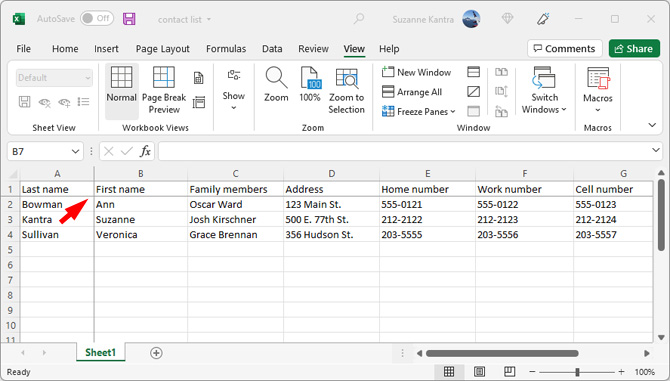
Steps to freeze rows and columns together in Excel
- Select the cell below the row you wish to freeze and next to the column you want to freeze. For example, to freeze row 1 and column A, you need to select cell B2.
- After selecting the appropriate cell, Select the View tab.
- Click on Freeze Panes.
- From the dropdown menu that appears, click on the Freeze Panes option.
You have just frozen the first row and the first column. Thin lines will separate the frozen columns and rows from the unfrozen columns and rows.
Steps to unfreeze cells
- Click on the View tab
- Select Freeze Panes
- Select Unfreeze Panes from the dropdown menu.
All of the cells will be unlocked.
[Image credit: Screenshots via Techlicious, laptop showing Excel via Techlicious/Smartmockups]
Sagar Naresh Bhavsar has been writing about technology for more than two years. Previously, he was a staff writer at Guiding Tech and TechWiser. He loves working out, having a cup of coffee, and playing guitar.