
Additional reporting by Suzanne Kantra
Nobody wants to find out that the battery on their AirTag is dead when they really need it. So, it's prudent to keep tabs on the battery status and replace it when it starts getting low.
Unfortunately, Apple doesn't make it as easy as it should be to see how much life is left in your battery. Here's how to find out if your AirTag battery is on its last legs and, if it is, the right way to replace it.
How to check your AirTag battery
The Find My app, where you might expect to see the battery status, does not normally show a battery life indicator. Instead, your iPhone will only display a “Low Battery” warning under the AirTag’s name in Find My when the battery needs replacement. The low battery indicator looks like a red empty battery icon with the text "low battery" under it.
To see if that warning is showing for any of your tags:
- Open the Find My app on your iPhone
- Switch to the “Items” tab located at the bottom of the screen
- Select your AirTag to view information related to it
- Look for the low battery indicator just below your AirTag name. If there is no indicator, the battery isn't low.
Typically, Apple also sends a notification to your iPhone when your AirTag's battery runs low. However, it's easy to miss or accidently swipe away amid all of your other device notifications.
How long does an AirTag battery last?
While Apple says the battery should last about a year in “normal use,” I’ve found that my AirTag batteries last a lot longer. If you rarely use the Find My feature, you’ll get about two years of battery life. On the flip side, if you’re using your AirTag’s “Play Sound” feature all the time, expect a lot less than a year.
Once you've received the low battery warning, expect your AirTag to last anywhere from a week to a couple of months, depending on use.
How to replace your AirTag battery
Every AirTag is powered by the commonly found CR2032 lithium 3V coin battery. Swapping your old battery with a new one is effortless, provided you know the correct method. Here are the steps to replace that battery and keep your tags in action.
- Flip over your AirTag so its shiny metal cover is facing you.
- Gently press down on the cover using one hand's thumb and index finger. If you're having trouble getting a grip, try holding the AirTag with both hands and pressing down with both thumbs.

- While pressing, rotate the cover counterclockwise to unscrew the chrome-plated cap from the AirTag.
- Pop out the battery and put in a new CR2032 lithium 3V coin battery. I use and recommend the Panasonic CR2032 3V coin batteries.
- Make sure the positive side is facing up so you can see the plus sign.
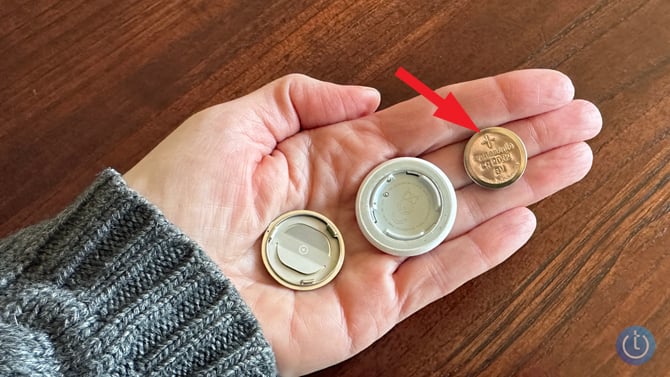
- Align the three tabs on the cover with the three slots marked on the AirTag and gently press down and twist clockwise to secure the cover. You'll hear a chirping noise when the battery is connected correctly.
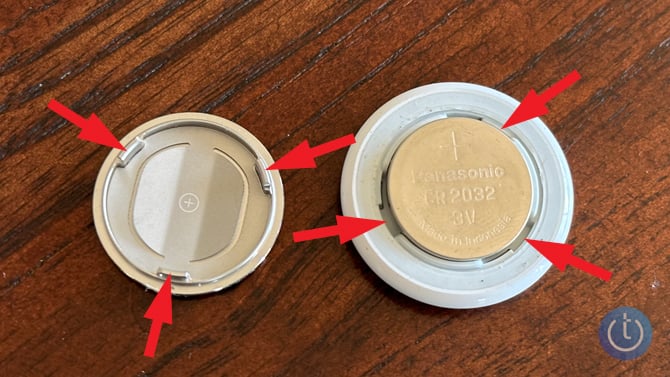
Why some CR2032 batteries don't work in AirTags
If you’ve purchased a CR2032 battery that’s labeled as "child-safe", it may not work in your AirTag. Apple says the child-safety bitterant coating on these batteries can disrupt the electrical connection with AirTags. For a child-safe battery, I recommend the Duracell Child Secure CR2032, which Duracell specifically claims is designed for use with Apple AirTag.
Updated on 4/16/2026 with battery compatibility issue information and product recommendation
[Image credit: Suzanne Kantra/Techlicious]


From Doug on December 28, 2024 :: 1:44 pm
Find My App advice, I see nothing about battery when I follow your instructions. I see “Play Sound”, “Directions”, “Share”, “Add Person”, “Lost Ait Tag”, “Show Contact”, and “”Notifications”. (rename &remove;). Nothing regarding battery or charge, or replace. Non-the-less I just changed batteries and all went well for one week, now the low battery chirp. No notification to iPhone.
Suggestions?
Reply