iOS 13.5 just rolled out, and it comes with a few handy health features, including faster Face ID unlocking if you’re wearing a mask, new tools to help public health services make COVID-19 apps, and the ability to automatically share your medical information with emergency services when you call 911. They’re all useful additions, but the last one is especially important because it could help you get emergency care more quickly when you need it the most. When it’s enabled, your phone or Apple Watch will securely send the information in your Medical ID, plus your location (if available) directly to emergency services when you call, text, or use the phone’s Emergency SOS feature, so first responders know your basic health info immediately.
If you have an iPhone, we recommend updating to iOS 13.5 — go to Settings > General > Software Update to get started — and setting up the new Medical ID sharing feature.
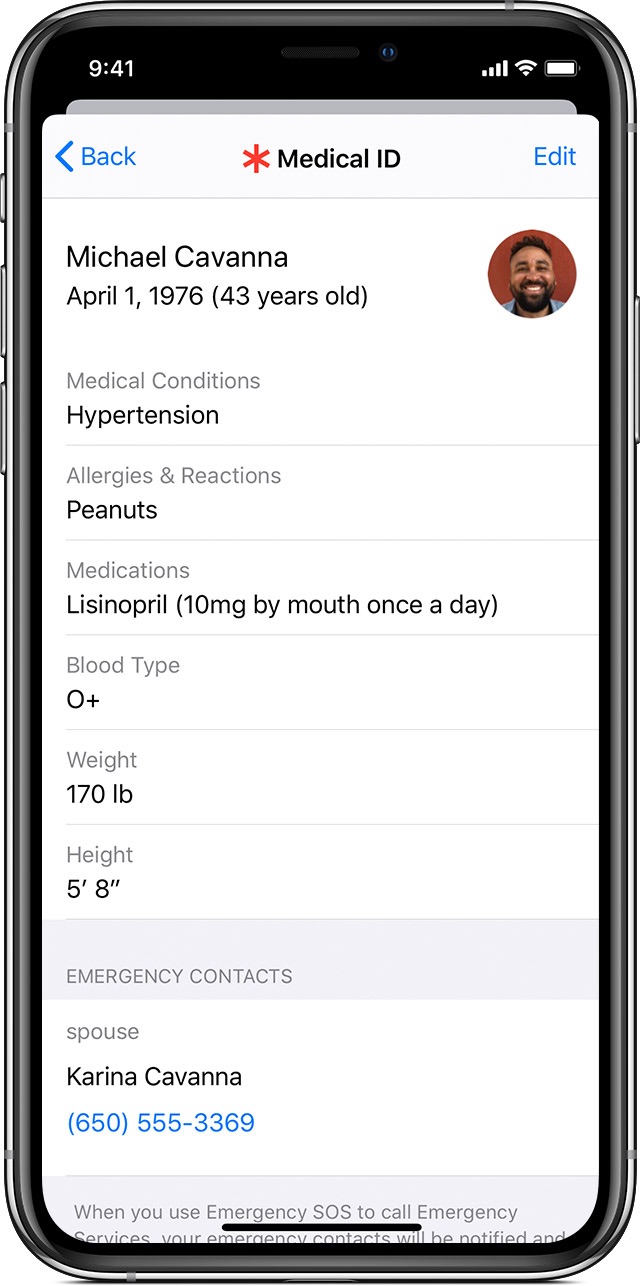
How to set up a Medical ID on your iPhone
If you don’t already have a Medical ID, now’s a great time to set it up. If you do have a Medical ID, it’s a good idea to double check it before turning on sharing. Here’s what you need to do:
- Open the Apple Health app
- Tap your profile picture in the upper right
- Tap Medical ID
- Tap Get Started to create an ID or Edit to edit an ID
From here, you can enter all of your important health information, including medications, health conditions, and allergies — which could be life-saving information in an emergency. When you're done entering your info, tap Done to save it.
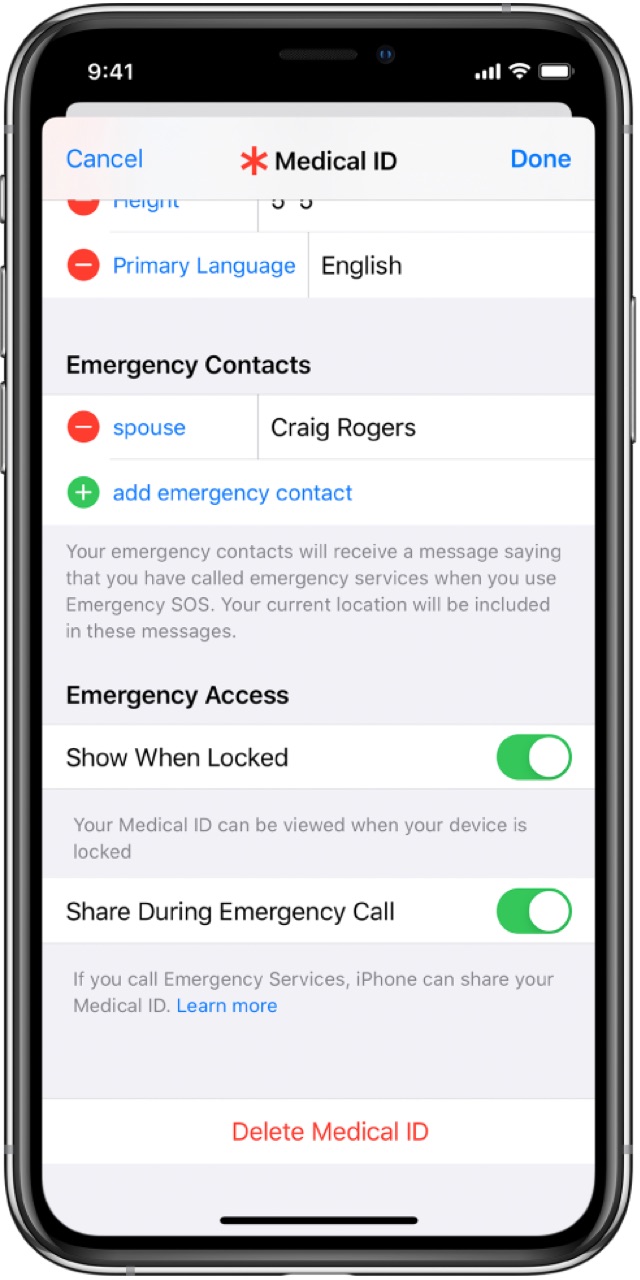
How to set up emergency Medical ID sharing
Now that your Medical ID is set up and up to date, you can turn on sharing right from the Medical ID setup. Here’s what you need to do:
- Open the Apple Health app
- Tap on your profile picture, then Medical ID > Edit
- Scroll down to the Emergency Access section and enable Share During Emergency Call
- If you’d like paramedics to see your Medical ID from your iPhone lock screen, also enable Show When Locked
- Double check that location data is enabled under Emergency Services location data under Settings > Privacy > Location Services > System Services > Emergency Calls & SOS
How to set up emergency contacts
We also recommend setting up emergency contacts who will get a message when you call emergency services using the Emergency SOS feature. It’s extremely handy for keeping your loved ones informed in case of an emergency — and means you don’t have to remember to call or text. This is also set up in your Medical ID settings:
- Open the Apple Health app
- Tap on your profile picture, then Medical ID > Edit
- Scroll down to Emergency Contacts (just above Emergency Access)
- Tap the plus sign next to Add Emergency Contact
- Tap a contact from your address book and add their relationship
- Tap Done
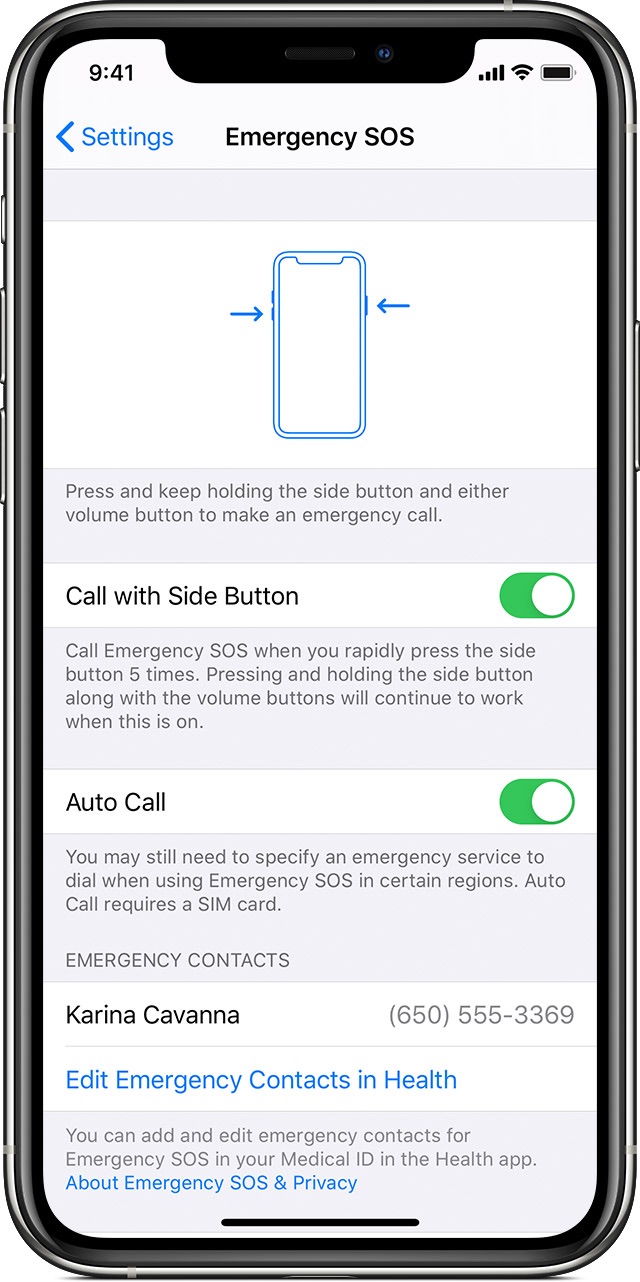
How to set up Emergency SOS on your iPhone
While Medical ID sharing doesn’t require Emergency SOS, it’s a fast way to get help in an emergency. When it’s turned on, a certain button tap — press and hold the side button and a volume button on an iPhone 8 and newer, or tap the side or top button five times on an iPhone 7 or earlier — will automatically call emergency services and text your location to your emergency contacts, no dialing required. After you activate Emergency SOS, a slider will show up on your screen which you can slide to call emergency services immediately, but it will call on its own after a short time delay.
Setting it up is simple:
- Open the Settings app
- Tap Emergency SOS
- Enable Auto Call
- Turn the countdown sound on if you want an audible warning before your phone makes the call
How to turn on Fall Detection for Apple Watch
If you have an Apple Watch 4 or 5, you can set it up to use Emergency SOS if it detects you’ve taken a hard fall. This isn’t just a feature for the elderly: any of us could take a bad tumble, and turning this on lets you get help more quickly by automatically calling emergency services, sending your Medical ID, and texting your emergency contacts.
When it’s enabled, the watch sounds an alarm and shows an alert if it’s detected a fall. You can tap I’m OK to dismiss the warning or slide SOS to call emergency services. If the watch doesn’t detect you moving, it sounds an alarm to alert anyone in the area and automatically calls emergency services after one minute.
Here’s how to set it up:
- Open the Apple Watch app
- Tap Emergency SOS
- Enable Fall Detection
If you have an Android device, you also have options
Android doesn’t have as many emergency features as iOS, but it can display your medical information from your lock screen for paramedics and send your location — but not your medical information — to emergency services when you call. Here’s how to set up emergency sharing on Android.
[Image credits: Apple]