Updated on 4/22/2024 with information and instructions for New Outlook.
Are you tired of constantly sifting through your crowded inbox, trying to find that important email from your boss or a critical update from a family member? Microsoft Outlook offers a feature that allows you to color-code your emails, making it easier to identify and prioritize messages from specific contacts or other criteria.
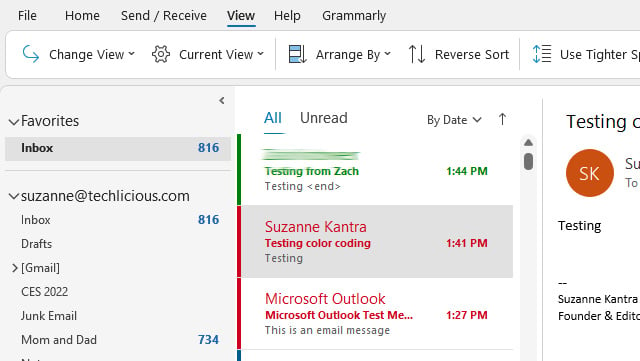
Outlook's color coding is based on rules that you set up to highlight emails with a specific color when they arrive. For instance, you could set up a rule that emails you receive from your boss will appear in green.
How those colors appear in your inbox will vary slightly based on which version of Outlook you have. In earlier versions of Outlook, which Microsoft calls "Classic Outlook," the subject line will appear in a green font. In the most recent version of Outlook, which Microsoft calls "New Outlook," a green tag will appear in front of the subject line text.
While there are a few steps to go through to set up your color-coding rules, the process is straightforward. Check out the steps below for color-coding your emails in New Outlook, Classic Outlook, and the even older Outlook 2019 below.
Color coding emails in New Outlook
New Outlook comes pre-loaded on new Windows 11 computers, and you can use the basic software for free. However, color-coding with Rules is only available if you have a paid subscription to Microsoft 365.
- Go to View tab.
- Select View Settings.
- In Settings, select Mail and then Rules.
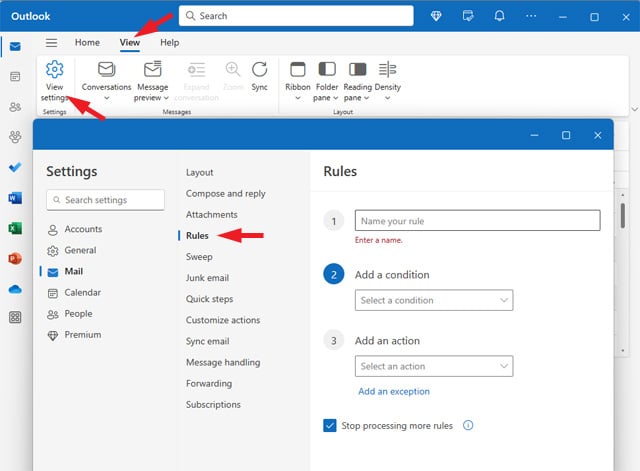
Within the rule creation window, you have a few options for defining how your color rules will operate.
Add a condition to trigger your rule
In the Add a condition dropdown, you can color code your emails based on a number of different criteria, everything from who the email is from to the subject line or specific keywords.
Add an action
The Add an action dropdown provides all your choices for what to do with an email when it meets your set condition. To color code your emails, select Categorize. From the dropdown menu on the right, choose an existing category color or select New Category to create a new color tag (a window will open for creating the category, but it may be annoyingly hidden behind the Settings window). I highly recommend creating a new tag with a meaningful name so you can easily see both the name and color of the tag when scanning through your emails.
Choose whether to stop processing additional rules
Rules will be applied starting with the newest rule. There may be times you don't want multiple rules applied to an email. For example, you may want to color code emails from your boss with as red, but you wouldn't want a later rule triggered that sends all emails with embedded images to your spam folder. In this case, keep the box checked for Stop processing more rules.
Click the Save button to finish setting up your rule.
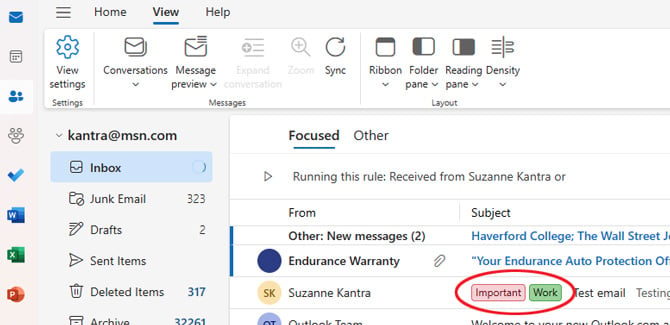
Below, you will see examples of a red "Important" tag and a green "Work" tag next to the subject line based on rules I created.
Read more: Don't Panic! A Step-by-Step Guide to Retrieving Unsaved Word Files
Color coding emails in Classic Outlook
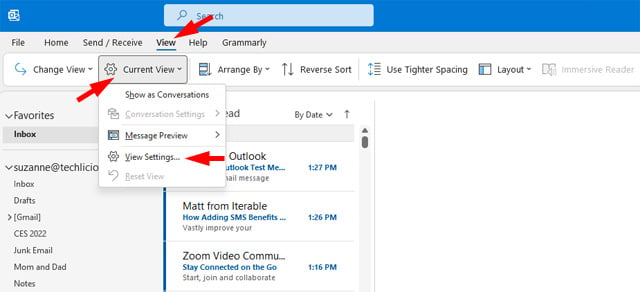
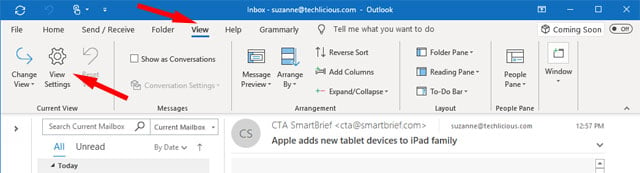
- Go to the View tab.
- Select Current View.
- Select View Settings.
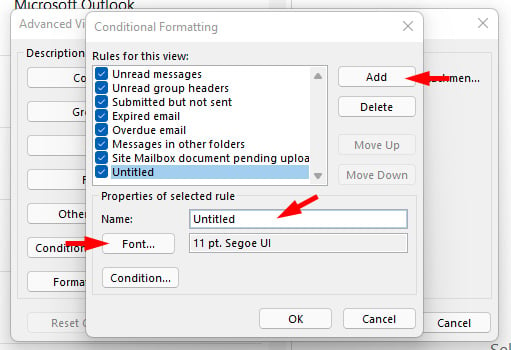
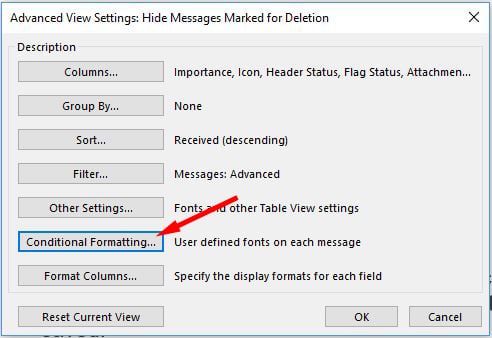
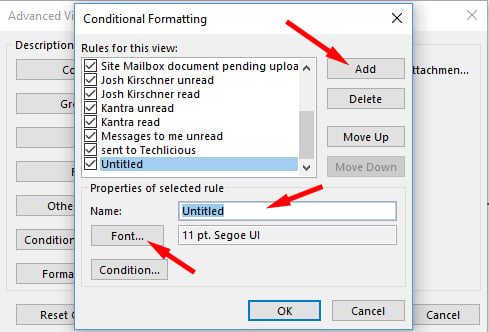
- Choose Conditional Formatting.
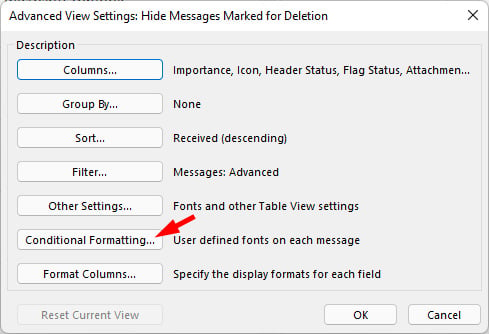
- Click Add.
- Name your rule.
- Click on Font.
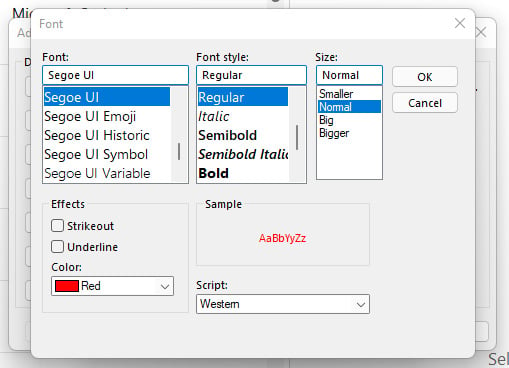
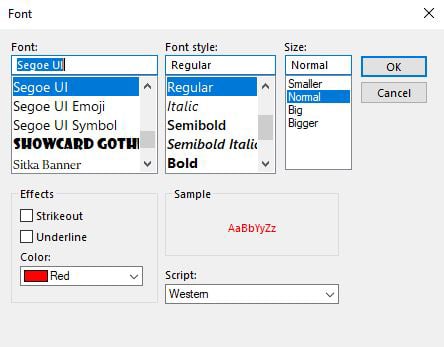
- Pick a color, style and size and click OK.
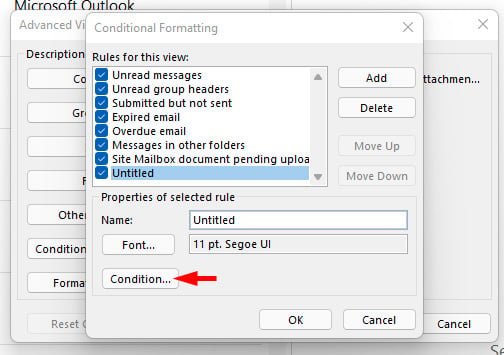
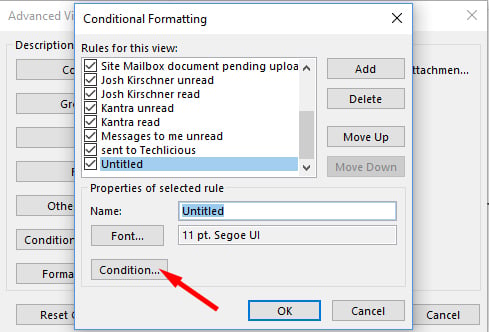
- Click on Condition
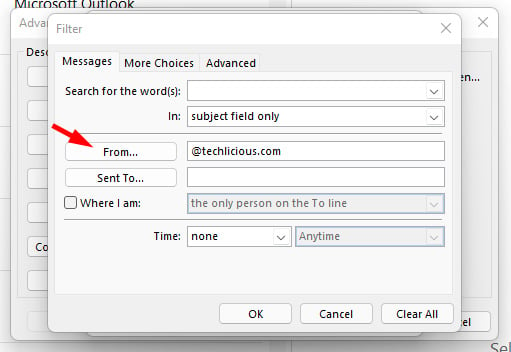
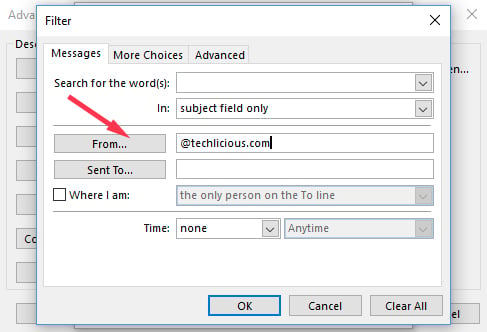
- Type in the email address of the sender or senders you want to highlight. For multiple people, separate the email addresses with a semicolon. And, if you want all emails from a particular company with a unique domain name, you can use the "@" domainname.com. For example, Techlicious would be: @techlicious.com. Then select OK.
Here's how email will appear if you assign red to a contact.
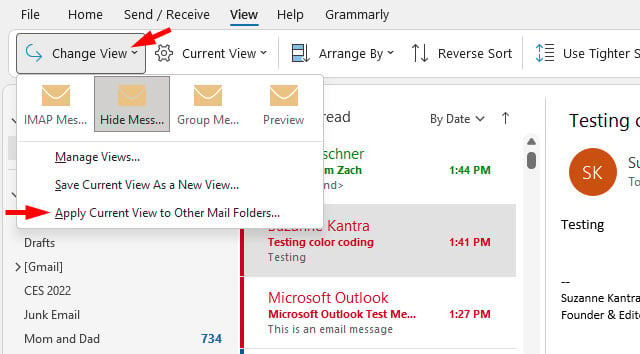
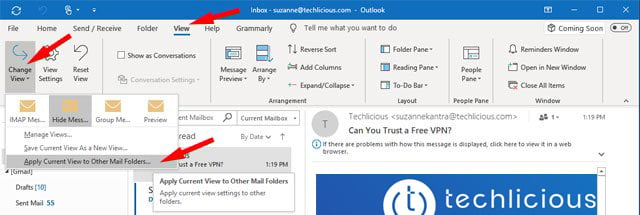
If you want to apply this color coding to all of your email folders, go to:
- View.
- Change Views.
- Apply Current View to Other Mail Folders.
- Select the folders where you want the conditional formatting. There's a box at the bottom that lets you choose to Apply view to subfolders so you'll be covered if you create new subfolders.
Read more: How to Switch Email Accounts Without Losing Emails
Color coding emails in Outlook 2019
- Go to the View tab.
- Select View Settings.
- Choose Conditional Formatting.
- Click Add.
- Name your rule.
- Click on Font.
- Pick a color, style and size and click OK.
- Click on Condition.
- Type in the email address of the sender or senders you want to highlight. For multiple people, separate the email addresses with a semicolon. And, if you want all emails from a particular company with a unique domain name, you can use the "@" domainname.com. For example, Techlicious would be: @techlicious.com. Then select OK.
Here's how email will appear if you assign red to a contact.
If you want to apply this color coding to all of your email folders, go to:
- View.
- Change Views.
- Apply Current View to Other Mail Folders.
- Select the folders where you want the conditional formatting. There's a box at the bottom that lets you choose to Apply view to subfolders so you'll be covered if you create new subfolders.
[Image credit: important email concept via BigStockPhoto]
For the past 20+ years, Techlicious founder Suzanne Kantra has been exploring and writing about the world’s most exciting and important science and technology issues. Prior to Techlicious, Suzanne was the Technology Editor for Martha Stewart Living Omnimedia and the Senior Technology Editor for Popular Science. Suzanne has been featured on CNN, CBS, and NBC.


From James Eliot on January 18, 2011 :: 4:15 pm
Given that macs make up the majority of computers for early adopters, and an even higher percentage for female early tech adopters, you might note that the color coding of email works easily in Mac Mail as well.
Merely go to Mail > Preferences > Rules and add a rule that assigns a color to specific senders as you designate.
Keep up the good work. By the way, I really liked the daily coverage of CES.
Reply
From Paco V. on February 12, 2012 :: 7:12 am
Outlook from mac does not appear to have an option to modify colors, nor modify fonts under rule actions.
I have not been able to “merely” go to Mail > Preferences > Rules and add a rule that assigns a color to senders, recipients, etc…
Are there extra steps or commands that might be missing?
-PV
Reply