Breville Control Grip |
 |
 |
No room in your home is as comically besieged as the kitchen for the sheer breadth of craptastic gadgetry invented to clutter its drawers and cabinets, while befuddling earnest home cooks. I couldn’t count the menagerie of electronic slicers, and dicers, and mixers, and mincers, and choppers, and shredders and grinders, and dubious all-in-one thingamabobs I’ve been tempted by—many of which are now being blessed with fearsome Bluetooth and “smart” capabilities. To my discerning eyes, however, the once mysterious immersion blender is the rare exception. In fact, after several weeks of testing, I now consider one a must-have.
In its simplest form, an immersion blender, a.k.a. a wand, upright, or hand blender, is a high-speed rotating blade attached to a handle that you submerge into a cooking pot or mixing bowl. The business end of the blender always has some sort of bell-shaped guard (more on those in a bit). The motivating idea behind these multi-purpose devices is that, rather than transferring your food into a dedicated or overly large and cumbersome food processor, blender or mixer, you can quickly achieve the same results with a much handier and faster handheld version. In practice, this means not only being able to easily puree soups or sauces in literally a few quick bursts of power, but also make quick work of nut butters, dips, smoothies or mixed drinks, or even more esoteric culinary ventures like homemade mayo. Many blenders also come with potentially attractive accessories such as a whisk or chopper.
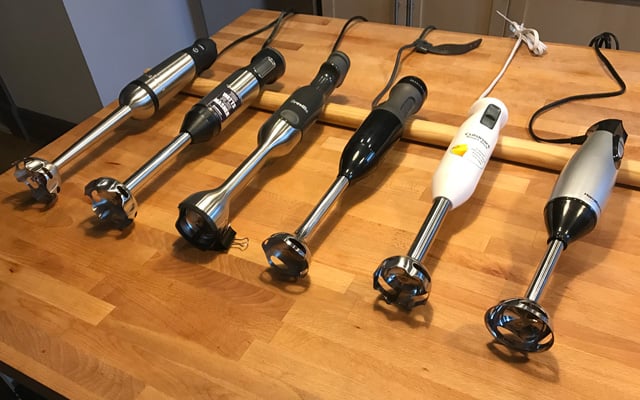
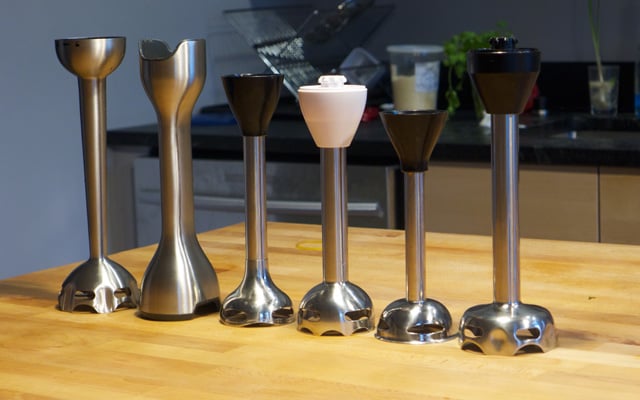
From the left: All-Clad KZ750D, Cuisinart CSB-100, Breville Control Grip, Kitchen Aid KHB2351, Cuisinart CSB-75, Hamilton Beach 59765
I recently road-tested a half-dozen of the leading models and consider myself an instant convert. An immersion blender made quick work of many often tedious tasks such as liquefying soups, making dips and sauces, as well as tasty frozen drinks, without adding too much to the hassle of cleanup or storage. To find a select list of test models, I consulted professional reviews from trusted publications and also took in real world owner experiences from thousands of consumers (more on this below). Once I winnowed-down the options, my short list included the All-Clad KZ750D Immersion Blender ($99.95 on Amazon), Breville Control Grip ($99.97 on Amazon), Cuisinart CSB-75 Smart Stick 2-Speed Immersion Blender ($26.49 on Amazon), Cuisinart CSB-100 Smart Stick Variable Speed Hand Blender ($77.49 on Amazon), Hamilton Beach 59765 2-Speed Hand Blender ($28.80 on Amazon), and the Kitchen Aid KHB2351 3-Speed Hand Blender ($47.00 on Amazon). With the exception of the All-Clad, all of these blenders came with accessories of some sort, as modest as a blending cup to a full-array of attachments such as a whisk, or chopping bowl with food processing blade.
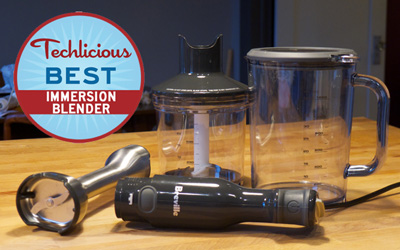
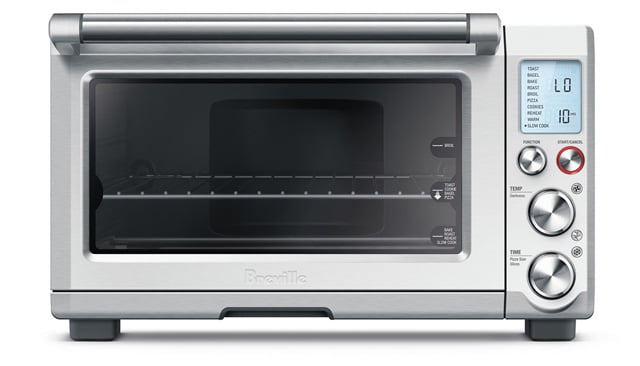
After challenging all of these test models with a punishing gauntlet of home cooking recipes, the good news is that I had a generally good experience with most all of them, however, our hands-down favorite was the Breville Control Grip. Its powerful but quiet motor, extended-length blending shaft, comfortable controls and useful accessories put it over the top, especially since it’s reasonably priced for such a high-quality device at just under $100.
Going deep
One criticism of immersion blenders as all-in-one devices is that they are like the definition of the Renaissance man: They may do many things, but none perfectly. I’d agree, though I’d also offer another old chestnut: Perfect is the enemy of good. And so, while even my top pick, the Breville Control Grip, may not go head-to-head with the results of a dedicated top-quality blender or food processor, for most home cooks they are absolutely “good enough”, which sounds like faint praise but isn’t. If you’re a home cook of even average ambition, an immersion blender will up your game substantially.
When picking test subjects, I looked for models with at least two motor speeds, to be more versatile, and only corded models—the need to keep battery-powered ones continuously charged up means they don’t make practical sense for home cooks. Accessories weren’t a primary concern. However, depending on your skill set and interests, they might be the added value that makes an immersion blender a must-have for you (or just an instant way to terminally clog yet another kitchen drawer. Handy!)

To gauge their functional capabilities, I put the blenders to work on three different dishes: mixing and blending a fresh-made tomato pasta sauce; pureeing a smooth, roasted squash soup; and chopping and blending a fruit smoothie made from juice, frozen mangoes and strawberries. Besides the most basic ability to slice and dice through the various ingredients without issues, I paid particular attention to the texture and consistency of the resulting foods. In particular, for the tomato sauce, I wanted the herbs, garlic and olive oil to be well mixed and blended while still leaving a coarse enough overall texture. Conversely, I looked for the soup to be perfectly smooth, almost pudding or yogurt-like in texture, without any accidental chunks floating around. And for our smoothies, we wanted a consistent blend – a real challenge with two types of frozen fruit. To do the job well required a powerful enough motor and sharp blades without getting clogged or even burning out.
Besides their blending chops, as it were, there were several areas of comparison that ended up making the decision process far easier. At the most basic level, there was comfort and ease-of use; specifically, the shape and weight of the handle, the length of the power cord, the action of the buttons, and the ability to control the wand and feel safe. I also looked at the length of the blending shaft—was it long enough to use in a deep pot?—and the process for attaching it or other accessories. Build-quality was important and, in a few cases, a major differentiating factor. And crucially, I paid attention to how easy it was to clean—some models are dishwasher-proof, others aren’t and require more delicate care.
One Blender to Rule Them All
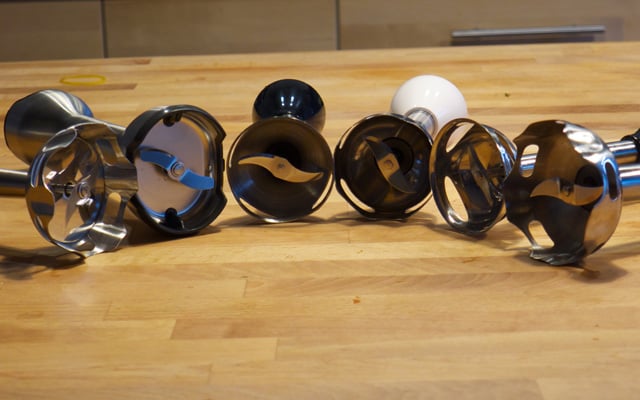
From the left: All-Clad KZ750D, Breville Control Grip, Kitchen Aid KHB2351, Cuisinart CSB-75, Hamilton Beach 59765, Cuisinart CSB-100
Right from the unboxing, the Breville Control Grip is impressive, all sleek lines and smart design. Its 8-inch long shaft is longer than most and made of brushed stainless-steel that’s smooth top-to-bottom, with no seams to trap food; making it able to go deep into cooking pots, while being the easiest to clean of the bunch. The comfortable hand grip is molded like a joystick, with a rubber coating that is soft but also slip-proof even when wet (which is all the time when I’m in charge of dinner). The power button is sealed under the rubber and is easy to press without being a hair trigger. On top is a dial to adjust the speed to one of 15 settings, which we think is probably overkill but nice to have, all the same. The cord is heavy-duty gauge and a generous six-feet-long, which allows for more freedom of movement between a stove and countertop. Also included is a whisk attachment, a 3-cup chopping bowl with its own blade and driver top, and then an even larger 42-oz mixing or storage jug.
In our experience with other Breville devices, we’ve been impressed with thoughtful design choices and other small details that cumulatively make for an especially satisfying experience. The Control Grip has plenty of them. For instance, the storage jug’s rubber top can be fastened to the bottom of the container to function as a slip-proof mat, which is especially handy with a powerful blender. And wouldn’t you know, the chopper bowl and top fits right in the mixing bowl for easier storage. Another savvy design choice, the handgrip has a lip that separates your trigger finger from your middle finger, making it easier to hold and thus control, and also ensuring you always have just one finger poised over the power button, preventing accidental button presses. Similarly, the Breville was the sole model to come with a blade guard, a modest little snap on shield that covers the business end of the shaft and which will be appreciated by anyone who has hazarded an unwary hand into the kitchen whatnot drawer and pulled back a bloody finger as a souvenir, thanks to a long-forgotten food processor blade lurking in the corner.
One thing you quickly discover when using an immersion blender is what’s called the vortex, a pleasingly sci-fi-ish term for the suction effect created by the high-speed rotation of the angled blades. On the one hand, it’s useful as it causes your food to circulate and thus prevents having inconsistent pureeing. The problem though is some models suffer from too much suction, which causes the bell of the blender to get stuck to the bottom of your mixing container, not only preventing proper mixing but also creating a modest safety issue if you aren’t aware and attempt to pull the wand away without holding your mixing bowl with your other hand.
From the left: All-Clad KZ750D, Breville Control Grip, Kitchen Aid KHB2351, Cuisinart CSB-75, Hamilton Beach 59765, Cuisinart CSB-100
One key differentiating feature of the Breville’s performance is its unique racetrack-shaped bell, with open notches on the side. The unorthodox shape allowed for smooth blending action without a noticeable suction (which we’re sure will soon be appearing on competing products).
And in all of the food tests, the Breville made short work of the material without our ever feeling like I had a tiger by the tail (as I did when accidentally triggering one blender’s Turbo mode). To the contrary, the Breville feels very controlled and, well, fun to use. In action, the Breville had a remarkably quiet hum, and yet it chewed easily through everything I threw at it: I pulverized a pint of blackberries and made frozen-fruit popsicles with my kid (on sale soon at a street corner near me); then I made three different types of hummus in about a minute each, using both the blending wand and the chopper attachment (the chimichurri flavor won hands down); and using the whisk attachment tossed up some fluffy, rich whipped cream, again in just a minute or two.
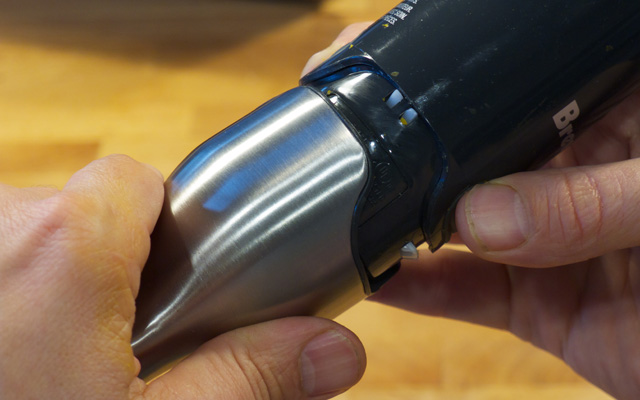
The sole criticism I have with the Breville Control Grip is the mechanism for connecting attachments, a pair of mechanical buttons on the front and rear of the power unit that must be squeezed simultaneously to remove an attachment, and which require the two-finger pincer-strength of a mountain free-climber. In testing all of the immersion blenders, I found a good workflow was to blend one-handed, often pulsing, and when finished to disconnect the mixing shaft and put it in the sink with one hand so that the power unit can be set down on a counter safely and without making a mess. The Breville generally failed or at lease flummoxed this portion of testing, often requiring a tooth-gritting tug of war to finally free the mixing shaft. It’s irksome, but far from a deal-breaker for an otherwise stellar experience.
In picking test models, but also when comparing my test results, I consulted as many professional reviews as I could find, as well as user reviews from retail sources such as Amazon. It turns out there is no one conclusive “best” pick among immersion blenders. Encouragingly, Consumer Reports awarded the Breville 92 of 100 points rating it “excellent” and it was the top pick for The Sweethome, as well.
Retail sites were especially useful for getting “real world” user experiences with the various options, and so I paid special attention to sites where there were at least several dozen user reviews of our picks, such as Sur La Table, Bed Bath & Beyond and Amazon (for which our top pick, the Breville, had more than 650 reviews). Through all, the Breville Control Grip earned near universal praise and scored an average 4.5 of 5 stars or higher. One typical note from an Amazon verified buyer echoed our sentiments and those of most other reviewers succinctly: “Excellent product, exceeds my expectations. Weight, construction are top notch. Power for any home task. Nice accessories. Good quality for your money.”
The Runner-Up
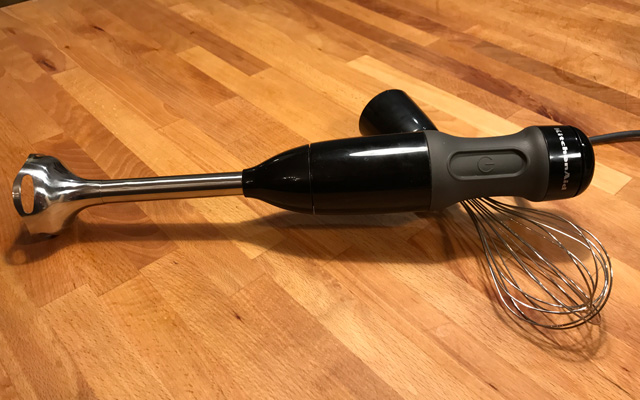
While I don’t think our top pick, the Breville Control Grip, should be considered a pricey splurge at about $100, I was impressed enough with the KitchenAid KHB2351 3-Speed Hand Blender that it bears consideration, especially as it comes in at about half the price. Every aspect of the Breville met or exceeded those of the KitchenAid, however, the Kitchen Aid is still an overall well-made machine I wouldn’t hesitate to recommend.
As with the Breville, the KitchenAid is sturdily built of stainless steel with rigid plastic and slip-proof rubber on its handle. The extra-long power button is comfortable to use with your choice of finger, though I found the 3-position speed adjustment knob on top problematic as it’s a little too smooth and slippery to turn when dry, much less when wet. Though KitchenAid claims an 8-inch stainless steel shaft, it’s more like 6 as the upper two inches are the plastic connector used to join it to the power unit. It also comes with a chopping bowl (a half cup smaller than the Breville’s) and a 3-cup mixing/storage bowl (about half the size of the Breville’s) as well as a whisk attachment. While we had minor issues with the Breville’s accessory connector (see above) the KitchenAid attaches with a twist though, as with the speed adjuster, the smooth plastic makes that a bit tricky if your hands are wet, which they will be.
In my testing, the KitchenAid performs well, with a powerful enough motor to handle everything from fibrous veggies to ice with aplomb. If the Breville is a stretch for any reason, the KitchenAid is a great backup with considering.
The Also-Rans
As noted above, I had a largely good experience with most of the blenders at the most basic level—any of these can and will slice, dice, blend, and puree in a pinch—but there’s no question that our pick is hands down the best performer and value of the bunch, and most other models had at least one failing that knocked it from contention.

The All-Clad KZ750D Stainless Steel Immersion Blender is a gorgeous machine, but at $100 we think too over-powered and pricey compared to our pick, considering it comes with no accessories at all. We loved its extra-long shaft, though combined with its extra-wide protective bell it verges on unwieldy, with too much muscle for many users. We’d call it a prosumer model. One nagging hiccup is the placement of the Turbo button, which instantly turns this thing into a rogue powerboat. The button is located just above the power trigger making it too easy to accidentally press instead of the regular power button; in fact, for our initial food test, we did just that, creating a fearsome dervish of lava-hot soup, which splattered and splashed all over our counter, thank-you-very-much.

Both the Cuisinart models we tested performed well, have a solid feel and quality materials, came with either a blending bowl (CSB-75) or a chopper and whisk accessory (CSB-100), and were dishwasher safe with a great price to boot—all great explanations for their evident popularity among Amazon buyers, in particular. But in my testing, I simply couldn’t get over the awful implementation of a mechanical safety lock, which requires that you push in a button with one hand before being able to activate the power button. This necessarily takes two hands and, since the name of the game with immersion blenders is frequent pulsing, this is a bizarre, self-defeating design choice as you must depress the lock button every time you release the power button. In fact, we’d go so far as to say this two-handed system is actually a safety hazard, as it’s extremely easy to have the blending bowl knock over or tip if it gets suctioned to the blender, which is common. At any rate, there’s no doubt Cuisinart’s models are popular, but for us, the hassle of the locking mechanism, which we appreciate in theory, make them a pass for us compared with our pick.
In comparison with all the other models we tested, the Hamilton Beach 59765 2-Speed Hand Blender felt like a toy—and not a very nice one at that. Yes, it blends, but all of its various components were flimsy and don’t seem designed to last. The power buttons aren’t sealed and depress too deeply, which makes it uncomfortable to hold; the mixing wand was the shortest of all the ones we tested, meaning it’s not able to be used with more than a cup or two of food. And the mixing wand itself is astonishingly poor—the straight 1.5-inch blade doesn’t create much of a mixing vortex, causing it to clog with food bits too easily, and the shaft itself is secured to the plastic connector cone by mere bent metal tabs, which we’d wager will be a source of early death. The best we can say about it is that’s it’s cheap, for around $30. However, for an extra $25 our runner-up pick, the KitchenAid KHB2351OB 3-Speed Hand Blender, is orders of magnitude better, if budget is a concern.
An instant game-changer
Pro chefs and savvy home cooks have long touted the efficiency and versatility that immersion blenders bring to your cooking game, and my testing bears that out. Whether it’s to speed up every task or to broaden your culinary horizons, an immersion blender is a terrific asset, and the Breville Control Grip was the hands-down best and most satisfying model of all we tested. It’s made of high-quality components, is easy to use, works quickly and consistently, and makes clean-up a cinch. Now if you’ll excuse me I’m going to go dig into the pantry to find some more things to puree.
Breville Control Grip - The Best Immersion Blender


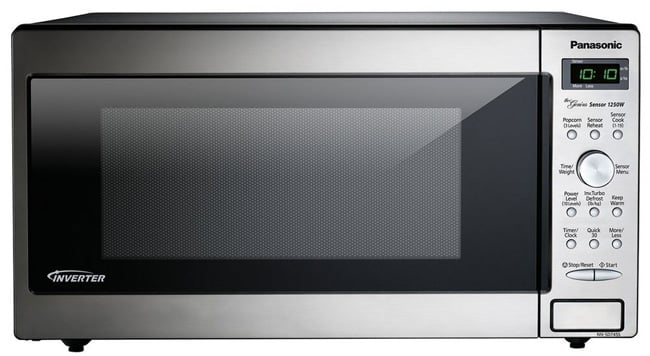
 In most homes, the microwave only serves a few basic tasks: boiling water, popping popcorn and heating the occasional frozen dinner. And there's a good reason for this; microwaves offer little control over how heat is delivered. Try to get too fancy with the cooking and you'll likely end up with over-cooked edges and curdled sauces. But our pick for the best microwave, the
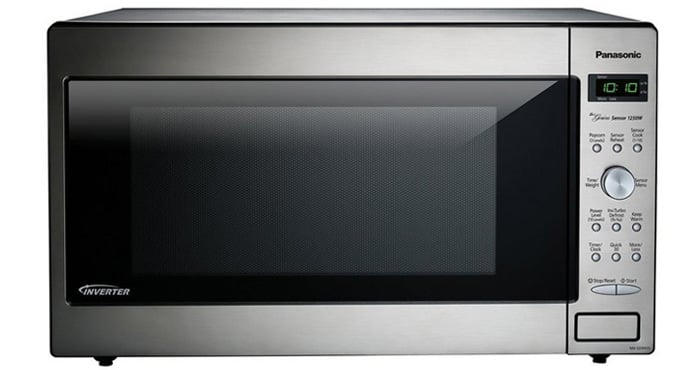


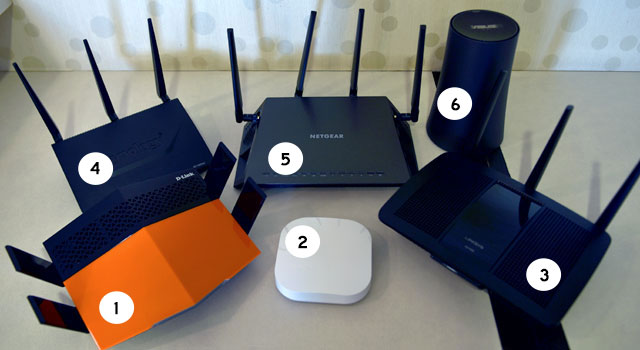

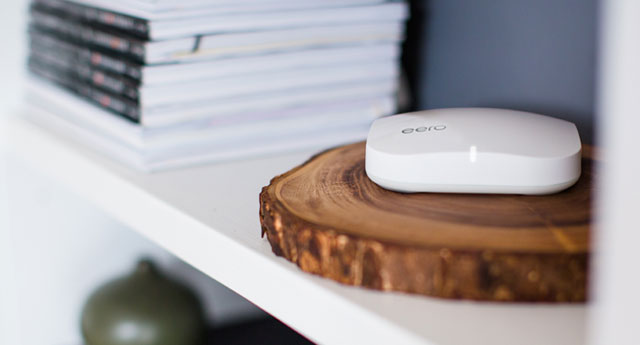
 Part of the aesthetic is the number of antennas, which vary. The Netgear Nighthawk X4S and D-Link EXO each have four, the Linksys EA7500 and Synology RT1900ac have three each, and the OnHub and Eero have no visible antennas at all. Routers without visible antennas still have them, only they are inside the unit itself, and exposed antennas have traditionally been used to angle a signal or for boosting it with longer ones.
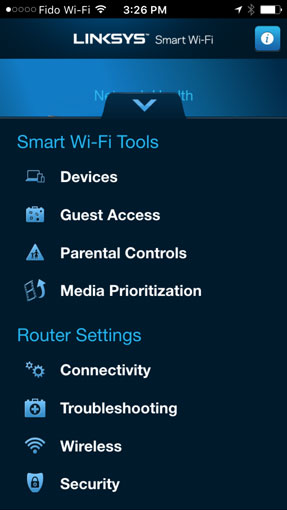 The Linksys EA7500 stands out here because it offers a nice mix of beginner and advanced features through Linksys’ Smart Wi-Fi browser-based interface. The free Linksys Smart Wi-Fi app for iOS and Android doesn’t present the full breadth of administrator features and options in that it doesn’t provide access to advanced settings, like port forwarding or MAC filtering, for example, but is still well laid out and easy to use, even when not at home. Multiple Linksys routers set up under an account and all their respective network bands are accessible, meaning we could help manage a relative or friend’s Linksys router, if need be.
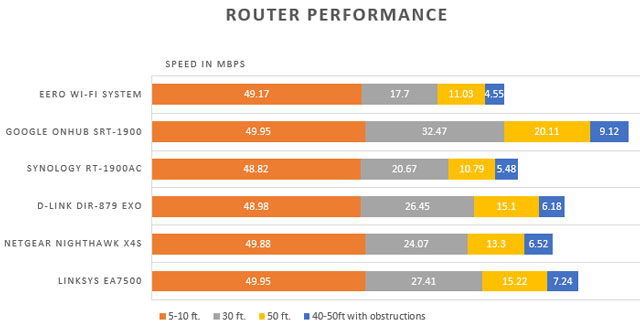
 While devices supporting the new protocol aren’t really available yet, it is possible to use a


 My initial experience with Cortana has been erratic and about as unpleasant as using Siri on my iPhone. Often I would use a command like “play video,” and Cortana would look up the phrase “play video” and show results from the web.
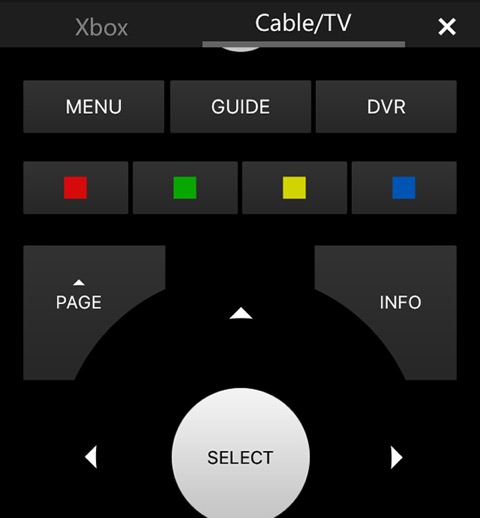 Game controllers aren’t a natural extension of my hand the way they seem to be for my son. They don’t look or feel like a TV remote. That’s why I’m happy about the Xbox app for iPhones and Android. Once you connect the app, swiping and tapping your smartphone screen lets you navigate around the Xbox. If you’ve connected a cable or satellite receiver to the Xbox One, the app includes a cable/TV remote with channel buttons, navigation, sound, playback and DVR.


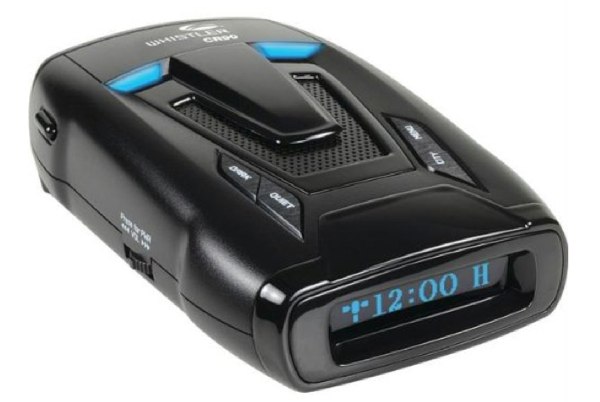
 While there is no shortage of detectors under $200, most are old models that have performed poorly in reviews. One exception is the
 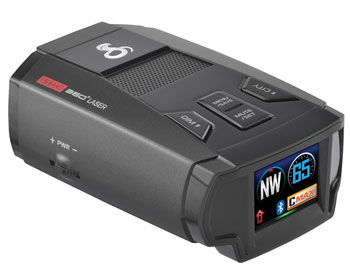 At only
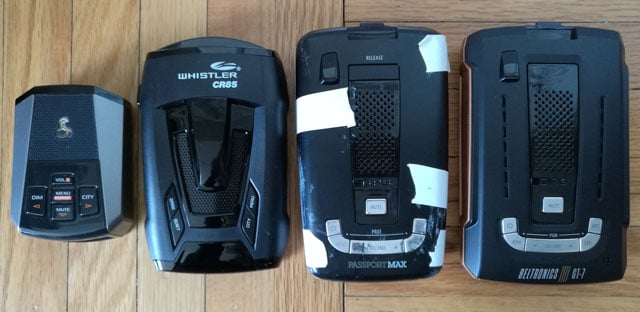
  The LRD950 was highly rated by Vortex Radar, though Radar Roy initially flunked it for poor performance. Radar Roy later amended his review believing that his unit may have been defective since his results differed so much from other reviewers (see my note above about defective detectors in my own testing of the CR90 compared to Vortex Radar).
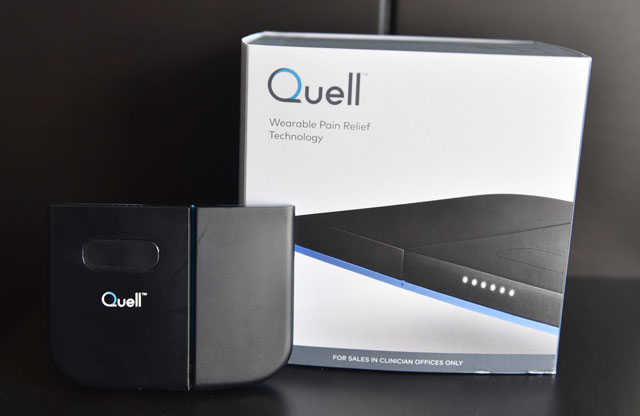
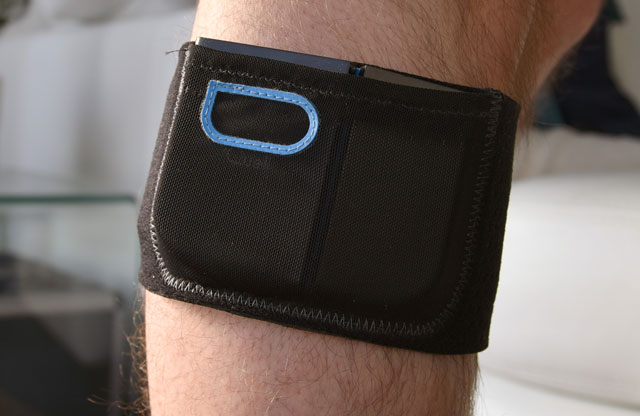
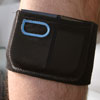
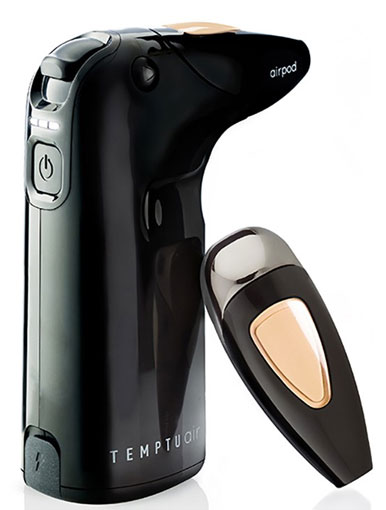
 It’s designed to be worn anytime you need the relief, which can vary from all times of the day to instances where pain may be more prominent. This also includes during sleep, and the device has been optimized to recognize the wearer is in a slumber when the user sets it manually on the free Quell
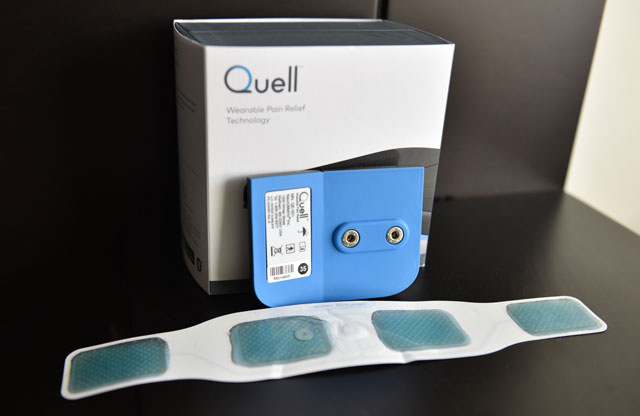
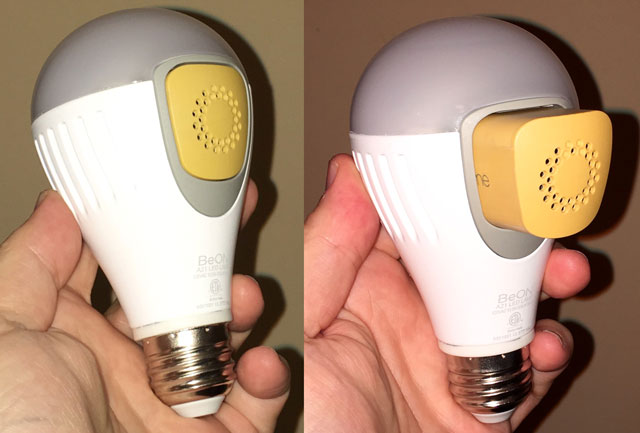
 Security Lighting's primary purpose is to have your lights go on and off on an erratic, non-predictable schedule pattern while you're away, to make it appear as if someone is home. Front and center of the Security Lighting pane is a giant Home/Away touch toggle. "Away" is what activates the three options below this toggle.
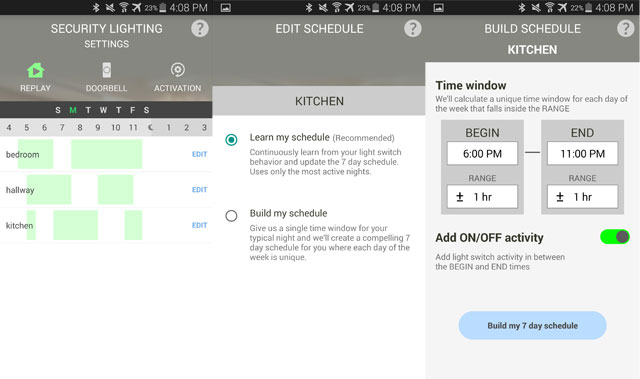
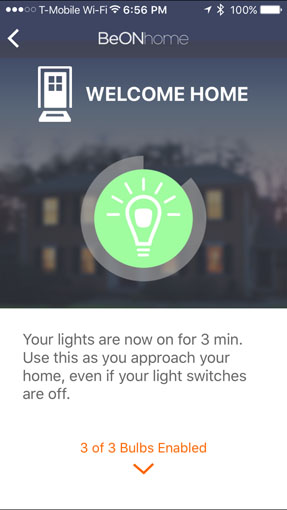 Welcome Home and Safety Lighting

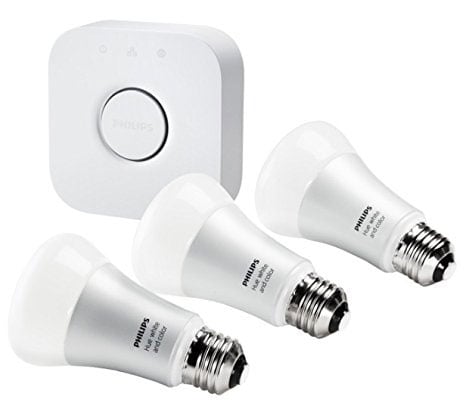
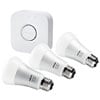
 The Hue White and Color Ambiance Kit is the second generation of Philips remarkable color-changing smart bulbs, and the new Hue bridge now boasts compatibility to a host of platforms and products—including Amazon Alexa compatible devices, like
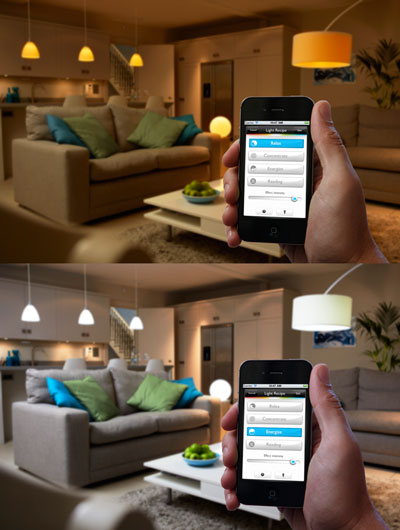
 We’ve all been there: The popcorn is popped, the family is gathered and then — come on, you know what happens next — you get the dreaded video buffering wheel. And just like that, movie night goes up in smoke. Or the YouTube video won’t load on your tablet. Or your video game hangs right as you’re about to hit the next level. The scenarios may vary, but the conclusion is always the same: Your Wi-Fi just doesn’t cut it.
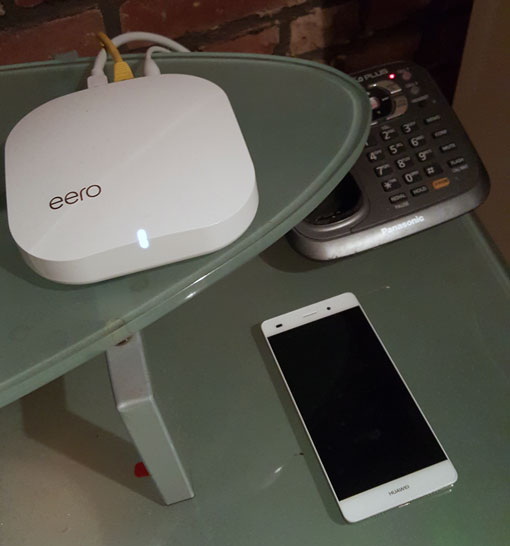 For our test, we received a three-pack from the company. It took approximately 10 minutes to set up the entire thing. The companion app (available for
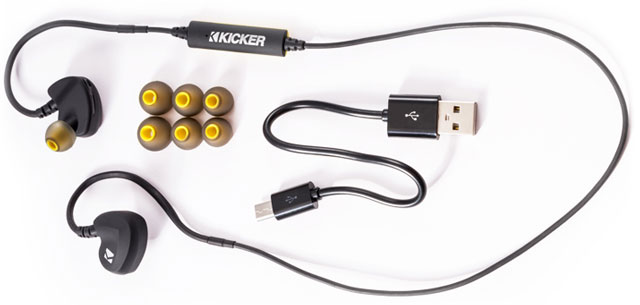
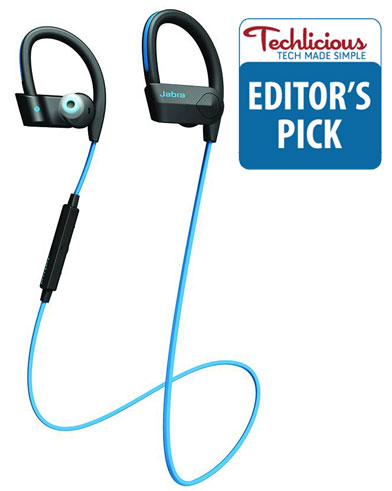
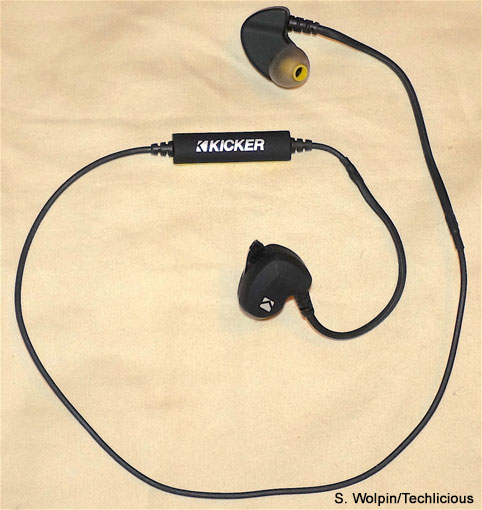 Instead of a pre-formed plastic hook, the cord turns into a twist-tie-like flexible cord that can be bent around your ear to get a customizable and unshakable in- and over-ear fit. I find this design far more comfortable than in-lobe "wings" or "stabilizers," which can make your ears feel as if they've been stuffed, or stiff over-ear hooks. We admit that this is subjective criteria. Overall, the Kicker's fit feels snug but not stuffed, and can withstand the most violent of workout jerks, more so than the simple buds on other models and especially the collar-style phones.
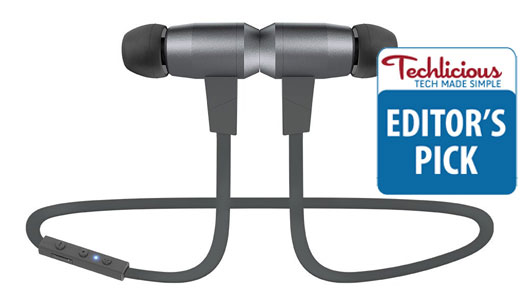
 The music playback presence, soundstage and clarity of these exercise-centric over-ear hooked phones rank behind only the Optoma NuForce BE6 and the LG HBS850, lacking only some "presence" brightness and the boomy bass that often fuels workouts of these other two alternatives.


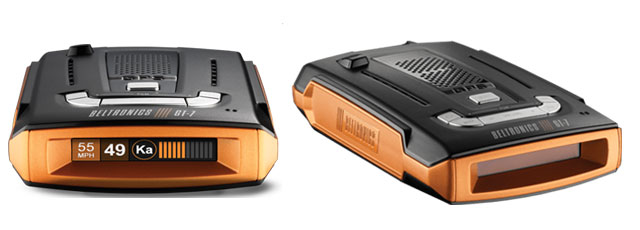
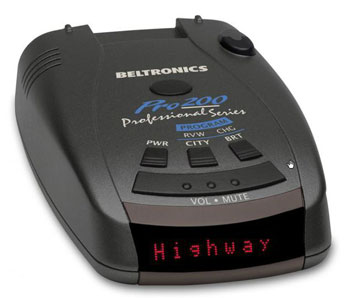
 The display on the GT-7 is easily readable in all lighting conditions and provides numerous options for what informational and alert data to show. The color can be changed between copper (my favorite), red, blue or green, and provides a heads-up speed indicator on the display, with alerts for when you exceed a customizable preset speed. And there are four display information configurations modes that provide varying levels of technical details about detected threats. I found the "Standard" mode—which displays speed, threat type (Ka, K etc.) and threat signal intensity—to be just fine.
 A convenient feature on the GT-7 (and Passport Max line), lacking on the Cobra, is a button on the plug of the Smart Cord to silence alarms. This simple addition is far easier to use than reaching across your dash to fumble with the mute button on the detector, especially on the dark. Unfortunately, Beltronics was not thoughtful enough to add a USB jack to the cord to allow charging your phone at the same time, something that would seem to be an obvious feature if they want to encourage you to use your phone for Escort Live.
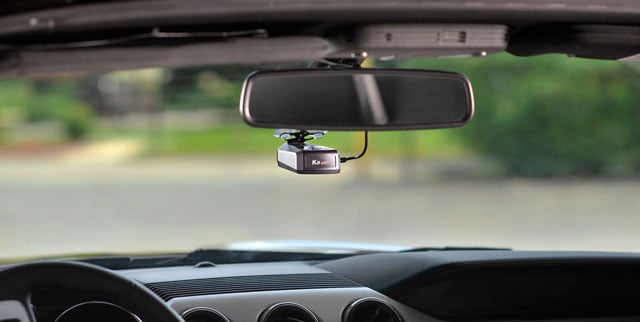
 The GT-7 uses the same sticky cup mount found on the Passport Maxes. Unlike the terrible version found on the original Passport Max, the new magnetic mount doesn’t allow the GT-7 to constantly bounce off the holder when driving and makes it far easier to mount and remove the device. The sticky mount is also far more resistant to falling off the windshield than typical suction cup mounts used by Whistler and Cobra. There is some vibration when driving, but it's not that bad. [UPDATE 8/1/16: Having spent considerably more time with the GT-7, I am finding the rattling to be more annoying than I originally found (though still not as bad as the Max). Testing side-by-side with the Escort Max 360, the 360's mount design is far better, completely eliminating the rattling issue.]


 Ease of use


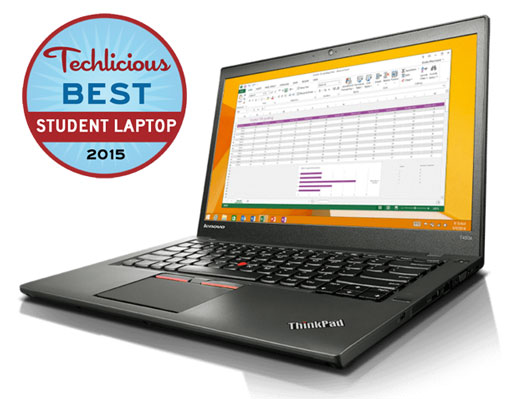


 Best Portability: The Dell XPS 13
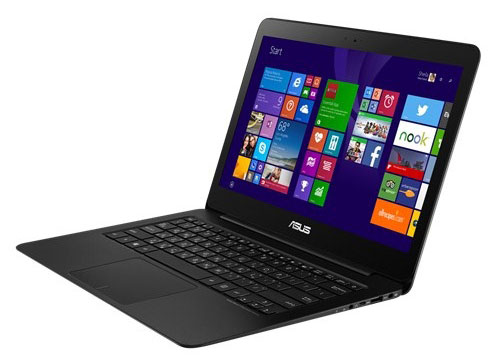 Best Budget Ultrabook: The ASUS ZenBook UX305

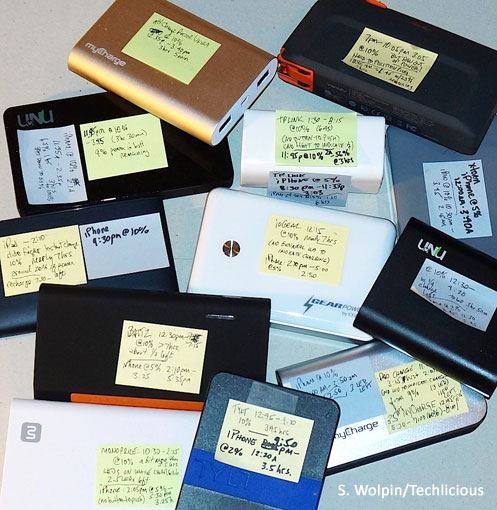 Our battery testing took considerable patience. I discharged an iPhone 6 Plus and an iPad Air down to 10 and 5 percent, respectively, by running continuous video; a process that took about 10 hours each, Then I recharged the devices, running multiple tests using each portable battery to double-check initial results. Phones and tablets don't "ping!" when they're done recharging so I literally had to watch them every second as they were getting close to full..


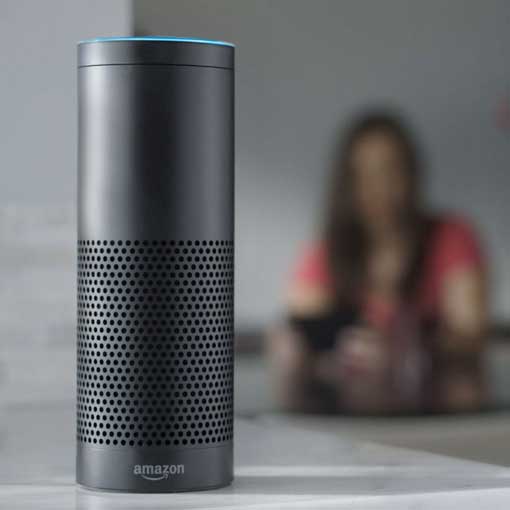 My wife was helping her boss plan a Silicon Valley trip when she asked me if I knew the distance between Mountain View and San Francisco. Normally, I would have opened my laptop and checked Google Maps. Instead, I spoke — "Alexa?" — and then asked the question. Alexa, the brain inside the new Amazon Echo ($179.99) household assistant, let me know the distance was 33.5 miles.
 ,
, 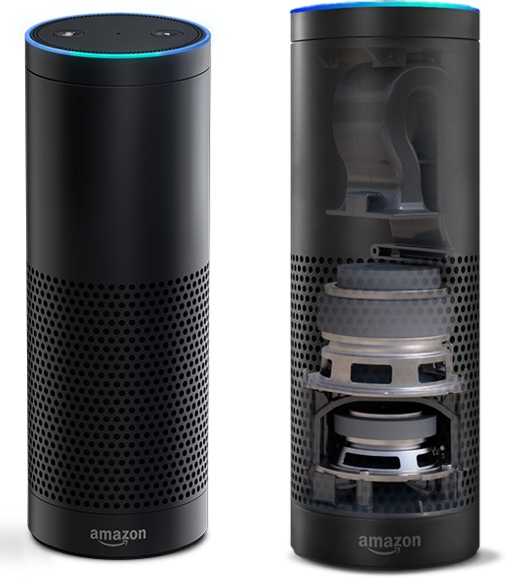 The Echo paired via Bluetooth to your smartphone or tablet becomes a Bluetooth speaker; with sound not as fulsome as the UI Boom but still impressive, considering the Echo was primarily designed for a radically different purpose. You can ask the Echo to play music from a specific artist or a playlist pulled via Wi-Fi from your Amazon music library (not your smartphone's library) or one of the aforementioned streaming services, identify a song currently playing, stream a specific Internet radio station, read one of your Audible audio books or give you a customized news report (what Amazon calls a Flash Briefing) based on topics and sources you select. You can use voice commands to control Echo's volume ("Alexa, volume 8!"), mute, repeat, cancel and stop.


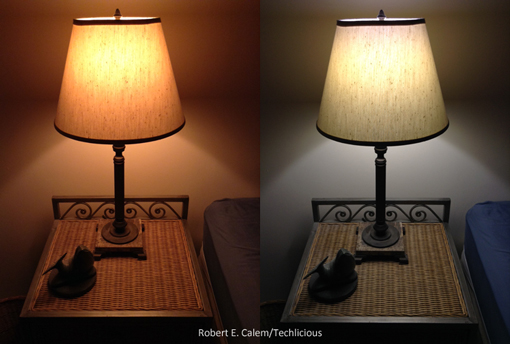
 Artificial light and modern schedules have become the bane of a good night’s sleep. Light from your TV or a tablet near bedtime makes it harder to fall asleep, while daylight shining through the window may wake you up before you’re quite ready. That’s because the human body responds to light by producing more or less of the hormone melatonin, which induces or disrupts sleepiness.
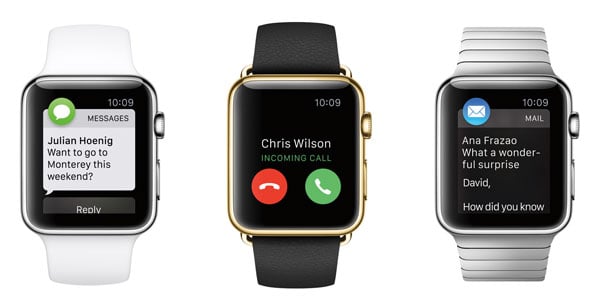
 Apple Watch: You want it, but do you need it?
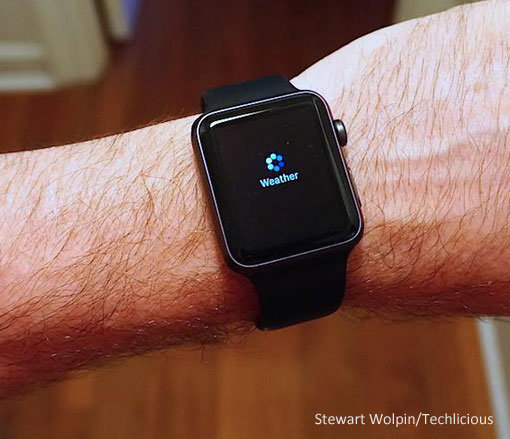
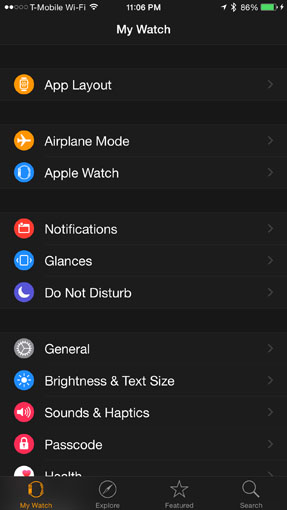 To perform most of its most useful functions, the Watch needs to be Bluetooth-paired with your iPhone. As a result, everything you are able to do with the Watch is customized via the Watch app on your iPhone. Make sure you’ve downloaded the latest iOS version to your phone before downloading and pairing your Watch with the Watch app.
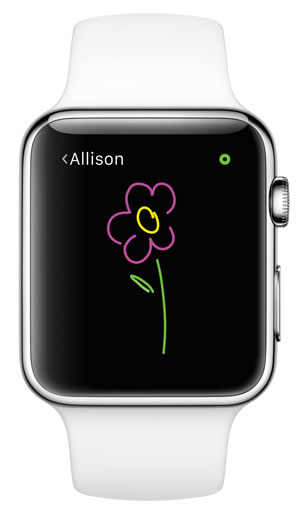 There are only 11 customizable Watch faces, many of them remarkably similar; you can add “complications” –– small status indicators such as temperature, Watch battery life, time in a second city, upcoming calendar events and more –– to most faces. Given Apple’s connection to Pixar/Disney, I expected more licensed character face options than just Mickey Mouse — c’mon, what Star Wars nerd wouldn’t want a Boba Fett Watch face? watchOS 2 will allow you to use your own photos as Watch face backgrounds and Apple will add some location-specific Time Lapse animated faces displaying that reflect the time of day, but I’m hoping for more imaginative faces from Apple or third parties (it’s too obvious a profit center), or maybe we’ll get an iPhone or Mac app or tool to let us create our own customized Watch faces.
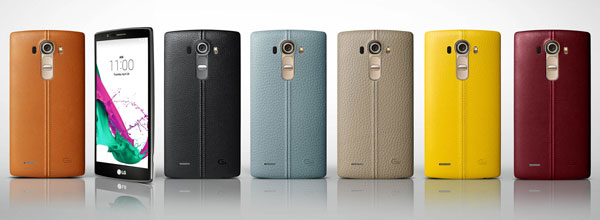
 I've been reviewing a pre-production, international version of the LG G4 for the last two weeks and, by almost any measure, it promises to be one of the best, if not the best, smartphone on the market. While in many ways its improvements over the LG G3 are subtle, the G3 was already a terrific phone, the G4's new camera is a major leap forward. Those improvements, together with the new leather-backed case design, provide the LG G4 with the an overall package that can't be beat.


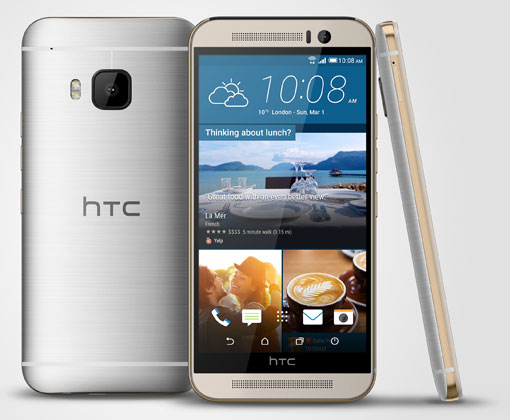 The HTC One M9 is every bit as good as the M8 model it replaces, and slightly better in a few areas. But in a market crowded with exceptional devices like the Apple iPhone 6, the LG G3 and Samsung Galaxy line (including the coming S6), incremental improvements aren't enough. And, in some critical areas, such as battery life and the camera, the HTC is lagging behind its competition.


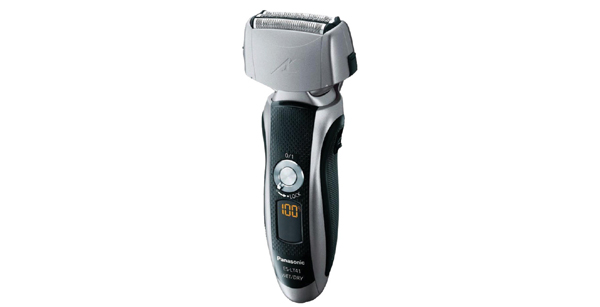
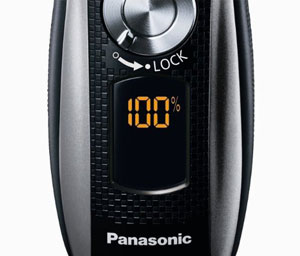 Though the manufacturer’s suggested retail price is $149.99, the Panasonic ES-LT41-K is discounted at Amazon.com to just $82.64 at the time of this writing, well within my self-imposed budget. One of Panasonic’s three-blade Arc3 models, it boasts features found on many higher-priced shavers, including:
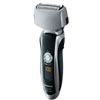

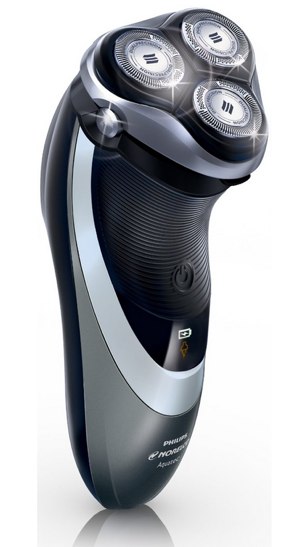 In the arena of rotary shavers costing less than $100, the Philips Norelco AT810 PowerTouch with Aquatec shaver, which carries a manufacturer’s suggested retail price of $69.99 but is
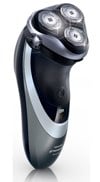


 LG Tone+ HBS730