 Soundbars are the go-to solution for easily adding better audio to a TV. The all-in-one design plus slender, low-profile form factor is easy on the eyes, easy to install, and compared to other surround-sound solutions, typically easy on the wallet.
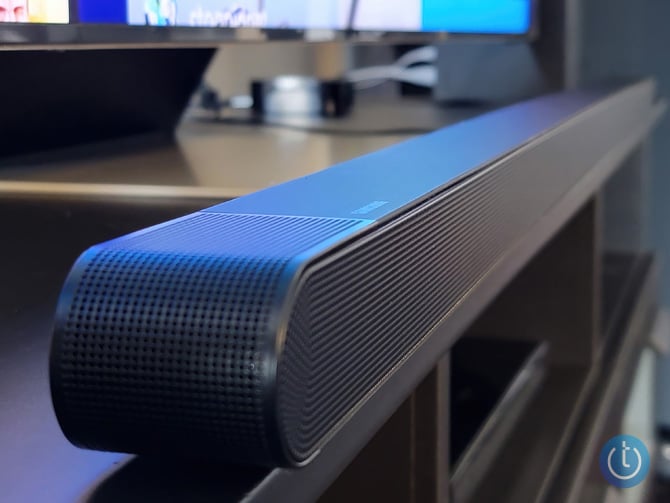
Early soundbars were basic in function and capability. Today, you'll find models with highly sophisticated smart features and high-fidelity surround-sound capability, including 3D immersive sound like Dolby Atmos and DTS:X. The Samsung HW-S800B Ultra-Slim ($799) 3.1.2 Dolby Atmos soundbar and wireless subwoofer system is all of these things but packaged in an almost impossibly slender design.

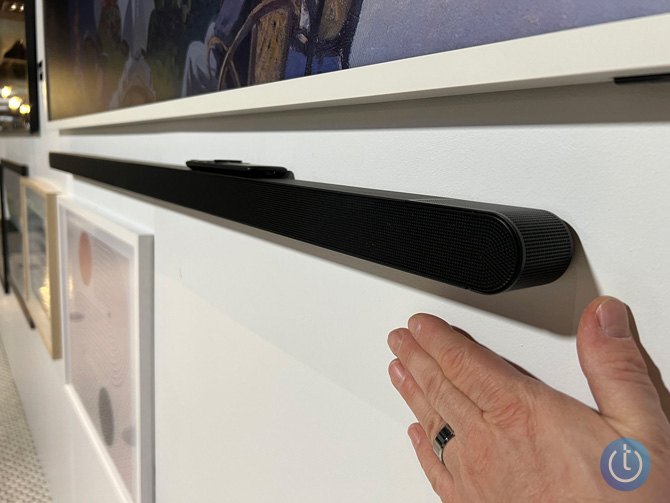
When compared to the S800B, even the slimmest soundbars look chunky. This is particularly true for Dolby Atmos soundbars, which need to accommodate the physical width of the up-firing drivers. Consequently, Dolby Atmos soundbars are at least several inches deep and stick out more than the TV when wall mounted.
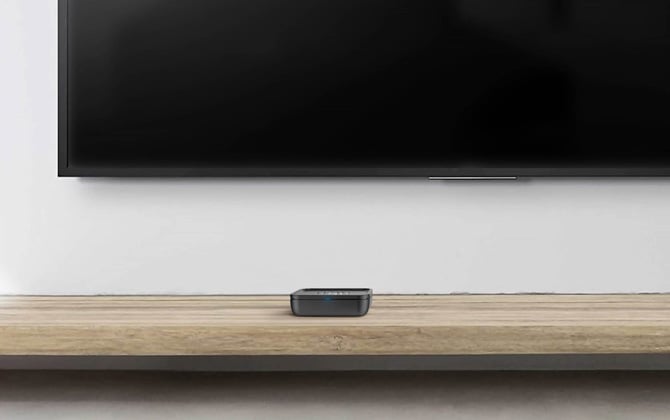
But the Samsung S800B is something different; it's radically shrunken in height and depth and a generous 45.6" wide, which makes it a great match for TVs 55" and up.
The S800B offers a dramatically lower profile than any soundbar I've seen or heard, much less reviewed. Despite its slenderized form, this Samsung incorporates Dolby Atmos with real up-firing drivers on the main soundbar, which are used for the Atmos height channels, instead of relying solely on height virtualization like many entry-level Atmos soundbars. It can also upmix non-Atmos content and uses the up-firing drivers for that.
Features and Specifications
The S800B is a 3.1.2 soundbar system consisting of the main soundbar and a compact wireless subwoofer. The dimensions of the soundbar speak for themselves: 45.6" wide, 1.5" high, and 1.57" deep. In addition, it is the first soundbar from Samsung that offers a wireless connection for Dolby Atmos, and it is compatible with 2022 Samsung TVs.
The form factor of the S800B is revolutionary. So is its wireless connectivity: Samsung touts it as the first-ever to offer a wireless connection for Dolby Atmos (when used with compatible 2022 Samsung TV, starting at the BU8000 and above).
Furthermore, the soundbar's Q Symphony feature works concurrently with the built-in speakers of Q Symphony-equipped Samsung TVs. Q Symphony is a function that combines the soundbar's speakers with the TV's built-in speakers, so they operate as one cohesive system. Q Symphony allows the combined TV and soundbar system to produce a more immersive and powerful listening experience than either can achieve on its own. Samsung has a full list of Q Symphony compatible TVs and an in-depth explanation of the features.
The S800B takes an ultra-minimalist approach when it comes to wired inputs. The single option is HDMI ARC, and there's no way to connect any other sources. However, this soundbar offers the option of wireless connection and streaming through both WiFi and Bluetooth. WiFi streaming uses Chromecast, Spotify Connect, or AirPlay.
With Bluetooth, you can connect various sources for direct playback—most likely a smartphone, but it'll also support dedicated players. Meanwhile, the WiFi option even supports Dolby Atmos, a capability that's a first for a wirelessly connected soundbar.
The reason you need a separate soundbar is that TVs have gotten ever thinner, and the front is now all screen. This leaves little or no room for built-in speakers. But with today's TVs, even a typical soundbar might be too tall to fit under the TV when on a stand, or it'll protrude excessively from the wall compared to a flush-mounted TV.
This soundbar is compatible with Samsung SWA-9500S/XY wireless rear surround speakers, allowing users to expand the surround sound and immersive audio capabilities from 3.1.2 to 5.1.4 channels. The surrounds are real 2.0.2 speakers with their own up-firing drivers, so you increase the height channel count to four when you add them. This configuration supports real Atmos as well as upmixed Atmos.
The SmartThings app for iOS and Android phones offers easy access to all the soundbar's functions and helps with setup, too.
Once connected to WiFi, the S800B offers Apple AirPlay and Chromecast built-in for easy audio streaming from mobile devices, in case you want to use it as a sound system. It also offers Tap and Play with compatible Samsung phones, letting you switch music playback seamlessly from the phone through earbuds to the soundbar using Bluetooth.
This soundbar offers multiple sound modes; for example, Game Mode Pro activates automatically when you start gaming and uses the up-firing speakers to create a maximally expansive surround-sound experience for gamers. I did not sense any latency, but I don't have a way to measure it.
There is an AVA (Active Voice Amplifier) function within each sound mode that offers enhanced audibility for dialog.
|
Pros |
Cons |
|
|
Unpacking and Setup
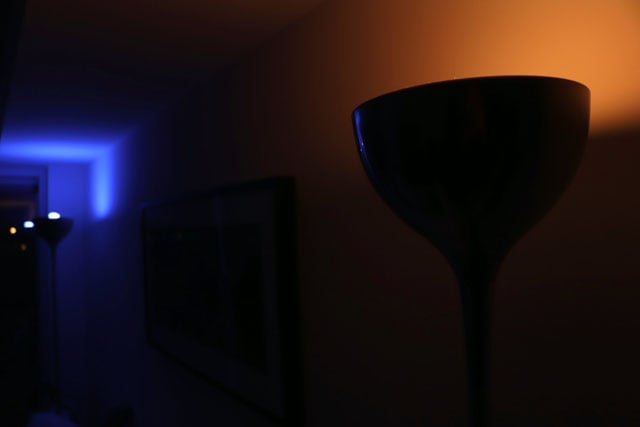
I had no idea what to expect when I first unpacked the S800B. I'd seen it before but never heard it or physically handled one. Because the packaging is sized to accommodate the subwoofer, it looks like any other soundbar.
However, the moment I took the S800B out of the box, my first thought was, "hey. I can twirl this like a baton or swing it like a sword," and if I was a Tik Tok influencer, I suppose that's what my review would consist of. The fact you can twirl it with one hand should give you some idea of how long and slender this soundbar is!
I used this soundbar in conjunction with a Samsung 8K QN900A Neo QLED, a 2021 model which supports Q Symphony, a feature of the S800B that lets the soundbar use the up-firing speakers on the TV for enhanced sound. However, the 2022 Neo QLEDs will offer additional functionality not available on the model I used: Wireless Dolby Atmos and the use of all the TV's speakers when Q Symphony is engaged (as opposed to just the up-firing speakers, like on the TV I used).
While my focus is on using the S800B with a Samsung TV since that plays to its strengths, I also tried it with a projector. It's the only Dolby Atmos soundbar I have seen that works perfectly within the constraints imposed by an ultra-short-throw (UST) projector. It fits whether wall-mounted right under the screen—where a regular soundbar would block the light—or resting on a stand or credenza in front of the projector, which normally would require an extra-deep credenza.
While I could not use the wireless Dolby Atmos function offered with 2022 TVs and the S800B, I was able to send 5.1 surround sound from the 2021 QN900A to the soundbar via WiFi and had no issue with the connection or sync/delay.
I relied on a wired HDMI ARC connection for sound, using the supplied micro-HDMI to HDMI cable to connect to the TV for most of my listening. One important caveat is that the S800B connects via ARC, not eARC, so it will not work with lossless Dolby Atmos. However, there's no issue with streaming apps and OTA TV (broadcast/cable); it'll work seamlessly with those sources, and you don't have to do anything to work. The only thing missing is support for Atmos on Blu-ray.
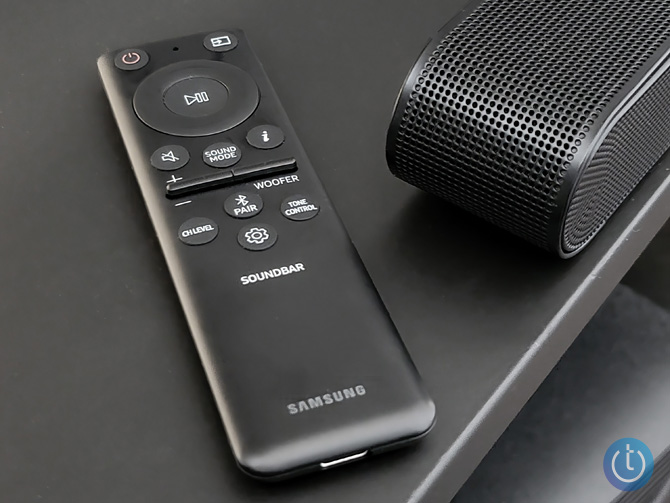
If you want to get the most out of this soundbar, you need to use the Samsung SmartThings app, available for Android and iOS devices. You can adjust all the settings with just the remote; the soundbar uses voice prompts and small flashing LEDs to indicate status, but all the settings are easily visible and accessible with the app.
Regardless of what phone I used—I tried both a Galaxy S20 Ultra and an iPhone 13 Pro Max—the app recognized the soundbar right away. I only had to add it once, and it became part of my SmartThings device collection, making it accessible from any phone that has the app.
Audio performance
Sound reproduction is all about physics, and the smaller you make a transducer (the part of a speaker that creates the sound), the greater the limitations in terms of what it can do, especially when it comes to bass output. Of course, this begged the question of how well the S800B handles movie night volume levels and whether the compact wireless subwoofer integrates seamlessly.
Through careful tuning, Samsung has found a way to make this system sound rich, full-bodied, clear, and immersive—at least in what I expect to hear in a soundbar in its price range. It is a distinct improvement over built-in TV sound, I compared it to the QN900A's built-in sound, and there was no comparison whatsoever—the S800B sounds far better.
There is no free lunch when it comes to the physics of audio reproduction, so Samsung had to do something to make the small drivers of this soundbar deliver such an impressive performance. Some measurements with Room EQ Wizard revealed the possible solution: Take it easy in the lower midrange, including where the soundbar's bass output crosses over to the sub.
Before going further, a quick bit of audio physics: Sound is measured in dB (decibels), and an increase of 10 dB equals a doubling of perceived loudness. But, it takes ten times as much power to create 10 dB more sound! Every extra 3 dB requires double the power. And the lower the frequency, the more power it takes to achieve a certain output level. This is why a subwoofer does the heavy lifting for the deep bass in many soundbar systems, including this one, but it also lends a hand with some mid/bass output. The trick is ensuring the subwoofer and soundbar blend well so the sound is cohesive.
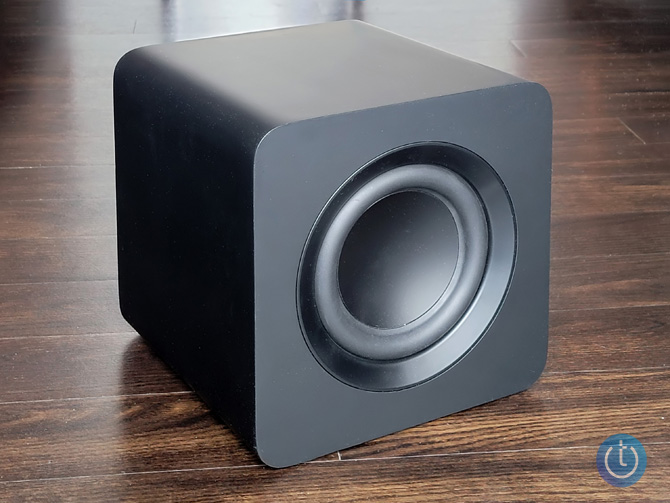
When measured, this soundbar system has a robust subwoofer—especially considering its size—that cleanly covers a range from roughly 35 Hz (-20 dB) up to 160 Hz. Thanks to room gain, you can hear and even feel output starting at 35 Hz, and it picks up strength beginning at 50 Hz. Bass response drops off to near silence by the time you get to 30 Hz, but the good thing is while the driver is still working, there is no distortion or port noise like I'm used to hearing from most soundbar subs playing below their range.
Running my REW sweeps, I gleaned that the S800B uses a crossover roughly centered around 120 Hz, typical for a soundbar wireless sub. Above 150 Hz, the system's output experiences a dip of around 6 dB, which I attribute to tuning intended to prevent overloading the system (6 dB less takes ¼ the power to reproduce).
It's not a "textbook" smooth response curve. Still, it's also not a huge compromise and technically is within the +/-3 dB response range cited by most speaker specifications, so nothing to get too excited about! The SpaceFit room correction feature reduces this effect to only a 4 dB dip in response, which might be a big deal for an audiophile evaluating multi-thousand-dollar speakers. Still, it is quite a trivial deviation for a lifestyle soundbar system.
The tuning of this soundbar passes muster and has good tonality, with just a bit of brightness to the treble, which is not at all fatiguing and comes across as extra detail. Besides, that can be easily dialed out with the treble control, if you wish.
The response curve of the S800B makes sense to anyone who obsesses over the physics of sound. In my opinion, the goal is to ensure the soundbar does not overwork its miniaturized transducers.
The sub may be small, but it benefits from DSP tuning that lets it leverage a passive radiator to create clean deep bass from a very compact enclosure. It is so small, it fits directly behind my TV on the TV stand, totally hidden and taking up no extra space in the room! It also works great right next to the stand. The subwoofer level adjustment on the remote gets a discrete switch, one of the best features of any soundbar; it lets you dial in as much or little bass as you want—or that neighbors will tolerate.
With this or any soundbar, I recommend placing the sub near the soundbar because otherwise, you may be able to tell where it is located. When the sub is near the soundbar, it blends seamlessly.
Samsung's SpaceFit Sound function promises to actively apply room correction using the built-in mic, with no setup needed; you just enable it. I ran frequency response sweeps with the function turned on and off, and from any seat in my living room, the SpaceFit-enabled response curve offered a measurable and audible improvement.
Audio quality
In the context of a soundbar system, I'm thoroughly impressed with the performance Samsung squeezed into the S800B. It is especially impressive with movies containing sophisticated Dolby Atmos mixes, well beyond my expectations. For example, Mad Max: Fury Road is a staple of countless Dolby Atmos demos I've attended. The S800B pulled off the essentials with ease to my jaded ears, from the bass rumble of engines and so many percussive blasts from explosions and crashes. The sub is quite surprisingly powerful and precise, and capable. It easily keeps up with the demands made by the soundbar.
The S800B offered more 3D envelopment—whether Dolby Atmos or upmixed surround-sound—than any compact standalone soundbar has a right to! It's not something I can quantify, and yes, Samsung's own full-size Atmos soundbars will offer higher performance. Still, it was obvious that this soundbar can generate a holographic sound field, one that benefits from its Atmos and upmixing abilities. My impression is it creates a sound field that's as broad and enveloping as what I get from a full-size surround sound system featuring real speakers.
As for the height channels, I would not say it's anything like an AVR-based Atmos system in terms of overhead effects. But, the soundbar can make the whole sound field appear elevated and with dialog that appears to come from the screen itself. It does this regardless of what display you use, and you don't need a Samsung TV to enjoy this benefit. Along with the elevation, you get a great sense of width. The system can convincingly create distinct, focused sound effects that appear to float in the air, far to the left or right of the screen if the mix calls for it, and not merely emanating from a slim soundbar located just under the screen.
I tried the different listening modes and found that I could leave Adaptive Sound enabled; I found no need to second-guess the soundbar. I can't imagine anyone would want to fiddle with different sound modes to figure out which one works best. If you are playing a movie, Adaptive sound is, to my ears, just like the Surround sound mode. But if another sound mode does something specific you like—whether it's the toned-down Standard mode or the extremely expansive DTS Virtual:X mode—then by all means, use it.
I had zero issues with dialog clarity, regardless of what I watched. But for anyone that's an issue, Samsung has a Voice Enhancement function and the Active Voice Amplifier, which uses the built-in mic to determine how much to enhance dialog clarity. It's a rather strong effect, not something I'd use unless there is a specific issue, but it will ensure that every word comes through loud and clear!
One thing I wish I could comment upon further is Q Symphony. A few weeks before starting this review, I heard the effect of pairing a Q Symphony equipped 2022 Samsung TV and soundbar, and the combined effect is superior to the TV or soundbar operating on their own. The S800B I reviewed has this capability, and I wish I could comment further on how the pairing sounds in this review, but the 2022 TVs are not yet available to review.
While this soundbar is aimed at TV owners, I appreciated how I could use it with a UST projector. I review USTs for Projector Central and can unequivocally state that none can offer anywhere near the audio performance of the S800B. But because of the design of UST projectors, they sit where you'd usually put a soundbar or a center channel. I queued up Gravity, which unfortunately is not yet out in UHD 4K but has a truly excellent Atmos soundtrack that makes full use of the 3D immersion from the first scene onward.
With the S800B, that immersion did not extend above and behind me as it would with an AVR and speaker-based system, but it created an impressive bubble of sound around the TV with considerable width, some height, and some depth. It did not extend behind me, but all Samsung promises is 3.1.2 unless you add the optional surrounds. The one constant is the clarity of the sound, and it constantly defies expectations with its clarity.
Music also sounds great through the S800B. At times, shockingly so. This is great news for living rooms where the TV and soundbar are the primary sound system for the home. It was not lost on me that the QN900A TV included Spotify in its initial setup, and you can definitely use a TV to run a variety of music streaming services.
At first, I was apprehensive about listening to music because in my head, even if it could handle movies and video games, somehow, music would reveal the S800B to be some sort of gimmick. It didn't happen. I almost feel silly heaping such praise on a soundbar. Still, it's fun to listen to. It has qualities I'd associate with a high-fidelity sound system, not a soundbar that's deliberately trying to be as low profile as possible. In addition to the soundbar playing surprisingly loud and clear, the subwoofer handled bass nicely, it's tight, with good tonality, and you can feel it. Overall, the stereo sound field is satisfyingly wide and deep and detailed.
My greatest apprehension with music and soundbars is sung vocals. With instrumental electronic music, you can adapt to inaccurate sound; there's no point of reference to say, "hey, this is wrong," but that's not the case with singing. So I figured we're good to go if this soundbar can handle Queen. So I queue up We Will Rock You, let 'er rip, and it was finally time for my jaw to drop.
It sure sounds like Freddie Mercury, but not only could I hear the lyrics, I could listen to all the little nuances as the track builds to the guitar solo, and then the guitar itself came through with a focus and precision that took me completely by surprise. There's no way you can look at the S800B, consider its sound, and not be impressed.
So I thought, OK, passed the Queen test, let's see what happens if I feed this soundbar "A Day In The Life" by The Beatles. Not only have I been listening to the track for practically my whole 50-year life, but I have also been to Abbey Road and heard that chord— the one with the long sustain played at the end of the track—on the actual piano, in the same studio and in the same spot as The Beatles, so I have the ultimate subjective point of reference. And what shocked me was that by the time the track reached its climactic conclusion, the S800B triggered goosebumps. I got goosebumps from a soundbar!
Overall, The Beatles sounded excellent through this slim Samsung, as did other artists like Public Enemy, Bassnectar, and my current go-to work-at-home soundtrack, Blockhead. Unlike soundbars that rely purely on virtual surround processing for Dolby Atmos, this Samsung creates a sense of immersion without altering the character of the sound. Music comes through clear and detailed, and natural.
Finally, there's gaming. There's nothing to complain about here; the S800B gave me great game sound that had the same qualities as movies, with a wide sound field, distinctly localizable individual sounds, and an enveloping ambiance. All of which combine to create a greater sense of realism, or at least of being in the game. Although there is a dedicated Game sound mode, I found no reason to stop using Adaptive Sound for games since it sounds essentially the same to my ears.
The bottom line

The $799 S800B is a genuinely innovative soundbar system that offers an aesthetic advantage and placement flexibility beyond that of other soundbars offering 3.1.2 Atmos with up-firing drivers. It is optimized for use with Samsung TVs that offer Q Symphony and WiFi connectivity, but it will work with just about any TV or projector with an HDMI ARC port and Bluetooth-equipped devices. Despite its minimalist design, it is quite flexible.
What matters most, to my ears, is that the size reduction achieved by the S800B does not come at the cost of fidelity. The main limitation imposed by physics is output, which is to say you can buy larger and more powerful Dolby Atmos soundbars that will play louder than the S800B. But even so, I found it gets plenty loud for my needs and maintains clarity and dynamics even with the volume turned up high.
When I first saw the S800B, I wondered if Samsung could shrink a soundbar to this extent and still offer a compelling listening experience. I'm surprised the engineers pulled it off. The S800B demonstrates a mastery of compact soundbar design that, at times, seemed like pure sorcery. On its own, without the extra features you get with select Samsung TVs, it creates clear, balanced, surprisingly immersive, eminently listenable sound.

[Image credit: Mark Henninger/Techlicious]
Mark Henninger is an AV enthusiast, equipment reviewer, photographer and videographer. He is a THX-trained video calibrator and has extensive experience working with consumer displays including TVS, projectors, monitors and smartphones. Mark started the editorial review program at AVS Forum, where he served as Senior Editor and then Editor.
]]>


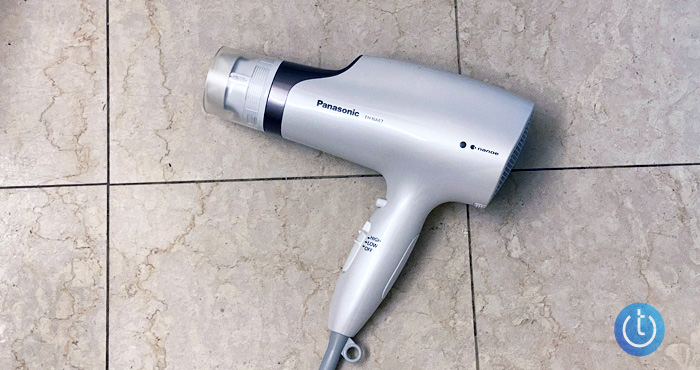
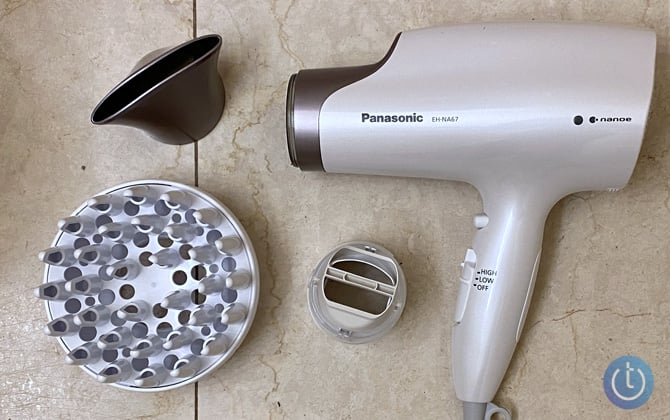
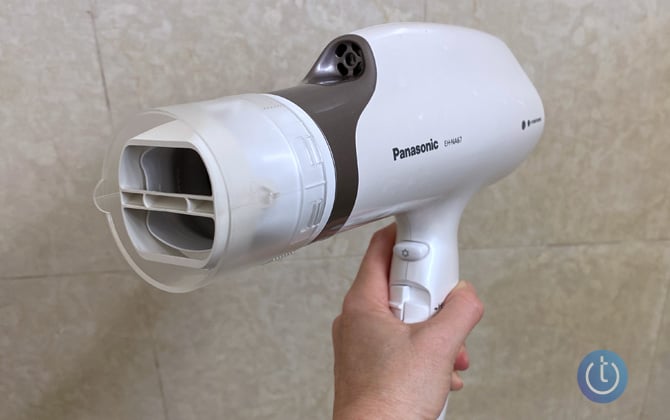
 Last year, we gave Panasonic’s Nanoe EH-NA67-W hair dryer ($150) a Techlicious Top Picks of CES 2021 award for its innovative oscillating quick-dry nozzle and Nanoe technology, which creates ultrafine water particles to keep your hair hydrated. But how well does the technology work in real life? For the last four months, I’ve been testing the Panasonic Nanoe to find out.

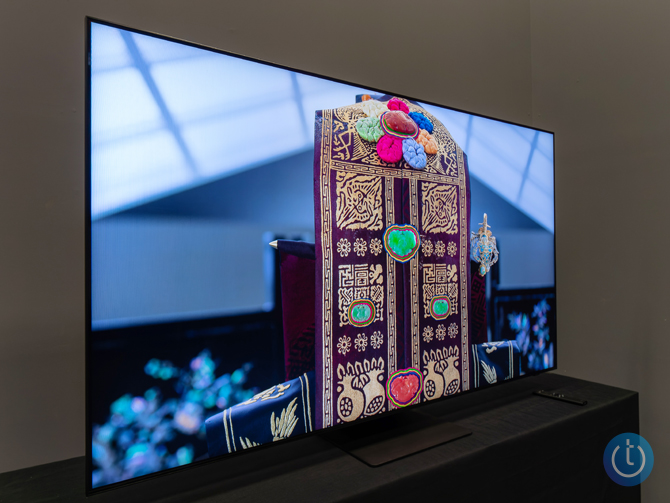
 What happens if you take one of the best premium 4K TVs, the Samsung QN90A Neo QLED, and upgrade the video processing from 12 bits to 14 bits? You get the 2022 Samsung QN90B Neo QLED, a TV that is a dead ringer for its predecessor on the outside but offers noticeable improvements in picture processing that translate to visibly better picture quality. Taken together with all of its features and my experience testing TVs for the last nine years, I consider the QN90A the best all-round 4K TV on the market.


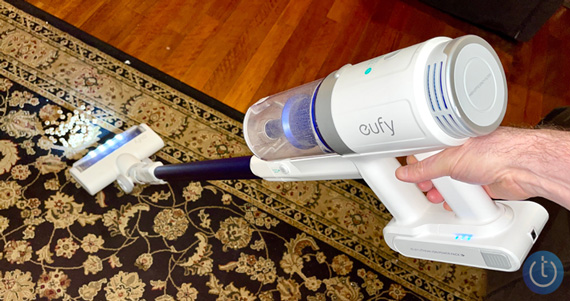


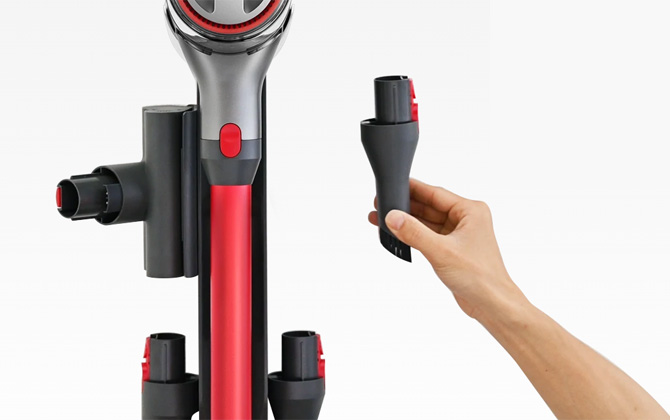


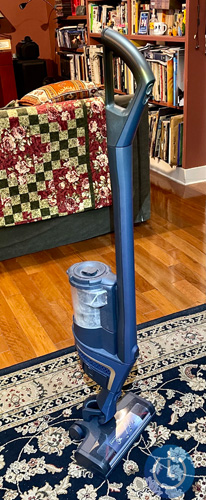
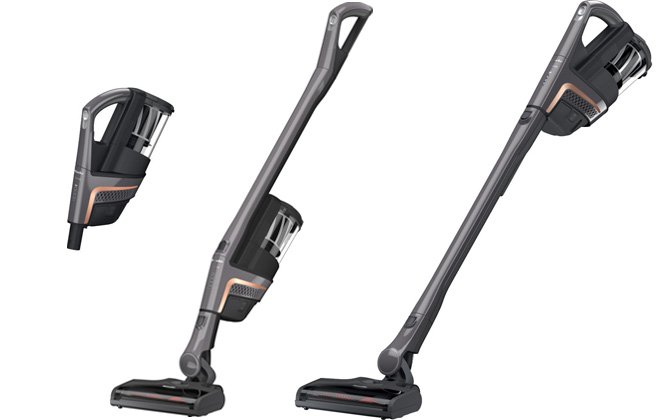
 Vacuuming is a stop-and-go activity. You start, then you stop to pick up something off the floor. You need to move a chair. Someone calls. Your vacuuming is constantly being interrupted. But when you turn off its power to deal with the interruption, what do you do with a stick vac? For most stick vacs, you need to lean it against a wall or furniture. But Miele has completely redesigned its Triflex HX1 stick vac so it can stand up on its own in the middle of the floor.


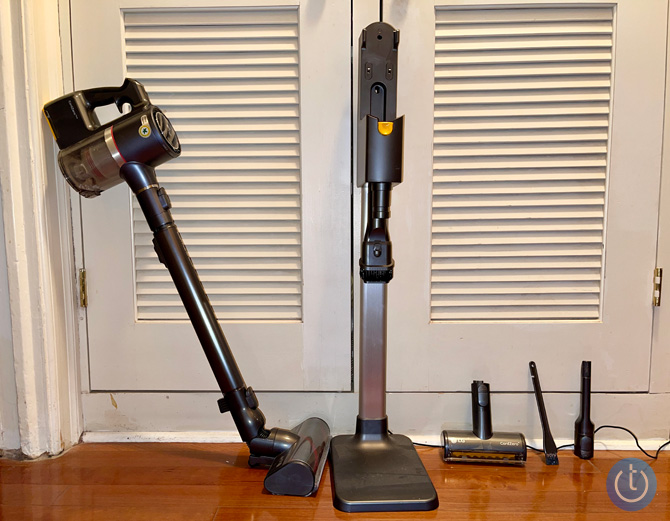
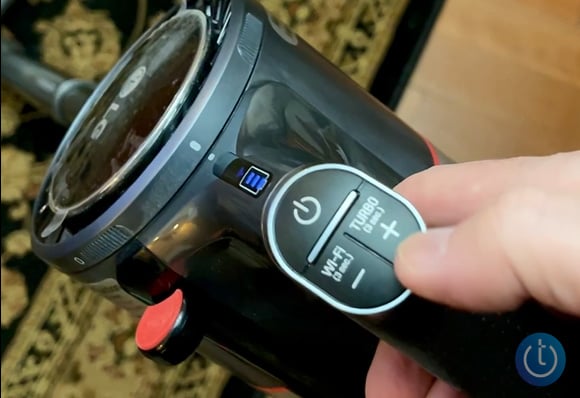
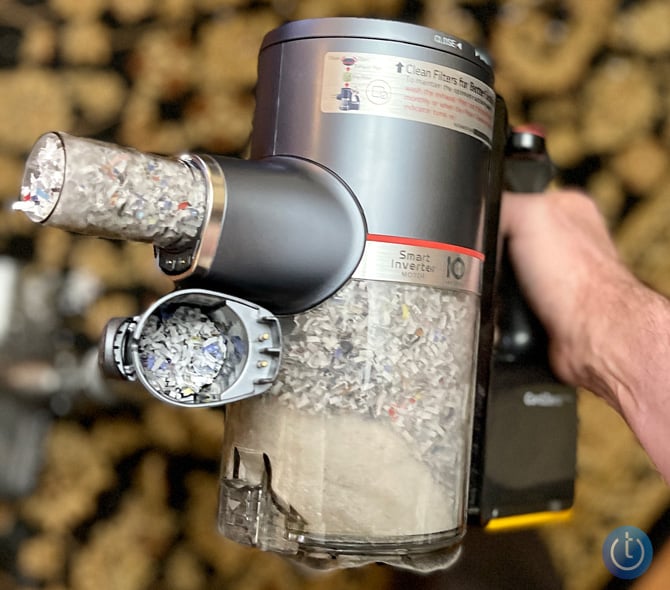


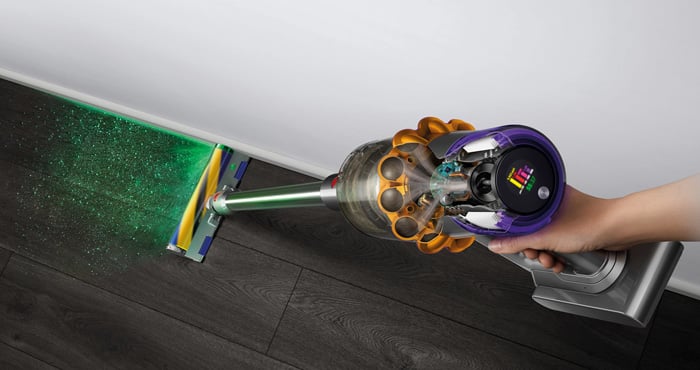
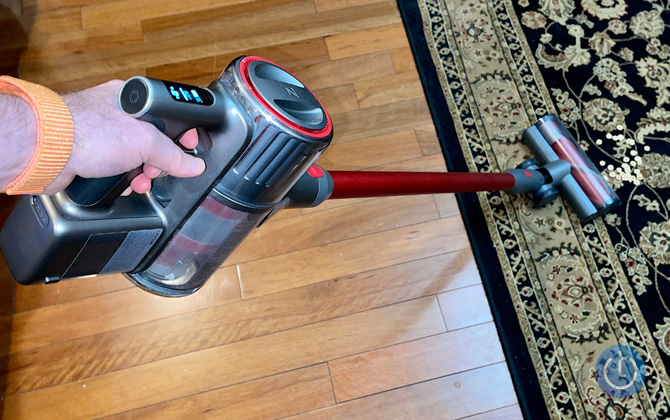
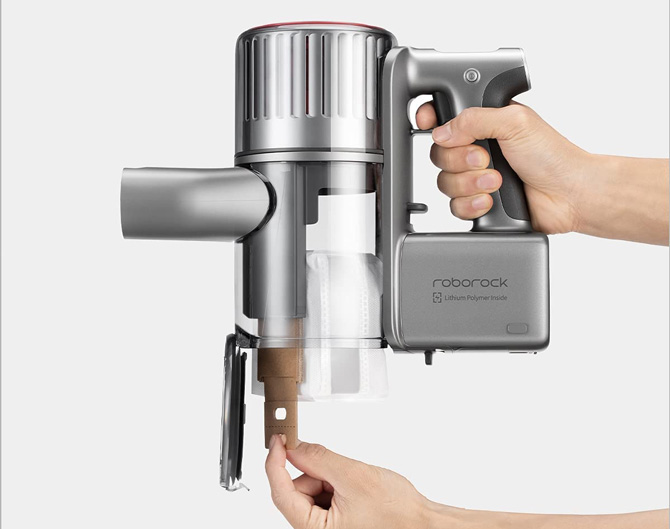
 The powerful and versatile V15 Detect includes a host of functional and logistical improvements primarily a replaceable battery and two unique brush attachments, over Dyson's previous and nearly identical V11 flagship. The V15 Detect+ adds a HEPA filter and a "low-reach" 90-degree bendable adaptor.

 The GoPro Hero10 Black ($549) is the latest state-of-the-art action camera from the company that created the genre and continues to dominate it. The Hero10 Black is complementary to any other camera you might own, going places and doing things that smartphone cameras and full-size cameras are unable to. Conversely, the Hero10 lacks many features and capabilities found on other camera types.


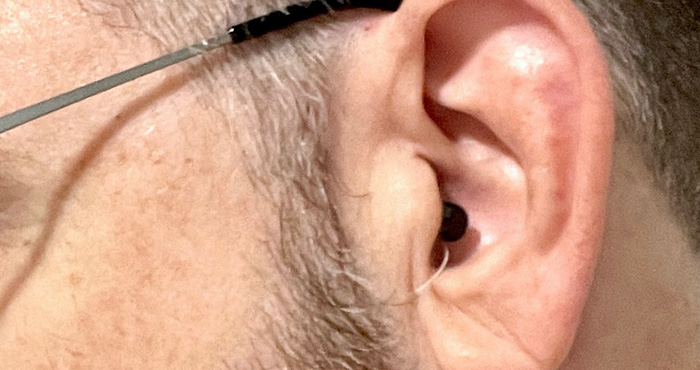
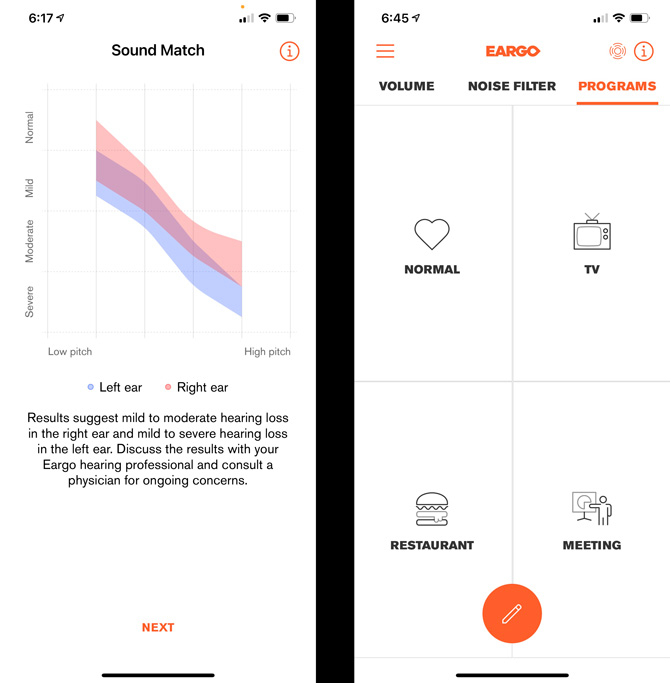
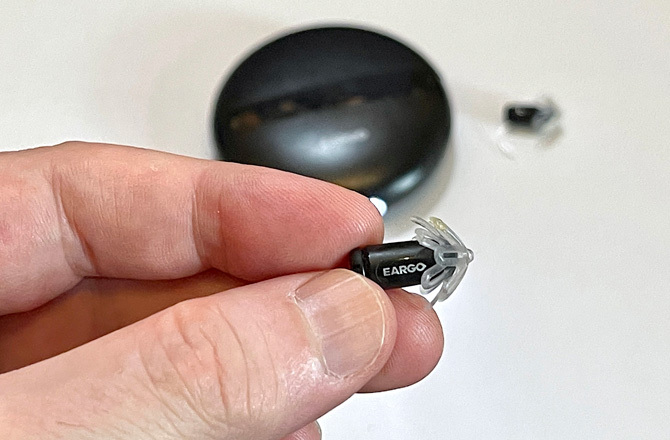
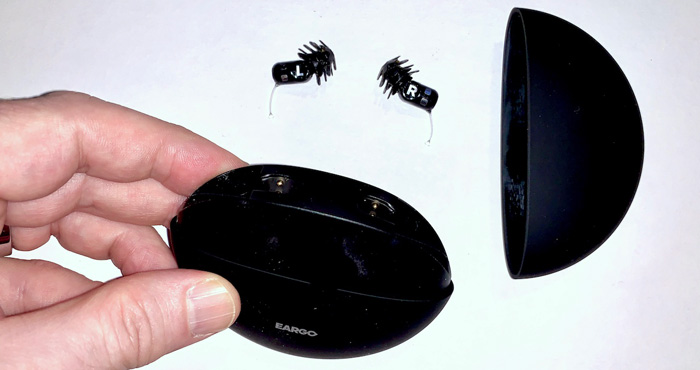
 Over the years, I've tested a variety of over-the-counter hearing assistive devices, some actual FDA-approved hearing aids, others so-called personal sound amplification products (PSAP). Until recently, I believed the best relatively low-cost non-prescription over-the-counter hearing aid available was Eargo's Neo HiFi, which I reviewed 18 months ago. That is until I tested the Neo HiFi's replacement, the Eargo 5, the fifth-generation hearing aid from the company.

 WinX YouTube Downloader
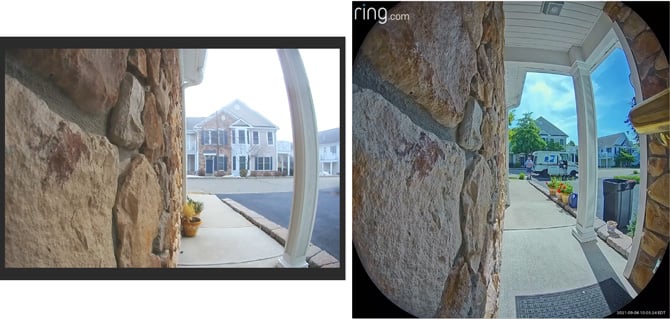
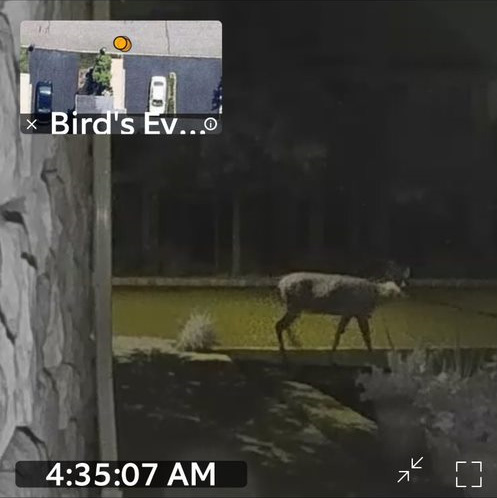
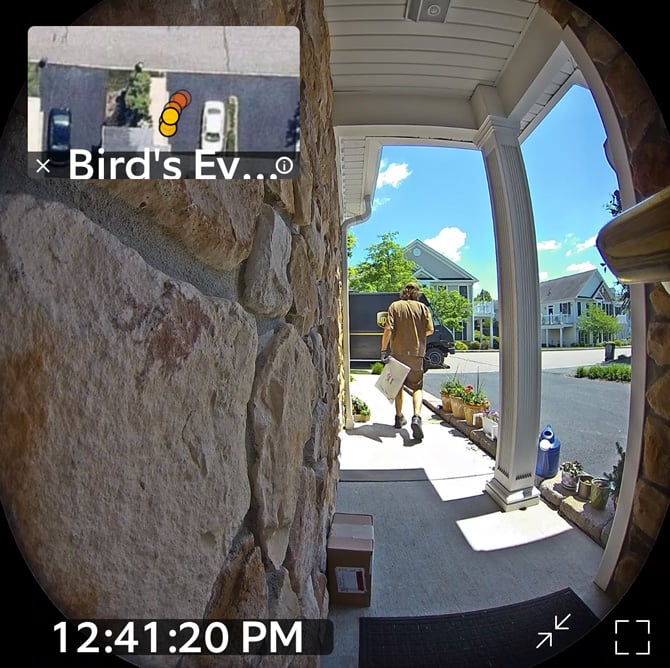
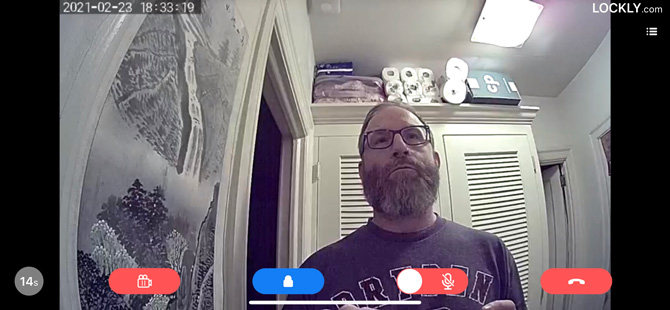
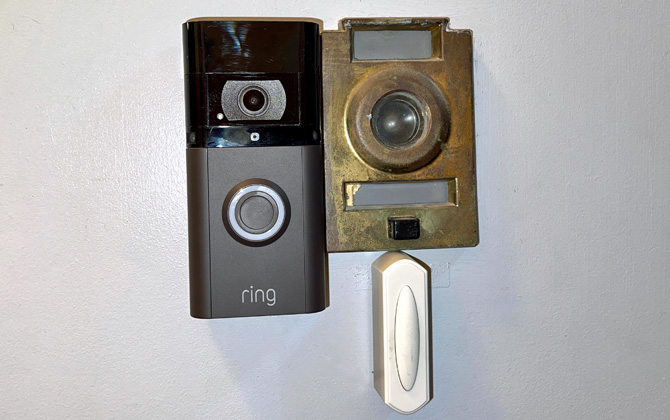
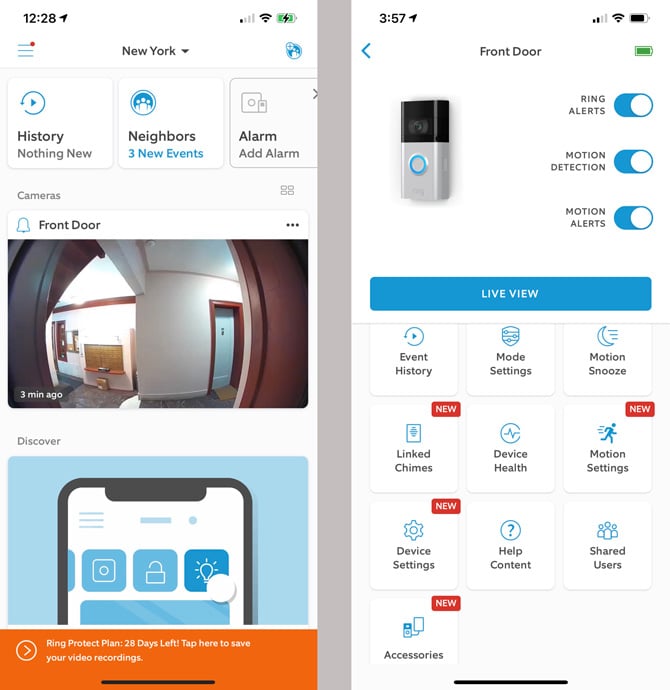
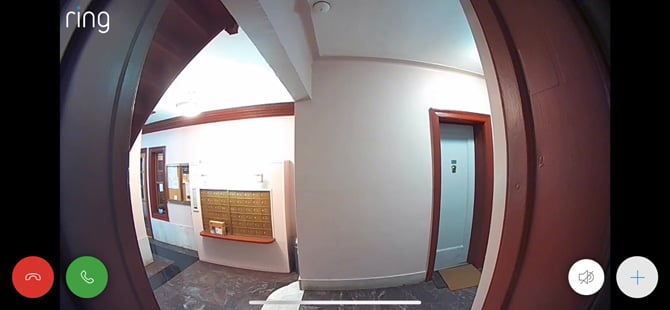
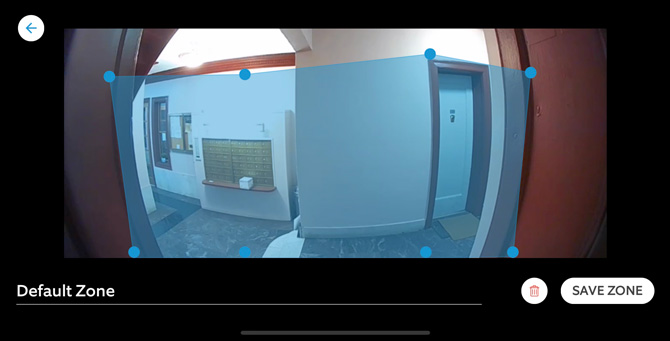
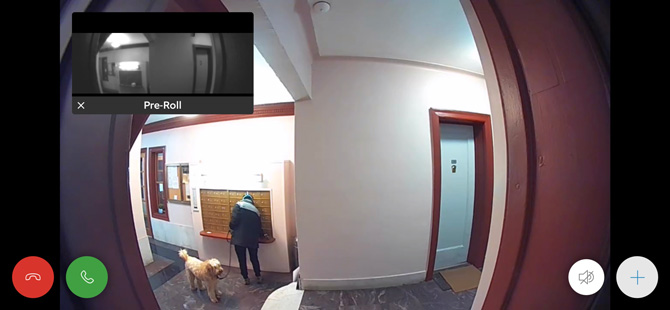
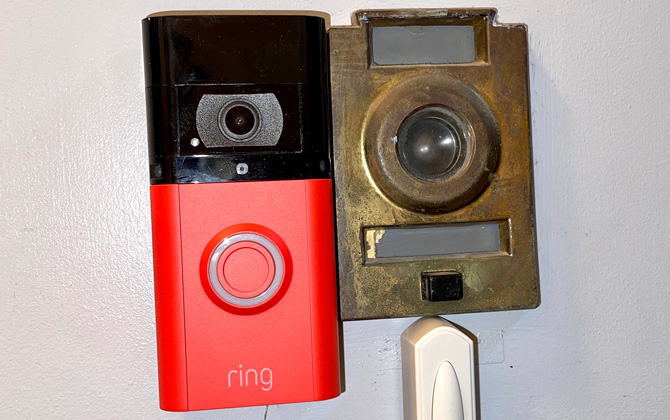
 I've been using the Video Doorbell Pro 2 for about a month, swapping it out to replace my original Video Doorbell Pro that I've had for years. The larger field of view lets me see packages on the ground that I couldn't see before, and I can hear responses from the two-way audio much clearly. More importantly, I can see where visitors to my property are coming from and which direction they go when they leave, thanks to the Bird's Eye aerial viewpoint. These features, plus better motion detection and fewer unwanted alerts, make the Ring Video Doorbell Pro 2 well worth the extra $80. If you're in the market for a new cam, it's definitely the model I would recommend. Even those who own the Ring Pro may want to consider springing for the upgrade.
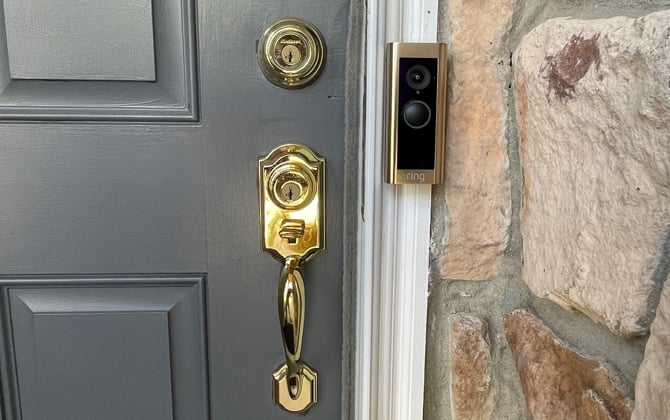


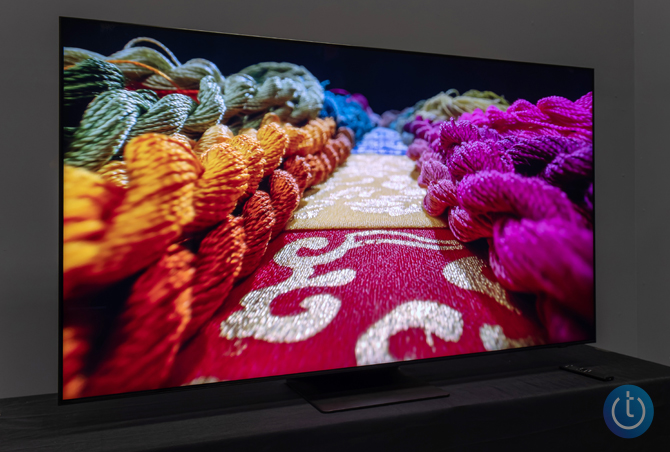
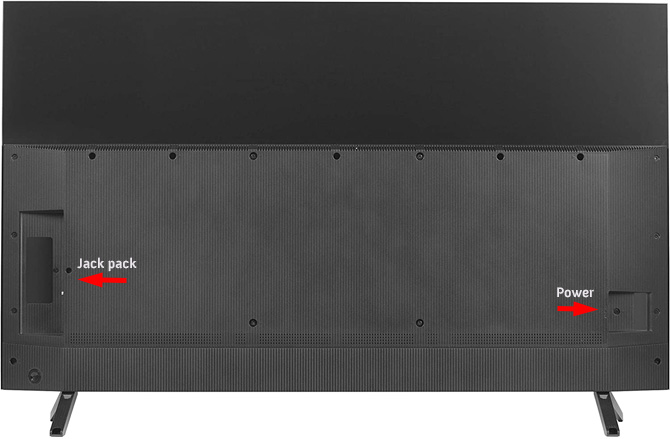
 Regardless of your budget, your first consideration when buying a TV is image quality. But with so many high-quality sets to choose from, setup, operation, and ease-of-use should factor into your decision as well.


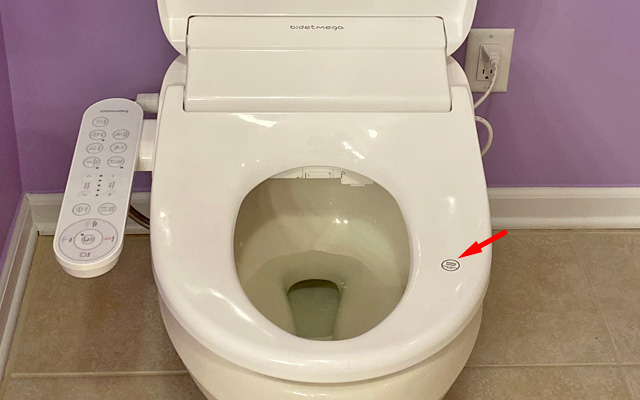
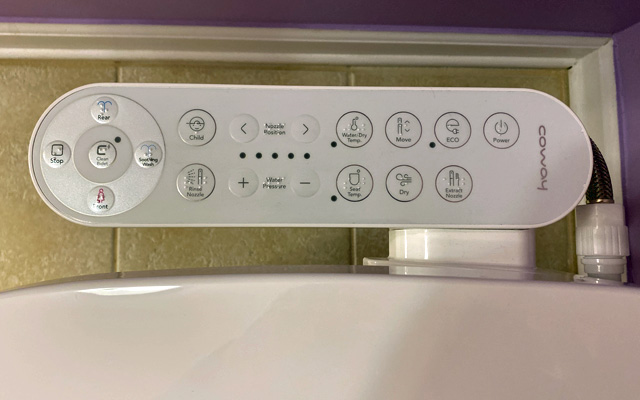
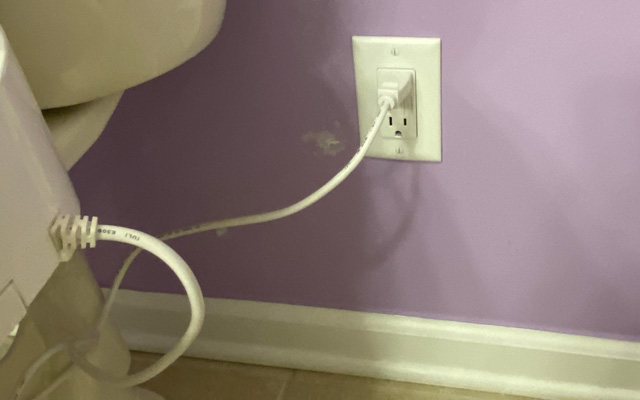
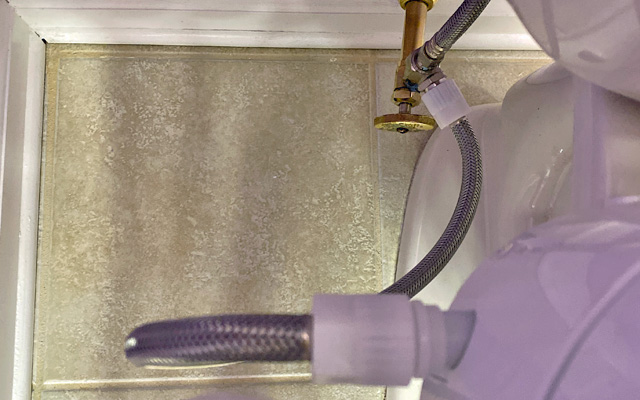
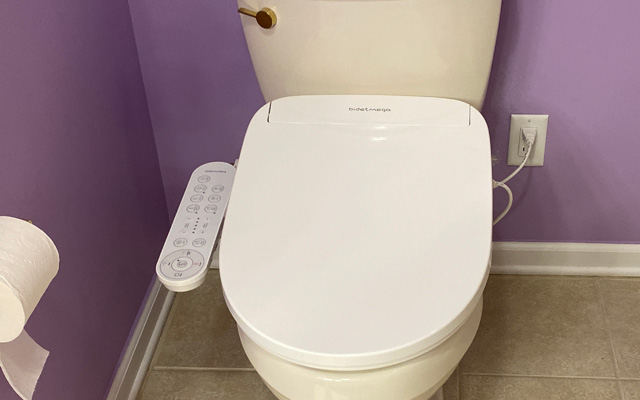
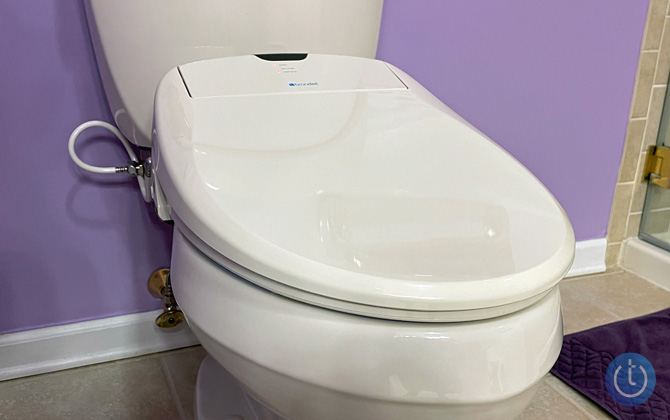
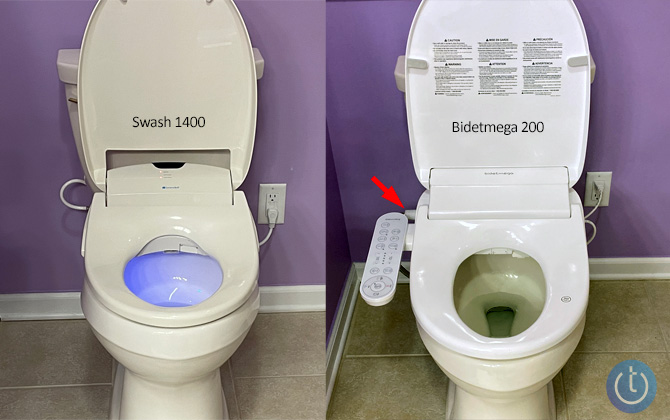
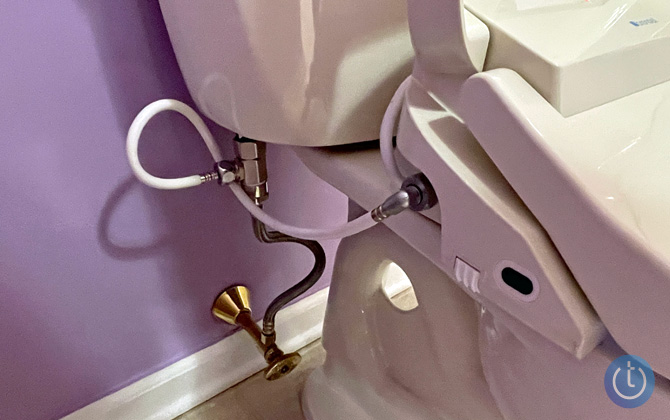
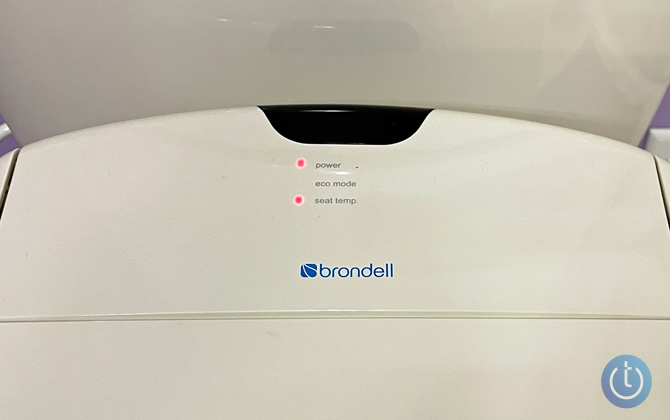
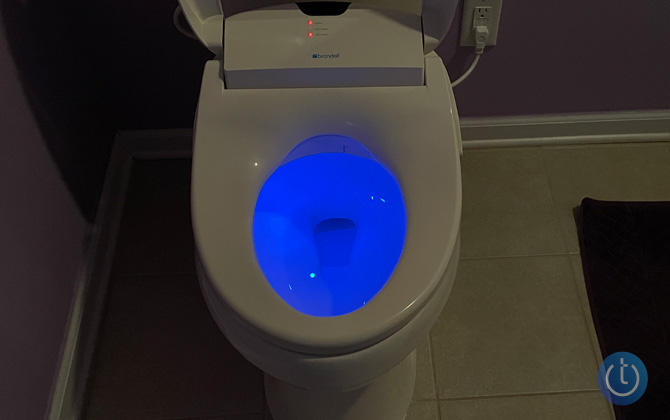
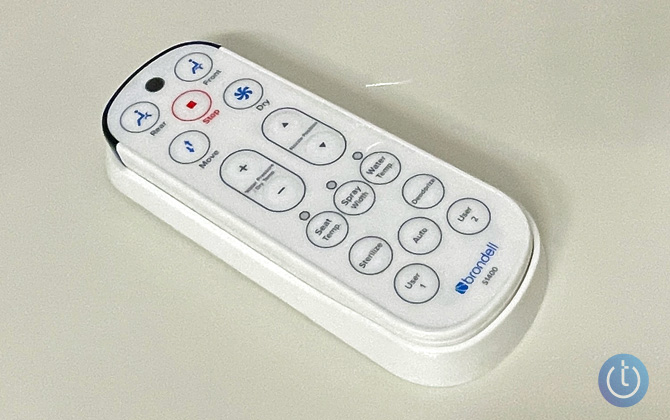
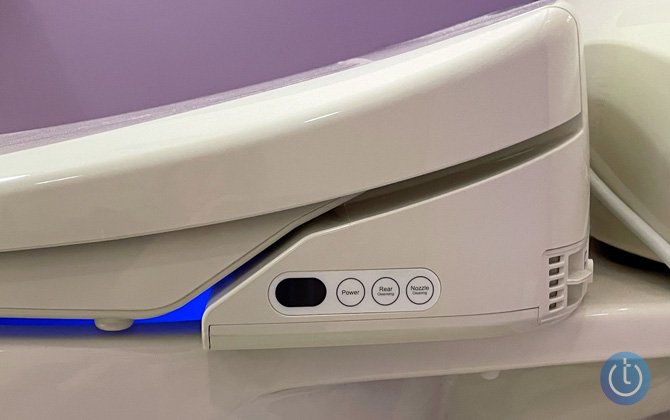
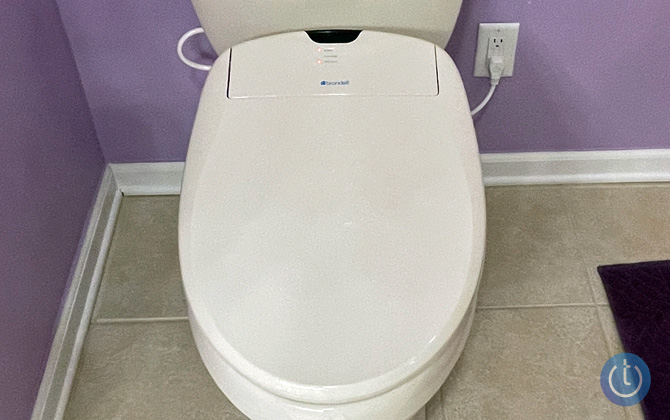
 While adding a bidet in new construction is becoming more commonplace here in the U.S., an easier and less expensive way to get that freshly cleaned experience is with a bidet seat or washlet. Less expensive units (under $100) have a simple spray function for cleansing, while the high-end units (topping $1,000) offer options like night lights, built-in mp3 players, and auto-closing lids. The Coway Bidetmega 200 ($449.00, on sale on Amazon for $328.94 as of 4/27/2023) sits in between and hits the perfect balance between functionality and price.