7984 <![CDATA[Lenovo IdeaPad Slim 3i Review: Solid Specs, Not Great Battery]]> lenovo-ideapad-slim-3i-review 2025-09-03T15:35:18Z 2025-09-03T15:37:20Z computers/lenovo-ideapad-slim-3i-2025-100px.jpg computers/lenovo-ideapad-slim-3i-2025-table-1200px.jpg Josh Kirschner joshkirschner@gmail.com 1 open We tested Lenovo’s IdeaPad Slim 3 from Costco. Solid everyday performance, but limited battery life and older ports hurt its appeal.

]]>
Lenovo IdeaPad Slim 3i 3.5 The Costco-exclusive Lenovo IdeaPad Slim 3i offers capable performance for everyday tasks, but it doesn’t stand out in any particular way. While it has the horsepower to handle standard workloads, its dated port selection and middling battery life make it feel overpriced at $769.99. When and if Costco puts it on sale, the overall package will become more appealing.

This Costco configuration includes an Intel Core 5 210H (8-core) processor, 16GB of DDR5 RAM, and a roomy 1TB SSD. That’s a solid mix for web browsing, productivity apps, video calls, and multimedia. In my testing, the system opened apps quickly and didn’t slow down when juggling multiple programs. For students, families, or remote workers needing a reliable everyday machine, it will get the job done.

Since this is a Costco exclusive model, it bundles in Costco’s standard 2-year warranty and 90-day return policy, so factor that in when comparing the price versus options from other retailers.

Lenovo IdeaPad Slim 3i shown from the front

Display and Sound

The 15.3-inch WUXGA (1920 × 1200) touchscreen gets reasonably bright when cranked all the way up to its 300-nit peak. It’s usable in bright rooms, and the anti-glare finish cuts reflections nicely. Colors are accurate but muted, which means the display won’t wow anyone editing photos or binge-watching shows. The stereo speakers with Dolby Audio are fine for video calls and casual use, but for movies or music, you’ll want to pull out your favorite pair of headphones.

Keyboard and Usability

The backlit keyboard is comfortable to type on, though not as crisp as Lenovo’s higher-end ThinkPads. Lenovo included a full number pad, which can be handy if you use one often. The downside is that it shifts the trackpad off-center, creating a slightly awkward typing position relative to the display. The trackpad works well, though, responding properly to both finger movement and clicks. The integrated 1080p webcam includes Lenovo’s standard physical privacy shutter, which is a nice touch.

Close-up shot of the Lenovo IdeaPad Slim 3i keyboard

At 3.59 pounds, the laptop is relatively light for its size. The plastic chassis feels sturdy, though there’s some flex if you lift it by the corners. The hinge holds the screen steady without wobble.

Ports and Connectivity

Port selection feels dated. Lenovo includes two USB-A ports but just one USB-C. You also get a full-size HDMI 1.4 output, an SD card reader, and a headphone/mic combo jack. The overall mix is practical for users with legacy devices, but it is generally behind the times. On the plus side, wireless connectivity is more modern, with WiFi 6 and Bluetooth 5.2.

Close-up shot of the Lenovo IdeaPad Slim 3i ports on the side

Battery Life

Battery life is underwhelming. The 60Wh battery powered the Slim 3 for only 6-8 hours in my testing, depending on workload. That’s enough for part of a workday, but you’ll want to keep the charger handy. For students or travelers who can’t always count on an outlet, this could be a dealbreaker.

Charging is handled with an old-school proprietary 65W barrel connector, not USB-C. The Slim 3 can be powered via the USB-C port, too. And it was able to draw power at 90W when in sleep mode or powered off in my testing, but charging this way takes away your only USB-C port. Hopefully, Lenovo swaps out the proprietary plug for another USB-C in the next generation.

Read more: AI, OLED, and 17 Hours of Battery Life – On a Chromebook? Yes.

Final Thoughts

The Lenovo IdeaPad Slim 3 is a competent laptop that gets the basics right, but it doesn’t excite me in any particular way. Performance is solid, the display is serviceable, and the weight makes it portable for its class. But the weak battery life, dated ports, and muted screen make $769.99 on Costco feel a little steep. At full price, it’s tough to strongly recommend it. But if a Costco sale comes around, the Slim 3 becomes a more sensible buy.


Key Specs (Costco Model 83K4000RUS)

  • Processor: Intel Core 5 210H (8-core)
  • Memory: 16GB DDR5 4800MHz RAM (expandable to 32GB)
  • Storage: 1TB M.2 SSD
  • Display: 15.3-inch touchscreen, WUXGA (1920 × 1200), 300 nits
  • Graphics: Integrated Intel graphics
  • Audio: 2 × 2W stereo speakers with Dolby Audio
  • Webcam: 1080p with privacy shutter
  • Connectivity: Wi-Fi 6, Bluetooth 5.2
  • Ports: 2 × USB-A 3.2, 1 × USB-C 3.2 (power delivery), HDMI 1.4, SD card reader, headphone/mic combo jack
  • Battery: 60Wh, 3-cell
  • Weight: 3.59 lbs.
  • OS: Windows 11 Home
  • Price: $769.99 (Costco only)

[Image credit: Techlicious]

]]>
0 computers computers
7973 <![CDATA[Reencle Prime Review – Minimal Maintenance, Big Composting Power]]> reencle-prime-kitchen-composter-review 2025-08-19T19:08:57Z 2025-08-19T19:40:58Z health/reenacle-prime-100px.jpg health/reenacle-prime-1200px.jpg Stewart Wolpin sw@stewartwolpin.com 1 open I tested the Reencle Prime composter for 3 months. Here’s how it handled meat, dairy, and everyday kitchen waste with minimal maintenance.

]]>
Reencle Prime Kitchen Composter 4 Starting last October, New York City (where I live) mandated curbside compost collection. The added benefit for us New Yorkers is less food waste on the streets for rats, gnats, ants, flies, and cockroaches to be attracted by.

For farmers, gardeners, and environmentalists, composting is not exactly news – in most cases, it’s a critical part of their lives. But for most of us, especially city folk like me, the idea of separating out “organics” – food waste and yard trimmings – and creating compost (or “humus”) for either disposal or use as nutrient-rich plant/garden fertilizer is a new aspect of home recycling and environmental awareness.

To comply with the law, my building set up a brown compost bin in the basement for us tenants to dump our compostable food waste into. But this meant keeping smelly food scraps separated out in my apartment until I was ready to take the trek all the way downstairs. Not an ideal scenario, and the reason why many New Yorkers I know simply ignore the requirement.

Coincidentally, Reencle reached out shortly after the law went into affect to see if I’d be interested in testing its latest kitchen composter, the Reencle Prime ($499), one of a growing number of consumer-grade home kitchen composters. Since I was now obligated to designate a separate kitchen container to collect my compostable food waste, I decided to grab the opportunity to try a standalone composter.

I’ve been using the Reencle Prime for around three months and, overall, it made for a welcome assistant for my first foray into the world of composting.

 + Pros  – Cons
  • Compact enough for the smallest kitchens
  • Can compost raw or cooked meat and fish
  • Eliminates food waste smell and insects
  • Easy, low-cost maintenance
  • Quiet
  • Expensive
  • Not countertop-sized
  • Small shovel for emptying
  • No maintenance alerts
Techlicious Editor's Choice award logo "The Prime has few limits on what you can throw in and is easy to maintain, making it a welcome addition."

The Reencle Prime shown from the front

Reencle Prime basics

Reencle makes two home composters, the 3.7-gallon Prime, which I tested, and the 5.8-gallon Gravity. In comparison to the Gravity, the Prime accepts less waste – a maximum 2.2 pounds a day vs. the Gravity’s 3.3 pounds a day, uses slightly more power (1.25 kWh vs 1.128 kWh), and is a bit noisier (29db vs. 24dB). However, for my two-person household, the Prime’s lesser capacity was not an issue, and you’ll only hear it if standing near it in the still quiet of the middle of the night.

Prime measures a slight 18.4 inches high,13 inches wide, and 12 inches deep, and weighs a not exactly light 20.1 pounds. It has a six-foot power cord, so I can store the Prime plugged in under a kitchen utility table and slide it out to my food prep area when I'm cooking or for after-dinner cleanup. Some small wheels would be nice, though, so I wouldn't have to schlep it over.

There are double lids to access the Prime composting chamber. The smaller lid opens automatically with your foot via a sensor at the Prime’s base or via a push-to-open button on top. This smaller lid stays open for six seconds, or you can manually lift the entire hinged top open for as long as necessary to dump larger amounts of waste or to empty once the chamber is full of compost. Unfortunately, when you lift the whole lid, the smaller lid also falls open, risking some food spillage.

On the left inside wall of the chamber is a horizontal white LED that indicates maximum compost capacity; on the inside rear wall is a replaceable and cleanable mesh air filter.

Fresh scraps inside the Prime

Read more: Typhur Dome 2 Air Fryer Adds Dual Heating for More Even Cooking

How Reencle composters compost

There are many types and methods of composting, some that run on electricity, others that don’t. The most common consumer electrical composters are so-called “drying & grinding” types that dehydrate and pulverize food waste, and slower models that use microbial fermentation.

Reencle’s Prime and Gravity composters are more akin to the latter sort. Using an aerobic bacterial composting system – but not fermentation, which increases interior operational heat by a third compared to dehydrators. To cut the heat of fermentation, the Prime and the Gravity employ a proprietary blend of aerobic bacteria called ReencleMicrobe to decompose organic matter to produce a more natural compost material.

Set-up and operation

Both the Prime and the Gravity come with a Compost Starter bag of small pellets that look like sawdust but actually contain the microorganisms that break down organic waste. You dump all the pellets into the Prime’s chamber, then pour in 50-60 fluid ounces of water – seven cups. Then you close the cover and let the concoction concoct for 18-24 hours, after which you start dumping food scraps into the composter.

What scraps can you dump? The food items you can and can't compost is the one downside of composting – it’s complicated, it’s often dependent on the model, and requires a learning curve.

Some composters, for instance, limit what kinds of waste you can compost, such as raw or cooked meat and fish. Prime and Gravity let you dispose of almost any organic waste, including raw or cooked meat or fish, dairy products, and pasta. No hard organic substances, such as bones, crustacean and other solid shells (crab, lobster, walnut…but eggshells are okay), or large pits (aka avocado and peach). Small soft seeds, such as those from watermelon, citrus fruit, and apple cores, are also okay, but citrus rinds should be chopped up – they contain complex carbon compounds resistant to microbial breakdown.

Anything manufactured, even if biodegradable, such as cigarettes and paper, is a no-no – except for coffee ground-filled coffee filters labeled compostable, and tea bags sans their strings and tags. Also a no-no is heavily salted waste, especially if you plan to use the compost for gardening, since salt-increased soil salinity isn’t healthy for growing things. But Reenacle says dumping soup is okay.

Prime had no problems decomposing relatively large soft waste – whole rotten bananas, whole bread slices, lettuce and cabbage stems, etc. Reencle recommends crumbling up large hard crackers, though, so as not to damage the composter’s stirring rods.

Another Prime and Gravity bonus is not having to wait hours for a composting cycle to complete before you can add more waste. Both models continually compost, so you can toss in waste at any time.

Read more: Why This New Air Purifier Belongs Next to Your Couch, Not Hidden Away

Maintenance

Once the Prime starts composting, you won’t need to order any more starter pellets. As the Gravity churns your waste with the initial set of microbes, the microbes remain as part of your compost and reproduce themselves. This remaining population decomposes new waste and continues the ongoing microbe reproduction and decomposition cycle.

When the Prime’s chamber reaches capacity – mine requires emptying around every three weeks – the position of the stirring rods makes it hard to completely empty the chamber. So, you are helpfully forced to leave an amount of microbe-infested compost in the unit.

Prime emptied and showing a stirring rod

Included with the Prime is a too-small (IMHO) plastic shovel. To empty a filled chamber, you scoop out the compost – which has a musky smell that’s strong, but not unpleasant – into a bag or container. This latter part is where I suffered a composting disconnect.

If you’re disposing of the compost rather than collecting it for gardening, it’s assumed you’ll shovel the compost into a plastic bag. But to me, since plastic bags are not biodegradable, this defeats home composting’s environmental purpose. So, I bought compostable food waste bags. (The Unni compostable bag shown below costs about $0.12 per bag.) And since the shoveling from the Gravity into the bags can get sloppy, I also bought a small, cheap waste basket and used the waste bags as a liner.

Compostable bag filled with compost

Even then, spillage off the shovel before you get the compost from the chamber into the bag is hard to avoid. You must shovel around the stirring rods, which means you may not be able to get a full scoop. I yearn for a faster, neater, more efficient compost removal solution. But, since I only need to empty the chamber every three weeks or so, this is a minor quibble.

There are two filters you’ll need to keep an eye on. The first is a small rectangular mesh air filter on the rear inside chamber wall. If the filter looks clogged, it can be easily removed, washed, and reinstalled.

The Prime also comes with two charcoal filters – one that attaches to the unit and a replacement that clips onto the back. According to Reencle, if the unit starts to smell, you should replace the first filter, which should last a year or more. Since two filters are included, you’ll be covered for at least two years. Replacement charcoal filters cost just $35, whereas many dehydrator-type composters require filter changes two to three times as often.

Knowing when to empty the chamber, clean the air filter, or replace the charcoal filter is largely up to the user’s judgment. I would have liked some sort of alert light on the unit to at least warn or remind me when to worry about doing any of the three.

The bottom line

Once I grokked what foodstuffs I could dump into the Prime, and once I got into the rhythm of dumping food waste into the Prime instead of the garbage – I’m still developing the put-it-in-the-composter muscle memory – using the Prime made me feel as if I was contributing in my tiny way to the health of the plant.

More practically, my garbage no longer stinks and no longer attracts tiny pests, especially those damn tiny fruit flies that seem to appear out of nowhere and multiply – well, like fruit flies! So, no more noxious Raid pesticide spraying.

As far as the Prime itself is concerned, I wish emptying the chamber were a bit faster and efficient, and that biodegradable food scrap bags for the safe environmental disposing of compost were also included, or at least suggested.

But not being especially limited as to what foodstuffs I can throw in and when, along with the minimal maintenance, makes the Prime a welcome – if moderately expensive – addition to both my kitchen and my conscience.

The Reenacle Prime is priced at $499 and available on Amazon and the Reenacle site. And if you need more capacity, you can step up to the $649 Reenacle Gravity.

[Image credit: Stewart Wolpin/Techlicious]

]]>
0 home kitchen-household top-picks
7957 <![CDATA[Galaxy Z Fold7 Review: Samsung Finally Gets the Fold Right]]> samsung-galaxy-z-fold7-review 2025-07-25T17:41:55Z 2025-07-25T17:45:56Z phones/samsung-galaxy-z-fold7-outside-half-fold-100px.jpg phones/samsung-galaxy-z-fold7-outside-half-fold-1200px.jpg Adam Doud adamdoud@techlicious.com 1 open Samsung trims the fat on its latest foldable, delivering better hardware and smarter software – but not without a few small sacrifices.

]]>
Samsung Galaxy Z Fold7 4 The Samsung Galaxy Z Fold7 is a breath of fresh air – no doubt about it. It's remarkable the amount of improvements that Samsung (and Google) have brought to the foldable space in the course of a year. However, it comes after arguably three or four years of…you know…no innovation.

On the plus side, the new phone has a 200-megapixel camera. Samsung decreased the thickness of the Fold by almost one-third. And there are strong new multitasking and software improvements to the Fold 7

On the minus side, Samsung tacked on an extra $100 to the price. And, there’s no S-Pen functionality, which will really rankle a small but vocal minority of users.

I've been using a Galaxy Z Fold7 review sample provided by Samsung for more than a week, and I've found it to be the best book-style foldable you can buy in the U.S. today. There are a few compromises that will annoy the die-hards, but most folks, including me, won't mind.

Samsung Galaxy Z Fold7 is shown from the back half folded.

 + Pros  – Cons
  • Extremely thin and light
  • Spacious inside screen
  • Excellent performance
  • Great cameras
  • Mediocre battery life
  • Insanely tall camera bump
  • Highly reflective inner screen
Techlicious Top Pick award logo "The best book-style foldable you can buy today in the U.S."

Design: So thin, wow!

The headline of the Samsung Galaxy Z Fold7 is how thin it is. Measuring just 8.9mm when folded and 4.2mm when opened, Samsung caught up to most of its competitors overnight. The inside screen is also larger, matching the Google Pixel 9 Pro Fold's 8-inch screen. Both of these were absolutely necessary changes, especially given the Pixel Fold's position in the U.S. market starting last August – jumping from a 4.76% share to 12.9% in Q4 2024.

Samsung Galaxy Z Fold7 is shown from the front half folded.

Read more: Google Pixel 9 Smartphone Lineup Adds Plenty of New AI Features

The result is that the phone, when closed, feels like a normal phone, though it's a tad narrower. Unlike previous years, this phone is very usable when closed; typing is easy with two thumbs. It will never stop being funny to me that one of the key ways I judge a foldable is how much you can use it when it's closed. The Samsung Galaxy Z Fold7 easily passes that test with flying colors.

Samsung Galaxy Z Fold7 is shown from the front folded.

However, we don't measure a phone's thickness at its thickest point – the camera bump, and this one is so tall it comes with its own Sherpa. The bump on the Z Fold7 adds another 60% thickness to the phone, and as a result, this phone wobbles on a table so much that it feels like you should be tapping out Morse code.

Display: S-Pen sacrificed in the quest for thin

One of the big sacrifices that had to be made, to hear a Samsung rep tell it, was the digitizer embedded in the display that enabled S-Pen functionality. According to the same rep, few people used it – around 70% of people who bought an S-Pen case for the Fold 6 still didn't use the S-Pen. That number feels…inflated, but at the same time, I don't have anything to refute it. Truth be told, I got the S-Pen case for the Fold 6, and while I used the S-Pen fairly regularly, it probably wasn't terribly often. RIP S-Pen digitizer. We hardly knew ye.

Samsung also redesigned the hinge so that it's 27% thinner, which contributes to the overall thinness. Doing so did not affect the crease in the inner display – it's still there and you can still see it, especially when viewing a solid color background, like when reading a book. It's gotten so much better than earlier generations, to the point where you can barely see it in some cases. But it's still there, and haters will still hate on it.

You can see a slight crease in the middle of the screen when the Samsung Galaxy Z Fold7 is open.

One other note, the inside screen is extremely glossy, which can make the phone hard to read when open on a sunny day. Often, what happens is the phone reflects what's in the background, making it hard to read. If you find the right angles, you'll be okay, but it can be on the annoying side.

Read more: Samsung’s Foldables Evolve: Fold7, Flip7, and the First Flip FE

Samsung’s OneUI 8: A multitasker's dream

On the software side, things are great, and it's a combination of Samsung and Google bringing you the goods. The Z Fold7 comes with OneUI 8, which is based on Android 16, out of the box, and it makes multitasking wonderful. You can do the usual stuff, like run apps side-by-side, and floating windows and all that, but Android 16 brings a 90/10 split view which, as the name implies, lets one app take up 90% of the window while it pushes the other app off to the side, so you can only see a thin strip of it. When you tap that strip, it slides your main app over and slides the other app into view.

This is very similar to OnePlus's Open Canvas, which is available on the OnePlus Open and the OnePlus 13 (though it's much more effective on the Open). However, OnePlus takes it a step further by allowing up to three apps to run simultaneously. That can be a bit much, but the flexibility of the 90/10 split is just fine for research purposes. I love it, and I'm so happy that Google was inspired by OnePlus's idea.

Monster performance, mediocre battery life

Samsung is using Qualcomm's flagship processor, the Snapdragon 8 Elite, to power the phone, and this is the only Samsung foldable to sport the 8 Elite this year. The Z Fold7 comes with storage options from 256 GB up to 1 TB, and with RAM options of 12 GB and 16 GB.

The Snapdragon 8 Elite is a monster and easily burns through games like Asphalt Legends with no problem. The phone can get a bit on the warm side during extended gameplay, but not so hot to be concerning. On a particularly hot day in Chicago, when I visited Six Flags Great America amusement park, I spent much of the day taking photographs and videos, as well as reading on the Kindle app, while waiting in line. I noticed the phone started to get warm, but it never overheated.

The Fold7 has the same-sized 4,400 mAh battery pack as last year's Fold6. What's impressive is that Samsung managed to pack the battery into a significantly thinner phone; however, like the Fold6, that also means the Fold7 is a one-day device. That's not bad, per se, but it's also not great. We're living in a time where a flagship phone is a day-and-a-half or two-day phone, so when you look at it that way, it's not amazing. However, it'll get you through a day of medium to heavy use (cellular data, no WiFi), and that's perfectly adequate; though I wouldn't bet on it if you're playing hardcore gaming titles all day.

As for charging, Samsung still offers a conservative 25W charging speed, which is also not amazing. It's not bad for the U.S., but overseas, those phone makers are teaching us all what's possible with battery tech. It's not uncommon to see charging at speeds of 80W and up in phones over there. They're driving Ferraris while we're still dribbling along on tricycles. Something has got to give – though Motorola shows promise. The company’s new edge phone (gen 6) can charge at up to 68W with the company’s charger.

Cameras get a big upgrade

In the past, cameras have been a cut corner on foldables. I'm pleased to report that's not the case anymore. These cameras are not the best I've seen on a smartphone, ever, but they're right up there with the foldables I've tested in the past. The champion here is the 200-megapixel main camera, paired with a 10-megapixel 3x telephoto camera, and a 12-megapixel ultrawide camera. There are two selfie cameras – both are 10 megapixels, though the one on the inside has a 100-degree field of view. By the way, the inside selfie camera is no longer an under-display selfie camera, so it's visible all the time.

Like a lot of smartphone cameras, your results will vary depending on your lighting. During the day, these cameras will stand up to most other phones on the market, regardless of whether they fold or not. Video capture is great too – you'll feel like your phone is on a track if you're walking and filming.

You can zoom up to 30x, as long as your subject is blocky and has a lot of straight lines, like an American flag, for example. Portrait mode is also very good. Normally, the sticking point for portrait mode comes from wispy hairs. On my head, the camera basically covers them up, but in a good way. On my daughter's head, it can actually isolate a lot of the hairs and keep them in focus.

Two photos taken in portrait mode with the Samsung Galaxy Z Fold7: on the left is the author and on the right is his daugher.

At night, things get a bit more dicey. Moving subjects are a non-starter, as is the selfie camera. That's not anything new in smartphones, but the main camera is quite good at subjects that are still. Even portrait mode is pretty usable at night. Walking and filming still displays some judder with your footsteps, which is very common in smartphone cameras, but it's far less pronounced than on a lot of other phones, which is a pretty big deal.

In both photos and video, there's still a good deal of grain in the darker areas (take a look at foliage in the photo below). If you're sharing your photos and videos to social media, or you generally view them only on a phone screen, you'll be in good shape. If you try anything larger, you'll notice a lot of issues very quickly. But honestly, I'm pretty impressed with what Samsung did with these cameras.

Photo taken of a building at night by the Samsung Galaxy Z Fold7. You can see some grain in the foliage and walkway

The bottom line

Samsung Galaxy Z Fold7 shown open from the front

Samsung made a lot of hard choices with the Galaxy Z Fold7, and across the board, I believe it made all the right ones. The company (finally) responded to the market and what its competitors were doing, and that's a relief. Now, there are more horses back in the foldable phone race, which will push these devices even further, and that's exciting. It's almost like getting in on the ground floor again, but this is a ground floor that's worth its weight – or lack thereof – in gold.

The Samsung Galaxy Z Fold7 starts at $1,999.99 (for a limited time, Amazon is offering a $200 gift card with your purchase). You can choose from storage options ranging up to 1 TB, as well as RAM options of 12 GB and 16 GB. Color options are Jet black, Blue Shadow, and Silver Shadow. 

[Image credit: Adam Doud/Techlicious]

]]>
0 tablets phones top-picks
7933 <![CDATA[Moft’s Dynamic Folio Might Be My Favorite iPad Accessory Ever]]> moft-dynamic-folio-hands-on 2025-06-27T23:43:18Z 2025-07-11T16:29:19Z computers/moft-dynamic-folio-100px.jpg computers/moft-dynamic-folio-ec-logo-1200px.jpg Adam Doud adamdoud@techlicious.com 1 open The Moft Dynamic Folio isn’t cheap, but its origami design makes my iPad more useful than any other case I’ve tried – and I've tried a lot.

]]>
Moft Dynamic Folio case for iPad Not rated Moft is a company that has been producing origami-style accessories for phones, tablets, laptops, and more for years. The company has made folding accessories an art form – pun intended – by transforming flat accessories into useful items through clever flipping and folding. Now, it has released an iPad folio case that ups the ante once more. This is the Moft Dynamic Folio case. It's available for multiple iPad sizes – in my case, I have the folio for the iPad Mini 6th generation.

The folio attaches to the back of the iPad magnetically and closes over the front, just like any other iPad cover. I actually wish the magnets in the back were a little stronger. I have dropped the iPad, and while the case protected the tablet from the initial impact, occasionally, the iPad flops out of the case. That's not ideal, especially if you don't have butter fingers like me.

Moft Dynamic Folio is shown open with an iPad. The Techlicious Editor's Choice Award logo is in the lower right corner.

The front cover has seven distinct folds in it, which unlock the origami magic of the folio. Combined with the fold on the back and a little flap that also opens up, Moft claims there are over 20 different positions you can fold the cover into to display the iPad at various angles.

Moft Dynamic Folio shown in dual screen mode

One of my favorites is the Dual-view mode, which sets the tablet down at an 18-degree angle, and leaves a small flap you can put your phone onto to display both at once.

Moft Dynamic Folio shown in theater mode

Another go-to mode for me is "theater mode," which lifts the iPad off the table a few inches and tilts it back for comfortable content watching.

There are other configurations you can use for drawing on the tablet, resting the tablet on your leg so the case wraps around your thigh, or propping the iPad up in portrait orientation for reading.

Read more: iPadOS 26 Brings a Mac-Like Experience to Your iPad

The case is made of vegan leather, which is luxurious to the touch. There's also an optional modular pen holder that securely holds your Apple Pencil in place and doubles as a ruler, if you need one for some reason. I especially appreciate this aspect of the case because I have been known to lose my Apple Pencil in my bag literally every time I put my iPad in a bag, speaking of magnets that are too weak.

Moft Dynamic Folio shown from the back

The Dynamic Folio can be picked up from Amazon or Moft's website. The iPad Mini 6 version is $39.99, and the prices range up to $69.99 for the iPad Pro 13" size. The pencil holder is an extra $9.90, and if you ask me, both are well worth it. There are less expensive cases you can buy, but none of them are this versatile.

I had been using Apple's stock iPad mini case up until Moft sent this review sample, and I am never going back. I particularly enjoy theater mode, watching a movie with the iPad just enough off the table to make for a more immersive environment. The only thing left for Moft to do is to make some of these for Android tablets, and I would be absolutely hooked.

Read next: AI, OLED, and 17 Hours of Battery Life – On a Chromebook? Yes.

[Image credit: Adam Doud/Techlicious]

]]>
0 computers computers top-picks
7927 <![CDATA[My Wife Took the Renpho Eye Massager – Now I Can’t Get It Back]]> my-wife-took-my-renpho-1-eye-massager 2025-06-17T20:55:43Z 2025-07-11T16:39:44Z health/renpho-eyeris-1-worn-100px.jpg health/renpho-eyeris-1-worn-ec-logo-1200px.jpg Adam Doud adamdoud@techlicious.com 1 open The Renpho Eyeris 1 turned out to be the stress-relief tool my family needed. Read why I still recommend it – even if I don’t use it.

]]>
Renpho Eyeris 1 Eye Massager Not rated As a traveling tech reporter, I often find myself in hotel rooms after 16-hour demanding days, logging 20,000 or more steps on a tradeshow floor. To make a long story short, it's pretty, well, stressful. To that end, Renpho reached out with an offer for a care package to help ease the strain at CES this year. Part of that package included the Renpho Eyeris 1 eye massager – as in, it massages your eyes. Well, I'll try anything once, so it arrived.

Renpho Eyeris 1 worn by the writer. The Techlicious Editor's Choice logo is in the lower right corner

To make a long story short, it wasn't really for me. I didn't find it particularly relaxing or comforting, but then my stress tends to live in my back and shoulders, not my eyes and head. So, when I got home from CES, I asked my wife, who suffers from chronic migraines, if she wanted to give it a try.

I haven't seen it since.

This device has become an absolute godsend for the women (wife and teenage daughter) in my life, and that's a good enough endorsement for me. But first, here's what the device actually is and how it works

The Renpho Eyeris eye massager looks like a slim VR headset. There's a vegan leather inside cover that goes over your eyes, which is as soft and supple as the real thing, and a hard plastic shell on the outside. The shell folds vertically down the middle for easier storage – I say "easier," because I'm not entirely sure it's actually much smaller folded than it is when open, but I digress. When folded, a USB-C charging port is revealed.

Renpho Eyeris 1 shown folded

On the right-hand side (while wearing the device), there are three buttons: Power, pressure, and music. The power button is the largest of the three and, therefore, the easiest to identify, as it should be. The other two are the same size, so you need to remember which is which. One controls the pressure, and the other controls heat. The music button plays built-in relaxation music. Neither my wife nor daughter uses that – my wife listens to podcasts.

Renpho Eyeris 1 shown from the side so you can see the buttons.

You can pair the massager with your phone as an audio device. The sound quality is…fine…but you'd be better off with a pair of earbuds. There's also an app, but the base model doesn't connect to it, which is weird. For $20 more, you can get the "smart" version, which connects to an app. That seems like an odd place to put a paywall, so that's not awesome. That didn't deter my wife or my daughter; they still love it.

When you turn on the device, it automatically kicks into the first routine, which involves heat and pressure. There's also vibration, and single taps on the power button that cycle through the various combinations. There are six options: eye massaging, vibration, heat, or any combination of these. My wife's favorite is heat and pressure. She occasionally uses vibration, but for her headaches, it often doesn't help. Speaking of which, the massager runs for 15 minutes at a time.

The headset applies pressure to the eyes with small airbags inflating and deflating beneath the vegan leather interior. You can adjust the pressure using the aforementioned button, but you can't alter the timing of the pressure. Both my wife and my sister-in-law (who bought one after trying ours) would like the ability to adjust how long the pressure lasts before deflating.

Renpho Eyeris 1 shown from the front.

The Renpho Eyeris 1 eye massager isn't for me, but that's a personal thing. Judging by the women in my life, it’s a winner. My wife and daughter don't use it daily, but a few times per week. We typically need to charge the 1,500 mAh battery about once a week, without music playback, so your mileage may vary. It charges with USB-C, so the charging cables for your other devices should work here – one less thing to pack. If you have a person in your life who suffers from headaches or generally carries stress in their head, this is a good solution.. It's currently on sale for $59.99, and that seems to be a perma-sale on Amazon, so the price is not too bad either. How much would you pay for headache relief?

[Image credit: Adam Doud/Techlicious]

]]>
0 home health-fitness top-picks
7925 <![CDATA[2025 Razr Ultra: The Android Flip Phone I’d Actually Use]]> 2025-razr-ultra-hands-on 2025-06-14T20:19:51Z 2025-07-11T17:07:52Z phones/motorola-razr-ultra-cover-screen-100px.jpg phones/motorola-razr-ultra-cover-screen-ec-logo-1200px.jpg Andrea Smith abcandread@gmail.com 1 open I didn’t expect to love a flip phone, but the Razr Ultra’s outer screen changed how I use my phone. Here’s what stood out after a week of testing.

]]>
2025 Razr Ultra Not rated Foldables have always intrigued me for their promise of more screen in a pocketable form, but clamshells felt too cramped – until now. I have been using the 2025 Razr Ultra for the last week, and it’s the first clamshell that feels complete. With its expansive 4-inch cover screen and full-size fold-out display, it finally feels like a foldable that’s not asking me to compromise on specs and usability.

Motorola 2025 Razr Ultra is in tent mode with the screen cover showing. The Techlicious Editor's Choice Award logo is in the lower right corner

Design: Premium Build, Pocket-Ready Style

The Razr Ultra weighs about the same as my iPhone 16 Pro, and as a 4-inch square, it slips easily into a crossbody bag or pocket. The textured fabric on the back (my test unit was Pantone Cabaret – a bold, hot pink) felt great in my hand and still looked pristine after a week of heavy use. The titanium hinge is rated four times stronger than the 2023 Razr, and it feels solid. I flipped it open and shut constantly, and it felt sturdy, not delicate.

Motorola 2025 Razr Ultra is in tent mode with the fabric back showing.

Cover Screen and Display: Big, Bright, and Surprisingly Useful

I didn’t expect to love the cover screen, but I found myself using it constantly. Since you can run nearly any app on it, including full Maps navigation, I used it for walking around New York City, going to meetings, listening to Spotify, and checking messages, all without ever having to unfold the phone.

The cover screen is a 4-inch AMOLED LTPO (Low-Temperature Polycrystalline Oxide) panel that enables adaptive refresh rates. The screen can intelligently ramp up to 165Hz for smooth scrolling and drop down to 1Hz to save battery when showing static images.

Widgets for favorites like weather and messaging made it feel so much more useful, and the nearly edge-to-edge design didn’t feel cramped at all. What impressed me about the design is the side button fingerprint unlock that lets me unlock the phone with one hand, without ever having to open it. I answered texts, checked my calendar, ran Spotify, and even played a game or two without feeling the need to expand the screen.

When you do unfold the Razr Ultra, whatever you were using on the smaller screen instantly opens up on the internal 7-inch screen. The inner screen is bright (4,500 nits peak) and high-res (2,992x1,224 pixels), with a smooth 165Hz refresh rate. I barely noticed the crease when watching YouTube videos or reading Kindle books. Is it there? Sure, but just barely, and it visually fades away when you're scrolling or tapping.

The 2025 Razr Ultra is shown open and you can see that there's no visible crease.

Battery Life and Charging: All-Day Performer

The 4,700mAh battery easily lasted through a day of work and streaming, even with the cover screen in frequent use. In my testing, I got through the day with 30% left by 11 p.m. The Razr Ultra supports 68W wired charging (55% in 30 minutes) and 30W wireless charging if you have the right charger. No charger is included in the box.

Cameras: Better, but Still a Step Behind

You won’t get professional-quality photos from the Razr Ultra, but you will get decent shots. The main, ultrawide, and selfie cameras all performed adequately in bright light, especially for sharing on social or sending pictures via messaging. If you’re good with decent, the Razr Ultra’s dual rear lenses offer more versatility while closed than its main competitor, the Samsung Z Flip 6. The Razr Ultra retains its ultra-wide lens and supports 4K video capture. The Z Flip 6 lacks ultra-wide support when shut, and video is capped at 1080p.

Read more: What to Do if You Forget Your Android Phone Password

Who It’s For

Personally, I loved the Razr Ultra’s cover screen for staying focused, and snapping it shut is deeply satisfying. If you love the idea of a foldable but have been waiting for one that feels solid, fun, and genuinely useful, the Razr Ultra delivers. It offers a usable cover screen, sturdy hinge, and flagship specs. However, at $1,300, it’s expensive, and Motorola still falls short on software longevity, offering only 3 years of OS updates and 4 years of security patches – half of what Samsung provides with the Z Flip 6, which you can find on sale for around $1,100. If you upgrade every few years, that may not matter. But if you're in it for the long haul, it's something to consider.

Read next: OnePlus 13 Hands-On: Waterproof, Powerful & Packed with Innovation

[Image credit: Andrea Smith/Techlicious]

]]>
0 tablets phones top-picks
7911 <![CDATA[SwitchBot K10+ Pro Combo Review: Perfect for Apartment Dwellers]]> switchbot-k10-plus-pro-combo-review 2025-06-02T16:47:03Z 2025-06-02T16:54:04Z health/switchbot-k10-plus-combo-in-station-front-100px.jpg health/switchbot-k10-plus-combo-in-station-front-1200px.jpg Andrea Smith abcandread@gmail.com 1 open The SwitchBot K10+ Pro Combo promises apartment-friendly cleaning with dual vacuums in one dock. We tested it to see if small can also be mighty.

]]>
SwitchBot K10+ Pro Combo Robotic Vac and Stick Vac 4 When I saw the SwitchBot K10+ Pro Combo at IFA 2024, my immediate thought was that this compact combo unit was what my apartment-dwelling friends have been waiting for. The SwitchBot K10+ Pro Combo pairs the world's smallest robot vacuum with a slender cordless handheld stick vacuum, which share a unified Dust Collection and Charging Station.

Its compact size makes it ideal for an apartment or a smaller space where it easily maneuvers in tight quarters, and its quiet operation means you won't disturb roommates or neighbors. But does its mini size mean mini performance? I spent weeks with the K10+ Pro to find out if it's the ultimate dust-busting sidekick or just a cute novelty.

The SwitchBot K10+ Pro Combo is shown with the robot, stick vac, and accessories in the base.

 + Pros  – Cons
  • Extremely compact design fits in tight spaces
  • Ultra-quiet operation at 45dB
  • Lightweight handheld under 3 pounds
  • LED dust detection indicator on the stick vac
  • Struggles with high-pile carpets
  • Suction power is underwhelming compared to competitors
  • Requires an additional hub for smart home integration
Techlicious Editor's Choice award logo "An ultra-quiet, space-saving solution that's perfect for apartment dwellers."

Design and Size: Small and Light, But Mighty

At just 9.8 inches in diameter and 3.6 inches high, the K10+ Pro is substantially more compact than standard robot vacuums I've tested, like the iRobot Roomba Combo j9+ (13.3 inches) and Narwal Freo Z Ultra (13.8 inches). This gives it superior maneuverability in tight spaces, easily navigating between chair legs and under furniture where bulkier robots struggle. I was impressed with how easily it weaved between my dining chairs while bigger robots did their awkward three-point turns.

The SwitchBot K10+ Pro robot is shown maneuvering between chair legs

The accompanying cordless handheld vacuum weighs under three pounds and comes with four attachments for cleaning furniture, curtains, stairs, and vehicles. While it doesn't match the suction of top-tier models like Dyson stick vacs, its swivel head design and ability to easily slide under furniture, along with its 41-minute runtime, make it perfect for quick cleanups and spot cleaning.

One of my favorite features is an LED dust detection light, similar to those found on some Dyson models, which helps you identify areas that require extra cleaning. It's like looking at your wood floors when the sun is streaming in; you don't see it with the naked eye, but when the light is on it, you see all the dust, dirt, and debris you might otherwise miss.

The SwitchBot K10+ Pro Combo stick vac LED light shows pet hair and dust on wood floor.

Read more: Yarbo Adds Fully Autonomous Trimmer to Its Modular Lawn Care Robot

Compact Charging Base

The dual charging and dust collection base (7.7 x 8.7 x 16 inches) serves both vacuums while maintaining a significantly smaller footprint than premium self-cleaning models with their built-in water tanks and mop-washing stations. The base stores up to 70 days of dirt in its 4L antibacterial dust bag – slightly less than the typical 90-day capacity, but reasonable given it is used for both vacuums.

The SwitchBot K10+ Pro Combo base is shown with accessories, robot, and stick vac.

Performance: Great for Some Surfaces, Just Okay for Others

The K10+ Pro excels on tile, wood, and laminate flooring, as well as short-pile carpet, using LiDAR navigation and obstacle avoidance. However, it struggles getting over high-pile carpets, requiring you to program "keep-out" zones in the app.

I found the robot’s suction power to be a bit underwhelming. At 3,000 Pa it falls notably short of competitors like the Dreame X40 Ultra ($1,499.99, on sale for $899.98), which has 12,000 Pa suction power. While adequate for daily maintenance, like a sweep of crumbs and pet hair, the K10+ Pro can't match the deep cleaning capabilities of other premium models. Of course, it can also get into spaces that high-end models can’t, which is what makes it ideal for apartments and smaller spaces.

The handheld vacuum offers stronger suction at 20,000 Pa max mode and 8,000 Pa standard mode. While it was strong enough to pick up cat litter on the lowest mode, it struggled with debris like tracked-in rock salt and larger messes, even on the max mode. Additionally, I was frustrated that I couldn’t start it in max suction power mode. I always had to take the extra step of turning it on and then switching to higher suction power. Not a deal breaker, but something that could be improved.

The SwitchBot K10+ Pro Combo stick vac shown vacuuming carpet

Read more: No Drills, No Keys: SwitchBot’s Face-Unlock Smart Lock Is Renter-Ready

Quiet Operation

The K10+ Pro's SilenTech noise reduction technology keeps operation at just 45 decibels, compared to the typical 60-75dB range of most robot vacuums. It's so quiet, I got up from my desk several times to check to see if it was still running - I couldn't hear it unless it was in the same room as me. The app includes a Do Not Disturb mode to prevent it from running on a scheduled clean or emptying its dustbin operation during specified hours.

Smart Features: Solid, With One Big Catch

The K10+ Pro doesn't have smart home integration built in, but you can connect it with your ecosystem of choice by purchasing the SwitchBot Hub 2 ($69.99). The Hub 2 supports Apple Home (via Matter), Alexa, SmartThings, or Google Assistant, allowing you to control the K10+ Pro with voice commands and, when you're away, remotely via your phone.

The Bottom Line

At $799.99, the SwitchBot K10+ Pro Combo (on sale for $399.99 at time of publication) is best suited for small-space dwellers seeking a quiet, compact cleaning solution. Its maneuverability in tight spaces and lightweight handheld vacuum make it a very attractive package. Those with thick carpets or demanding cleaning needs should consider more powerful options like the well-priced Roborock Q5Max+ ($599.99, on sale for $329.99), the ultra-powerful Narwal Freo Z Ultra ($1,499.99, on sale for $1,299.99), or my favorite for mopping, the Roomba Combo j9+ ($1,399.00, on sale for $799.00).

[Image credit: Andrea Smith and Josh Kirschner/Techlicious]

]]>
0 home kitchen-household top-picks
7889 <![CDATA[CUKTECH 15 Ultra Power Bank: Serious Power with Smart Feedback]]> cuktech-15-ultra-power-bank-review 2025-05-15T19:50:21Z 2025-05-15T20:13:22Z misc/cuktech-15-ultra-laptop-100px.jpg misc/cuktech-15-ultra-laptop-ec-logo-1200px.jpg Josh Kirschner joshkirschner@gmail.com 1 open A smart screen, 140W USB-C ports, and dual-device fast charging make this power bank a serious tool for pros and tech-savvy travelers.

]]>
CUKTECH 15 Ultra Power Bank Not rated If you regularly travel with power-hungry gear or just want a reliable backup for your phone and laptop, the CUKTECH 15 Ultra is one of the most capable portable chargers I’ve tested. With two USB-C ports (up to 140W each, PD3.1) and one USB-A (15W), with a combined maximum output of 165W, this 20,000mAh power bank isn’t just high capacity – it’s high performance.

The CUKTECH 15 Ultra is plugged into a laptop.

What sets the CUKTECH 15 Ultra apart from the many 100W-class competitors on the market is the display. Most power banks tell you how much charge they have left – maybe in vague bars or a percentage. The CUKTECH goes several steps further. With its 1.3-inch TFT color display, it doesn’t just tell you how much juice is left; it shows how long that power will last at your current output rate and confirms exactly how much power your connected devices are drawing in watts, volts, and amps. For anyone who’s ever wondered, “Is my phone actually fast charging right now?” this is the rare battery that gives you a clear answer.

Closeup of the Cucktech 15 Ultra's display while powering a laptop.

Performance in my real-world tests was solid. I ran two 65W Lenovo X1 Carbon laptops simultaneously, and both charged at full speed with no throttling. That’s not something you can take for granted with many multi-port banks. And on a recent 18-hour multi-flight slog back to New York City from China, the CUKTECH easily kept my laptop and phone charged for the entire trip.

Read more: Lenovo's New ThinkPad X1 Carbon: The Business Laptop We Love

If you’ve ever been caught heading out the door with a low battery bank, you’ll appreciate the “Beast Mode” dual input charging. Plugging two high-wattage USB-C PD chargers into both input ports recharged the CUKTECH 15 Ultra much faster than typical single-port options, giving you around 70% in 20 minutes.

Closeup of the CUKTECH showing Beast Mode

Physically, the charger has a functional but sleek look. At 6 x 2.25 x 1.75 inches and 1.3 pounds, it’s not pocketable, but it is bag-friendly. The build quality feels solid, and the display is bright and easy to read even in daylight.

While it supports a wide range of fast-charging protocols (PD3.1, PPS, QC, and others), the real story here is how it blends high power output with smart charging insight. For anyone who needs serious mobile power – whether it’s for business travel, camping, or managing a family’s worth of devices – the CUKTECH 15 Ultra is a solid choice.

The CUKTECH 15 Ultra is available for $119.99 on Amazon and other retailers.

Check price on Amazon button

[Image credit: Josh Kirschner/Techlicious]

]]>
0 computers computers tablets phones travel top-picks
7886 <![CDATA[This Futuristic Mower Makes Cutting Grass Surprisingly Fun]]> litheli-easysurge-review 2025-05-14T17:07:07Z 2025-05-23T13:45:08Z health/litheli-easysurge-front-side-100px.jpg health/litheli-easysurge-front-side-1200px.jpg Jonathan Takiff scribejt@aol.com 1 open The Litheli EASYSURGE 18.5" is lightweight, self-propelling, and packed with smart features that could make lawn mowing your new favorite chore.

]]>
Litheli EASYSURGE 18.5" Electric Lawn Mower 4 Yeah, it’s lawn mowing season again – but this year, the chore won’t feel nearly as onerous if you plunk down the bucks for the Litheli EASYSURGE 18.5" Lawn Mower. It’s a novel update to a household necessity that commands – and mostly warrants – its premium asking price.

To my mind, the EASYSURGE 18.5" is the Mustang Mach-E of grass cutters: a 21st-century reinvention of a classic species, souped up with sleek race-car styling and turbocharged, battery-powered performance. It’s the only self-propelling (brushless) motorized mower I’ve encountered that looks cool standing still, oozes fun, and features uniquely ergonomic controls. Like others in the growing class of battery-powered mowers, the EASYSURGE 18.5" runs quieter than gas mowers (you can still hear yourself think), produces no pollution, and requires minimal maintenance. All that adds up to more than a utilitarian product – it’s something even your lazy-bones offspring or spouse might be inspired to take for a spin.

Litheli EASYSURGE 18.5-inch lawn mower is shown from the front three-quarter angle view.

 + Pros  – Cons
  • Intuitive, ergonomic controls
  • Lightweight and easy to maneuver
  • Excellent self-propel system
  • Rear wheels lock when reversing
  • Battery drains quickly in EASYSURGE mode
  • Wet grass buildup under the deck
Techlicious Editor's Choice award logo "Tackles slopes and dense grass with ease – and looks good doing it."

All Revved Up and Ready to Go

User-friendly from the start, setup and operation were intuitive and relatively easy – even without an owner’s manual in the review sample I unpacked with my pal and sometime test collaborator John Siemiarowski, owner of Electrical Wizardry.

We got the party started on the sloped front lawn of John’s Mt. Airy Philadelphia neighborhood house – a test site two weeks overdue for a good first-of-season clipping. As such, we needed to mow the lawn twice with the Litheli (pronounced Lithe-Lee): first with the grass cutter’s tungsten blade at its highest (6 out of 6) setting, then again at a lower setting for a closer crop. But the going was never tough. The Litheli neither complained nor balked at the dense, moist grass – and the end results were quite gratifying.

Weighing just 40.8 pounds, the EASYSURGE 18.5" is far lighter than gas-powered mowers that require a heavy aluminum deck. A single able-bodied person can lift the plastic-decked unit out of its packing box. And lo and behold, this thing arrives almost entirely pre-assembled, with wires tucked away, connected, and nothing to screw on or bolt down.

John Siemiarowski lifts the Litheli EASYSURGE 18.5-inch lawn mower out of its box.

Just flip up, extend, and lock the T-shaped handle at your chosen angle (45 or 55 degrees). Then open the mower’s hood and plug in the 20,000 mAh U20 lithium-ion battery packs. There’s room for four onboard, though only two operate the mower at a time.

Read more: This Eero Deal Comes at a Perfect Time for Your Summer WiFi Needs

Papa’s Got a Brand New Bag

The only piece we needed to attach was the 50-liter (13.2-gallon) rear-mounted grass-catching bag – which is optional. The mower comes with a mulching plug installed. In mulching mode, finely chopped clippings are side-discharged onto the lawn. But if you want to avoid raking – especially after mowing an overgrown lawn – flip up the rear discharge cover, remove the plug, and clip on the bag.

Litheli EASYSURGE 18.5-inch lawn mower is shown from the back three-quarter angle view.

User tip: Three structural support rods are tucked inside the collapsed cloth bag. You’ll need to attach them to fastening strips before clipping the bag into place. If you skip this, the bag may slip off when weighted with grass. For proper setup, consult the illustrated manual.

The manual also reveals that the EASYSURGE 18.5" supports Bluetooth, enabling basic mower monitoring and adjustments through the Litheli app on your phone or tablet. But honestly, why bother? This mower puts nearly all features and functions right in front of you on the multi-tasking SurgePanel – an unusual instrument array of knobs, buttons, paddles, and thermal touch controls embedded in its steering wheel-style (non-rotating) handle.

Read more: How to Fix Bluetooth Pairing Problems

The Pleasure’s in the Panel – and the Power

For safety, starting the mower requires a few steps: tap the power-on button, then press the mowing switch while simultaneously pulling up on either of the paddles under the handle. I found this interlocking safety system more intuitive and comfortable than the traditional pull-rod mechanism found on most mowers.

Also unique: changing the cutting height is motorized. Instead of bending over to adjust a lever on the chassis, just dial in one of six blade height settings – ranging roughly from 1 to 3 inches – using a dashboard knob. A satisfying buzz confirms the change.

Mowing speed is also adjustable via the dashboard, from a slow walk (1.34 MPH) to a brisk trot (2.91 MPH), with several options in between. To propel the mower, press a thumb rocker on either side of the handle – just above the paddle switches. And yes, you can change speeds mid-mow.

Need more power for thick patches or steep inclines? Press a dedicated button to engage EASYSURGE mode, which “overclocks” the motor from 3500 to 4100 RPM – a best-in-class spec for sub-20-inch mowers, according to Litheli. The trade-off? Battery life drops fast. You’ll get about 30 minutes of mowing with four batteries in EASYSURGE mode, compared to 100 minutes in Normal mode.

The process may sound complicated, but it’s surprisingly intuitive. Grip the handle and paddle switches, press a thumb rocker, and steer. That’s it. You can push the mower manually without power assist – but expect some resistance. (Think pedaling an e-bike with the motor off.)

Litheli EASYSURGE 18.5-inch lawn mower control panel closeup

One quirk: the rear wheels tend to lock if you try to pull the mower backward in self-propelled mode. The workaround isn’t in the manual, but here’s the trick: release the propel button, nudge the mower forward a couple of feet, then pull back. That disengages the gear lock and frees the wheels. There’s no powered reverse, but once you learn this ritual, it becomes second nature. Honestly, it’s a small price to pay for self-propulsion – especially when tackling hills. (Litheli recommends limiting use to inclines under 20 degrees, but I had no issues pushing it up a 30-degree slope – just a bit of wheel digging.)

Read more: The Battery-Powered TV That's Perfect for Tailgating or Poolside

Minor Annoyances

Litheli hasn’t solved the age-old issue of wet grass clumping under the deck. It’s easy enough to flip the mower over and scrape it out – but remove the batteries first and make sure the blade has stopped. Never spray water on the unit. Also, expect the sharp-looking plastic body to get scratched unless you flip it onto something soft, like a blanket.

Cleaning the Litheli EASYSURGE 18.5-inch lawn mower

And while the EASYSURGE 18.5" is quieter than a typical two- or four-stroke gas mower and emits no fumes, it’s not exactly whisper-quiet. (Litheli lists the noise level at 93 decibels.) So skip the early morning or late-night mow – your neighbors won’t thank you.

Pricing and Kit Options

The basic Litheli EASYSURGE 18.5” Lawn Mower kit is on sale now for $269.99 (MSRP $429.99). It includes two U20 batteries and a 4.5-amp dual-slot charging dock. Each battery also includes a USB-C to USB-A cable so you can charge it separately using your own power brick. And the USB-C port is bi-directional, meaning it can charge the battery or output power from it. There’s also a USB-A port and a three-prong drop-in connector for the mower or charger.

Litheli U20 battery is see with USB-C and  USB-A ports

If you’re mowing more than a quarter-acre and want to avoid a two-hour recharge break, you’ll want all four battery slots filled – good for about an hour or half an acre of weekly mowing on light-to-medium grass. The four-battery version ($309.99, MSRP $671.99) adds roughly $50 to the price.

Editor’s note: Like other tool brands, Litheli (founded in China in 2017) is building a full ecosystem of products powered by the same U20 battery. That means you’ll be able to swap batteries between your mower, chainsaw, drill, paint sprayer, car fridge, or leaf blower. Be aware that some U20 batteries have lower capacity, and while their 16.6-ounce weight may be too much for some jobs, their USB-C and USB-A outputs make them handy for recharging devices like laptops, phones, or drones.

The Bottom Line

Litheli EASYSURGE 18.5-inch lawn mower is shown from the front three-quarter angle view with John Siemiarowski .

The super-intuitive controls and strong performance of the Litheli EASYSURGE 18.5" Lawn Mower (on sale for $269.99, MSRP $429.99) mowed me over. Sure, you can buy an electric mower for less, but its advantages put this baby in a class by itself. It’ll lighten your workload and may even make you the envy of your DIY lawn-care neighbors.

Check price on Litheli button

Check price on Amazon button

[Image credit: Jonathan Takiff/Techlicious]

]]>
0 home outdoor-living top-picks
7869 <![CDATA[Dexcom Stelo: A Simple Way to Monitor Glucose – No Prescription Needed]]> dexcom-stelo-review 2025-05-05T22:26:17Z 2025-08-28T16:42:19Z health/dexcom-stelo-on-arm-100px.jpg health/dexcom-stelo-on-arm-1200px.jpg Suzanne Kantra suzanne@techlicious.com 0 1756420937 open I wore Dexcom’s over-the-counter blood glucose monitor for a month. Here’s how it compares to Lingo and what it’s like to use in real life.

]]>
Dexcom Stelo OTC Continuous Glucose Monitor 4 In March 2024, the FDA approved the first over-the-counter continuous glucose monitors (CGMs), marking a quiet but significant shift in how we can track and understand our health. Devices like Dexcom’s Stelo and Abbott’s Lingo are no longer just for people managing diabetes with a prescription – they’re now available to anyone who wants insight into how blood sugar affects energy, mood, sleep, and long-term health.

After reviewing Lingo earlier this year, I’ve now spent a month with Dexcom’s Stelo, the only other FDA-cleared over-the-counter CGM currently on the market. Both deliver on their core promise: real-time glucose tracking without a doctor’s visit. But they take different approaches – and depending on what you’re looking for, that matters.

What Makes Stelo – and OTC CGMs – Different

Traditional prescription CGMs like the Dexcom G7 are designed for people with diabetes, offering tight integration with insulin pumps, customizable alerts, and clinician support. Over-the-counter CGMs like Stelo are stripped down to the essentials: they’re meant for people who aren’t taking insulin but want to monitor glucose for broader wellness reasons – such as improving energy, managing weight, or spotting hidden food sensitivities.

The Stelo biosensor looks like a medical patch – gray plastic, 25mm by 28mm, with a large adhesive ring that holds it in place for up to 15 days. It’s applied to the back of your upper arm, where it continuously measures glucose levels just beneath the skin. You pair the sensor with the Stelo app, and from there, you get a real-time view of your levels, alerts when spikes happen, and a record of your recent readings.

 + Pros  – Cons
  • Discreet, lightweight sensor
  • Apple Health integration
  • Available for Android and iOS
  • Medical-looking design
  • Basic app with limited insights
  • No lifestyle “challenges” or coaching
Techlicious Editor's Choice award logo "A simple monitor that provides just the data you need"

A Month with Stelo: The Experience

Dexcom sent me a month’s worth of sensors, and I used them in two sessions – first with the original app, then with the newly updated version. The latest update brings one long-overdue feature: historical data. Previously, you lost access to your glucose data once the sensor expired. Now, you can go back and review trends across the full time you’ve been wearing sensors. That’s a meaningful upgrade, especially if you’re trying to understand long-term patterns.

The app itself still feels pretty basic. It does a solid job of showing your glucose graph and alerting you to spikes. For instance, it was immediately obvious that my morning dirty chai latte had a noticeable impact on my levels. You can log events like meals, exercise, or emotional stress, but you have to switch over to a separate screen to see those notes. It’s a small thing, but the lack of integration between the graph and your log makes it harder to connect cause and effect in real time.

Screenshots of Stelo app. On the left you see the glucose chart and an alert for a glucose spike. On the right you see a trend alert about morning spikes.

That said, the app does nudge you toward reflection. Like Lingo, Stelo highlights recurring spike patterns and suggests possible triggers. You also get summary reports showing how often you were in your target range, along with educational content on why levels rise and fall. If you’re simply looking to keep tabs on your glucose and get prompted when something’s off, Stelo’s experience is likely more than enough.

How It Compares to Lingo

Coming from Lingo, I immediately noticed the difference in tone and functionality. Lingo offers a more engaging, lifestyle-oriented experience. You get features like the Lingo Count – a proprietary score to help visualize how well you’re managing fluctuations – and optional “Challenges” that prompt you to experiment with different food, exercise, and sleep habits.

Stelo is more clinical in presentation. It’s not trying to coach you so much as inform you. That may be a plus or minus, depending on how self-directed you are. On the other hand, Stelo pulls in data from Apple Health, so you can view sleep, activity, and steps alongside your manually entered meals. Lingo doesn’t do that yet.

Another important difference: compatibility. Lingo only works with iPhones. Stelo works with both iPhones and Android phones, which makes it the more accessible option for people who don’t live inside the Apple ecosystem.

As for accuracy, I noticed that my glucose readings were consistently a bit lower with Stelo than with Lingo, though both tracked the same general trends. I can’t say definitively which one was more accurate, but the pattern consistency gave me confidence in the overall insights.

Read more: Glucose Monitoring Made Easy: My Take on Abbott’s Lingo

Design and Wearability

The Stelo's design is distinctly medical – a small gray plastic puck surrounded by a small ring of visible adhesive. It lacks the white polished consumer look of the Lingo, and it's not as obvious when wearing short sleeves.

Abbott Labs Lingo on the left and Dexcom Stelo on the right

Both Stelo and Lingo use medical-grade adhesive. I liked that Stelo includes an optional extra adhesive ring – it’s not exactly stylish, but it helps keep the sensor in place, especially during workouts. Still, just like with Lingo, I found that the sensor occasionally caught on clothing. You can buy an overpatch for a sleeker hold, like the Skin Grip ($25 for a box of 20), which come in a variety of colors and patterns. It'd highly recommend them if you're planning on going to the beach or doing yard work.

The Bottom Line

Dexcom's Stelo ($99 for two two-week sensors) is a solid, no-frills entry point into the world of glucose monitoring. It’s the only option for Android phone users and is ideal for anyone who wants alerts, basic trend data, and minimal fuss. If you use an iPhone and are looking for richer guidance or motivation to build healthier habits, the Abbott Labs Lingo ($49 for one two-week sensor) still offers a more engaging experience.

[Image credit: Suzanne Kantra/Techlicious]

]]>
0 home health-fitness
7862 <![CDATA[Elehear Beyond Review: A Solid Value for Bluetooth OTC Hearing Aids]]> elehear-beyond-otc-hearing-aids-review 2025-04-29T17:29:01Z 2025-04-30T13:28:02Z health/elehear-beyond-worn-closeup-100px.jpg health/elehear-beyond-worn-closeup-1200px.jpg Stewart Wolpin sw@stewartwolpin.com 1 open For weeks, we tested the Beyond OTC hearing aids for sound quality, Bluetooth features, comfort, and value to help you decide if they're right for you. ]]> Elehear Beyond OTC Hearing Aids 4 Getting quality audio for both conversation and wireless music listening from the same set of OTC hearing aids means compromise. Good conversation amplification means you’ll need perforated or slotted “open” ear tips that enable an equal mix of ambient and amplified sound to produce a natural-sounding conversation experience, but less than adequate (to put it mildly) music listening audio quality.

More solid “closed” canal-sealing ear tips isolate and improve hands-free phone calls and music listening, but result in less amplified, less natural-sounding conversation, and your own voice sounds more muted and detached during conversation.

Elehear’s Beyond over-the-ear receiver-in-canal (RIC) OTC hearing aids present a relatively affordable compromise between the good conversation and good Bluetooth music poles. You’ll get excellent, natural-sounding ambient amplified conversation and surprisingly full, loud wireless conversation and music with the included “open” ear domes. However, you’ll lose any music definition once you find yourself in an even semi-noisy environment such as a crowded city street, conversation-filled rooms, or loudly humming mass transit, regardless of whether you choose “open” or “closed” ear domes.

Elehear Beyond with their case

 + Pros  – Cons
  • Good combo hearing aid/Bluetooth music audio quality
  • Open and closed ear tips
  • Good battery life
  • Case supplies four extra full charges
  • Over-the-ear “receiver in ear” (RIC) style
  • Expensive
  • Huge carry/charging case
Techlicious Editor's Choice award logo "Excellent hearing amplification and solid call quality"

Setup

Elehear Beyond are standard over-the-ear hearing aids with a teardrop battery/control module that sits behind the ear with a slim cable that fits over your ear and connects to an ear tip/ear dome that sits just inside your ear’s canal – hence this style of hearing aid’s “rest in canal,” or RIC, moniker.

Setting up the Beyond is stupid simple. Strip the plastic off the hearing pieces’ battery contacts to fully charge them in the case; a full charge takes just 2.5 hours, far shorter than the usual 4-hour charging time for a lot of OTC hearing aids. Download the Elehear app. Choose the Beyond on the main splash screen. Open the case with the buds inside and open your smartphone’s Bluetooth settings to pair the Beyond. Easy peasy.

Each time you freshly insert the Beyond after charging, ear pieces need a few seconds to re-pair with the app and your phone, and app controls are only available when the Bluetooth connection is established.

The Elehear include a selection of different-sized ear tips with the Beyond including small, medium, and large (SML) perforated “open” ear domes, SML solid “closed” ear domes, and a pair of cone-like “tulip” tips.

Elehear Beyond eartips: from the left are the Tulip Dome, Open Dome, and Closed Dome.

Also included is a pack of eight wax cap tip replacements, a tip cleaning brush/pick tool, and a “multi-function tool pen,” which lets you measure your ear length to determine if the default Beyond RIC connecting cable is the right length. Shorter or longer cables, if necessary, can be ordered from the company.

Elehear Beyond cable measuring tool

Battery life

Longer battery life per charge is the one big advantage of the Beyond versus bud-style Bluetooth-enabled OTC hearing aids, such as the HP Hearing Pro ($499) and the Apple AirPods Pro 2 ($249). With Bluetooth on and a mix of hearing assistance, hands-free calls, and music listening, I got 12-13 hours of battery life from the Beyond – a bit shy of true “all-day” wear usage. However, just 15 minutes of charging – while you shower, nap, take a walk, whatever – supplies 6 hours of additional juice to complete the day.

Read more: AirPods Pro 2 as Hearing Aids Review: Revolutionary, but Flawed

When I disconnected Beyond’s Bluetooth in my phone’s settings to use the Beyond merely as hearing aids, I got the rated “all-day” 20 hours of battery life on a single charge. It’s simple to switch the Beyond’s Bluetooth connection on or off in your phone’s Bluetooth settings to get the longest full-function battery life. You’ll just have to wait for the Bluetooth connection to re-establish itself for music and calls or to use the app.

As noted, the Beyond hearing aids take 2.5 hours to charge fully, and the charging case supplies a generous four full additional battery charges. By comparison, the similarly bulky case for the nearly twice as pricey Sennheiser All-Day Clear ($799) isn’t equipped with a battery for recharging at all.

Read more: Review: Sennheiser All-Day Clear - High-Quality Sound with a Catch

The Beyond charging case and each hearing piece have three battery charging level white LEDs, which means you’ll have to flip open the case to gauge the charging level of each earpiece.

Comfort and appearance

As noted, the Beyond are standard over-the-ear RIC hearing aids, which means they’ll be fairly invisible as you face someone head-on or even three-quarters, such as in a group conversation. However, the behind-the-ear modules are clearly visible to anyone behind you if you have short hair, like mine.

The Elehear Beyond shown worn with glasses

At 4.8 grams (0.17 oz), each hearing piece feels heavier than other RIC hearing aids I’ve tested. As a result, after several hours of wear, the earpiece cords felt as if they were cutting into where my ear meets my head, exacerbated by my glasses’ temples. I often had to lift my glasses’ temples to rest above my ears to relieve the pressure. I didn’t get this ear cutting discomfort from any other RIC hearing aids I’ve tried.

Since they feel heavier, Beyond seem to rattle or even clank against my glasses’ temples when I move my head, such as while jogging/running or just emphatically shaking my head “no.” And you’ll hear the earpiece modules rub against pillows and cushions you rest your head on.

By default, the Beyond come with the cone-shaped, one-size-fits-all “tulip” tips attached. They fit fine, but to me, they tickled my ear a bit. The round “open” and “closed” tips felt more natural and all-day comfortable.

Beyond’s other big drawback is the bulky carrying case, which measures a not-exactly-pocketable 4.09 x 2.34 x 1.33 inches and weighs a relatively hefty 4.23 ounces.

Bud and app controls

Each of Beyond’s behind-the-ear modules is equipped with a handy volume up-down/power on-off toggle; the volume toggle conveniently controls the loudness level of each individual hearing piece in case your hearing loss varies in each ear. With no other control buttons or touch controls, however, you’ll need to haul out your phone to answer/end hands-free phone calls or control Bluetooth music playback.

Elehear’s smartphone app includes a surprising plethora of audio shaping options and control settings. To shape their sound for your particular hearing issues, there are 19 levels of volume for left/right, separately or synced; “Brighter” or “Deeper” sliders from +/- 14 for left/right ear pieces separately or synced; automatic speech enhancement that, toggled off, lets you set Noise Control in nine levels including Off, Low, Mid, or High; and, Speech Focus, directional amplification for either 90 degrees in front of you or surrounding 360 degrees, which mainly adds amplified sounds around and behind you without diminishing the volume ahead of you.

Two screenshots of the Elehear app: on the left, you see the main audio adjustment controls, and on the right, you see the tuning control for volume and tone

You also get 12 separate Tinnitus settings in the app – soundscapes including weather, nature, and transport noises, as well as white, pink, brown, and blue noises. I’ve had constant and severe tinnitus for decades (essentially pretty loud pink noise, which sounds like never-ending steam escaping), and these kinds of masking or distracting soundscape solutions have never worked for me, but your experience may differ. These soundscapes would work most effectively to assist sleep, but I don’t recommend wearing the Beyond to bed – lying on the side of your head will uncomfortably and painfully smush the hearing pieces on and into your ear and head.

Sound quality

Once you get the Brighter/Deeper balance right, and considering the Beyond are not self-fitting so don’t automatically adjust to your specific hearing loss issues, amplified conversation and TV sound is above average for pure amplification hearing aids, as long as you stick to the “tulip” or “open” ear dome tips.

“Open” ear tips keep the mix of ambient and amplified sound more natural. In relatively quiet environments such as your home or office, Bluetooth music and hands-free phone conversations sound slightly fuller with more volume than other Bluetooth RIC hearing aids I’ve tried. Helping to improve music playback and hands-free call quality while wearing “open” ear domes is an automatic muting of the Beyond microphones to reduce the interference of amplified ambient noise.

But make no mistake, all Bluetooth-enabled RIC OTC hearing aids suck when it comes to music playback, even the Beyond, especially in noisier environments, outdoors, or wind where most volume, fidelity subtleties, and higher frequencies are masked or simply washed away.

Wearing the “closed” domes will add more ear canal sealing to get a bit more isolated Bluetooth music and conversation listening at lower volume levels. However, this solution is vastly inferior to standard Bluetooth in-ear buds or headphones. Plus, ambient conversation sounds are sharpened and sound a little less natural. My own voice sounded only a bit more distant, rather than nearly muted, although not as much as the more music-oriented HP Hearing Pro or Apple AirPods Pro 2.

All in all, I prefer the Beyond’s “open” buds for all-around use, especially since I use them primarily for everyday conversation and TV listening rather than wireless music listening or hands-free calls. When you want to listen to music, you’ll want to swap the Beyond’s out for “real” Bluetooth buds. Technically, you could wear headphones over the Beyond, but, again, the earpieces would get potentially painfully squashed against your head and ears.

As with all non-self-fitting OTC hearing aids, you get several presets to compensate for specific ambient environments. But, as usual, I could barely discern a difference between the “General,” “Restaurant,” and “TV” presets. All produced a flatter, wider sound field than the default, which didn’t really enhance any of these ambient situations. The one preset exception was “Music,” which presented a noticeably wider soundstage and slightly more discernible frequency separation. For everyday use, Beyond’s “Default” setting sounded more focused and directional in front of me than any of the presets.

The bottom line

The Elehear Beyond shown worn from the side

The Elehear Beyond are not self-fitting OTC hearing aids – there’s no app hearing test that tunes the Beyond to your specific hearing loss. Instead of personalized, tailored hearing improvement, the Elehear simply amplify everything, even with EQ and other audio customization options in the app. As such, the Beyond’s $399 (often discounted) price tag seems like a bargain compared to higher-priced self-fitting Bluetooth-enabled RIC hearing aids such as the Sennheiser All-Day Clear (now $799.95, but can be custom-tuned by an audiologist), the Bose-Lexie B2 Plus ($999), and the new non-self-fitting Audien Ion Pro ($689).

For what they do – excellent but non-customized hearing amplification, solid hands-free call quality, above average RIC Bluetooth music delivery, and reasonable battery life – the Elehear Beyond represent a great value compared to other current Bluetooth-enabled RIC non-self-fitting hearing aids. You’ll just have to either swap them out for “real” Bluetooth buds (or wear a pair of full-cup headphones over them) for acceptable music listening.

You can buy the Elehear Beyond in silver or “champagne” gold on Elehear.com for $399, and you’ll get a 45-day risk-free trial – you don’t even pay for return shipping.

Image credit: Stewart Wolpin/Techlicious, Elehear]

]]>
0 home health-fitness otc-hearing-aids
7847 <![CDATA[Samsung HW-QS700F Review: Theater Sound Without the Bulk]]> samsung-hw-qs700f-soundbar-review 2025-04-15T15:00:57Z 2025-04-16T16:49:58Z av/samsung-qs700f-side-100px.jpg av/samsung-qs700f-side-1200px.jpg Suzanne Kantra suzanne@techlicious.com 1 open I spent a week testing Samsung’s HW-QS700F 3.1.2 soundbar. Here’s how it sounds, what works best, and where it falls short.

]]>
Samsung HW-QS700F 3.1.2 Soundbar 4 If you’re looking to upgrade your TV’s sound, Samsung offers a wide range of soundbars – from ultra-slim models that nearly disappear under your screen to full-blown home theater systems that take up serious space. The Samsung HW-QS700F falls right in the middle. It’s part of Samsung’s premium Q-Series, like the top-of-the-line HW-Q990F I recently reviewed, but it comes in at a much more affordable $699.99 (versus the Q990F’s $1,999.99). At the same time, it’s priced similarly to the HW-S800D (on sale for $629.99, $899.99 MSRP), Samsung’s sleekest soundbar that’s designed to be heard, not seen.

Think of the QS700F as the sweet spot between these two. It offers richer, more immersive sound than the ultra-slim S800D, while skipping the bulk – and much of the cost – of the flagship Q990F. You still get premium features like wireless Dolby Atmos, Q-Symphony to sync with your Samsung TV’s speakers, and a clever design that lets you place it flat on your console or rotate it to sit flush against the wall without compromising sound quality.

I spent more than a week testing the QS700F, watching movies, listening to music, and comparing it directly with Samsung’s other top soundbars. If you want cinematic sound without going overboard on price or size, the QS700F may hit that just-right middle ground.

 + Pros  – Cons
  • Compact design with flexible orientation (flat or wall-mounted)
  • Clear, immersive sound with strong spatial effects
  • Easy setup
  • Voice Enhance Mode amplifies background sounds in addition to voices
  • Bass lacks punch without bass boost enabled
Techlicious Editor's Choice award logo "An affordable soundbar with premium features and a flexible, décor-friendly design"

Design and setup

Physically, the QS700F strikes a balance between sleek form and practical function. At 2 inches high, 45.67 inches wide, and 4.72 inches deep, it isn’t as ultra-slim as Samsung’s S800D (which stands just 1.4 inches tall and has a depth of 1.5 inches), but the QS700F has a unique trick up its sleeve: a built-in gyro sensor. That lets it automatically reconfigure its speaker orientation whether you lay it flat on a media console or wall-mount it vertically. I tested it sitting flat under a 65-inch Samsung Neo QLED 8K QN900D, and there was plenty of clearance – unlike with the larger Q990F (3 inches high), which just skimmed the bottom of the screen.

The setup was straightforward. You can connect via the included HDMI cable using the soundbar’s single HDMI eARC port, or go wireless over WiFi or Bluetooth. I primarily ran my evaluations using HDMI, but I also tested the wireless setup and had no trouble pairing the soundbar to the TV. There were no sync issues or audio lag, even when streaming Dolby Atmos content. The wireless subwoofer, which is compact at just under 10 inches in all dimensions, paired instantly and stayed connected.

While you can use the soundbar with the included remote alone, I recommend downloading Samsung’s SmartThings app to unlock its more advanced features. In particular, I recommend turning on bass boost and Adaptive Sound, and if you have a compatible Samsung TV, enable SpaceFit Sound Pro, which calibrates the soundbar for your room.

Audio performance

As part of my testing, I used the QS700F for everything from everyday streaming to a few go-to movie scenes and music tracks that help me evaluate spatial audio, dialog clarity, and bass performance. Overall, I was impressed with how much sonic depth the QS700F was able to produce from such a modest footprint.

With its 3.1.2-channel configuration (three front-firing speakers, two up-firing height speakers, and one subwoofer), the QS700F delivers a convincing Dolby Atmos experience. In the church scene from The Old Guard, where a low-flying plane approaches a nearby airport runway, I could clearly hear the jet’s engine roar shift from behind me to directly overhead. That kind of vertical imaging adds a lot to action scenes and sets the QS700F apart from the ultra-slim S800D, which delivers impressively immersive sound for its size but doesn’t produce quite as much resonance or low-end depth.

Read more: Samsung S800D Soundbar Review: Big Sound, Ultra Slim Profile

Dialogue clarity is another area where the QS700F performs well – most of the time. Voice Enhance Mode ensures that voices remain front and center, but it can be a bit heavy-handed. In the bustling market scene from The Old Guard, dialogue came through clearly, but incidental sounds – like a newspaper being dragged across a table – were also amplified, becoming distractingly sharp. It’s a noticeable step down from the flagship Q990F’s Active Voice Amplifier Pro, which isolates speech more intelligently without over-boosting other midrange sounds. The Q990F’s more refined dialog handling requires a 2024 Samsung TV to unlock, so it may not be a deciding factor unless you have – or plan to buy – a compatible model.

Bass performance on the QS700F was satisfying, though you’ll want to turn on Bass Boost to get the most out of the subwoofer. Without it, the low end lacks the chest-pounding thump you want from movie explosions or rumbling aircraft engines. With Bass Boost enabled, the subwoofer produced deep, clean, low-end energy that matched the rest of the system well.

The QS700F's compact subwoofer is the same size as the flagship Q990F, but uses a single 6.5-inch driver and 8-inch passive radiator versus the Q990F's dual 8-inch drivers. And, only the Q990F includes Dynamic Bass Control, a feature that prevents distortion at low frequencies. In that same Old Guard church scene, the Q990F revealed more of the textured rumble in the engine roar – details that were lost on the QS700F. 

For music, the QS700F was a solid performer. I kept Adaptive Sound on for casual listening, which handled everything from streaming playlists to TV background music with ease. But when I sat down for more critical listening, I preferred switching to Dolby Virtual:X. It delivered greater separation between instruments and broadened the stereo image. Again, bass boost was essential to bring out the thumping beat on tracks like Muse’s “Madness” or Panic! at the Disco’s cover of “Bohemian Rhapsody.”

Features and extras

The HW-QS700F comes with many of the core features found in Samsung’s higher-end soundbars. There’s support for wireless Dolby Atmos (from compatible 2022–2025 Samsung TVs), Q-Symphony to combine the soundbar with your Samsung TV’s speakers, and game-friendly enhancements like Game Mode Pro for precisely-located 3D sounds. There’s also support for streaming audio via AirPlay 2, Spotify Connect, and Roon – I recommend using a WiFi connection (and its higher data rates) rather than Bluetooth for the best quality.

In terms of connectivity, the HW-QS700F includes just one HDMI eARC port and an optical port. A 3-foot HDMI 2.1 cable comes in the box.

The bottom line

The Samsung HW-QS700F soundbar (on sale for $629.99, MSRP $699.99) is ideal for people who want a home theater experience without overwhelming their living room. It delivers noticeably fuller, more immersive sound than the ultra-slim S800D (on sale for $629.99, MSRP $899.99) while still offering a flexible, décor-friendly design that fits into a variety of spaces. If you’re looking for a mid-range soundbar with premium features, I’d recommend putting the QS700F on your shortlist.

[Image credit: Techlicious]

]]>
0 home-entertainment home-audio home-audio top-picks
7846 <![CDATA[JLab Hear Review: What You Can Expect From $100 OTC Hearing Aids]]> jlab-hear-otc-hearing-aids-review 2025-04-14T16:31:49Z 2025-05-22T18:50:50Z health/jlab-hear-with-case-in-hand-100px.jpg av/jlab-hear-with-case-in-hand-1200px.jpg Stewart Wolpin sw@stewartwolpin.com 1 open They look like earbuds, stream your music, and boost sound – but can $100 hearing aids help you hear better? After weeks of testing, here's what I found out.

]]>
JLab Hear OTC Hearing Aids 3 You are reading correctly. JLab’s Hear OTC hearing aid-slash-Bluetooth buds are just $100 – $99.99, to be precise.

And they don’t suck. Well, they kinda do. They don’t exactly provide natural-sounding ambient sound boost like more expensive hearing aids – they certainly amplify sounds adequately, but they sound mostly thin, sharp, and hollow. But, after all, what do you expect from hearing aids that only cost a hundred bucks?

The JLab Hear are a really cheap introduction to non-prescriptive hearing aids that could help you determine if over-the-counter hearing aids work for you. If you decide OTC hearing aids will work for you – just not the JLab Hear – and you opt for a better, real-world-priced solution, just keep the Hear around for emergencies.

Hear does include more features than I expected. You get two separate sets of silicone ear tips: small, medium, and large “closed” tips which help isolate sound for music listening and hands-free calls, and S-M-L perforated “open” tips that mix ambient with amplified sound designed to create more naturally sounding boosted conversation. There’s also a variety of both app and on-bud touch audio and play/pause controls for not only music and phone calls but volume as well.

JLab Hear are shown in their case in a hand for scale

 + Pros  – Cons
  • Inexpensive
  • Good handsfree phone call audio quality
  • Open and closed silicone ear tips included
  • Ample amplification
  • UBS-C charging cord on case
  • Small case
  • Poor music, amplified sound quality
  • Not self-fitting
  • Not “all day” battery life
  • No noise cancelling

Setup

Hear are easy to set up, especially since there’s a handy USB-C charging cord connected right to the bottom of the small case. Once fully charged, there are video instructions in the JLab Hearing app (not to be confused with JLab’s regular Bluetooth bud app) to help you pair the Hear, guide you about the ear tips, and demo the variety of on-bud tap volume and play controls.

JLab Hear case is shown from the back with the USB-C cable sticking out. The buds are shown next to the case

Along with the different-size ear tips, you also get circular silicone “cush fins” that wrap around the buds to help stabilize them in your ears, but you’ll have to remove them so the buds fit back in the case for recharging. For an extra $10 you can buy a set of closed S-M-L foam ear tips.

Battery Life

One of the Hear’s more interesting bonuses or drawbacks, depending on their usage, is their battery life. With Bluetooth on and a mix of music and hearing aid use, I got the rated 7-10 hours of power from a single charge, far more than most music-only Bluetooth buds. While a healthy battery life for Bluetooth buds, 10 hours falls far short of the usually necessary “all-day” hearing aid powering.

You can switch off the Hear’s Bluetooth connection and just use the buds as hearing aids to stretch the battery for another hour or so. You just need to return the buds to the case to switch back and forth between Bluetooth on and off.

It takes two hours to fully recharge the case and two hours to recharge the buds either via USB-C or just in the disconnected case. The case provides a full extra charge.

Design and comfort

The Hear buds look just like most other round Bluetooth ear buds rather than the Apple AirPod-like sticks.

JLab Hear shown in ear

You can buy the Hear in one of three colors: graphite black, a golden “beige,” and an off-white “cloud.” You get a 30-day return window and a surprisingly lengthy two-year warranty.

While the Hear buds don’t “disappear” from feeling them in your ears as do more expensive “invisible” buds such as the standard hearing-aid-only Eargos and the Sony CRE-C20, the Hear are light and remained perfectly comfortable in my ears for a continuous 10 hours of wear. Even without the cush fins, the buds felt secure in my ears, reliably stayed in place, and rarely needed to be adjusted.

Read more: Sony's New CRE-C20 Are the Best OTC Hearing Aids I've Tested

However, the Hear on-bud touch controls are sensitive; when I did need to adjust the buds’ fit, I often accidentally either paused or started the music playing.

On-bud and in-app controls

In the app, you can adjust a number of audio settings as long as your Bluetooth is connected, a lot more adjustment options than I expected for $100 buds.

You can set the buds to four different ambient environments: Loud, Restaurant, Conversation, Quiet. Each can be toggled on or off, which limits the number of taps you’d need to make to toggle through the environments via the buds’ touch controls.

The Quiet and Restaurant environments heightened the upper treble frequencies, Restaurant seemed to highlight the midrange, while the Loud Environment slightly heightened more of the lower frequencies, but all these sonic variations are subtle. I advise picking one setting that sounds good at home for “normal” environments and just turn the others off.

Adjusting the app’s 10-band equalizer didn’t seem to impact sound at all. A sliding Remove Background Noise control helps shape ambient sound, but I found setting it to the extreme “less noise” produced warbly sound as the buds constantly readjusted their amplification setting and often completely muted themselves for a few seconds before re-adjusting.

Hear allows you to adjust left and right volume separately or synchronized. There are only four levels of loudness, but I found each level louder also slightly increased fuzzy distortion on higher frequency sounds.

All in all, you have a lot of ways to adjust the sound to match your hearing loss, far more than you’d need if the buds simply included a hearing test to automatically set the appropriate frequency levels to your particular hearing needs like self-fitting aids.

Sound Quality

Hear provides generous audio settings and control options, but not so much sound quality.

Amplified audio quality for both music and especially conversation and TV sound leans toward the hollow, fuzzy, and shrill, especially at higher volumes. Hear does boost volume reasonably well – depending on which ear tips you wear.

With the “open” tips, you’ll get more natural-sounding amplified conversation, not just as natural as more expensive hearing aids. But Bluetooth music with the “open” tips barely qualifies as background sound and is drowned out almost entirely in noisier situations such as on a crowded street or on mass transit.

With the “closed” tips, Bluetooth music listening is more sound-isolating but still barely adequate – your music listening isn’t aided like it is on the self-fitting Apple AirPods Pro 2. When you pause music, Hear takes around five seconds for their transparency mode to activate and start amplifying ambient sound, but your own voice is muted during conversation. Hands-free phone calls and brief conversation interludes when you pause the music, however, both sound relatively clear and clean.

Read more: AirPods Pro 2 as Hearing Aids Review: Revolutionary, but Flawed

The bottom line

JLabs Hear are show next to their open case.

For $100, the JLab Hear with the open ear tips make a fine introductory and comfortable hearing aid for everyday use around the house or office, superior in both sound quality and feature adjustments to most cheap late-night-TV advertised “hearing aids” but hardly comparable to pricier self-fitting buds. Those with moderate or more severe hearing loss will need to boost the Hear volume, which can cause distortion.

With closed eartips, Hear are fine for running errands with musical accompaniment and conducting intermittent chats with vendors or cashiers when the music is paused.

But if you’ve got moderate or more specific hearing loss and you also want a decent wireless music listening experience, I’d opt for more expensive self-fitting Bluetooth hearing aids such as the Apple AirPods Pro 2 ($249, usually on sale for $190) or the HP Hearing Pro ($499).

[Image credit: Stewart Wolpin/Techlicious]

]]>
0 home health-fitness otc-hearing-aids
7839 <![CDATA[Is the iPhone 16e Good Enough for a Costa Rica Vacation?]]> touring-costa-rica-with-an-iphone-16e 2025-04-04T20:45:51Z 2025-04-18T19:06:52Z phones/iphone-16e-airplane-window-100px.jpg phones/iphone-16e-airplane-window-1200px.jpg Jonathan Takiff scribejt@aol.com 1 open Apple’s iPhone 16e delivers impressive battery life, clear video, and smart AI tools—but its single-lens camera reveals clear trade-offs for serious travelers.

]]>
Apple iPhone 16e Not rated A review unit of Apple’s new, most affordable ($599) 16 series smartphone, the iPhone 16e, landed in my hands literally the day before I was to depart for the wilds of Costa Rica. So, of course, I had to take it along – to test out the phone’s most touted features and also see if I could live with its cost-shaving compromises, most significantly in the photo-capturing department. Yeah, that’s a really big “if” when you’re aiming to spot and score images of exotic creatures and vegetation in one of the most biodiverse lands on Earth.

Picture taken out the window of the plane on the approach to our destintion in Costa Rica

Taking photos of objects behind glass

On our first full day in Costa Rica, we started slow with visits to San Jose's Gold and Jade Museums (offering historic overviews of the nation’s rich natural resources, cultural evolution, and decorative skills) and also the grand National Theater, an 1890s reflection of the country’s lofty artistic ambitions, built largely with tariffs placed on coffee exports.

A bit of panic set in when I first started shooting objets d’art (and their printed descriptions) in the Gold Museum, as I couldn’t get the 16e’s single-lens camera to focus as readily as I’m used to with the three-lens iPhone 12 Pro. The 16e lacks the separate wide-angle lens (included on the iPhone 16 and 16 Pro) that also enables you to move in extra tight for a “Macro” view. And this phone’s auto-focusing tools do not include a LIDAR sensor (likewise found on the pricier iPhones) that’s extra helpful in low-light situations and when shooting through glass display cases.

But the fix here wasn’t that hard. I just had to step back a foot or two more from my subject matter, and all things came into focus – from lovely golden sculptural miniatures to ceramic pots and jugs integrating whimsical (or spiritual) animal imagery to the glorious Neo-Baroque interior of the concert hall.

Picture taken with an iPhone 16e of a gold frog

2 for 1 Special?

The iPhone 16e’s single camera lens is billed as a “2-in-1 48MP Fusion” hybrid that captures both 1X standard range and 2X telephoto images – the latter by narrowing in on (cropping) just the inner 12 megapixels of its 48 MP imager. Of course, you can then continue to zoom in digitally for tighter shots – to a 10x zoom that makes do with a mere 600-800 KB of pixel data but still looks reasonably decent on the 16e’s 6.1-inch Super Retina display screen, thanks to smart exposure and image processing.

I was most pleased with the close-range shots I nabbed of the white-faced (aka Capuchin) monkeys who came to visit and feast on fruit one afternoon at the charming Laguna Vista Villas eco-resort in Osa.

iPhone 16e shot of a monkey taken from close up.

When trying to nab far-away birds and beasts, though, I gotta confess – I sometimes suffered iPhone 16 Pro envy, craving that primo-phone’s additional 5X optical telephoto lens with sharper digital zoom potential up to 25X power. Yes, I could sight and record those distant creatures with my lesser rig. But I couldn’t capture the expression in their eyes, count the feathers or fur follicles on their necks – the small details that help bring these creatures to life, details that shout out “you were there.” Honestly, the Bare-throated Tiger Heron was a lot more interesting to observe in person.

iPhone 16e long distance shot of a heron

Taking videos

My simian acquaintances also proved excellent video stars, as I shifted gears, tracking their bold moves onto the railing of the Laguna Vista dining room in high-def video. The iPhone 16e captures action at razor-sharp resolutions up to 4K/60 frames per second, further enhancing the moving images with Dolby Vision dynamic range expansion, though for file storage and sharing sake purposes, I kept the resolution/frame capture here at 1080p/30 fps.

Also please admire – in excellent iPhone 16e video detail – the strength and dedication of Costa Rica’s ubiquitous leaf-cutter ants (Zompopos), marching through the woods at our most upscale (touristy) resort destination, the Botanika Osa Peninsula in Puerto Jimenez. Almost disappearing under their loads, these ant critters lift and carry home up to ten times their body weight in flowers and leaves – all to cultivate a bread-like fungus that they then consume.

Zooming in and going wide

Back in still-shootin’ land, I found even 7.5X digital zoom shots of creatures stalking 100 feet away could still look pretty good on the iPhone 16e’s “3x5-ish” (snapshot size) screen, so long as there was enough light for the camera lens to click at 1/60th of a second (or faster). One hundred feet was as close as I needed (or wanted) to get to an exotic coatimundi, a curious cross of raccoon and dog we found foraging in Corcovado National Park.

Photo of a coatimundi taken with 7.5x optical zoom on iPhonbe 16e

Also, a pleasant surprise – how well this iPhone’s camera auto-adjusted its focus when held up to the viewfinder of an 80X-power, tripod-mounted “birding” telescope brought along by our very knowledgeable Corcovado trail guide, Luis Diego.

Photo of Monkey taken by iPhone 16e

And note the clean stitching/smoothing of the wide view PANO (panoramic) shot I captured of a Laguna Vista Village sunset. My image came out looking coherent and free of shaking even when my manual panning moves were hesitant or wobbly. The 16e’s onboard optical image stabilization might not be quite the match for the “sensor-shift optical image stabilization” utilized in the iPhone 16 and 16 Pro. But the basic OIS is still pretty darned good.

iPhone 16e panoramic shot of a sunset

Taking photos using the Action Button

While lacking the dedicated Camera Control button found on its iPhone 16 peers, the 16e does let you customize (in Settings) its rim-placed Action button to enable fast, one-thumb camera use. Press once to turn the camera on, and press a second time to snap the shutter. Worked well!

I wish there was a way to program the Action button so it could simultaneously summon up all the other available Action options on a single menu screen. I could have used it for fast switching between the basic camera-shooting function and the AI-powered, cloud-connected Visual Intelligence tool, which quickly recognizes and feeds back information pertaining to a submitted snapshot.

Post-Trip AI Fixes

As with its pricier 16 peers, a more sophisticated new A18 series chip in the iPhone Phone 16e brings home the promises of Apple Intelligence. Yes, the AI package is still in the early development stages, but not without some rewards already.

Ask Siri a question it can’t answer, and you’ll be offered a connection to ChatGPT, which likely can (and did!) respond helpfully. Useful language translation skills are also on board.

Even after I returned home, I could take advantage of the AI-driven “Clean Up” tool to fix flaws in my vacation photos. In theory, you’re supposed to make an eraser-like wiggle on the screen with your finger on an area of the image that you want to disappear. But in practice, this Apple Intelligence is so smart it often makes preemptive suggestions for you – by putting a “glow” on random stuff it spots in the shot that you can then vanquish with a tap.

Check out how smartly the AI Clean Up polished a shot taken at the Doka Coffee Plantation – eliminating the half-a-body poking into it. It’s magical!

A before shot on the left has half a person, the after shot on the right has no person, though a couple of artifacts.

A display that doesn’t hold up to sunlight

While the 16e’s screen resolution is very crisp and colors quite vivid, the maximum brightness of the display – 800 nits/1,200 peak – is not always up to the job when you’re trying to frame shots outdoors in the mid-day sun. The screen literally pales in comparison with the 2,000 nits outdoor rating found on the iPhone 16 and 16 Pro.

Yes, I could see enough in bright sunlight to snap a shot on a nature walk at Xandari, a floral wonderland of a retreat in the hill country above San Jose. But working the phone’s on-screen tint adjustment control to accentuate the bright yellow highlights I admired in a Garden Groton plant or to fine-tune the color (more orangey/less red, please) of a Heliconia “lobster claw” plant was difficult. And reading (sometimes stressful) emails and news updates by the pool (What was dumb me thinking?) was almost impossible on the screen.

Battery life and charging

Moving over from a worn-down iPhone 12 Pro that was regularly running out of juice before dinner, I was thrilled immediately by the extra-long battery runtime on the 16e. Even after an eleven-hour journey from Philadelphia, checking email along the way and watching about five hours of movies and concert videos on American Airlines’ in-flight service, the iPhone 16e’s battery icon was still showing 50 percent available when I arrived with my travel companion at our first stop – the charming Grano de Oro hotel in the capital city of San Jose, Costa Rica.

Another big test of the 16e came a few days later, after hauling (via small plane and rugged all-terrain vehicles) to the rustic Osa Peninsula region. On a nine-mile hike through the lush rainforest and beaches of Corcovado National Park, I really put the phone through its paces, recording 150 still images and videos. And yet, I still had 25 percent battery capacity remaining at the end of the day! In many isolated global locales, that would have been more than enough juice to send out, if need be, an Emergency SOS help request via the backup satellite connection system that Apple has built into the 16e and its kin. But alas, there’s no service in Costa Rica.

The iPhone 16e recharges quickly – to 50% in a half hour and to a full charge in a little over an hour – if you wire it to a high-capacity 20-watt power adapter (sold separately). You can also wirelessly recharge this smartphone s-l-o-w-l-y at 7.5 watts by laying it flat on a Qi wireless charging pad. The 16e isn’t MagSafe capable – no built-in magnets – and doesn’t support the higher-speed MagSafe Qi2 charging of up to 25 watts like its iPhone 16 and 16 Pro siblings.

There is a workaround for that with the iPhone 16e. You stash the phone inside a “designed for MagSafe” case like the ESR Halolock Tough Case or the ZAGG Denali Snap. These protective wraps have a built-in ring of magnets, which then lock on and transfer power at 7.5 watts to the phone from a MagSafe accessory like my 10,000 mAh Anker MagGo.

Read more: How to Get (Most) MagSafe Capabilities on Your iPhone 16e

Bottom Line

For anyone who’s bought into the Apple products ecosystem, swapping out an older iPhone for the 16e is going to give you a lot of satisfaction and offers a great leap forward.

But if you’re aiming to place your exotic nature photos in National Geographic (or frame prints for your walls), you gotta go with a Pro to shoot like a Pro.

[Image credit: Jonathan Takiff/Techlicious]

]]>
0 cameras tablets phones travel
7836 <![CDATA[Samsung HW-Q990F Tested: Stunning Sound, Steep Price]]> samsung-hw-q990f-tested-stunning-sound-steep-price 2025-04-01T15:00:37Z 2025-04-01T19:44:38Z av/samsung-hw-q990f-soundbar-end-100px.jpg av/samsung-hw-q990f-soundbar-end-1200px.jpg Suzanne Kantra suzanne@techlicious.com 1 open We spent over a week testing Samsung’s premium Dolby Atmos soundbar. Find out why the audio experience is impressive – but not perfect for everyone.

]]>
Samsung HW-Q990F Soundbar 4.5 Samsung's HW-Q990F sits at the pinnacle of the company's acclaimed Q-Series soundbars, delivering an unmatched audio experience with true 11.1.4-channel surround sound. Positioned as a premium solution for home cinema enthusiasts, it promises immersive Dolby Atmos and DTS:X audio alongside sophisticated AI-enhanced features.

Before diving into the Q990F specifically, it's worth understanding where it fits in Samsung's soundbar ecosystem. The Q Series represents Samsung's premium soundbars, with the Q990F sitting at the absolute top of the range. These are the only models that offer full Dolby Atmos and DTS support with dedicated height channels and rear speakers.

The Ultra-slim Series, which includes models like the S800D I recently tested, features incredibly thin soundbars designed for minimal visual impact. These 3.1.2 systems come with surprisingly powerful but compact subwoofers and deliver virtual Dolby Atmos rather than true overhead sound.

Read more: Samsung S800D Soundbar Review: Big Sound, Ultra Slim Profile

For those seeking mid-tier options, the S Series provides all-in-one soundbars with built-in woofers instead of separate subwoofers. They offer virtual Dolby Atmos but lack the physical speaker array of the Q Series. At the entry-level, B Series soundbars support DTS Virtual:X but not virtual Dolby Atmos, making them suitable for basic audio enhancement but not immersive spatial audio.

So, as the best of the best in Samsung’s lineup, my expectations were high for the HW-Q990F. After thoroughly testing the soundbar for more than a week, I found it delivers on its ambitious promises – though it’s not for everyone with its $1,999.99 price tag.

 + Pros  – Cons
  • True 11.1.4-channel Dolby Atmos with immersive, theater-quality sound
  • New dual active subwoofer delivers deep, distinct bass
  • Active Voice Amplifier Pro delivers louder, natural dialogue clarity
  • Simple setup with wireless rear speakers and subwoofer
  • Expensive
  • Subwoofer can overwhelm acoustic/classical music
  • Best features require 2024 or later Samsung TVs
  • May be too large for smaller TV setups
Techlicious Editor's Choice award logo "An authentic theater experience with audio so real it genuinely feels like you're there."

Design and setup

The HW-Q990F maintains the sleek, minimalist aesthetics of earlier Q990-Series models. At 48.5 inches wide and just under 3 inches tall, it's built for larger TVs. During testing with the 65-inch Samsung Neo QLED 8K QN900D, the soundbar just barely sat below the screen without blocking my view.

The Samsung HW-Q990F soundbar is shown from one end.

The big upgrade here is the new small but powerful subwoofer. The Q990D used a single 8-inch driver in an 8.6 x 16.2 x 16.1-inch enclosure, producing 200 watts. The Q990F’s subwoofer features dual 8-inch opposing drivers specifically designed to offset vibration in a much smaller enclosure measuring just 9.8 x 9.91 x 9.8 inches, making it easy to tuck away discreetly. Despite the small size, the new subwoofer generates more power (300W) and deep bass frequencies down to 32 Hz.

The Samsung HW-Q990F subwoofer is shown between a hutch and sofa

Setup for the Q990F is straightforward thanks to wireless connectivity for the rear speakers and subwoofer, each requiring only a power outlet. The soundbar connects to your TV through an HDMI 2.1 cable (included in the box), utilizing the HDMI eARC port for control, with two additional HDMI inputs available for direct connections. I had the system set up in just a few minutes.

Samsung's HW-Q990F is shown with its rear channel speakers and subwoofer

Like other Samsung soundbars, you'll need the SmartThings app to access some advanced features that are not found on the remote, though you likely won’t use often. Take my advice: don't skip the SpaceFit automatic calibration. I have an open living room and dining area, and I could clearly hear the difference after calibration.

Hand holding the remote control

Audio performance

Since the Q990F shares many of the same features as the Q990D, I focused my testing on what's new – the dual active subwoofer, the Dynamic Bass Control feature (designed to prevent distortion at low frequencies), and Active Voice Amplifier Pro, which leverages your Samsung TV's neural processor and Q-Symphony technology to deliver louder, more natural-sounding voices.

This soundbar delivers an authentic theater experience with audio so real that it genuinely feels like you're there. For testing, I like to use a scene from "The Old Guard" set in a church near an airport runway. The soundbar reproduced the jet engine roar with incredible texture in the low frequencies – not just a generic chest-vibrating rumble.

Samsung's new Active Voice Amplifier Pro technology is significantly better than the previous version, Active Voice Amplifier. While earlier dialogue enhancement technologies I've tested would amplify all sounds in the vocal range (including distracting noises like paper rustling), this version intelligently isolates actual dialogue.

Testing with a crowded market scene in "The Old Guard," voices remained clear, natural, and easily discernible without sounding artificially separated from the soundtrack. Q-Symphony, which syncs audio with Samsung TV speakers, also improves dialogue clarity, but it's not nearly as effective as Active Voice Amplifier Pro.

Read more: Samsung Music Frame Review: An Innovative Blend of Sound and Style

For music playback, the results were mixed. Vocals were crisp, instruments well-separated, and subtle details faithfully reproduced. Chavela Vargas' rendition of "La Llorona" showcased the soundbar's remarkable ability to capture intimate details, like the vocalist’s breaths, that enhance the authenticity of the recording.

However, I somtimes found myself turning off the subwoofer for music listening. When left on, it could dominate music tracks that weren't bass-forward – especially classical or acoustic genres. Reducing or disabling the subwoofer easily solved this issue, restoring the balance of mids and highs that makes you feel present with the musicians.

If you’re keeping the sub on, the Dynamic Bass Control feature, which prevents distortion at low frequencies, truly shines with bass-heavy content. You'll notice this most during movie explosions or rumbling aircraft engines, but it also works beautifully with bass-forward tracks like Muse's "Madness" or the dramatic finale of Panic! At the Disco's "Bohemian Rhapsody" cover.

The bottom line

Samsung's HW-Q990F is shown in front of a 65-Inch Samsung Neo QLED 8K QN900D

On sale at launch for $1,799.99 (regularly $1,999.99), the Samsung HW-Q990F represents a significant investment, but its exceptional sound quality and feature-rich experience largely justify the premium price tag. For maximum benefit, you'll need a recent Samsung TV with Q-Symphony or, ideally, a 2024 or later model with a neural processor to take advantage of features like Active Voice Amplifier Pro.

There's no doubt this is Samsung's flagship soundbar. It produces rich, immersive sound that makes you feel like you're living in whatever you're watching. The occasional need to dial down the subwoofer for certain musical genres is a minor quibble in an otherwise outstanding package that will dramatically elevate your at-home entertainment.

[Image credit: Techlicious]

]]>
0 home-entertainment home-audio home-audio top-picks
7821 <![CDATA[SoundPEATS PearlClip Pro: Affordable Open-Ear Comfort, Solid Sound]]> soundpeats-pearclip-pro-review 2025-03-17T21:49:28Z 2025-03-17T21:50:29Z phones/soundpeats-pearlclip-pro-case-100px.jpg phones/soundpeats-pearlclip-pro-worn-1200px.jpg Rob Webb rob77webb@gmail.com 1 open After testing SoundPEATS’ PearlClip Pro open-ear earbuds, I found surprising comfort and audio quality – but they're not without quirks.

]]>
SoundPEATS PearlClip Pro 3.5 Whether you prefer traditional earbuds or not, many of us agree on one thing: sticking buds directly into your ear canals can feel intrusive – and even isolating. Enter open-ear earbuds, which sit comfortably outside the ear canal, allowing you to enjoy your music while remaining aware of your surroundings. This approach is especially appealing for runners, commuters, or anyone who needs to stay tuned into the environment around them.

The category of open-ear headphones has recently exploded in popularity, leading to a flood of new products in a variety of styles – ear hook, clip-on, and neckband – and price points. Sporting a clip-on design, the SoundPEATS PearlClip Pro ($69.99) boast a well-balanced sound profile, lightweight comfort, and a budget-friendly price tag that puts them well within most people’s reach.

As an avid music listener, I have reviewed various types of headphones and earbuds in the past and was slightly dubious about the open-ear PearlClip Pro before testing the product. However, I was pleasantly surprised by their overall performance, and despite one or two reservations, I would recommend them as a budget pick for anybody on the lookout for open-ear buds.

SoundPEATS PearClip Pro are shown with their case

 + Pros  – Cons
  • Affordable
  • Reliable connectivity
  • Customizable touch controls
  • Can wear in either ear
  • Audio quality is flat for some genres without Bass Boost mode
  • On-bud touch controls are overly sensitive
  • Call quality suffers in loud environments
  • App is clunky to navigate

Out-of-box experience

Designed for listeners with an active lifestyle who need to keep their ears trained on the world around them, the PearlClip Pro are (on paper) ideal for workouts, runs, or for working in a busy office environment. They have an IPX5 waterproof rating to protect against sweat and splash damage, a sturdy clip-on design, and run on Bluetooth 5.4, providing a stable and reliable connection.

They come packaged in a rather neat, compact box. Inside, you’ll find the PearlClip Pro earbuds, a charging case, a USB-C charging cable, some SoundPEATS panda stickers (which my daughter was very happy with), an app guide, and a largely indecipherable user manual in impossibly small print.

The SoundPEATS PearClip Pro show with the box, charging cable, and case

Luckily, the SoundPEATS website has a downloadable, infinitely more legible user manual that will have you up and running in no time.

Design and build quality

The first thing you notice about the PearlClip Pro is their design. Each earbud resembles a small dumbbell (similar to the much more expensive Huawei FreeClip), with the “handle” acting as a bridge. It sits on the outside of your ear in a clip-on fashion.

Initially, they feel a bit weird – it has to be said. There's a very mild bit of pinching with them, but I only found this to be an issue after wearing them for a longer stretch. For short-haul sessions, they’re reasonably comfortable, once you get over the initial quirkiness of the design.

The fit is nice and secure too, and I had no concerns about the earbuds slipping free or jostling around as I moved. Another plus is that thanks to their design, they don’t get in the way of your glasses. I wear glasses when I’m working and found I could happily type away, bespectacled, without obstruction.

The SoundPEATS PearClip Pro is shown worn from the side.

I found the speaker and battery ‘bulbs’ on each clip to look somewhat similar to one another, which can cause a bit of confusion to begin with. To make things simple and to save you some time, the end with the magnet goes on the outside of your ear, and the other end goes inside. You’re welcome.

At a mere 5.85g each, the PearlClip Pro earbuds are super lightweight and benefit from the lack of an ear hook, which many other open-ear earbuds have and I am personally not a fan of. They’re constructed from 70% liquid silicone and nickel-titanium wire – a composite that SoundPEATS claims is hypoallergenic and suitable for people with active lifestyles.

They also have an IPX5 waterproof rating, so they’re resistant to sweat and rain. They're perfect for both indoor and outdoor use – so long as you keep them well away from larger bodies of water. These are not earbuds that can be worn in the shower or while swimming, as they’re likely to drown faster than a rat in concrete boots.

The PearlClip Pro charging case looks pretty slick. It closes with a satisfying snap, and the earbuds slot neatly into place thanks to the built-in magnets. There’s a charger indicator light on the outside, and the simple color code tells you at a glance how much juice is in the tank.

For added convenience, the PearlClip Pro has automatic left and right channel adaptation, which comes in very handy. This means that you can place either bud into either side of the charging case, and within seconds, they will adapt to the respective left or right channel. Therefore, you never need to worry about finding the right bud for the right ear.  

These are all neat little touches that, although far from premium in feel, could easily fool anyone into thinking the PearlClip Pro are considerably more expensive than they are.

Read more: The Best Open Ear Headphones You Can Buy Today

Audio performance

The PearlClip Pro is armed with 12mm dual magnetic drivers and a dynamic EQ (enabled by default) that delivers a surprisingly meaty bass response with crisp highs and lows. Not bad at all – especially if you like bass.

On the PeatsAudio app (which you will need to register to use), you’ll find a bunch of preset modes for different genres, including Rock, Pop, Classical, Folk, and Electronic. There’s also Treble Boost, Bass Boost (my personal favorite), and Bass Reduce Modes for you to play around with, too

Unfortunately, to my jaded ears, there was little to distinguish between many of these modes, although you’ll certainly notice the difference if you engage the bass boost mode. Otherwise, you may feel slightly disappointed with the lack of depth in the audio across the board. In general terms, the overall sound quality is pretty good, albeit a little flat-sounding at times.

My musical tastes are varied, but they tend to lean towards the more bass-heavy end of the spectrum: rock and metal, electronic/dance music, and a good dollop of ’90s Hip Hop. While the sound quality here was decent enough for these genres, it was missing some meat on its bones without the extra spoonful of bass.

However, when I switched things up with Hans Zimmer’s excellent “Dune: Part Two” soundtrack, the mids and highs were crisp and clear, with a good level of separation between the two. I listened to this soundtrack with the Bass Reduce mode engaged. Everything soared as it should, with impressive clarity throughout.

After experimenting with the PearlClip Pro, I found that more orchestral stuff feels slightly distorted or overloaded with Bass Boost, while most other genres sound noticeably better with that extra bass switch flipped.

Call Quality

There are a couple of points worth mentioning regarding call quality. Chief among them is the fact that these are open-ear buds, and therefore the call quality is limited by the lack of active noise canceling. They do, however, feature environmental noise cancellation (ENC), which suppresses background noise during calls and helps ensure clear communication.

The mic quality was nice and clear, and for the most part, I was able to make and take calls without any issues. That said, the louder your environment, the more you’re likely to struggle with interference, so these may not be your go-to for taking calls in outdoor spaces.

Read more: This Is My New Favorite Headset for Work

The app and on-bud controls

The SoundPEATS app offers extra customization, such as EQ presets, sound modes (including dedicated Gaming and Movie modes), and adjustable touch controls. You can customize the number of taps for different commands – though I found the touch controls frustratingly sensitive. More than once, tracks would pause or skip accidentally if a stray finger happened to brush over the top of an earbud. Occasionally, a sharp, robotic voice will scold you with a “disconnected” announcement in your ear, if the lightest of touches is held for a half-second too long.

A closeup shot of one SoundPEATS PearClip Pro bud

Thankfully, disabling the touch controls in the app quickly resolved the issue. However, if you're committed to using touch controls, you might find these earbuds mildly frustrating.

The app is generally OK. Though, in all honesty, it’s unlikely to blow anyone away. It can be a little clunky to navigate, and it feels a bit bare, despite one or two neat touches. However, given that these are budget buds, it would be unfair to expect a comprehensive suite of features to play around with, and minor reservations aside, what’s here is fine.

Battery life and connectivity

These budget earbuds run on Bluetooth 5.4 and provide up to 24 hours of playtime when combined with the wireless charging case, or six hours without. Plus, if you’re strapped for time, you can eke out two hours of battery life from just a 10-minute charge.

Connectivity is excellent. I experienced no dropouts, and pairing was quick and effortless. Additionally, the PearlClip Pro supports simultaneous connection to two devices – a useful feature for multitasking between your phone and computer.

Should you buy the PearlClip Pro?

I enjoyed using the SoundPEATS PearlClip Pro ($69.99, check price on Amazon) despite some minor annoyances, like the overly sensitive touch controls. The fit is secure, and the clip design is comfortable. You won't mistake them for premium earbuds, but considering they're under $70, they sound surprisingly good, delivering deliver solid, balanced sound.

[Image credit: Rob Webb/Techlicious]

]]>
0 tablets headphones
7767 <![CDATA[Stelo]]> stleo 2025-01-28T23:48:48Z 2025-01-28T23:53:49Z Suzanne Kantra suzanne@techlicious.com 1 closed TK

]]>
Stelo OTC Glucose Monitor 3.5 In March 2024, the FDA approved the first over-the-counter continuous glucose monitors (CGMs). These devices open the door for anyone – not just those with a prescription for managing diabetes or prediabetes – to better understand their blood sugar levels and how they impact overall health.

Glucose monitoring impacts much more than prediabetes and diabetes. It influences your energy, mood, sleep, and metabolism. High blood sugar fluctuations can lead to weight gain, poor sleep, and even long-term health risks like heart disease. That’s where over-the-counter devices, like Abbott’s Lingo, come in – empowering anyone to take control of their health by offering insights into how food, exercise, and stress affect their body.

Hands-On with Stelo


 + Pros  – Cons
  • Easy to set up
  • Device attaches securely
  • Alerts to log when spikes are detected
  • Doesn't retain more than 24 hours of tracking data
  • Unattractive design with large adhesive patch

Abbott Labs Lingo applied to the back of an arm.

Applying the sensor 

The Lingo app pairs seamlessly with the sensor and offers a clean, intuitive interface.


At its core is the Lingo Count, which translates blood sugar increases and dips into an easy-to-understand metric for how well you’re managing your levels throughout the day. These counts, along with icons indicating when you ate or exercised, appear on a graph of your glucose levels. For me, it was immediately obvious that my morning dirty chai, which has honey and two shots of espresso, makes my levels rise significantly. I also learned I could manage the spike by drinking my dirty chai while walking the dog.

Two screenshots of the Lingo app. On the left you can see the graph showing glucose readings, icons for food and exercise, and a shaded area the a number signifying the Lingo Count. On the right you see a challenge suggestion to eat 30 gram of protein for breakfast,

However, the app isn’t perfect. Logging meals and exercise is a manual process. I would have preferred integration with food-tracking apps like Lose It! or Apple Health. On the plus side, Lingo provides helpful educational content, and you can opt into “Challenges” that invite you to test small, actionable changes to improve your control over fluctuations.

How Lingo Compares to Stelo

I just started testing Dexcom’s Stelo, Lingo’s main OTC competitor, and found that it has its own strengths and weaknesses. Setup is simple, and Stelo also provides access to real-time levels and trends, just like Lingo.

Stelo’s app is more basic than Lingo’s, though. Glucose levels are displayed on a separate screen from the food and exercise logging, making it harder to visually connect your actions to your levels. However, I appreciate that Stelo integrates data from the Apple Health app, allowing you to view relevant information like sleep, activity, and steps alongside your manually logged meals and exercise. By combining this data, the app provides a more comprehensive day-by-day view of your activity than Lingo, even if mapping this back to your glucose level is more of a chore.

Aesthetically, Stelo looks like a medical patch, featuring a small gray plastic puck (approximately 25 by 28 mm) surrounded by a large ring of visible adhesive. In contrast, Lingo has a sleek white circular design. Although Lingo is larger (approximately 30mm in diameter), I appreciate its more polished appearance, which I didn’t mind showing off when wearing short sleeves.

Abbott Lingo on the left and the Dexcom Stelo on the right. Above both is a quarter

Pricing and Availability

Lingo is available without a prescription – or subscription – at two price points: $49 for two weeks or $89 for four weeks on HelloLingo.com or AmazonStelo is priced similarly, providing a comparable entry point into the world of continuous monitoring.

[Image credit: Techlicious]

]]>
0 home health-fitness top-picks
7739 <![CDATA[Glucose Monitoring Made Easy: My Take on Abbott’s Lingo]]> glucose-monitoring-made-easy-my-take-on-abbotts-lingo 2025-01-15T01:57:56Z 2025-01-28T16:58:58Z health/abbott-lingo-100px.jpg health/abbott-lingo-1200px.jpg Suzanne Kantra suzanne@techlicious.com 1 open Abbott’s Lingo offers real-time glucose tracking to improve health and wellness. See my hands-on experience and if it’s worth trying.

]]>
Abbott Laboratories Lingo OTC Continuous Glucose Monitor 4 In March 2024, the FDA approved the first over-the-counter continuous glucose monitors (CGMs). These devices open the door for anyone – not just those with a prescription for managing diabetes or prediabetes – to better understand their blood sugar levels and how they impact overall health.

Glucose monitoring impacts much more than prediabetes and diabetes. It influences your energy, mood, sleep, and metabolism. High blood sugar fluctuations can lead to weight gain, poor sleep, and even long-term health risks like heart disease. That’s where over-the-counter devices, like Abbott’s Lingo, come in – empowering anyone to take control of their health by offering insights into how food, exercise, and stress affect their body.

Hands-On with Abbott’s Lingo

I tried the Lingo for two weeks to see if it delivers on its promise to make monitoring accessible and easy to use. For the most part, it succeeds.

 + Pros  – Cons
  • Easy to set up
  • Intuitive interface for viewing glucose readings
  • Attractive design
  • Doesn't integrate health data from Apple Health
  • Doesn't integrate with food-tracking apps
Techlicious Editor's Choice award logo "Lingo makes it easy to track your glucose levels and provides actionable insights into how to manage spikes."

Abbott Labs Lingo applied to the back of an arm.

Applying the sensor is straightforward: you press the applicator to the back of your arm and feel a slight prick. While it’s noticeable on the first day, especially for side sleepers like me, the device becomes unintrusive after that – unless you bump it or accidentally pull it off while changing tight clothes, which happened to me at the end of my testing.

The Lingo app pairs seamlessly with the sensor and offers a clean, intuitive interface. At its core is the Lingo Count, which translates blood sugar increases and dips into an easy-to-understand metric for how well you’re managing your levels throughout the day. These counts, along with icons indicating when you ate or exercised, appear on a graph of your glucose levels. For me, it was immediately obvious that my morning dirty chai, which has honey and two shots of espresso, makes my levels rise significantly. I also learned I could manage the spike by drinking my dirty chai while walking the dog.

Two screenshots of the Lingo app. On the left you can see the graph showing glucose readings, icons for food and exercise, and a shaded area the a number signifying the Lingo Count. On the right you see a challenge suggestion to eat 30 gram of protein for breakfast,

However, the app isn’t perfect. Logging meals and exercise is a manual process. I would have preferred integration with food-tracking apps like Lose It! or Apple Health. On the plus side, Lingo provides helpful educational content, and you can opt into “Challenges” that invite you to test small, actionable changes to improve your control over fluctuations.

How Lingo Compares to Stelo

I just started testing Dexcom’s Stelo, Lingo’s main OTC competitor, and found that it has its own strengths and weaknesses. Setup is simple, and Stelo also provides access to real-time levels and trends, just like Lingo.

Stelo’s app is more basic than Lingo’s, though. Glucose levels are displayed on a separate screen from the food and exercise logging, making it harder to visually connect your actions to your levels. However, I appreciate that Stelo integrates data from the Apple Health app, allowing you to view relevant information like sleep, activity, and steps alongside your manually logged meals and exercise. By combining this data, the app provides a more comprehensive day-by-day view of your activity than Lingo, even if mapping this back to your glucose level is more of a chore.

Aesthetically, Stelo looks like a medical patch, featuring a small gray plastic puck (approximately 25 by 28 mm) surrounded by a large ring of visible adhesive. In contrast, Lingo has a sleek white circular design. Although Lingo is larger (approximately 30mm in diameter), I appreciate its more polished appearance, which I didn’t mind showing off when wearing short sleeves.

Abbott Lingo on the left and the Dexcom Stelo on the right. Above both is a quarter

Pricing and Availability

Lingo is available without a prescription – or subscription – at two price points: $49 for two weeks or $89 for four weeks on HelloLingo.com or AmazonStelo is priced similarly, providing a comparable entry point into the world of continuous monitoring.

[Image credit: Techlicious]

]]>
0 home health-fitness top-picks
7737 <![CDATA[Why I Think the Soocas Neos II Redefines Oral Care]]> hands-on-soocas-neos-ii 2025-01-13T23:38:01Z 2025-02-27T15:32:02Z health/soocas-neos-ii-front-100px.jpg health/soocas-neos-ii-front-1200px.jpg Stewart Wolpin sw@stewartwolpin.com 0 open Combining brushing and water flossing, the Neos II delivers impressive results. As someone who hates flossing, here’s why it works for me.

]]>
Soocas MultiClean 2-in-1 Neos II Not rated Even you’re a regular tooth flosser, it’s likely not your favorite chore. And if you don’t floss – well, as soon as you open your mouth, your dentist may discover a new means of funding their extravagant lifestyle.

To help alleviate the flossing chore, the folks at Soocas have created the MultiClean 2-in-1 Neos II ($169.99), a toothbrush with an integrated water flosser. According to the company, the Neos II cleans up to 35 times more plaque than traditional manual brushing, and “has been tested to achieve 100% plaque removal and visibly whiter teeth in just three days.”

I’ve been using the Neos II for a month and, as a non-flosser with terrible teeth who’s funded his dentist’s vacation home, I can report it produces remarkably effective and satisfying – if potentially messy – results.

Soocas MultiClean 2-in-1 Neo II with Techlicious Editor's Choice logo in the lower right corner.

Neos II is a second-generation product, and much improved from the first. Neos II is 32% smaller than its predecessor – it’s only slightly larger and heavier than a standard electric toothbrush and much smaller than Waterpik’s standalone water flossers. Neos II also delivers 60 seconds of continuous flossing using half as much water than the first gen Neos, while my Waterpik supplies only around 30 seconds of water streaming.

Even with a smaller device, Neos II delivers statistically better results than most of its water flossing competition. For one thing, the Neos II’s pulsing water stream is delivered at 124.3 PSI peak pressure. By comparison, the much bulkier combined brush/water flosser Purr Smile Complete Oral Care Kit ($116.99)  delivers water at 110 PSI, and Waterpiks stream water at 45-75 PSI, depending on settings and model. You’ll also get 30 days of teeth cleaning from a single Neos II charge, about twice the battery life of standalone electric toothbrushes.

Does Neos II brushing and water flossing do as effective plaque/tarter removal and between-teeth cleaning teeth as string flossing? Maybe not 100% depending on how well or frequently you string floss, but “a product that pairs the two main things that we have to do to maintain our [dental] health is extremely valuable,” notes New York City dentist Dr. Lorna Flamer-Caldera, who recommends the Neos II. “This will take care of something that you were doing differently or not doing.”

Product design

Neos II comes in a surprisingly large box made of environmentally-friendly sugarcane bagasse – essentially the dry pulp left after processing. It’s increasingly used for packing and construction materials instead of merely discarded. Inside the box is an oval box containing the device and one brush head, plus six extra heads in packages of two.

Neos II has three buttons: the top round button triggers a two-minute regular electric brushing and, after a 2-3 second pause for spitting, a one-minute session of brushing plus flossing; the middle horizontal button is for choosing the brushing intensity; and the bottom round button activates one-minute of combined brush/flossing. Filling the compact water reservoir on the reverse side takes seconds, far less time than filling the reservoirs of far larger Waterpik.

The water reservoir is open on the back of the Soocas MultiClean 2-in-1 Neo II

The Neos II charges magnetically – the charger just magnetically snaps on. I do wish the USB cord was a little longer since electrical outlets in the bathroom aren’t always in convenient locations.

The magnetic charger is attached to the back of the Soocas MultiClean 2-in-1 Neo II

Brushing performance

First off, water flossers are messy, in my experience. The first time I used my Waterpik, water spurted every which way all over fixtures, faucets, and mirror. From then on, I used my Waterpik solely in the shower. Soocas says that, with practice, breathing through your nose, and otherwise following the instructions, the Neos II can be used over your sink with minimum mess. While not as messy as the Waterpik, my initial Neos II session resulted in unwanted cleanup. So, like my Waterpik, I strictly use the Neos II in the shower. Your results may vary.

Second, to me, three minutes – two for the brushing, one for brushing/flossing – is a LOOONG tooth-brushing session. But, damn if my mouth doesn’t feel as clean as after a dental hygienist visit. During the water flossing segment, I changed the usual side-to-side brushing to a more circular motion on and around the front and top of my teeth to get the most out of the pulsing water floss stream.

If you do need to momentarily pause your brushing or flossing mid-session, just push the appropriate round button to stop for a few seconds, take a breath or spit, and then press again to resume. If you want to end your brushing or brushing/flossing session in the middle, just hit the appropriate button again to pause, then set the Neos II down. It will reset itself after around 10-15 seconds.

Neos II has three intensity settings, but I just used the top setting. I assume the lower settings are for those with more sensitive teeth and/or gums. You get a slight pause every 30 seconds during brushing to gauge how much time you’re spending on each quarter of your mouth. The one-minute brush/flossing is just a continual process with no time elapsed indications.

Soocas seems to have eliminated at least one electric toothbrush annoyance – the build-up of annoying and disgusting toothpaste scum on the base of the brush head stem. My Neos II brush head has remained remarkably pristine.

Soocas doesn’t offer the usual assortment of different sizes, soft/hard, or types (gums, tongue, teeth, etc.) of brush heads. According to Dr. Flamer-Caldera, different types of brush heads aren’t necessary. “If you’re not choking, you’re not gagging, [and the brush] can reasonably fit into all of the corners of your mouth, then it will be effective for you,” she explained.

I found it just so.

Check price on Soocas button

Check price on Amazon button

[Image credit: Stewart Wolpin/Techlicious]

Stewart Wolpin has been writing about consumer electronics for more than 35 years, including news, reviews, analysis and history, and has attended and covered nearly 50 Consumer Electronic Shows and around a dozen IFA shows in Berlin. For the Consumer Technology Association (CTA), he is an elector for and writes the official biographies of the annual CT Hall of Fame inductees, and is the keeper of the industry’s official history.

]]>
0 home health-fitness top-picks
7729 <![CDATA[OnePlus 13 Hands-On: Waterproof, Powerful & Packed with Innovation]]> oneplus-13-hands-on 2025-01-07T16:30:31Z 2025-02-02T18:46:32Z phones/oneplus-13-hand-100px.jpg phones/oneplus-13-hand-1200px.jpg Andrea Smith abcandread@gmail.com 0 1738460791 open In my hands-on test, the OnePlus 13 impressed me with its IP69 durability, Aqua Touch screen usability when wet, and long-lasting 6,000mAh battery tech.

]]>
OnePlus 13 Not rated While every new flagship phone on the market feels like an incremental upgrade of last year’s model, the OnePlus 13 introduces features genuinely fresh to the table. The OnePlus 13 packs real innovations in durability, battery life, and even device-to-device communication. After spending some time with it, I can say this: OnePlus made a flagship smartphone that more than matches the competition and does it for less money than the Samsung Galaxy S24 or iPhone 16.

The OnePlus 13 is shown in the writer's hand.

A New Standard in Water Resistance

Let’s start with durability. OnePlus finally addressed a long-standing complaint by upping their water resistance game to IP69, which is a step above the IP68 rating of most competitors. In plain terms, this phone can handle not just accidental splashes or quick submersions but also high-pressure water jets. And yes, I watched as it went into a dishwasher, endured high-pressure water jets that would send most devices straight to the repair shop, and saw that it came out cleaner but unscathed. While not many users will do this, OnePlus backs up its waterproof claim (except for submersion in salt water), making the OnePlus 13 a reliable option for anyone prone to spills and accidents.

OnePlus 13 inside a running dishwasher

A Display That Handles Sun and Splash

The 6.82-inch OLED display, with a peak brightness of 4,500 nits, is one of the brightest screens out there. Even in direct sunlight, I had no trouble reading texts or watching videos. What’s more impressive is the Aqua Touch technology, which lets you use the screen with wet fingers, something I’ve never seen work smoothly on a Samsung or Apple device. I tested this near a pool, and it worked great – I didn’t have to dry my hands before trying to open and use the phone. The screen features a variable refresh rate of up to 120Hz, ensuring buttery-smooth animations and seamless gaming experiences.

Aesthetically, the phone feels premium. The industry-first micro-fiber vegan leather back on my blue review model (the phone is available in white, black, and blue), felt smooth and secure in my hand, giving it a look that stands out. I’d have to use it for a longer period to see how the vegan leather back responds to daily use.

Battery and Charging: More Power, Less Bulk

Battery life has always been a strong suit for OnePlus, and the industry-first 6,000mAh nanostack battery takes it to the next level. What’s remarkable is that the new technology allows it to be thinner and lighter than the previous model’s battery, which already lasted all day. Even with heavy use—streaming videos and snapping photos—I didn’t find myself reaching for a charger until well into the second day.

When it’s time to recharge, the 100W wired charging gets the job done in just 36 minutes, which is roughly twice as fast as my iPhone 12 and significantly outpaces Samsung’s offerings. The 50W wireless charging is equally impressive, especially compared to Samsung’s standard 15W speeds. And yes, OnePlus still includes a charger in the box, which is more than I can say for some brands.

Camera: A New Level of Detail and Depth

The camera system, once again co-developed with Hasselblad, features 50MP wide, 48MP ultra-wide, and 32MP telephoto lenses. But the standout is the new Snapshot technology, which uses GPU processing to simultaneously capture short and long exposures, resulting in sharper details in fast-moving subjects. Most phones make you choose between freezing motion or getting rich details. So I was impressed by the clarity of the droplets of water it captured at an outdoor water show, while still providing the depth and detail of the background.

OnePlus 13 in blue

Beacon Link: Communication Without Limits

Another surprising feature is Beacon Link, which enables direct device-to-device communication between OnePlus 13 phones at distances up to 200 meters without requiring a cellular or Wi-Fi connection. It’s not something you’ll use every day, but it's a really useful tool for outdoor enthusiasts, event organizers, or even emergencies. The only catch is that it’s limited to OnePlus 13 devices for now but opens interesting possibilities for future smartphone communication down the road.

How It Stacks Up

When you look at competitors like the Samsung Galaxy S24, iPhone 16, or Google Pixel 9, the OnePlus 13 doesn’t just keep up—it sets itself apart. Samsung’s Galaxy phones might have better ecosystem integration, and Apple’s cameras are hard to beat, but OnePlus wins on practical innovation. The IP69 rating, nanostack battery, and Beacon Link aren’t just flashy—they’re genuinely useful.

Pricing and Availability

OnePlus 13 is shown in black (left) and white (right)

The OnePlus 13 is available now at OnePlus.com for $899 for a 12/256GB version and $999 for the 16/512 GB model. It comes in Black Eclipse, Midnight Ocean (blue), and Arctic Dawn (white).

They’re offering up to $899 off with an eligible trade-in through Feb. 7th.

[Image credit: Andrea Smith/Techlicious]

]]>
0 tablets phones
7688 <![CDATA[AirPods Pro 2 as Hearing Aids Review: Revolutionary, but Flawed]]> apple-airpods-pro-2-as-hearing-aids-review 2024-11-19T17:30:47Z 2024-11-19T17:49:48Z health/apple-airpods-pro-2-case-100px.jpg health/apple-airpods-pro-2-case-1200x675px.jpg Stewart Wolpin sw@stewartwolpin.com 1 open Apple AirPods Pro 2 can now perform ably – and cheaply – as over-the-counter hearing aids, but there are some flaws and compromises.

]]>
AirPods Pro 2 as Hearing Aids 3 Apple has just proven what I’ve asserted for years: there is no reason why hearing aids, OTC or prescription, have to cost $1,000 or more. For just $250, AirPods Pro 2 now perform as self-fitting hearing aids that provide crystal clear amplified sound for both ambient sound as well as Bluetooth music listening and phone calls.

I’ve been testing OTC hearing aids since they first launched in 2022 and spent a couple of weeks reviewing the AirPods Pro 2 hearing aid capabilities. While they ably perform as OTC hearing aids, I found they are very much a v1.0 product, with the usual first-generation compromises, omissions, and flaws to contend with.

Apple AirPods Pro 2 are shown with their case.

 + Pros  – Cons
  • Inexpensive
  • Self-fitting
  • Bluetooth for music and phone calls
  • Free hearing test
  • Short battery life
  • Your own voice doesn’t sound natural
  • Scattered settings and controls
  • Poor amplification in multi-voice environments

As with all closed Bluetooth OTC hearing aid buds such as the HP Hearing Pro ($499), the Eargo Link ($799), and the new $99.99 JLab Hear, the AirPods Pro 2 make your own voice sound a bit disembodied. They also “only” provide around five to ten hours of battery life, which is great for standard music Bluetooth buds but hardly the “all-day” battery life provided by pricier hearing aids without Bluetooth. For instance, my current OTC hearing aid favorites, the Sony CRE-C20 OTC hearing aids, operate for a whopping 28 hours on a single charge, but they cost $999.99 and don’t include Bluetooth for music or phone calls.

Read more: Review: Sony's New CRE-C20 Are the Best OTC Hearing Aids I've Tested

If nothing else, Apple has provided a way for you to easily test if you’re suffering mild or moderate hearing loss. Do you find yourself saying, “What’d you say?” to friends? Are you turning up the TV volume louder than usual or are you relying more on closed captioning? iOS 18.1 can tell you for free – no pricey audiologist visit necessary – if you’re experiencing some hearing loss, and with your AirPods Pro 2, you have a cheap, introductory solution.

Set Up

Apple makes it simple to pair your AirPods Pro 2 with your iPhone and configure them as hearing aids. The earbuds come out of the box in pairing mode and appear on your iPhone when you open the case. A single tap is all it takes to complete the process.

Once your AirPods Pro 2 are paired, you can set them up as hearing aids through the Settings app. Go to Settings > AirPods Pro 2 > Take a Hearing Test. When you’re finished with the test, you select “Set Up Hearing Aid,” then toggle on “Media Assist,” “Adjust Music and Video,” and “Adjust Calls and FaceTime.”

While this basic setup routine makes a huge difference, I recommend fine-tuning the settings to better meet your needs. Within your AirPods Pro 2 Settings, you’ll be able to adjust things like the amplification volume and the balance between ambient noise and voices and turn on “Conversation Awareness.”

Unfortunately, navigating these more advanced settings is not an intuitive process. In fact, it's complicated enough that I decided to cover it in a separate article on How to Set up Your AirPods Pro 2 as Hearing Aids the Right Way.

Performance

First, on the positive side, AirPods Pro 2, considering they were not designed from the ground up as hearing aids, do an excellent job of increasing and crystalizing sound, especially voices. Plus, you can easily reduce unwanted, non-vocal environmental noises such as running water, light switches, creaky floors, keyboard clacking, air conditioning/heating, etc.

AirPods Pro 2 also continue to operate as hearing aids when disconnected from your iPhone. When you wander further than 30 feet from your phone, you will hear an initial beeping signifying you’re disconnected.

Design

AirPods’ most obvious “flaw” is aesthetic: they’re visible, something the hearing-impaired like to assiduously avoid advertising. But AirPods’ obviousness is actually an advantage over “normal” hearing aids. Tens of millions of people already wear AirPods – they’re, by far, the most popular earbuds extant. You’ll fit in perfectly with the vast AirPods-wearing masses, with no one the wiser about your aural deficiencies. When you continue to wear your AirPods during a conversation, your co-conversationalists will not suspect you’re hard of hearing, just rude. Now, your awkward choice is to admit failing hearing or failing manners.

AirPods Pro 2’s six hearing aid flaws

Battery life is not “all-day”

Most standard hearing aids offer “all-day” battery life, usually 12-16 hours. The new non-Bluetooth Sony CRE-C20 OTC hearing aids offer a whopping 28 hours of single-charge battery life. AirPods Pro 2, with mixed music playback with noise canceling and hearing aid use, provide around five-to-six hours of single-charge battery life.

However, this battery limitation is not necessarily a deal breaker. Folks like me with mild or moderate hearing loss don’t necessarily want to wear a hearing aid all day, only when we think we need to, such as when watching TV or when in a conversation situation. For intermittent use, where the buds are returned to their charger to fully power up when not in use, six hours-plus battery life is only an occasional minor annoyance.

Your own voice sounds weird

As noted, closed Bluetooth buds that seal your ear canal make your own amplified hearing aid voice sound disembodied. AirPods’ excellent transparency mode, combined with its equally excellent amplification, reduces the disembodied nature of your voice better than other closed bud-style OTC hearing aids I’ve used – but your voice still doesn’t sound anywhere near as natural as when wearing normal, open hearing aids. Hearing your own amplified disembodied voice seemingly come out of thin air in front of you take a bit of getting used to. Closed-bud hearing aids also tend to magnify food and gum chewing noises, although the AirPods are also less so than other models I’ve tested.

Quality declines when multiple people speak simultaneously

For some reason, in situations where multiple people are talking simultaneously, such as parties, group lunches, or meetings, the AirPods transparency mode gets muddy and warbly. Even when voices were moderately raised – me speaking loud enough to make myself heard or talking with my wife with the TV sound on – the sound seemed to dampen or warble. I found and even turned off – after some lengthy Settings drilling – the AirPods’ “Loud Sound Reduction,” but this didn’t seem to help.

Amplification drops when you turn slightly away from the source

I found the AirPods amplified most effectively when facing the sound I wanted to hear. Turning my head away from the sound source slightly lowered amplification, which impacts clearly hearing single individuals when surrounded by a group of people chatting – assuming the AirPods amplification doesn’t dampen or warble with sound overload.

There’s a weird “air” sound when outdoors

When I stick the AirPods Pro 2 in my ears outside, it’s as if I can hear the air itself – not the wind, mind you, but I hear what sounds like…air. I had to turn down the amplification volume to minimize or eliminate this air sound and still get an amplification of the sounds I wanted to hear.

There are no instructions

Apple provides no in-app/settings guidance on where to find or adjust varying hearing aid settings. It took me a couple of days to discover all the settings and features that I’ve explained here, and I’m not entirely sure I haven’t missed anything. And this is coming from someone who has tested OTC hearing aids for years. Those new to OTC hearing aids may find themselves even more lost in the weeds.

The bottom line

iOS 18.1 is Apple’s first attempt at transforming AirPods into hearing aids. Considering AirPods Pro 2 weren’t designed as hearing aids first, and despite their flaws, it’s a remarkable achievement. Apple’s engineers will likely learn from the experience and input and, hopefully, improve both performance and operations via additional iOS updates.

Overall, AirPods Pro 2 ($250, usually $189) as hearing aids are best for situational indoor use where the conversation is minimal – watching TV, concerts, business seminars, and presentations, no more than three people in conversation groups, in mass transit situations to hear announcements. With just six hours of battery life, don’t plan on wearing them all day, or, with its overload dampening issue, to help clarify conversations outdoors, at noisy parties, or in crowded restaurants.

Even with my caveats, I’d recommend all iPhone/AirPods Pro 2 owners upgrade to iOS 18.1 and take the hearing test just to assess their hearing health. Then, apply your personal hearing profile results to your AirPods Pro 2 to give you a sense of how hearing aids can improve your hearing and your life, whether you opt to use the AirPods as your primary hearing aids or decide to buy “real” ones.

Final thoughts

Looking to the future, I have six suggestions for Apple on how to make the AirPods better hearing aids.

  1. Create a separate “Hearing Aid” app or Settings section specifically for controlling AirPods’ hearing aid functions, including a set-up and usage guide.
  2. Create environmental pre-sets to allow AirPods to better adapt and operate in either single or multi-voice situations.
  3. Create directionality adjustments, available on many hearing aids, so we can choose to hear sounds either in front or all around.
  4. Fix the amplification dampening in multi-simultaneous voice conversation situations.
  5. Create “open” AirPods Pro ear tips specifically for hearing aid use as an accessory. These would be perforated ear tips that allow ambient sound to enter and mix with amplified sound, the way standard hearing aids create “natural” open sound. “Open” ear tips would make your own voice sound more natural and may lessen the dampening I experienced when confronted with multiple simultaneous voices. Even with “open” ear tips, Apple’s excellent noise canceling should still create a more-or-less closed environment for private Bluetooth music listening.
  6. Create AirPod Pro 2s in different skin tones so they can more naturally “disappear” and reduce the need to explain while you’re still wearing them during conversation.

With millions of AirPods Pro 2 already sticking out of customers' ears, Apple can essentially force the rest of the OTC hearing aid industry to figure out a new hardware pricing model to compete. And Apple will further pressure OTC hearing aid makers to lower their prices when it inevitably introduces new or less expensive AirPods that also can be turned into hearing aids. I can’t wait to see what comes next.

Check price on Amazon button

[Image credit: Stewart Wolpin/Techlicious]

Stewart Wolpin has been writing about consumer electronics for more than 35 years, including news, reviews, analysis and history, and has attended and covered nearly 50 Consumer Electronic Shows and around a dozen IFA shows in Berlin. For the Consumer Technology Association (CTA), he is an elector for and writes the official biographies of the annual CT Hall of Fame inductees, and is the keeper of the industry’s official history.

]]>
0 tablets headphones home health-fitness otc-hearing-aids
7625 <![CDATA[Review: Sony’s New CRE-C20 Are the Best OTC Hearing Aids I’ve Tested]]> sony-cre-c20-are-the-best-non-bluetooth-otc-hearing-aids 2024-09-23T21:00:42Z 2024-09-26T16:05:43Z health/sony-cre-c20-dime-100px.jpg health/sony-cre-c20-with-case-1200px.jpg Stewart Wolpin sw@stewartwolpin.com 1 open  Of all the models I've tested, the all-day battery life, near-invisible design, and loud, natural sound make the C20 the best OTC hearing aids out there.

]]>
Sony CRE-C20 OTC Hearing Aids 4.5 My biggest complaint about Sony’s first OTC hearing aids, the CRE-C10, made in partnership with Danish hearing aid maker WS Audiology, was the in-ear buds being powered by annoying and tiny single-use hearing aid batteries.

Apparently, I wasn’t the only C10 single-use battery complainer. A Sony spokesperson told me that the single-use battery issue was something “that we got a lot of feedback on.”

Read more: Sony CRE-C10 OTC Hearing Aids Deliver Great Sound with One Flaw

Problem solved for Sony’s second generation CRE-C20 ($999.99). For the same price, you now get the same discrete, nearly invisible in-ear ergonomics and the same loud, natural sound as the C10, only in a rechargeable model that provides up to a massive 28 hours of continual usage on a single charge.

I've been testing OTC hearing aids since the first products hit the market in late 2022. Based on my experience and weeks of testing, the Sony C20's single, substantial rechargeable battery upgrade and subtly enhanced speech clarity make it the best-sounding, self-fitting, non-Bluetooth OTC hearing aids available.

Sony CRE-C20 outside of their case.

 + Pros  – Cons
  • Virtually invisible
  • Rechargeable
  • Loud, natural sound
  • True “all day” battery life
  • Nearly half the price of the nearest competitor
  • No Bluetooth for calls or music
  • In-canal fit may be uncomfortable
  • Awkward in-case charging
  • Limited app adjustments
Techlicious Top Pick award logo "The best-sounding OTC hearing aids available."

Sony didn’t fix what wasn’t broken physically. The small (18mm long), light (1 gram) dorsal fin-shaped C20 buds are essentially identical to the C10, save the latter’s slide-open battery compartments, with a short tendril to help extract them from your ears. You also still get eight varied-sized oval ear tips that are easier to slip on and off than their predecessors.

As noted, the C20 are priced at $999.99, the same as the C10. However, without the C10’s ongoing cost of batteries, the C20 can be considered less expensive. If you’d rather go with the single-use battery C10, Sony has discounted them to $799.99 and also lowered the price of its Bluetooth CRE-E10 to $1,099.99, which may be an indication that an E20 is pending.

Back to the C20. Its battery life of up to 28 hours is just remarkable. All other in-ear OTC self-fitting rechargeable hearing aids I’ve tested, most significantly the more similar but more expensive Eargo models, usually top out at around 16 hours at best, which means you may need a short recharge at the end of a long day. In other words, the C20 are a true all-day hearing aid. Of course, the case provides up to at least two full recharges, so 84 hours of hearing sans AC refill, making them fine for a long weekend getaway.

Read more: Sennheiser All-Day Clear - High-Quality Sound with a Catch

The C20 oval carry/charging case measures 1.75 x 3.25 x 1.25 inches, which makes it eminently pocketable. However, the buds sit on their thin edges on the case’s tiny charging spots, so they must be placed carefully to ensure they’re charging.

Sony CRE-C20 with one bud in the case and one outside of the case with a dime for scale

Set-up and ergonomics

As with all self-fitting buds, the Sony Hearing Control app (available for both iOS and Android) includes a self-conducted hearing test. The 10-minute test sets hearing profiles for each of your ears.

As with most self-fitting hearing aids, choose a tip that fits comfortably but doesn’t seal your ear canal – they sound best with amplified sound mixed with ambient sound. The right-sized tip will also reduce the feedback squeal that high-pitched sounds can yield at higher volumes.

One fitting caveat: Unlike the Eargos, which can sit on the edge of your ear canal, the C20 buds need to be slipped a bit deeper into your canals for optimal sound, a position that may be uncomfortable for some. And for me, at least, the wire extraction tendril was too short, and I often had to dig to get the buds out of my ears. Another eighth of an inch could solve the problem.

Read more: Our Review of the Eargo 7 All-Day Invisible OTC Hearing Aids

Sony’s Hearing Control app hasn’t changed much. You get two primary controls: a single volume slide bar that goes up to 15 and a sharpness slider that goes up to +7 for sharper sound to improve voices and dialog down to -8 for less sharpness.

Like the C10, the whole idea behind the relatively simple app controls is to not worry about the C20 once they’re in your ears, but I miss the more expansive and precise hearing focus controls available for the Bluetooth E10.

Read more: Our Review of the Sony CRE-E10 Bluetooth OTC Hearing Aids

To help newbies, Sony offers access to a dedicated OTC hearing aids customer support team, pre- or post-purchase, including a free 30-minute one-on-one phone session.

Audio performance

Like the C10, the C20 produces completely natural sound. Even though the buds need to be inserted a bit more deeply into the ear canals, you’ll soon forget you’re wearing them. On more than one occasion, I tried to slip in a pair of AirPods, forgetting I still had the C20 inserted – D’OH! And the C20s remained unnoticeably comfortable through an entire day.

Like the C10, I found the C20’s amplification more discriminating than other self-fitting hearing aids. Instead of boosting every sound equally and indiscriminately, the C20 seem to reduce the sound of more everyday ambient sounds, such as running water, creaking floors, keyboard clicking, light switches, etc., that really don’t need to be louder.

Sony says this background reduction is the result of another upgrade to the C20, a more efficient reduction of these ambient sounds while increasing the priority to speech clarity. This made it easier for me to better discern dialog in noisy environments, such as a restaurant or party, than other buds I’ve tested.

Hearing in noisy environments is also aided by the C20’s higher volume, far louder than the varying Eargo models, including the new “budget” Eargo SE ($1,690, currently discounted to $1,450) at similar volume settings. Plus, you don’t have to keep your phone’s volume at 75%-plus like you do the Eargos to get an adequate volume level.

On the two remote control sound settings: For volume, I found 5-7 the ideal compromise between loudness and feedback from high-pitched ambient sound, depending on the situation. Simply increasing sharpness to +2 on the sharpness control proved to be a boon to vocal clarification – for me. Your setting results, of course, will vary, but the two controls corrected a wider variety of hearing sins than I expected.

The bottom line

Sony CRE-C20 shown in ear.

I couldn’t have been more thrilled to find out that Sony had eliminated the C10’s major pain point – making them rechargeable. I also was delighted that the C20 maintains the C10's high sound quality and discriminating high volume boosting.

Of course, the C20’s lack of Bluetooth limits their functionality and make them less of a value compared to similarly priced rest-in-canal (RIC, the hearing aids with the battery/controls behind the ear) models, like my pick, the Sennheiser All-Day Clear ($999), that include Bluetooth for at least hands-free phone calling. But the C20s can, of course, be worn under Bluetooth over-the-ear headphones or quickly replaced with standard Bluetooth earbuds for music listening.

For folks with mild but especially moderate hearing loss embarrassed to be seen wearing hearing aids, the discrete Sony CRE-C20 ($999) represent the best self-fitting non-Bluetooth hearing aid performance and value currently available.

Check price on Sony button

Check price on Amazon button

[Image credit: Stewart Wolpin/Techlicious]

Stewart Wolpin has been writing about consumer electronics for more than 35 years, including news, reviews, analysis and history, and has attended and covered nearly 50 Consumer Electronic Shows and around a dozen IFA shows in Berlin. For the Consumer Technology Association (CTA), he is an elector for and writes the official biographies of the annual CT Hall of Fame inductees, and is the keeper of the industry’s official history.

]]>
0 home health-fitness otc-hearing-aids top-picks
7576 <![CDATA[Nutribullet Flip: The Portable Blender That Keeps Your Smoothie Cold]]> nutribullet-flip-portable-blender 2024-07-31T13:29:53Z 2024-08-01T15:47:54Z health/nutribullet-flip-lid-100px.jpg health/nutribullet-flip-lid-1200x675px.jpg Suzanne Kantra suzanne@techlicious.com 1 open The Flip features an insulated cup to keep contents cold and a blending base doubling as a sipping lid, offering blend-and-drink flexibility on the go.

]]>
Nutribullet Flip 4 The appeal of a portable blender is the ability to consume smoothies and other blended foods on the go. However, if you don't have access to ice, you'll need to blend and consume your smoothie before your ingredients warm up. The $99 Nutribullet Flip solves this problem with an insulated blending cup that keeps your ingredients chilled for up to 24 hours.

Nutribullet Flip is shown with the travel lid.

 + Pros  – Cons
  • Insulated cup keeps contents cold for up to 24 hours
  • Powerful motor outperforms most portable blenders
  • Long battery life with 14+ blending cycles per charge
  • Heavier than competitors at 2 pounds
  • Higher price point compared to some alternatives
Techlicious Editor's Choice award logo "The Flip's insulated cup and powerful motor redefine portable smoothie-making."

The Flip has an innovative design that enables you to blend and drink right from the blender. Like other blenders, you load your ingredients in, and the press start button to turn it on. But then you flip it over so the blending blades are on the bottom. The top, which houses the blades, has a large sipping spout for on-the-go drinking (see below). I found the container to be a little top-heavy and awkward to drink from directly, but the spout easily accommodates a straw. (A reusable metal straw and cleaning pipe are included in the box.)

Closeup of the the sipping spout

At two pounds, the Flip is heavy compared to competitors like the 1.34-pound BlendJet 2 ($49) or even the 1.74-pound Ninja Blast ($59). However, most of the weight is in the Flip's blending top and there's no need use it as your to-go top if you blend at home. You can use the included travel lid, which has a spout and straw port. In my testing, smoothies remained frozen for hours, so there was no need to acquire ice and blend later.

Read more: KitchenAid's NITRO Carbon Steel Skillet: Less Rust, Less Fuss

The Flip has a powerful 11.1-volt motor, a significant step up from the 7.4-volt systems common in most portable blenders. This extra juice translates to superior blending performance, especially with tougher ingredients. In my experience, fibrous items like fresh ginger may require two 30-second cycles for optimal results.

Nutribullet Flip cup is shown with strawberries inside and the blending top is shown next to it with the blades showing.

Like all portable blenders, using ice requires some compromises with the Flip. While it can handle regular ice cubes, they shouldn't exceed 25% of the cup's blending volume for optimal performance. I noticed that going even slightly over the 4-ounce mark resulted in a couple of unblended ice cubes (see below), though running the cycle twice took care of the small lumps.

Nutribullet Flip insulated cup with a smoothie inside and the blending top with the blades showing. An ice cube is pointed out.

Battery life is another industry-leading feature. The Flip delivers 14+ 30-second blending cycles per charge, about 50% more than the average portable blender. And powering up is via USB-C, so you don't have to worry about losing a proprietary charger. When you screw on the top, you'll see the ring around the start button change from a blinking light to a solid light. It's purple when there's plenty of juice and yellow when you have about five cycles left.

Read more: GE Profile Smart Smoker Brings BBQ to Your Kitchen Counter

Nutribullet Flip with the ring around the start button glowing purple.

Like most portable blenders, cleaning is easy. A quick blend with a drop of dish soap makes cleanup a breeze. I appreciate the blender element's IPX6 rating, which means you can clean it without fear of water damage – a notable advantage over many portable blenders. While the blending top isn't dishwasher safe, the blending cup and travel lid are dishwasher-friendly on the top rack.

At $99, the Nutribullet Flip is at the high end of the portable blender market. However, its power, battery life, and insulated cup make it a compelling choice if you want flexibility on when and where you consume your smoothies.

Check price on Nutribullet button

Check price on Amazon button

[Image credit: Suzanne Kantra/Techlicious]

For the past 20+ years, Techlicious founder Suzanne Kantra has been exploring and writing about the world’s most exciting and important science and technology issues. Prior to Techlicious, Suzanne was the Technology Editor for Martha Stewart Living Omnimedia and the Senior Technology Editor for Popular Science. Suzanne has been featured on CNN, CBS, and NBC.

]]>
0 home kitchen-household top-picks
7571 <![CDATA[SwitchBot Lock Pro Review: The Smart Lock Solution for Renters]]> switchbot-lock-pro-review 2024-07-21T20:01:39Z 2024-07-21T20:06:40Z health/switchbot-lock-pro-install-open-door-100px.jpg health/switchbot-lock-pro-install-open-door-1200x675px.jpg Josh Kirschner joshkirschner@gmail.com 1 open The SwitchBot Lock Pro balances innovation, practicality, and affordability, and I strongly recommend it to renters looking for a smart lock solution.

]]>
SwitchBot Lock Pro 4.5 The smart lock market has long overlooked a significant demographic: renters and homeowners unable to modify their existing locks. The first SwitchBot Lock, released in 2022, aimed to fill that gap with an innovative design that could be mounted over your existing lock using adhesive tape. The concept worked well, but the adhesive tape's potential to fail and for the lock to fall off the door (as it has numerous times in my apartment) was a fatal flaw that we couldn't overlook.

The new SwitchBot Pro, priced at $119.99, solves that design issue by using your existing lock screws to attach the lock to the door, making it far more secure. In my testing, I found this to be a vast improvement over its predecessor, holding tightly and operating smoothly to lock and unlock. Along with other overall improvements to the functionality, this is now the perfect lock for renters like me.

The Switchbot Lock Pro is shown mounted on a door that's open.

 + Pros  – Cons
  • Easy installation for a variety of lock types. and secure mounting using existing lock screws
  • Multiple convenient unlocking methods are available
  • Improved battery life with optional extended power pack
  • Compatible with every major smart home system
  • Bulky design and limited color options (only available in black)
  • Default app notifications can be excessive
  • Smart home integration requires the purchase of a Switchbot hub
Techlicious Top Pick award logo "The best smart lock solution for renters."

Design and installation

The SwitchBot Lock Pro showcases a more refined profile compared to its predecessor, though it remains a noticeable addition to your door. Constructed with an aluminum-magnesium alloy and PC + ABS materials, the lock feels sturdy and well-built. However, the device is only available in black, which may not complement your door hardware.

The Lock Pro's unique feature is its compatibility with a wide range of lock types. SwitchBot claims support for various locks, including euro profiles, knob cylinders, double-cylinder deadbolts, and more. This makes it an option for a broad range of users, including those with older or unique lock systems. Crucially for renters, the Lock Pro doesn't require any permanent modifications to your door or original lock. You can easily remove it when moving out, leaving no trace behind – a feature that's sure to please both tenants and landlords alike.

In my testing, I successfully installed the Lock Pro on a lock dating back to the 1960s. The entire process took under 10 minutes and involved removing two screws from my existing lock plate and then using those same screws to attach the mounting bracket for the SwitchBot Lock Pro. The main Lock Pro unit clicks over the knob of your existing lock and onto its mounting bracket and is held permanently in place with four locking screws.

The back of the Switchbot Lock Pro is show with its mounting bracket

While the process is generally smooth, some users might find aligning the lock with certain door types slightly challenging. If there are fit issues with the thumb turn on your lock, the new SwitchBot Lock Pro can attach directly to the interior lock spindle. SwitchBot provides detailed instructions and video tutorials to assist you with installation.

The Switchbot Lock Pro installation components are shown on a wood surface.

Key features

Like its predecessor, the SwitchBot Lock Pro boasts the same impressive array of features designed to enhance security and convenience, along with a few minor upgrades.

Multiple unlocking methods

Out of the box, the Lock Pro allows for unlocking via Bluetooth using the SwitchBot app on your phone or watch. And because you haven't replaced your existing lock hardware, you can still use your old physical key, as well. But when paired with an optional keypad (which I highly recommend) and smart hub, the Lock Pro offers a plethora of options that support a number of real-world use cases.

In my household, everyone has their fingerprints registered with the keypad for easy access (fingerprints are only stored locally in the pad for privacy protection). We also set up temporary numerical codes for the keypad through the app for occasional visitors, such as our dog walker. And on the rare occasion someone needs to get in when we're not home, we can unlock the door remotely using the smart hub. There is even an NFC entry card option with the keypad if you want to give someone a physical means of entry and can't or don't want to make additional keys.

Switchbot Keypad Touch is shown mounted on a doorframe.

During more than a year of my family's use of the original SwitchBot Lock, all these methods functioned as advertised, with fingerprint recognition being particularly impressive in terms of speed and accuracy.

Read more: The Original SwitchBot Lock Review: A Smart Lock for Renters with a Big Flaw

The Lock Pro can also be set to automatically lock after a set period of time if it has been left unlocked; which happens every single time my kids enter or leave the apartment.

One new feature with the SwitchBot Lock Pro is the ability to open and close the lock from the inside with just a press on the knob instead of turning it (though you can still do that, too).

The lock operates quietly, with only a soft whir audible during locking and unlocking. This is a welcome feature, especially for users in apartments or shared living spaces.

Battery life

The Lock Pro uses four AA batteries, providing up to nine months of use, according to SwitchBot. This is a significant improvement over the previous model's six-month lifespan. SwitchBot offers an optional Dual Power Pack for users seeking extended battery life, promising up to 12 months of use.

A noteworthy feature is the Low Battery Unlock, which allows access even after the low battery warning, preventing lockouts. In practice, the low battery notifications provided ample warning for replacement.

Read moreRing's Best Battery Doorbell Yet: Pro Features Now Wire-Free

Smart home integration

When paired with the optional SwitchBot Hub Mini, the Lock Pro is compatible with Alexa, Apple Home, Google Home, and Samsung SmartThings. The Hub Mini is also Matter compatible.

The Hub Mini provides the additional remote locking/unlocking features I discussed above, along with real-time notifications for door lock status, door position, and more via the app. These features worked reliably during my testing, though the frequency of notifications was initially overwhelming and required adjustment in the app settings (I really didn't need to get an alert every time someone opened the door).

SwitchBot app

The SwitchBot app, which controls the Lock Pro, is intuitive and user-friendly. It allows for easy management of access codes for the keypad, monitoring lock status, and customization of settings. The app integrates well with other SwitchBot products, creating a cohesive smart home experience for those invested in the ecosystem.

Pricing and value

At $119.99 MSRP, the SwitchBot Lock Pro offers excellent value. The pricing is particularly competitive when considering the device's feature set, improved design, and unique suitability for renters.

Optional accessories like the Keypad Touch ($59.99) and Hub Mini Matter Enabled ($39.99) add to the overall cost but provide additional functionality that many users will find worthwhile. Even with these add-ons, the total cost remains competitive with high-end smart locks that may not offer the same level of features.

The bottom line

For renters especially, the SwitchBot Lock Pro fills a crucial gap in the smart lock market. It offers the benefits of a fully-featured smart lock without the need for permanent modifications to your existing locks. It successfully addresses the shortcomings of its predecessor (notably, its habit of falling off the door) while building upon its strengths.

While it may not be the perfect solution for everyone – particularly those seeking a more discreet or traditionally styled lock – for its target market, the SwitchBot Lock Pro is an excellent choice. It successfully balances innovation, practicality, and affordability, and I strongly recommend it to those in the market for this type of solution.

Check price on Switchbot button

Check price on Amazon button

[Image credit: Techlicious]

Josh Kirschner is the co-founder of Techlicious and has been covering consumer tech for more than 15 years. Josh started his first company while still in college, a consumer electronics retailer focused on students. His writing has been featured in Today.com, NBC News, and Time.

]]>
0 home home-security top-picks
7077 <![CDATA[Coway Airmega Icon: An Attractive Easy-to-use Air Purifier]]> coway-airmega-icon-a-stylish-easy-to-use-air-purifier 2024-06-26T18:33:27Z 2024-06-26T18:46:28Z health/coway-airmega-icon-editors-choice-100px.jpg health/coway-airmega-icon-editors-choice-1200x675px.jpg Suzanne Kantra suzanne@techlicious.com 1 open After testing the Airmega Icon for several months, I found it quickly and quietly cleans the air and is simple to use, making it easy to recommend.

]]>
Coway Airmega Icon 4 Updated on 6/26/2024 with current pricing. I am still using the Coway Airmega Icon and highly recommend it.

The view outside my New York City apartment window is clouded by a post-apocalyptic haze due to the recent wildfires in Canada. The poor air quality that’s plaguing the east coast of the U.S. is, unfortunately, becoming more common. While staying inside helps, a smoky smell starts to spread in my home as soon as I open a window or door. I've been testing the Coway Airmega Icon air purifier ($649.00) for several months under normal air quality conditions and was interested in how well it would perform under these new severe conditions. I was pleased with the results.

Coway Airmega Icon with the Techlicious Editor's Choice icon in the lower right corner

 + Pros  – Cons
  • Attractive, modern design
  • Easy to maintain
  • Quiet operation
  • Expensive
  • Some find the touch controls to be finicky

The Airmega Icon has a sleek, furniture-like design, so it isn’t an eyesore to place away from walls, where it will operate more efficiently. It uses a washable pre-filter for large particles like pet hair and dust, a HEPA filter for smaller PM2.5 (0.25 microns) particles like bacteria, mold, and pollen, and an activated carbon filter for gasses and volatile organic compounds (VOCs). The Airmega Icon has been certified with Clean Air Delivery Rates (CADR) of 173 (Smoke), 194.1 (Dust), and 235.3 (Pollen). CADR ratings represent the number of cubic feet per minute an air purifier can filter. Backed by these CADR ratings, Coway claims one air exchange per hour for rooms up to 1,298 square feet and four exchanges for rooms up to 324 square feet. (Multiply the square footage of our room by 0.66 to see the optimal CADR rating for your room size.)

I tested the Airmega Icon in my approximately 275-square-foot living bedroom, which should perform more than four air exchanges per hour. The Airmega Icon sits a few inches from the foot of the bed and a few feet from three walls, with the air intake unobstructed. It’s good but not an ideal placement, and it is reflective of real-world environments (many people, unfortunately, put their air purifiers in a corner, which limits airflow). I used the built-in air quality monitor on the air purifier and a handheld Igeress Indoor Air Quality Monitor for measurements.

Igeress Air Quailty Monitor showing a reading of PM2.5 at 317 μg/m3

When I began my testing of the Airmega Icon, it had been running for more than 24 hours, and the indoor air quality measured concentrations of PM 2.5 at 17 μg/m3 on the Airmega Icon and 21 μg/m3 on the Igeress – good air quality. The Igeress measurements shot up to 317 μg/m3 when I went outside (where we have a severe air quality warning).

When I left the windows open in my bedroom to let in the polluted outdoor air, the PM 2.5 levels quickly reached 140 μg/m3 on the Igeress before I closed up and turned the Airmega Icon back on. In less than 15 minutes, levels had reduced to PM 2.5 at 64 μg/m3 on the Airmega Icon and 72 μg/m3 on the Igeress. And after 30 minutes, levels had decreased to PM 2.5 at 29 μg/m3 on the Airmega Icon and 37 μg/m3 on the Igeress.

I performed the same test in my 450-square-foot living room with the doors open to the kitchen and bedrooms, knowing it should take longer to clean the air. When I left the door and windows open to let in the polluted outdoor air, the PM 2.5 levels reached 266 μg/m3 before I closed them up and turned the Airmega Icon back on. In about an hour, levels had reduced to PM 2.5 at 72 μg/m3 on the Airmega Icon and 63 μg/m3 on the Igeress. And after two hours, levels had decreased to PM2.5 at 35 μg/m3 on the Airmega Icon and 38 μg/m3 on the Igeress.

While today’s readings are a couple of data points, I’ve been using the Airmega Icon since I wrote my guide on “How to choose the right air purifier for you” for CNN Underscored. It brought me peace of mind through multiple family members’ COVID cases (it’s certified to remove viruses based on Korea Conformity Laboratories testing) and quickly dealt with smoke from many cooking adventures. And it has a wireless charger built into the top, which has come in handy.

In everyday use, the operation is quiet – you won’t know it’s on unless there’s a problem with your air quality. The LED provides an easy read on the air quality, with as good (blue), moderate (green), unhealthy (yellow), and very unhealthy (red), and you can turn the light off as needed. And if you place it in a bedroom, you can put it in sleep mode or program it so it will stay dark and quiet all night. I liked the touch controls that disappeared after a few seconds to leave a clear surface with just the PM 2.5 number, but others were perplexed by where to touch to access them and found them a bit finicky to use.

Coway Airmega Icon touch controls revealed against the wood surface.

For maintenance, you need to clean the pre-filter frequently to avoid build-up, but it’s washable. Filter replacement is simple, you remove the magnetic back and pre-filter, and it pops out. The combination HEPA/VOC filter costs $89 and should last about a year before needing to be replaced.

Coway Airmega Icon shown from a three-quarters top down.

The Coway Airmega Icon is pricey at $649 – you can buy a Clorox Large Room Air Purifier that will clean even larger spaces for $149. However, it's in line with other "designer" air purifiers like the Samsung Bespoke Cube ($699) and Alen BreatheSmart 45i ($483). Aesthetically, the Airmega Icon is attractive enough that you won’t mind that it’s visible in your space, so you’ll put it where it can work effectively. It works quickly to clean up indoor air messes like burned toast and is easy to operate and maintain. I highly recommend the Airmega Icon if you’re looking for a modern-design air purifier.

Check price on Coway button

Check price on Amazon button

[Image credit: Techlicious]

For the past 20+ years, Techlicious founder Suzanne Kantra has been exploring and writing about the world’s most exciting and important science and technology issues. Prior to Techlicious, Suzanne was the Technology Editor for Martha Stewart Living Omnimedia and the Senior Technology Editor for Popular Science. Suzanne has been featured on CNN, CBS, and NBC.

]]>
0 home kitchen-household health-fitness top-picks
7551 <![CDATA[Lenovo Yoga Book 9i (2024) Review: A Pricey, Elegant Dual-Screen]]> lenovo-yoga-book-9i-2024-review 2024-06-25T14:50:00Z 2024-06-28T15:29:01Z computers/lenovo-yoga-book9i-2024-vertical-100px.jpg computers/lenovo-yoga-book9i-2024-vertical-1200px.jpg Suzanne Kantra suzanne@techlicious.com 1 open If you regularly use a second display, the Yoga Book 9i offers the most elegant two-screen solution on the market – at a premium price.

]]>
Lenovo Yoga Book 9i (2024) 4 If you need two monitors for work, it used to mean investing in and carrying an extra display. Recently, though, you've had another option – a dual-display laptop that swaps the traditional keyboard and trackpad for a second display. That's where the Lenovo Yoga Book 9i 13IMU9 fits in. It's the second generation of Lenovo's innovative dual-screen laptop, and it delivers a satisfying two-screen experience in the space of a 13.3-inch laptop.

Lenovo Yoga Book 9i 2024 is shown in its stand with the displays stacked vertically.

The 2024 model of the Yoga Book 9i is almost identical to the first-generation Yoga Book, which won our 2023 CES Techlicious Top Pick Award for being the first dual-screen laptop. It has the same 13.3-inch 2.8K OLED displays, Bluetooth keyboard, mouse, digital pen, and origami stand that doubles as a keyboard and pen carry case. What's different is that this year's model comes with an Intel Core Ultra 7 155U processor instead of an Intel Core i7-1355U, which benchmarks show a 9% boost in performance – not much of a difference.

After weeks of testing, I found the Yoga Book 9i to be a capable machine with richly-colored displays and excellent sound for dual-screen work and watching movies. However, it's essentially last year's model, which makes its starting price of $1,980 feel expensive, and there are a few compromises.

 + Pros  – Cons
  • Richly-colored dual 13.3-inch 2.8K OLED displays
  • Excellent audio quality;
  • Impressive battery life
  • Versatile design with origami stand
  • High starting price of $1,980.99
  • Non-backlit Bluetooth keyboard
  • 60Hz display refresh rate
Techlicious Editor's Choice award logo "The most elegant two-screen solution on the market"

Design

The Yoga Book 9i is designed to catch your eye. It has a beautiful teal blue anodized aluminum chassis and folds to a sleek 11.78 by 8.03 by 0.63 inches thin. The matching keyboard case about doubles the thickness when you're carrying them together. I wish they'd attach magnetically, but they don't.

Lenovo Yoga Book 9i is shown closed with the keyboard case and mouse.

The case for the keyboard has a magnet that holds the keyboard in place. While the ends are open, the keyboard won't slide out. There's also a band to hold the digital pen.

The case keyboard functions as a stand for the laptop. You can stack the displays vertically or horizontally, and they work like an all-in-one computer with a Bluetooth keyboard and mouse. You'd think the setup might be unstable, but there is a lip on the stand that holds the laptop firmly in place, so I didn't worry about it slipping out.

The Lenovo Yoga Book 9i stand is shown from the side.

The Yoga Book 9i's main dual-screen competitor, the Asus Zenbook Duo, takes a different approach. Instead of the keyboard being an external accessory, the Zenbook Duo's keyboard and trackpad fully cover the bottom display when in use and closed. And, the stand is built into the laptop. So when you carry the Zenbook Duo, it's one piece, like a laptop. To accommodate the keyboard, the two displays don't line up flat when opened to 180 degrees, which some people find annoying in use. It's a tradeoff that comes down to personal preference.

Without the keyboard, stand, mouse, and pen, the Yoga Book 9i weighs 2.95 pounds, which puts it on par with the lightest 17-inch laptops. The total carry weight is around 4 pounds (without the power brick). The Zenbook Duo weighs 3.85 pounds with the keyboard.

Lenovo Yoga Book 9i is shown with the keyboard case and mouse stacked on top.

Dual-Screen experience

The reason to buy the Yoga Book 9i is its dual 13.3-inch 2.8K (2880 x 1800) OLED displays. They deliver deep blacks and true colors, and they support Dolby Vision. As 60Hz panels, they won't keep up with high-frame-rate games. However, you'll also find 60Hz panels on the Zenbook Duo, which has two 14-inch Full HD (1920x1080) OLED displays.

The gap between the displays is noticeable, especially if you've used devices with seamless foldable screens like the ThinkPad X1 Fold 16 or HP Spectre Foldable PC. I found the seam to be distracting, though you can span a window across the displays and drag and drop between them.

Read more: Review of the ThinkPad X1 Fold 16: A Leap Forward with a Few Stumbles

Lenovo Yoga Book 9i is shown with the two screens side by side.

When compared to the Zenbook Duo, the Yoga Book 9i's dual-display design has a key advantage. When opened to 180 degrees, the panels line up perfectly. The Zenbook Duo displays are offset with one higher than the other. This is fine if you're using them stacked vertically but is visually annoying if you're viewing them side by side.

It's worth noting that if you add an external monitor to the Yoga Book 9i, you're still limited to two displays. You can use only one of the laptop's displays and then duplicate the other laptop display on the external monitor.

Audio quality

The audio setup on the Yoga Book 9i is impressive. With four stereo speakers optimized with Dolby Atmos and tuned by Bowers & Wilkins, the sound quality exceeded my expectations. When I watched movies with Dolby Atoms soundtracks, like The Old Guard, the speakers delivered an immersive experience with clear dialogue and impactful bass. I found music playback to be equally enjoyable, with crisp vocals and a well-balanced sound profile.

Keyboard and input

The included Bluetooth keyboard provides a comfortable typing experience, though the lack of backlighting is a drawback. The Bluetooth connection is fast, and the keyboard is ready as soon as you turn it on. When you use the Yoga Book 9i as a traditional laptop and place the keyboard on the bottom display, a virtual trackpad loads. The trackpad is very responsive, though it takes a bit to get used to the virtual buttons.

Lenovo Yoga Book 9i is shown with the Bluetooth keyboard on top of the bottom display.

While the trackpad is responsive, I am a mouse person. The included mouse is a Lenovo 600 Bluetooth Silent Mouse. It's travel-sized and fits my hand perfectly, but those with larger hands may find it a little small.

You can also use the virtual keyboard and trackpad if you don't want to carry any accessories. While the virtual keyboard is usable, I would not recommend it for longer typing sessions. I find it tedious to tap on a screen with no feedback.

Lenovo Yoga Book 9i is shown with the virtual keyboard.

The Lenovo Digital Pen 3, which comes with the device, feels fluid and responsive when drawing and taking notes. And you can use it instead of the mouse or trackpad.

Ports

There is a disappointing lack of ports on the Yoga Book 9i. There are just three USB-C Thunderbolt ports, and that includes reserving one USB-C port for power – fortunately, you can use any of the three ports to plug into power. However, when you use the laptop with both displays vertically, one of the ports is covered by the stand. So, in practice, you may only have one free port available.

In comparison, the Zenbook Duo has a much wider range of ports. It has one USB Type A, two USB-C Thunderbolt, one HDMI 2.1, and a headphone jack.

Performance

Equipped with the Core Ultra 7 155U processor and 16GB of LPDDR5x memory, the Yoga Book 9i easily handles day-to-day tasks and even more demanding activities like video editing. For its price, though, I would have liked to see a higher-performing processor, like the Core Ultra 7 155H, which is 20% faster in benchmark tests and powers the Zenbook Duo. Lenovo could have also made Core Ultra 9 processors an option.

Battery life

Despite powering two displays, the Yoga Book 9's large 80Wh battery delivers impressive endurance. During my testing, it consistently lasted through a full workday with both displays active, alleviating my concerns that running two displays would result in frequent charging.

The bottom line

Priced starting at $1,980.99, the Yoga Book 9i with its Core Ultra 7 155U processor, 16GB RAM, and 1TB drive is expensive for a non-gaming laptop. The innovative dual-screen design and included accessories command a premium. However, the processor and lack of ports are disappointing considering the Asus Zenbook Duo starts at $1,499.99 with a multitude of ports and an Intel Core Ultra 7 155H processor (with 16GB RAM, and 1TB drive), and you can get a Core Ultra 9 185H (with 32 GB RAM and a 1TB drive) for $1,699.99.

At the end of the day, though, a dual-display laptop is all about the display experience. Having two flush displays – side-by-side or stacked – is something only the Yoga Book 9i can provide. It's the most elegant two-screen solution on the market, and for some people, the premium will be worth it.

Check price on Lenovo button

Check price on Best Buy button

[Image credit: Suzanne Kantra/Techlicious]

For the past 20+ years, Techlicious founder Suzanne Kantra has been exploring and writing about the world’s most exciting and important science and technology issues. Prior to Techlicious, Suzanne was the Technology Editor for Martha Stewart Living Omnimedia and the Senior Technology Editor for Popular Science. Suzanne has been featured on CNN, CBS, and NBC.

]]>
0 computers computers computers top-picks
7550 <![CDATA[Oclean X Pro Digital Review: Smart Features Meet Mixed Results]]> oclean-x-pro-digital-review 2024-06-21T20:47:21Z 2024-06-21T21:11:22Z health/oclean-x-pro-in-the-box-100px.jpg health/oclean-x-pro-in-the-box-1200x675px.jpg Josh Kirschner joshkirschner@gmail.com 1 open After two months of testing, I've discovered a mix of impressive features and notable drawbacks that make the Oclean X Pro Digital challenging to fully endorse.

]]>
Oclean X Pro Digital Toothbrush 3 With its sleek design, touchscreen display, and smart tracking features, the $109 Oclean X Pro Digital electric toothbrush aims to outshine premium models from industry leaders like Oral-B and Philips Sonicare. But does it deliver on its high-tech promises, or does it bite off more than it can chew? After two months of putting it through its paces, I've discovered a mix of impressive features and notable drawbacks that make this toothbrush challenging to fully endorse.

Oclean X Pro is shown with an additional brush head, the charging cable, and wall mount.

 + Pros  – Cons
  • Clever wall-mountable magnetic holder
  • Touchscreen offers helpful brushing feedback
  • App tracks long-term brushing efficacy
  • Competitively priced
  • Battery life falls short of claims
  • Overly complicated app
  • No pressure sensor
  • Touchscreen controls can be accidentally activated during use
  • Outdated micro-USB charging port

Design and build

The Oclean X Pro Digital has a modern, sleek appearance that gives the impression of a premium device. The handle is easy to grip (though may be a little narrow for those with large hands), and at 3.5 ounces, the toothbrush is noticeably lighter than other models I’ve used.

One notable design feature is the clever wall-mountable holder that attaches to the brush magnetically, keeping your bathroom countertop clutter-free. This holder can be easily installed using the included 3M tape, and it detaches for charging your brush.

The Oclean X Pro Digital toothbrush is shown mounted on the wall in its magnetic holder.

The toothbrush's touchscreen display is bright and easy to read, even for those of us who are a little farsighted. However, as I'll explore later, this feature is a double-edged sword.

Installing and removing the brush heads for cleaning is simple. The head pops onto a narrow metal spindle that leaves little space for grime or mildew to build up.

Cleaning performance

When it comes to its primary function, the Oclean X Pro Digital performs well. It offers a midrange level of cleaning aggressiveness that should suit most users comfortably. The brush comes with two heads – plaque control and delicate – providing options for different cleaning needs.

One of the X Pro Digital's strengths is its relatively quiet operation, which I measured right around 60dB. That’s significantly quieter than the 70dB+ on my Oral-B Diamond Care iO.

Smart features

The touchscreen display is the X Pro Digital's marquee feature, designed to provide useful information about missed areas during brushing without requiring the use of an app. In practice, I found the accuracy to be a little hit-or-miss, but the information is generally helpful. This on-brush display of brushing effectiveness is far more convenient than competitors like the Oral-B iO series and Philips Sonicare DiamondClean Smart series, which only show results through their companion apps.

Read more: Oral-B iO10 Toothbrush Base Shows When All of Your Teeth Are Clean

Closeup of the Oclean X Pro Digital display showing half of the teeth having been brushed in white and those that haven't been brushed in red

The touchscreen, while innovative, can be accidentally activated while handling the brush, potentially resulting in using the wrong brushing mode. On more than one occasion, I noticed the brush wasn’t going at the right speed, only to discover that I had accidentally swiped up or down into a different setting.

The touchscreen also doesn’t offer useful adjustment for brushing modes, only letting you switch between your preset mode (which you manage through the app), “sunrise soothing”, and “sunset cleanout.” which, I presume are equivalent to gentle and extra clean modes, though that is never explained in the documentation.

The Oclean X Pro Digital companion app tries to elevate the brushing experience with its smart features, but often complicates it instead. The app keeps track of your brushing efficacy over time, helping you identify and address problem areas. However, the app's complexity is overwhelming.

Oclean app showing brushing results. You can see the Oclean X Pro Digital in the background.

For example, there are 11 pre-programmed cleaning mode options, with the ability to create your own multistep custom programs. Each custom program step offers both a mode (clean, whitening, massage, sensitive) and a 32-level “brushing force” setting. What’s the difference between the mode and the force setting? I have no idea, and the app doesn’t help explain it. Other settings, such as for a “holiday reminder” and “Bluetooth acceleration” are equally mysterious as to their purpose in a toothbrush.

The X Pro Digital also does not have a pressure sensor, like its competitors from Oral-B and Philips Sonicare. This seems like an odd omission for a smart toothbrush that aims to improve brushing effectiveness.

Battery life and charging

Oclean claims a 30-day battery life, but my experience fell significantly short of this mark. I achieved less than two weeks per charge when using the standard mode. More concerning were two instances where the display became stuck on while the brush was idle, rapidly draining the battery. This is particularly disappointing when compared to competitors like the Laifen Wave, which in my testing achieved nearly 6 weeks of battery life.

Read more: Laifen Wave Review: A Serious Challenger to Oral-B and Sonicare

Beyond the clever magnetic mounting bracket, the charging method is a big letdown, using a dated micro-USB/USB-A charger instead of the now-standard USB-C. So, if your computer doesn’t have a USB-A port (most modern laptops don’t) you will need to buy a compatible charging brick. Plus, the toothbrush requires the charging stand and can’t be charged directly from the cable. This means you'll need to bring the stand and the cable with you when you travel.

A closeup of the Oclean X Pro Digital charging port and the microUSB to USB-A charging cable.

Additional features

The Oclean X Pro Digital is IPX7 waterproof, making it suitable for use in the shower, if you’re one of those brushing-in-the-shower people. Oclean also provides a generous 2-year warranty.

Value proposition

At $109.99 retail, the Oclean X Pro Digital is priced competitively for a smart electric toothbrush, especially when compared to similar models from other brands. The Oral-B iO line, for instance, starts at $119.99 for a model with brushing effectiveness tracking, with some models entering the $300 range. Philips Sonicare models with comparable features start around $200.

In terms of ongoing costs, replacement brush heads for the Oclean will run you between $4-$6, depending on style and quantity, which is reasonable for the market.

Who is it for?

The Oclean X Pro Digital is best suited for those looking for smart brush tracking without the high price tag of premium Oral-B or Sonicare models. It's also ideal for users who prefer the convenience of on-brush feedback rather than having to check an app after each brushing session. However, potential buyers should be aware of the compromises, particularly in terms of battery life and the app's steep learning curve.

The bottom line

The $109.99 Oclean X Pro Digital offers an intriguing mix of advanced features at a competitive price point. Its on-brush display of brushing effectiveness sets it apart from more expensive competitors, providing a unique convenience. However, the brush's ambitious reach comes with some significant drawbacks, particularly in battery life and overall user-friendliness.

For tech-savvy users willing to navigate a complex app and who prioritize smart features over battery longevity (or for those willing to ignore the app entirely), the Oclean X Pro Digital is a cost-effective alternative to higher-end models. However, for those seeking a more straightforward, reliable electric toothbrush experience, the compromises might outweigh the benefits.

Check price on Oclean button

Check price on Amazon button

[Image credit: Josh Kirschner/Techlicious]

Josh Kirschner is the co-founder of Techlicious and has been covering consumer tech for more than a decade. Josh started his first company while still in college, a consumer electronics retailer focused on students. His writing has been featured in Today.com, NBC News and Time.

]]>
0 home health-fitness
7538 <![CDATA[Sonos Ace Raises the Bar for Noise-Canceling Bluetooth Headphones]]> sonos-ace-raises-the-bar-for-anc-bluetooth-headphones 2024-06-05T13:45:45Z 2024-06-18T15:56:46Z phones/sonos-ace-button-100px.jpg phones/sonos-ace-outside-case-techlicious-top-pick-1200x675px.jpg Jonathan Takiff scribejt@aol.com 1 open Sonos Ace delivers top-tier sound, comfort, and a unique TV Swap feature, making them arguably the best ANC over-ear headphones on the market.

]]>
Sonos Ace Headphones 4.5 If you're in the market for a new pair of active noise-canceling (ANC) over-ear headphones, there's a new player to consider: Sonos. The company, renowned for its premium mesh multi-room sound systems, has been quietly working on ANC headphones for over half a decade. Now, they're finally delivering with the introduction of the Sonos Ace.

Sonos Ace on the right with their case on the left

Is the Sonos Ace ($449) the new top card in the premium-grade wireless ANC headphones deck? After a week of serious listening and comparing them to the Bose QC Ultra ($429) and Sony WH-1000xm4 ($248), among others, this headphones fanatic wouldn't bet against it.

The Sonos Ace are the only headphones I’ve encountered that can decode both major forms of Spatial Audio encoded music - Dolby Atmos and Sony’s 360 Reality - and also perform a home-grown spatial processing of non-Atmos/360 material. Increasingly, you'll find your favorite tracks available in spatial audio, and you won't want to go back. Spatial audio creates more dimensionality and drama while clarifying each instrument.

The Ace likewise stands out with TV Swap, a neat trick that users can play with their Sonos Arc soundbar to shift the soundtrack from the soundbar to the headphones via a low-powered WiFi Direct wireless connection. This is great for late-night listening when you don't want to disturb housemates or neighbors. (It's also coming soon to Sonos Beam, Beam Gen 2, and Ray soundbars.)

But honestly, what really pleases me the most is the Ace's core obsession with the basics – top-flight sound and ergonomic design, which collectively deliver a "built for comfort" package that's arguably second to none. It will likely spark owners to reach for the Ace first, even over other top headphones (from the likes of Apple, Bose, and Sony) they might have in their collection.

 + Pros  – Cons
  • Well-balanced, detailed, neutral sound
  • Comfortable, ergonomic design
  • Support for both major formats of Spatial Audio
  • Large case
  • Doesn't fully integrate with Sonos ecosystem
Techlicious Top Pick award logo "Top-flight sound and ergonomic design that delivers comfort second to none."

Audio Quality

The extra-comfy impression actually starts (and ends) with the sonic performance of the Ace – well-balanced, detailed, and neutral. Tuned by committee (in a good way), these entertainers are ripe and ready for literally any kind of music or soundtrack you throw at them, from hip hop to rock, jazz to classical. No shiny object syndrome is happening here – no "crank it up to 11" boomin' bass or excessive brightness that initially seems appealing (at, say, an in-store listening station) in other headphones but eventually induces ear fatigue and buyers' remorse. I've kept these things comfortably on my noggin for almost a full workday without fatigue setting in, with only the occasional brief time out needed to relieve the build-up of ear pressure that can happen when high compliance (40 mm) drivers are pumping in a tightly sealed space.

Design

Hitting the scales at 11.4 ounces, the Ace are not the lightest headphones on the block. Nor the most petite. Building on the boxy look of the 13.6-ounce Apple AirPod Max cans ($549) but comfier to wear, the Aces' sit nicely on my head with just the right degree of clamping, a thick surround of memory foam on the headband, and a slightly larger-than-normal and more rectangular (less oval) opening inside the memory foam-padded ear cups. Because this cup opening is wider than usual across the top and bottom (as is the foam), there is no pinching of my ears at the top and only minor overlap on my ear lobes. So, almost all of the ear tucks nicely inside a cone of foam silence.

Sonos Ace shown from the side on-ear

Adding to the comfort story – note the smooth, pinch-less design of the swiveling chromed metal shafts that link the headphone band and cans, with extend/retract, twist, and tension adjusters hidden inside the cups. So there's nothing exposed here to snag and tug on a wearer's long tresses. The downside? While folding flat, these cans don't also swivel inwards. So, the Ace's carry case has a slightly larger diameter than that of rivals, like the Bose QC Ultra shown below.

Sonos Ace case on the left with the Bose QC Ultra case on the right.

While we're on the subject, please also note the environmentally friendly nature of the Ace's case, made from recycled materials, as is the accessory pouch that clings inside (with a magnet) and holds the two cables (USB-C to USB-C and USB-C to 3.5 mm) included in the kit for plug-in audio connection, charging and AC-powered operation if you desire. The textured case material feels like hardened felt. I'm not sure how well it's going to hold up. As with the headphones themselves, there's no evidence of waterproofing. (So be careful out there. I've been carrying mine around inside a Ziploc bag.) I'd wager that Sonos will sell replacement cases and maybe take back your originals for recycling. They've already announced a swap-out strategy (though not a price) for the Ace's magnetically secured, vegan leather-wrapped earcups.

Sonos Ace show inside their case with the accessoy pod nestled in the headphone band.

Connecting with the Sonos ecosystem

Honestly, I was hoping that the Sonos Ace would debut as a full-fledged member of the Sonos ecosystem. That didn't happen. While Ace is controllable with the same S2 app that runs Sonos speakers, it's a less versatile offspring. Sonos system devotees can't just pick music off your subscribed-to streaming services and play it straight from the network to the headphones, as is possible with all Sonos speakers. 

Why would that matter? When running on WiFi, Sonos products can pull down and deliver lossless High Res FLAC encoded content at resolutions up to 24 bit/48KHz. And in theory, WiFi signals travel farther than their Bluetooth brethren – but not in testing with my Sonos Arc soundbar. The Bluetooth connection range between my iPhone 12 Pro and the Ace headphones actually proved more robust – stretching from a third-floor bedroom to a basement laundry zone (about 35 feet away, as the laundry bag flies.) The Arc to Ace WiFi radios stopped communicating when I walked 25 shoe lengths from the TV setup.

I was also hoping that streaming music selections playing straight to the Arc would be transferrable to the Ace headphones via TV Swap. More importantly, the audio would remain high-res as the connection between the Arc and Ace is made via WiFi Direct, a medium with higher data capacity than Bluetooth provides.

But none of that is happening in this first iteration of soundbar and headphones pairing. TV Swapping is only doable from external sources fed to the Arc via its HDMI or optical inputs.

As a workaround, I've called up favorite music services on my Sony Bravia XBR 48" OLED TV – SiriusXM, Radio Paradise, and Amazon Music Unlimited – and sent that content through the Arc to the Ace via the TV Swap connection. Some automatic signal down-converting (to 16 bit/48 kHz) was necessary to get new material from Little Feat and Dua Lipa playing on my Sony TV's Amazon Music app and into Sonos land. And from the Arc to the Ace, the WiFi carried signal resolution is reduced yet again, I’m told, though the music that reached my ears was still quite pleasing.

Sound processing

The Sono Ace can present lossless audio treats sent over Bluetooth from an Android-OS-based device that packs Qualcomm Snapdragon Sound aptX processing. Ace detectives might then conclude that a Qualcomm chipset – necessary to decode aptX – is aboard and likely also working on the active noise reduction and mobile phone call processing in these Sonos headphones. However, I couldn't pry that confession out of Sonos folks.

Whatever. The microprocessor is an all-around good performer. It is sufficiently efficient that you can run these headphones for 30 hours between charges with the ANC active. (Then do a fast three-minute charge to get three hours of use or charge them fully in under three hours.)

Fitted with 8 "beam focused"' microphones, the sound quality of Ace phone calls is respectable at both ends in a quiet talking zone and has decent muting of background sounds when out and about, I've been told. Sonos claims (of course) that the adaptive Active Noise Cancellation processing is "World Class." But as Qualcomm chips are packed in lots of global brand headphone products, you could take that tout two ways!

For my comparative home tests of the ANC on four different headphones, I blasted 85 dB of airplane cabin and coffee shop noises (found on Amazon Music) to my living room Move 2 speaker. Bose QC Ultra Headphones proved to be at the top of the crop and were superior at shushing these ambient noises. But the Sonos Ace were a respectable second, equal to the performance of the Sony WH-1000xm4 headphones in my arsenal, and significantly better at noise canceling than the $99 Anker Soundcore Space One, several reviewers' favorite bargain ANC headphone this season.

From the left: Sony WH-100XM4, Sonos Ace, and Bose QC Ultra.

In-app and on-ear controls

Easier operation: That's another thing Sonos was aiming for with the Ace. It achieves this most successfully with the tactilely distinctive multitasking Content Key on the right earpiece. No groping or guessing is needed to find and use this raised and bumped-out tool. Tap down to start and pause the music, double or triple tap to skip tracks forward and back, and hold longer to connect/disconnect TV Swap. Sliding the key forward and back elevates or lowers the volume. Below that is a conventional round button you press and hold to activate voice assistance or tap very briefly to alternate between Active Noise Cancelling and Aware mode ( the latter drawing in and amplifying outside sounds more aggressively than I'd like.)

Sonos Ace with the Content Key visible on the ear cup.

Sometimes, with just cause (to save power), the Ace headphones will disconnect from the Sonos app on your phone while maintaining their (other) Bluetooth link to your chosen streaming music app. The latter connection is sufficient for the Content Key to do its thing. But you need a live connection to the Sonos App to tweak the EQ settings and check the battery status. The "Reconnect" tab was operating erratically on the first Ace headphones Sonos sent my way. But a replacement Ace has been running flawlessly.

Other things I've discovered the hard way: To get TV Swap going, your Arc soundbar needs to be WiFi enabled. Even if your soundbar is connected to your home network via a hardwired Ethernet cable, you must also tap the "Enable WiFi" line in the Arc settings menu. Yes, both carriers can be connected simultaneously.

Read more: Sonos One vs Sonos Era 100: Should You Upgrade?

Also, if using an iOS device, make sure that its Dolby Audio output setting (found under Settings-Music-Audio- Dolby Atmos) is marked "Always On" rather than "Automatic" if you're going to be listening to spatial content from the Apple Music site. "Automatic" only triggers Apple and (sister brand) Beats headphones and earbuds to light up Atmos-coded files from Apple Music. The Ace decodes Atmos or 360 Reality content from Amazon, Tidal, Deezer, and Nugs.net, regardless of the output setting.

So how good is Spatial Audio on the Ace?

When used with a multi-speaker setup, Atmos and 360 Reality really do throw a lot of focused sound around your room in dramatic fashion. However, in headphones that have just a single 40 mm driver in each earcup, the challenge to float and even "pinpoint" sound "objects" in a virtual dome around your head is much harder. Signal phasing and timing adjustments can only do so much. Widening the apparent sound field proves to be much easier than vertically expanding it. That said, I have experienced some very interesting effects out of Ace headphones with encoded content. For example, you experience a sudden woosh of spooky depth in Kacey Musgraves' "Deeper Well" whenever she goes diving down her emotional hole. And you get a fantastic sense of spaciousness and unveiling of previously missed details in the Dolby Atmos' remix of the Beach Boys' classic "Pet Sounds" album (give a listen to "God Only Knows "and "I Just Wasn't Made For These Times").

With streaming and disc-based movies encoded in Dolby Atmos, the surround sound process does transfer from an Arc to the Ace when TV Swap is engaged, delivering some playful location shifting tricks. For other content Sonos turns on an alternate quasi-spatial scheme which is usable with or without head tracking that shifts the sound field left or right as you turn your head. As on the Bose QC Ultra headphones, which offer homegrown Spatial Audio processing (to the exclusion of Dolby Atmos or 360), some sound-spreading effects are successfully delivered, clarifying instruments and voices and adding a bit of environmental reverb. I think Bose works this magic act better, though neither rendering is earth-shattering. The Sonos version might improve when the Ace software is updated with TrueCinema processing, custom tuning the headphones to your home environment. Stay tuned.

Bottom Line

Clearly, Sonos has studied the premium wireless headphones field and found design aspects worth finessing. While I would have liked to see better integration with the Sonos ecosystem, the company got the most important things right: excellent sound quality, premium build quality, and a comfortable design. If you are shopping for a serious pair of headphones that will serve you well for years to come, the Sonos Ace ought to be on your shortlist.

Check price on Sonos button

Check price on Amazon button

[Image credit: Jonathan Takiff/Techlicious]

Jonathan Takiff is a seasoned chronicler of consumer electronics (30+ years), longtime staffer for Philadelphia newspapers, syndicated columnist and magazine/website contributor.

]]>
0 tablets headphones top-picks
7535 <![CDATA[Acer Chromebook Plus 516 GE: The First Real Gaming Chromebook]]> acer-chromebook-plus-516-ge-the-first-real-gaming-chromebook 2024-05-31T23:20:13Z 2024-05-31T23:21:14Z computers/acer-chromebook-plus-516-ge-nvidia-100px.jpg computers/acer-chromebook-plus-516-ge-nvidia-1200x675px.jpg Suzanne Kantra suzanne@techlicious.com 1 open The Acer Chromebook Plus 516 GE proves Chromebooks are for gaming, too, with its 120Hz 16-inch display, RGB keyboard, and ports galore.

]]>
Acer Chromebook Plus 516 GE 4 When you think about Chromebooks, you probably don’t envision gaming rigs. However, Acer’s new 16-inch Chromebook Plus 516 GE has the power and design aesthetic that may change your thinking.

Acer Chromebook Plus 516 GE showing the Nvidia GeForce NOW app with the Techlicious Editor's Choice logo in the lower right corner.

As a Chromebook Plus model, the 516 GE more than meets Google’s minimum requirements for Chromebook Plus – an Intel Core i3 or AMD Ryzen 7000 CPU, 8 GB of RAM, 128 GB of storage, and a 1080p Full HD display. It also can take advantage of the new AI-powered features that Google just announced, such as the "Help me write" tool for Google Docs and "Magic Editor" for Google Photos.

Is it a real gaming Chromebook? For gamers, Acer gave the Chromebook Plus 516 GE a giant 16-inch display with a 120Hz refresh rate, which is necessary for smooth graphics for cloud-based gaming. There's no discreet graphics card, but you don't need one for cloud gaming. Other features that make it gaming friendly as its four-speaker sound system, tons of ports for peripherals, and high-speed internet.

I've been testing the Acer Chromebook Plus 516 GE (model CBG516-2H-59S4) over the last week and if you're a cloud gamer, there's a lot to like. It also doesn't hurt that its sleek black design and RGB backlit keyboard make it look the part.

Design and display

At first glance, you'll immediately notice the Chromebook Plus 516 GE's sleek, dual-finish aluminum case and RGB backlit keyboard, which scream gaming machine. You can customize the keyboard, choosing colors and mapping them to four separate zones to add a touch of personalization to your setup.

Acer Chromebook Plus 516 GE RGB keyboard

While the keyboard doesn't offer the tactile feedback that some gamers might crave, it's well laid out, with highlighted WASD keys that serve as a helpful design element for gaming. Typing on the keyboard is comfortable, and the key travel is satisfactory for most users.

For a 16-inch laptop, the Chromebook Plus 516 GE is surprisingly slim and light. It measures 14.04 x 9.83 x 0.84 inches and weighs 3.81 pounds.

The laptop's 16-inch IPS LED display has a resolution of 2560 x 1600 and a smooth 120Hz refresh rate, making it well-suited for gaming and video playback. With 350 nits of brightness, the display is bright enough for most indoor environments. However, I would not recommend it for outdoor use. The color is accurate, and you can view it at a wide angle without significant color distortion.

New Chrome OS features

The Chromebook Plus 516 GE, like all new Chromebook Plus laptops, comes with a suite of new AI-powered features designed to enhance your productivity and creativity. When you purchase a Chromebook Plus, you'll receive a 12-month trial subscription to Google One Premium AI, which unlocks access to many of these features.

One of the most helpful tools is "Help me write," which works in Google Docs, Gmail, social media sites, and even YouTube (for writing video descriptions). I've used it to overcome writer's block, create outlines, and check my grammar.

Google Photos also gets a significant boost with Magic Editor. You can now easily reposition people in your photos, erase unwanted objects (or even people), and apply presets to change the look of your images. For example, you can change the color of the sky, add a color focus to make the subject pop, or blur the background. In my experience, these tools work wonders most of the time and are well worth trying.

Read more: Google Photos Unleashes Free AI Photo Editing Tools for Everyone

Another useful addition is the "Create with AI" tool for generating custom wallpapers and backgrounds for video calls. For most applications, you can use a set of predefined terms to describe your desired background, such as choosing the style of an office and a color palette. Google Meet takes it a step further by allowing you the freedom to describe any background you can imagine. While I appreciate the open-ended capabilities of Google Meet's Create with AI tool, the results were somewhat hit-or-miss, as is often the case with AI. The traditional preset backgrounds available for Google Meet and other applications, like Zoom, tended to produce more professional and predictable results.

Screenshot of Chrome's Create with AI wallpaper tool

One of the important new gaming features for Chrome OS is "Game Dashboard," a discreet set of controls that you can easily access whenever you're playing a game. You can take a screenshot, record your gameplay, or map Game Controls with just a click. You can also easily add video from the front camera to capture your reactions and choose to record the game audio, your audio, or both.

"Game Controls" is another new feature that helps you play Android games with multiple touchscreen controls. You'll need to assign a key to each on-screen control manually, which isn't an intuitive process. Fortunately, you can view the key icons next to the controls while playing, so you don't have to memorize them.

Screenshot of the Grand Mountain app showing the keyboard controls.

Note that not all Android games support "Game Controls," so select games from the "Recommended for your Chromebook" section of Google Play. And if you plan on playing a lot of Android games, you might want to consider a touchscreen Chromebook Plus model instead.

Performance

The Chromebook Plus 516 GE has plenty of power to keep you in the game. Under the hood of the model I tested, you'll find an Intel Core i5 processor 1240U, paired with 8GB of LPDDR4 RAM and a 256GB NVMe SSD. In performance benchmarks, it scored a respectable 223 on the CrXPRT 2 test and a 1254 on the Basemark Web 3.0, placing it just below premium Chromebooks like the HP Dragonfly Pro.

Audio

I was pleasantly surprised by the Chromebook Plus 516 GE's immersive, rich audio sound. There are two upward-firing speakers and two downward-firing speakers with woofers. The woofers project sound in opposite directions, to eliminate unwanted vibrations for clear, distortion-free listening, whether you're gaming or watching action movies.

Ports and connectivity

The Chromebook Plus 516 GE offers a comprehensive array of ports, providing you with ample options for connecting peripherals and external displays. There are two USB Type-C ports, one USB Type-A port, an HDMI 2.1 port, and a headphone jack. So, you can easily connect a mouse or controller, making it well-suited for gaming setups.

For internet connectivity, the Chromebook Plus 516 GE supports WiFi 6E and Ethernet. This is crucial for cloud gaming, where low latency and high bandwidth are essential for a smooth, lag-free experience.

Webcam

The Chromebook Plus 516 GE features a Full HD 1080p webcam with auto exposure. I found the camera produces bright, crisp images. My favorite feature is the "Improve Lighting" feature, new for Chrome OS, which works wonders when you'd otherwise have uneven lighting on your face.

Read more: Banish Background Noise: Upgrade Your Video Calls with Krisp

Battery life

With its 65 W battery, Acer rates the Chromebook Plus 516 GE at up to 10 hours of battery life. I didn't benchmark this spec, but in my testing, I consistently got in an entire workday without running out of power.

Pricing and availability

The Chromebook Plus 516 GE is priced at $649 at Best Buy, which places it slightly above the mid-range point for Chromebook Plus models, which start at $349. While it may not be the most affordable option in the lineup, the Chromebook Plus 516 GE offers a solid combination of features and performance that justify its price tag.

The bottom line

With its gaming-inspired aesthetics, expansive 16-inch display, enveloping sound, and ample power, the Chromebook Plus 516 GE is a compelling package. It strikes a balance between performance and user-friendliness, making it an attractive option for those who want a gaming-capable machine without the complexity or cost of a traditional gaming laptop.

Check price on Best Buy button

[Image credit: Screenshots via Techlicious, Techlicious]

For the past 20+ years, Techlicious founder Suzanne Kantra has been exploring and writing about the world’s most exciting and important science and technology issues. Prior to Techlicious, Suzanne was the Technology Editor for Martha Stewart Living Omnimedia and the Senior Technology Editor for Popular Science. Suzanne has been featured on CNN, CBS, and NBC.

]]>
0 computers computers top-picks
7102 <![CDATA[The Midea U-Shaped Window AC Quietly Delivers Superior Cooling]]> midea-u-air-conditioner-quietly-delivers-superior-cooling 2024-05-31T15:23:21Z 2024-05-31T16:15:22Z health/midea-u-front-100px.jpg health/midea-u-front-1200x675px.jpg Stewart Wolpin sw@stewartwolpin.com 1 open Thanks to its innovative U-shaped design, the Midea U is one of the quietest AC units on the market, plus it delivers superior performance and convenience.

]]>
Midea U 8,000 BTU Room Air Conditioner 4.5 As we head into what the National Weather Service predicts to be a record-hot summer, room air conditioners are not only desired but a potential lifesaver. Unfortunately, even the quietest window AC unit can fill a room with a loud continuous hum on the level of an airplane engine, making the cooling cure nearly as bad as the sweltering disease.

The Midea U 8,000 BTU window AC ($379), however, thanks to a radically different U-shaped design, blows cold air in a whisper, and is, by far, the quietest window AC I’ve ever owned. My 8,000 Midea edition is 10-15 dB quieter than even a 5,000 BTU AC unit in our apartment, and at its lowest auto eco mode literally keeps your room as quiet as a library.

Midea U air conditioner shown in window from the top down so you can see the outside and inside portions of the unit. In the lower right you see the Techlicious Editor's Choice award logo.

Equipped with WiFi, the Midea also comes with an intuitive smartphone app that makes automated and remote operation super simple, and its physical remote control is equipped with an LCD screen that displays full operational status. With a variety of included weather seals, the Midea is designed to sit permanently in your window – but, as a result, it requires some handyman skills, time, and patience to properly install.

Best of all, the Midea U is less than $400 – with discounts, I got it from Amazon for $349 – and it comes with a window support bracket; the 10,000 BTU Media U is $449 before discounts, the 12,000 Midea U $499. By comparison, standard 8,000 BTU units usually can be found for around $300, depending on timing and discounts, but are far noisier, which makes the Midea price premium totally worth it.

 + Pros  – Cons
  • Ultra quiet
  • Excellent WiFi/app control
  • Year-round weather sealing
  • Less than $400
  • Complicated installation
  • Confusing remote control
  • No auto left/right air flow louver swivel

Ergonomics/Installation

Most obviously, the Midea U does not look like a typical window AC unit. (There are visually identical U-shaped models from Mr. Cool and Perfect Aire, which are not made by Midea.) There are upside-down U-shaped units from GE and others, but these only fit sill-less windows. Midea claims to have re-invented the AC, and they’re right.

Midea’s U-shape means you can almost completely close your double-hung windows between AC’s two halves, which offers numerous advantages. First and foremost, that annoying hum from its compressor and fan is now outside and behind your nearly closed window, which is why the Midea U is so quiet. Because your window can now be nearly closed behind the front section, it’s easier to seal the little remaining open space against the cold in winter, which means you should be able to just leave the Midea U in your window year-round with minimal additional insulation. Finally, you can easily open your window to let in fresh air when it’s cool enough outside to do so.

Achieving these sound muffling and weather insulation advantages, however, requires a bit more work than the normal shoving the AC unit in your window, spreading those flimsy accordion flaps to close the gap between the AC unit’s sides and the window jambs, and closing your window on top of it.

The Midea U weighs 55.55 pounds – around average for 8,000 BTU units – but at nearly 20 inches deep, it’s much bulkier, so you better either have a strong back or a Media recommended second pair of hands. Its front measures a normal 21.9 wide by 13.26 inches tall, so it will fit windows up to 36 inches wide, but extends 9 inches into your room, about twice that of other normal box-shaped AC units.

To make sure the Midea stays sealed in your window against winter’s cold and doesn’t produce any vibrational noise, the installation is…well…complicated, necessitating the careful installation of not only the included window bracket but varying and sundry pieces of weather sealing. In the manual, the installation instructions run 10 illustrated pages; fortunately, a QR code in the manual links you to helpful video instructions.

I consider myself handy, but I took one look at all those lengthy and precise instructions and made a single stupid attempt at lifting the Midea by myself – then immediately called my super to install it. It took him an hour-plus to do so. If you similarly opt for third-party installation, supervise it to make sure the weather stripping is placed, and placed correctly.

For some reason, an extruding lift lip on the bottom of my storm window and perhaps a wider-than-normal double-hung window construction meant there wasn’t enough space between the Midea’s two sections to fully pull down both the glass and the screen panes.

Operation

Instead of often confusing touch controls, the Midea is equipped with old-fashioned physical round buttons on its front display, including controls for temperature up/down, mode (Auto, Cool, Dry, Fan), Fan Speed (Fan, Low, Medium, High, Auto), along with an Eco energy save mode, an LED on/off to keep distracting display lights off in your bedroom, and Sound, which turns off the action “beep” confirmation.

closeup of Midea U control buttons

The Midea RF remote – you don’t have to point it at the AC – is as fully functional and easily laid out as the front unit’s panel and includes a 2x1-inch orange backlit LCD that provides a full visual status view. But controls seem to lag if they worked at all – the remote seemed to operate according to its own unknowable logic.

Midea U remote control

You also get a few unique features. A Swing control, for instance, makes the upper louver wave up and down for, I guess, variable airflow. When the unit is turned off, the louver closes, creating an additional cold weather seal. Oddly, adjustable twin left-right directional louvers don’t auto sweep. A Sleep button raises the temperature by 2 degrees Fahrenheit in 30 minutes, then another 2 degrees in another 30 minutes, then, after 7 hours, returns to the original temperature.

You also get the usual Timer button that will automatically switch the unit on at a set time in the future in 30-minute increments for up to 10 hours, in hour intervals up to 24 hours. While I often used this timer (or “delay”) function on previous “dumb” ACs, you likely won’t need to since the handy scheduling and remote operation options in the Midea smartphone app render the Timer moot.

Given the remote control’s operational quirkiness, you’ll find the Midea smartphone app far easier to use. You get access to all the aforementioned on-unit and remote control functions, at home or away – I had no trouble turning on and/or changing the settings from the road – along with some additional features. Scheduling lets you set the unit to turn on at specific times on specific days with specific settings; for instance, I set the Midea U, located in our living room, to go on 8:30 AM on weekdays in Eco and Auto mode. I would have loved a setting that turned the unit on automatically when the room hit a certain temperature. But this is quibbling, suggested only since the Midea app offers so many other set-it-and-forget-it auto settings.

Performance

The Midea U is so quiet I often have to double check to see if it’s on. At its highest, loudest setting, the Midea only registered around 43dB at 15 feet away, just a smidge louder than a library, while my other 8,000 BTU unit registered 57 dB at 15 feet at its loudest, about the same amount of sound as normal human conversation, and 53 dB at its lowest eco/auto setting. The Midea U was even quieter than my office 5,000 BTU unit, which checked in at 47dB in eco/auto.

Differences in decibel levels are, like Richter scale earthquake measurements, logarithmic – for instance, 60dB is half as loud as 70 dB and 40 dB is just an eighth as loud as 70 dB. In the real world, I found the stark noise difference between our older 8,000 BTU AC and the Midea U shocking.

Once your room reaches your desired cool comfort level at its highest settings, you can switch the Midea U to Eco and Auto modes and set a desired maintained temperature. But unlike other AC units that annoyingly and loud switch on and off to maintain a set temperature, the Midea maintains a constant, quiet cooling airflow. This ability to quietly maintain a set temperature, combined with the auto on Schedule, the only time we need to interface with the Midea when we’re home is to turn it off.

With the older 8,000 BTU AC on in the living room, my wife and I had to jack up the volume on the TV, and, eventually, we would just decide to be warm rather than deafen ourselves. With the Midea U, we don’t have to touch the TV volume. I can only imagine the difference the Midea U would make in a bedroom, but I can almost guarantee you’d get a better and more comfortably cool summer night’s sleep than you would with any other window AC.

With its efficient timing, auto settings, and DC inverter technology, Midea claims the U achieves more than a 35% energy savings compared to other traditional units, and that it’s the first window AC to obtain the Energy Star Most Efficient 2022 Certification.

The bottom line

Midea U shown from the front

Yes, the 8,000 Midea U air conditioner is slightly pricier than standard box-shaped models, but it’s unlikely you will find a unit as quiet and easy to use. Plus, it includes the window support bracket, which itself separately would cost you anywhere from $25 to $75. The initial Midea U installation is a bit more complex and time-consuming, but if properly installed with weather stripping, you can just leave it in your window when the weather cools, perhaps requiring only minimal additional insulation.

In short, the Midea U ($379) is not only the quietest AC unit I’ve ever owned, but it’s also the easiest and most convenient to use. I wouldn’t be surprised if other AC makers adopt its noise-muffling U-shaped design, given it’s far superior performance and convenience.

Check price on Amazon button

Check price on Walmart button

Updated on 5/31/2024 with new pricing.

[Image credit: Stewart Wolpin/Techlicious]

Stewart Wolpin has been writing about consumer electronics for more than 35 years, including news, reviews, analysis and history, and has attended and covered nearly 50 Consumer Electronic Shows and around a dozen IFA shows in Berlin. For the Consumer Technology Association (CTA), he is an elector for and writes the official biographies of the annual CT Hall of Fame inductees, and is the keeper of the industry’s official history.

]]>
0 home home-improvement top-picks
7520 <![CDATA[FlexiSpot C7 Review: The Ergonomic Office Chair That Won’t Break the Bank]]> flexispot-c7-review 2024-05-14T00:23:38Z 2024-05-16T03:24:39Z health/flexispot-c7g-air-ergononmic-chair-100px.jpg health/flexispot-c7g-air-ergononmic-chair-editors-choice-1200x675px.jpg Josh Kirschner joshkirschner@gmail.com 1 open After extensive testing, we recommend the FlexiSpot C7 to anyone seeking a comfortable, supportive, and adjustable office chair at a reasonable price. 

]]>
FlexiSpot C7 Ergonomic Office Chair 4 As someone who spends far too many hours seated at my desk, I understand the importance of investing in an office chair that offers both proper support and long-term comfort. And since each one of us is shaped differently, getting those levels of support and comfort dialed in requires your chair to provide the necessary adjustments to tailor your seat to your…well…seat.

Flexis[pt C7 chair shown from the front

The FlexiSpot C7 Ergonomic Office Chair, which I have been testing in my office for the past month (along with my colleague), manages to accomplish that task admirably. And coming in sub-$350 (depending on what sale they're currently running) makes the C7 far more affordable than similar choices from premium manufacturers, such as the Herman Miller Aeron or the Steelcase Karman.

There are some sacrifices. Material quality is lower than a Herman Miller, and the C7 is recommended for folks 5'4" and taller. But it's easy for me to recommend the C7 to most people looking to buy a new office chair and who don't want to get a second job to pay for it.

 + Pros  – Cons
  • Highly customizable, with numerous adjustments
  • Sturdy construction
  • Comfortable mesh seat and effective lumbar support
  • Excellent value for money
  • Materials not as premium as those found in high-end office chairs
  • Assembly instructions could be clearer
  • May not be suitable for users shorter than 5'4" or taller than 6'5"
Techlicious Editor's Choice award logo "The C7 offers excellent support, adjustability, and comfort without breaking the bank."

Shipping and assembly

The FlexiSpot C7 arrives in a compact package with a shipping weight of 56 lbs. Assembly is relatively straightforward, although having two people available is helpful given the chair's weight of 55 lbs.

One minor issue we encountered during assembly was a mismatch between the provided bolts and the instructions. There were extra bolts that prevented the base from attaching properly, and our seat bottom had more attachment holes than indicated, leading to initial confusion. However, we were able to figure it out and complete the assembly process without too much difficulty. Clearer instructions are an area for improvement.

Flexispot C7 chair parts before assembly

Read moreSimpliSafe Outdoor Monitoring Stops Would-Be Intruders

Materials and build quality

The FlexiSpot C7 is solidly built, with a sturdy base and durable materials. However, compared to higher-end office chairs like those from Steelcase or Herman Miller, the C7's materials feel slightly less premium. The plastic components have more visible molding seams and a less dense feel, somewhat reminiscent of the difference in trim quality between a Honda and an Audi.

The C7 I tested had a mesh seat, which keeps you cooler throughout the day. A foam seat is available if you prefer more cradled support.

The C7 comes with a 10-year warranty.

Adjustability

The FlexiSpot C7 boasts an array of adjustments to customize the chair to your body proportions and working style. The seat is a generous 21" wide, and the depth can be adjusted from 17" to 20", as well as tilted. Seat height spans from 19.3" to 22.6", which FlexiSpot says is designed to accommodate users between 5'4" and 6'5". The chair also features 3D adjustable armrests (slide front/back, up/down, and swivel in/out), and the back recline position ranges from 93° to 128°, with a tension adjuster. The headrest, too, can be adjusted up and down and tilted up to 45°.

Closeup shot of the Flexispot C7 showing the controls for adjustment.

An optional footrest is also available for additional leg support. I did not get one with my review unit, as this was being used at a desk, so I didn't have the opportunity to test it.

In short, you have a lot of choices here.

Read moreSamsung's Luxury Laundry Combo: A Fast, High-Capacity All-in-One

Comfort and ergonomics

During our month-long testing period, both my colleague (5'4" woman) and I (5'7" man) found the FlexiSpot C7 to be extremely comfortable. Despite my colleague being at the edge of the recommended 5'4" minimum height, she had no issues adjusting the chair to suit her needs. The mesh seat offers firm support, while the dynamic lumbar support (it moves with you as you lean back) works effectively in various sitting positions, keeping the back well-supported, whether sitting upright or reclining.

Closeup of the lumbar support for the Flexispot C7 chair

The armrests are comfortable and easily adjustable, contributing to the overall ergonomic design of the chair. We both found that the C7 promoted good posture and provided ample support during long working hours.

Compared to other office chairs I have tested, such as those from Steelcase and Herman Miller, the C7 holds its own in terms of comfort and ergonomics. While the materials may not be quite as luxurious, the C7's adjustability and support are on par with more expensive options. After a month of use, both my colleague and I were highly satisfied with the chair's performance.

Value for money

At the time of writing, the FlexiSpot C7 is on sale for $339.99, marked down from its full price of $658.99. While the frequent sales make the full price seem a bit misleading, the discounted price represents excellent value for money, considering the chair's features, comfort, and durability.

Compared to premium office chairs that can cost well over $1,000, the C7 offers a compelling balance of quality and affordability.

Read moreNew Roomba Mopvac Under $300: Get Top-Tier Cleaning on a Budget

The bottom line

Flexispot C7 shown from the back

After extensively testing the FlexiSpot C7 for a month, I can confidently recommend this chair to anyone seeking a comfortable, supportive, and adjustable office chair at a reasonable price point. While the materials may not be as high-end as those found in more expensive chairs, the C7's build quality is impressive, considering its price.

If you're in the market for an office chair that offers excellent support, adjustability, and comfort without breaking the bank, the FlexiSpot C7 is worth considering. Its combination of features, durability, and affordability make it a strong contender in the mid-range office chair market.

Check price on FlexiSpot button

[Image credit: Josh Kirschner/Techlicious]

Josh Kirschner is the co-founder of Techlicious and has been covering consumer tech for more than a decade. Josh started his first company while still in college, a consumer electronics retailer focused on students. His writing has been featured in Today.com, NBC News and Time.

]]>
0 home
7517 <![CDATA[Hands on: A Tiny but Mighty 2-in-1 Charger for Your Apple Devices]]> 12south-butterfly-2-in-1-magsafe-wireless-charger 2024-05-10T20:22:30Z 2024-10-16T14:26:31Z phones/12south-butterfly-closed-with-iphone-apple-watch-charging-100px.jpg phones/12south-butterfly-closed-with-iphone-apple-watch-charging-1200x675px.jpg Suzanne Kantra suzanne@techlicious.com 1 open Say goodbye to the clutter of multiple Apple device chargers and hello to the world's smallest 2-in-1 MagSafe wireless charger – perfect for travel.

]]>
Twelve South ButterFly 2-in-1 MagSafe Charger 4 Tired of juggling multiple chargers for your Apple devices while traveling? I've been using the Twelve South ButterFly 2-in-1 MagSafe Charger and find it's an elegant solution for my iPhone and Apple Watch with fast wireless charging, premium build quality, and a tiny form factor.

Twelve South ButterFly shown charing an iPhone and Apple Watch. The Techlicious Editor's Choice award logo is in the lower right corner.

In fact, the ButterFly is the world's smallest 2-in-1 USB-C MagSafe charger, according to Twelve South (given the thousands of MagSafe chargers on the market, I didn't attempt to verify this). Measuring just 0.9 inches in height, 2.4 inches in width and depth, and weighing a mere 4.2 ounces, it is about the size of an AirPods Pro case.

The ButterFly looks like a luxury product. It has a brushed aluminum outer casing with a beautiful matte finish that is fingerprint-resistant, a practical feature for a travel charger. The interior has soft vegan leather to protect your iPhone and Apple Watch.

Twelve South ButterFly shown open

As a wireless charger, the ButterFly has 15W MagSafe fast charging for your iPhone and 5W fast charging for your Apple Watch. While I'd recommend using a MagSafe case for easy alignment (it can be tricky to find the right spot for charging), most thinner cases allow wireless charging. You can also power up your AirPods on the MagSafe charging pad or your AirPods Pro Gen 2 on the Apple Watch charger. So, you can mix and match based on your needs.

One of the things I liked most about the ButterFly during my testing is that you can configure the charger in a few different ways to suit your needs. In the most basic mode, you can lay it flat for easy access to charging on both charging pads. However, some Apple Watch bands get in the way of flat charging, like my Sport Loop, so the ButterFly’s Watch charger can flip up from the base. (Note that I found it difficult to pry it up with short nails.) The flip-up design also enables you to use the Watch’s Nightstand mode so you can view it like a bedside clock.

Twelve South ButterFly shown charging an Apple iPhone and Apple Watch

You can also fold the ButterFly so you can use it as a stand for watching videos (horizontally) or StandBy mode as your smart clock. You'll need the strong magnetic attachment of your bare iPhone or a MagSafe case for this to work. Even then, the magnets aren't that strong, and it can easily slide down if you knock it. I was able to charge both my iPhone and Apple Watch in this configuration. It just required flipping the band to the outside so I could make a clean connection to the flat Apple Watch charger.

Find out: How to Turn Your iPhone into a Smart Display with iOS 17 StandBy Mode

Twelve South ButterFly shown charging an Apple iPhone and Apple Watch

In the box, you'll find a 30W power adapter, a USB-C braided cable, and four international plug adapters, making the ButterFly an all-in-one solution for your charging needs. In a pinch, the 30W power adapter can even double as a charger for your MacBook Air, which is a nice bonus.

Twelve South ButterFly shown with its accessories: the power adapter, four plug adapters, and USB-C cable

Read more: This New iPhone Security Feature Keeps Your Phone Safe from Thieves

With its compact size, fast charging capabilities, and versatile configuration options, the Twelve South ButterFly 2-in-1 MagSafe Charger is an excellent investment for travelers. It’s available now for $129.

Get the deal on Amazon button.

[Image credit: Techlicious]

For the past 20+ years, Techlicious founder Suzanne Kantra has been exploring and writing about the world’s most exciting and important science and technology issues. Prior to Techlicious, Suzanne was the Technology Editor for Martha Stewart Living Omnimedia and the Senior Technology Editor for Popular Science. Suzanne has been featured on CNN, CBS, and NBC.

]]>
0 tablets phones apple-watch
7506 <![CDATA[Lenovo Yoga 9 Gen 9 Review: Premium Design, Powerful Performance]]> lenovo-yoga-9-2-in-1-gen-9-review 2024-05-02T18:05:18Z 2024-06-06T15:39:20Z computers/lenovo-yoga-9-gen-9-table-100px.jpg computers/lenovo-yoga-9-gen-9-table-1200x675px.jpg Suzanne Kantra suzanne@techlicious.com 1 open The Lenovo Yoga 9 Gen 9 has an excellent display, powerful hardware, and thoughtful design, making it a top contender among premium 2-in-1 laptops.

]]>
Lenovo Yoga 9 2-in-1 Gen 9 (model 14IMH9) 4 
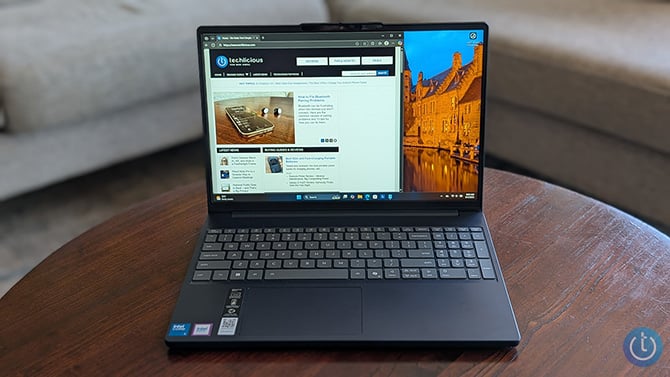
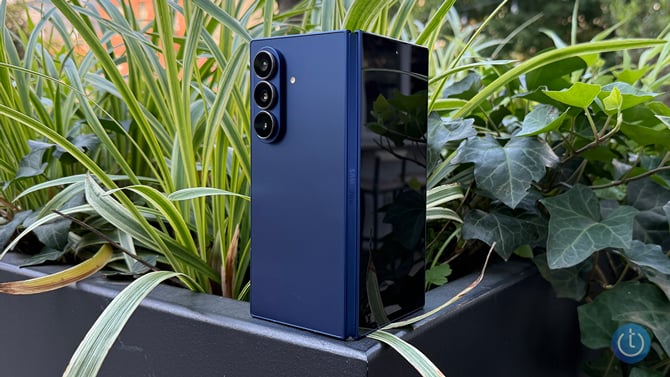
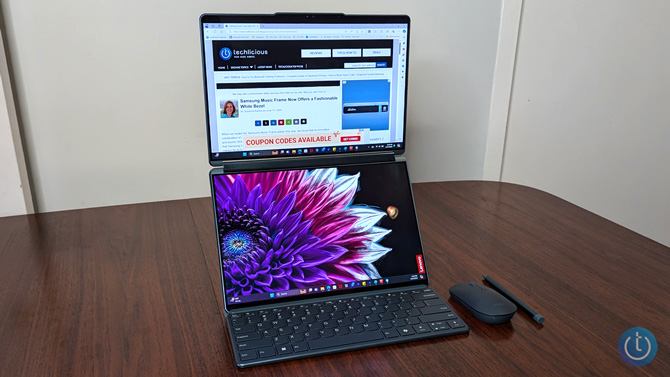
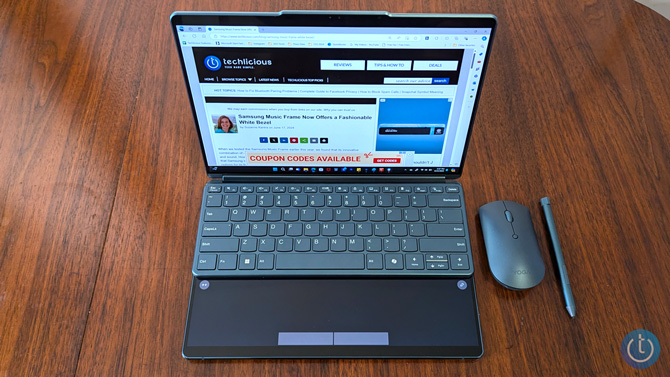
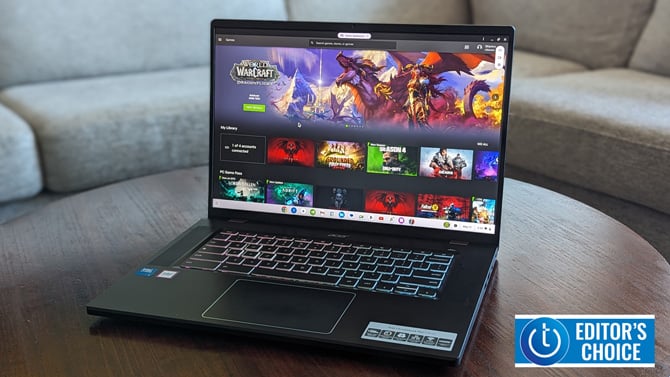
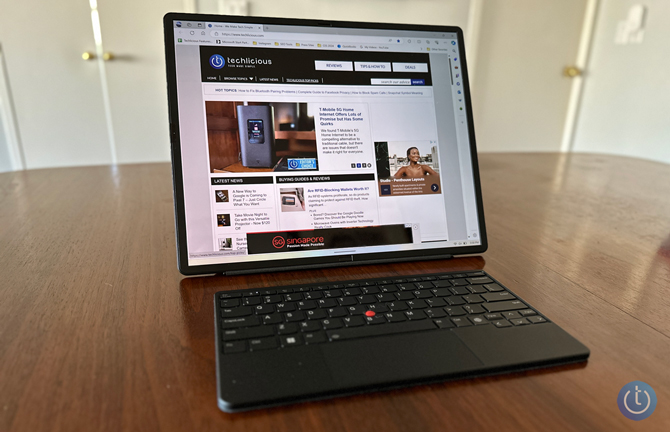
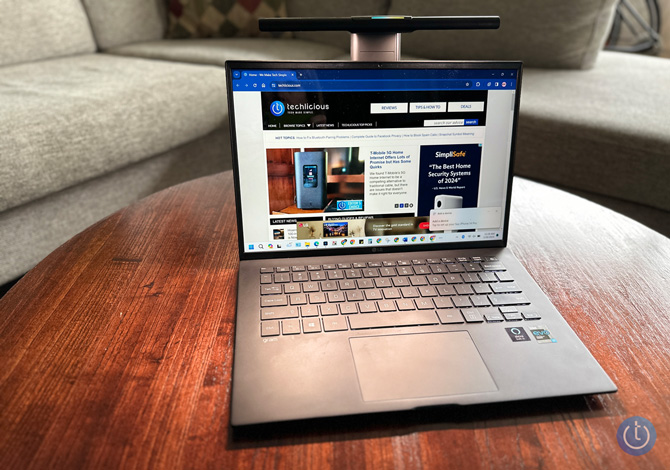
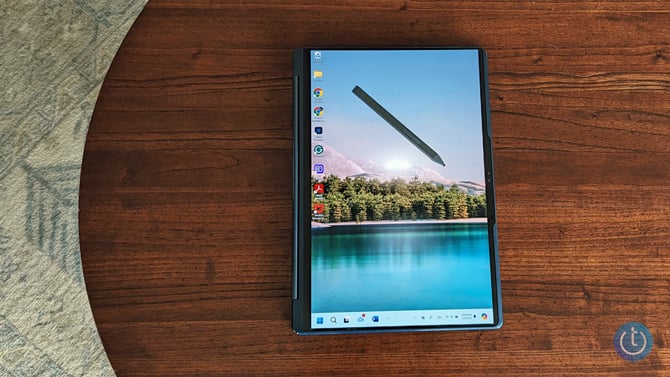
The Lenovo Yoga 9 2-in-1 Gen 9 (model 14IMH9) is a stunning laptop that combines premium design with powerful performance. Its "Cosmic Blue" color and sleek aluminum chassis are sure to turn heads, while its 2-in-1 form factor offers the versatility of using it as a traditional laptop, presentation tool, or tablet for taking notes.

Lenovo Yoga 9 Gen 9

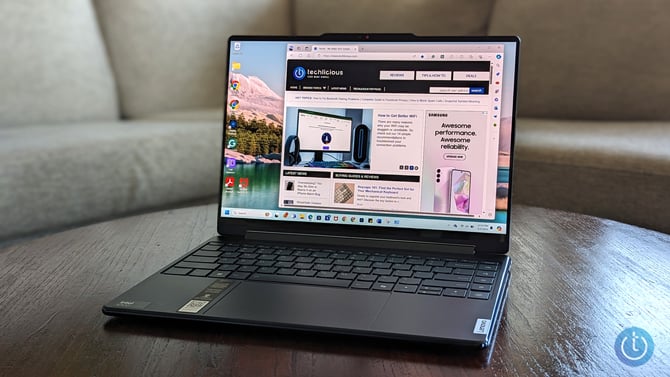
The Gen 9 tops its already outstanding predecessor in two significant ways. Under the hood, the Yoga 9 boasts an Intel Core Ultra 7-155H processor and Intel Arc graphics, delivering a significant performance boost over its predecessor. The 14-inch OLED display now has a 120Hz refresh rate (up from 90Hz), vibrant colors, and Dolby Vision support, providing an immersive visual experience.

However, the Yoga 9 Gen 9's impressive specs and design come at a price, both in terms of its high price and subpar battery life. During my weeks of testing, I found that the laptop struggled to meet Lenovo’s claimed 12.5 hours of battery life, often lasting less than half of that in real-world usage.

Despite these drawbacks, I find the Lenovo Yoga 9 remains a compelling choice for anyone who prioritizes performance and style. Its excellent display, powerful hardware, and thoughtful design make it a top contender in the premium 2-in-1 laptop market.

 + Pros  – Cons
  • Classy, sophisticated design
  • Vibrant OLED display with 120Hz refresh rate
  • Responsive keyboard and trackpad
  • Included Lenovo Slim Pen
  • Immersive Dolby Atmos audio
  • Poor battery life
  • High price point compared to similar clamshell laptops
  • Limited to 16GB of RAM
Techlicious Editor's Choice award logo "A classy 2-in-1 laptop with plenty of power"

Design and build quality

The Lenovo Yoga 9 is a premium laptop with a sophisticated design. The aluminum chassis has a flawless fit and finish, showcasing the high-quality materials used in its construction. The rounded edges contribute to its sleek appearance and make it comfortable to hold, especially when using it in tablet mode.

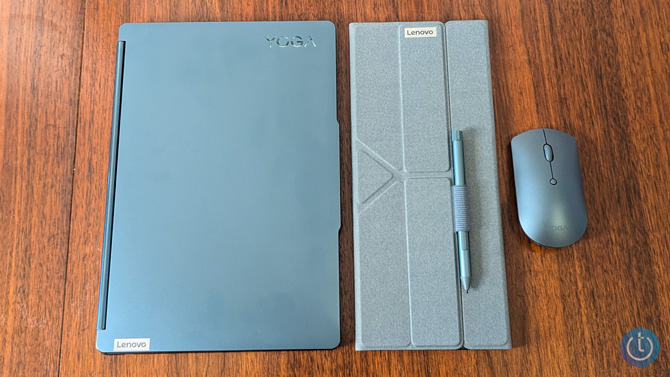
I love the deep slate blue color of the case (Lenovo calls it "Cosmic Blue"), which strikes a nice balance between style and subtlety. The matte finish of the case also adds the practical benefit of resisting fingerprints.

Lenovo Yoga 9 Gen 9 back with Lenovo Slim Pen attached

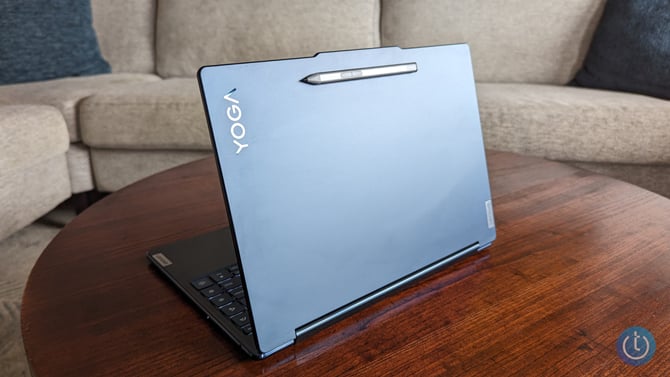
The camera bump at the top of the display both provides a grip to open the laptop and keeps the bezel size to a minimum around the display. The Yoga 9 also includes a physical shutter for the camera, providing added privacy when the webcam is not in use.

The Yoga 9's 2-in-1 design is well-executed, with a hinge that's stiff enough to hold the display securely in any position. The laptop's speakers are embedded in the hinge, delivering clear audio in both laptop and tent modes. However, when using the device as a tablet, I found that my hand would partially cover the speaker, slightly muffling the sound.

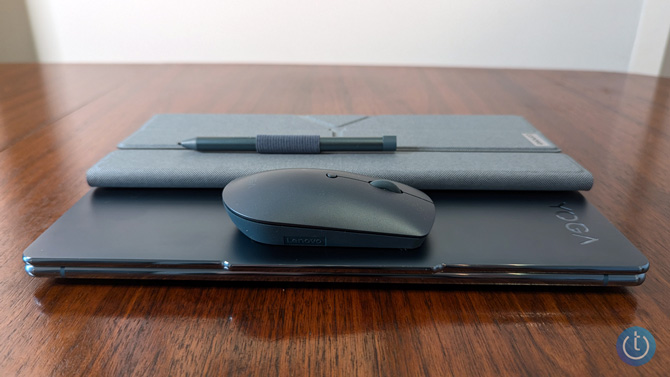
Measuring just 0.64" H x 12.40" W x 8.58" D and weighing 2.98 pounds, it's slim and light enough to easily carry around, making it an ideal choice if you need a portable device for work or travel. These dimensions put the Yoga 9 on par with other 2-in-1 laptops in its class.

Display

The Lenovo Yoga 9 2-in-1 Gen 9 features a 120Hz 2.8K OLED panel, an upgrade from the 90Hz display in the previous model. (There is also a 4K 60Hz OLED option.) The higher refresh rate makes for a smoother, more responsive experience, especially when scrolling through web pages or documents.

Note that the display defaults to 60Hz out of the box, so you'll need to manually switch to 120Hz in the display settings to enjoy the faster refresh rate. Just be aware that this will likely take a toll on your already limited battery life.

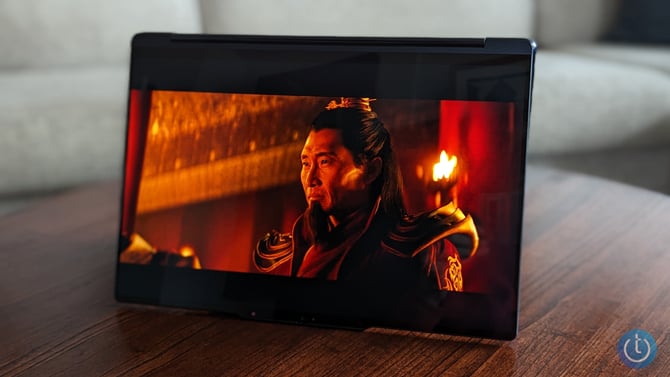
The display has VESA DisplayHDR True Black 500 certification, which means it can produce deep, inky blacks and a wide color gamut. Coupled with Dolby Vision support, this results in an excellent HDR experience. The benefits were readily apparent when I watched The Last Airbender – I could easily make out details in the shadows of the alleys, and the fires in Firebender Royal Palace really popped.

Lenovo Yoga 9 Gen 9 in tent mode showing a scene for The Last Airbender.

I found the Yoga 9's screen to be plenty bright for most situations, even in well-lit rooms. I would steer clear of using it in direct sunlight, though.

You can set the display to adjust automatically to ambient light, which worked well enough when I was sitting still. However, I found it to be a bit annoying when I was in changing light conditions, like on a train ride. The screen was always slightly behind when adjusting to the light around me.

Read more: Need More Screen Space? Lenovo's New Portable Monitor Is Here to Help

Performance

The Lenovo Yoga 9 2-in-1 Gen 9 is powered by an Intel Core Ultra 7-155H processor, a notable upgrade from the Core i-series CPUs found in many Windows laptops. This new processor brings improved performance, efficiency, and AI capabilities to the table. Coupled with the more powerful Intel Arc graphics, which replace the aging Iris Xe graphics in the outgoing Gen 8 model, the Yoga 9 delivers a significant performance boost. In fact, third-party graphics testing shows up to a 48% increase in performance when comparing Arc to Iris Xe.

The laptop is still capped at 16GB of RAM and 1TB of SSD storage. I would have liked an option for 32GB of RAM or more, especially considering the laptop's high-end positioning. I like to have lots of tabs open in my browser when working, and I sometimes max out the RAM with 16GB. That said, the RAM speed was bumped up to 7465 Mhz from 5200 Mhz, which should help with overall performance.

During my testing, I found the Yoga 9 managed to keep its cool under most conditions. However, when pushed to its limits, the fan speed ramped up considerably, becoming quite noisy. This is something to keep in mind if you plan on using the laptop in quiet environments or for tasks requiring sustained heavy processing.

Audio and webcam

The Lenovo Yoga 9 features a Bowers & Wilkins Speakerbar, which consists of two 2W tweeters and two 2W woofers. During my testing, I noticed that the speakers emphasize the mid and high frequencies, resulting in a crisp and clear sound profile. While you might miss the resonant bass found in larger speakers, the overall audio quality is full and rich for a laptop.

When watching Dolby Atmos content, like The Old Guard on Netflix, the Yoga 9's speakers create an enveloping soundstage. In a scene where the characters walk through the graveyard next to a church, I could distinctly hear the planes flying overhead, adding to the immersive experience.

However, I did notice some distortion at maximum volume, with the high frequencies becoming somewhat harsh. Thankfully, you likely won't need to crank the volume all the way up, as the speakers produce ample sound at lower levels.

Moving on to the webcam, I found the image quality to be clear and detailed, with colors that accurately represented real life. This feature is welcome for anyone who frequently participates in video calls or conferences.

When closed, the physical privacy shutter provides a visible red indicator across the lens. This added security measure offers peace of mind when you're not using the webcam and want to ensure your privacy.

Keyboard, trackpad, and pen

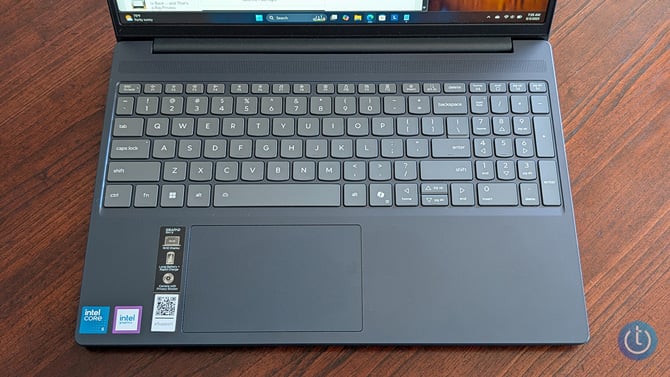
The Lenovo Yoga 9 2-in-1 Gen 9's keyboard is a pleasure to type on for extended periods. It has well-spaced keys that offer plenty of travel and tactile feedback.

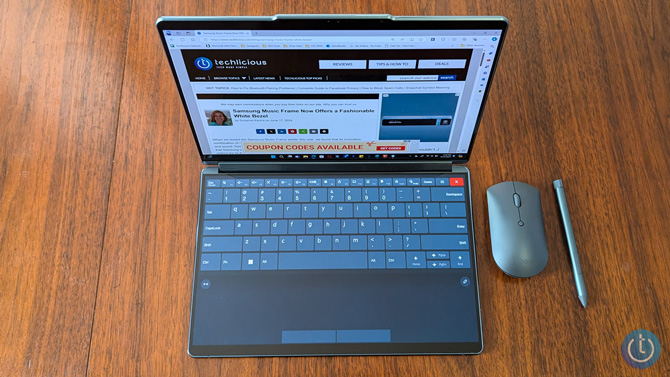
One of the standout features of the Yoga 9's keyboard is the extra stack of keys on the right side. These keys provide useful shortcuts for toggling through audio settings, eye comfort modes, and power modes. I particularly appreciated the user-assignable key. You can set it to open a specific application or website, run a key sequence, or even insert a custom text block.

Lenovo Yoga 9 Gen 9 closeup of the keyboard

Another thoughtful feature is the keyboard's two levels of backlighting, which ensure visibility in low-light conditions. You can also set the backlighting to automatic, which helps conserve battery life when illumination isn't needed.

The trackpad on the Yoga 9 is generously sized, providing ample space for comfortable navigation. It's responsive without being overly sensitive, striking a good balance between accuracy and ease of use. The trackpad also supports multi-touch gestures, which are easy to configure according to your preferences.

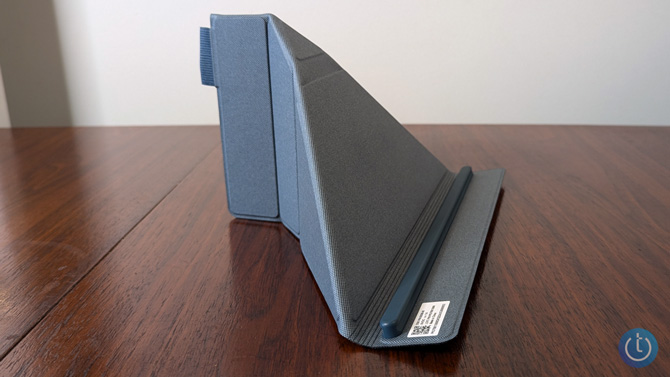
The Yoga 9 comes with a Lenovo Slim Pen, which magnetically attaches to the laptop and can be stored in the optional blue fabric laptop sleeve. The pen works well, with tilt and pressure sensitivity for a natural writing and drawing experience. However, I don’t find the pen's flat design comfortable for extended note-taking sessions.

Read more: Lenovo Tab P12 Review: Big Features, Budget-Friendly Price

Ports and connectivity

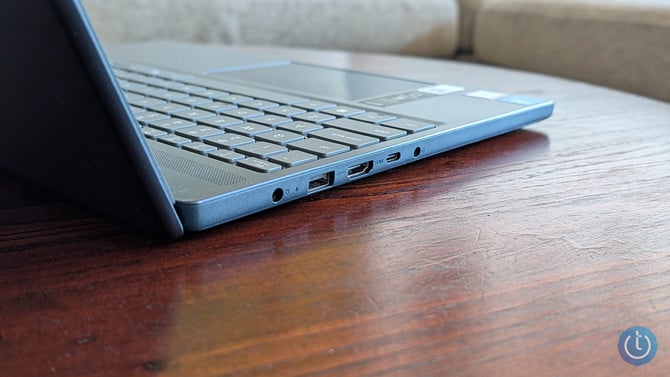
The Lenovo Yoga 9 2-in-1 Gen 9 offers a solid selection of ports, providing a good balance of versatility and convenience. On the laptop's left side, you'll find two Thunderbolt 4 ports and one USB-A 3.2 Gen 2 port, while the right side houses a USB-C 4 port and a headphone/microphone jack.

With the Yoga 9's port layout, you can charge the laptop from either side, thanks to the Thunderbolt 4 and USB-C ports supporting power delivery. This arrangement makes it easier to reach power, and you don’t need your power cord running across the back of your laptop.

Although there's no dedicated HDMI port, you can easily connect the Yoga 9 to an external display using one of the Thunderbolt 4 or USB-C ports with the appropriate adapter.

I didn't encounter any issues with the headphone/microphone jack during my testing. The audio quality through the headphone jack was as expected, and the microphone input worked well for voice calls.

The Yoga 9 has Wi-Fi 6E and Bluetooth 5.1 for wireless connectivity. Throughout my use, the wireless connection remained fast and stable, with no noticeable range or signal strength issues.

Read more: The Future Is Clear: Lenovo Announces Transparent Laptop at MWC

Battery life

The Lenovo Yoga 9 2-in-1 Gen 9 was disappointing. It has an advertised battery life of 12.5 hours with the display set to 250 nits brightness (out of a maximum of 400 nits). However, in my experience, the actual battery life fell short of this claim, delivering less than half the expected duration.

During a recent train ride, I observed that the battery level dropped to 75% after the first hour and further down to 56% after two hours, which was disappointing. This test was conducted with the battery-saver mode enabled and the display refresh rate set to 60Hz. I didn't notice a significant difference in battery life when using the 120Hz refresh rate. However, it's worth noting that I wasn't running video content during this particular test.

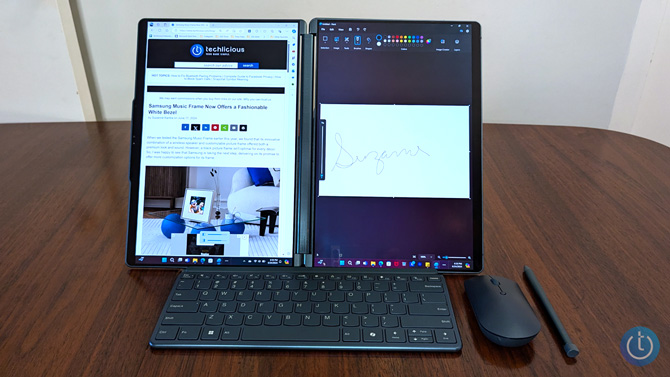
To extend battery life, you can make additional adjustments to the display settings through the Lenovo Vantage app. These options include dimming the taskbar and reducing the brightness of inactive application windows. If you primarily work within a single app, these settings can be beneficial, and you can always use layouts to pin two apps as actively visible. Personally, I found that I prefer the dimmed taskbar appearance.

One positive aspect of the Yoga 9's battery performance is its Rapid Charge Express technology. This feature allows the laptop to gain up to 3 hours of use from just 15 minutes of charging, which can be a lifesaver in situations where you need to quickly top up the battery.

The bottom line

Lenovo Yoga 9 Gen 9 in tablet mode showing the Slim Pen

The Lenovo Yoga 9 2-in-1 Gen 9 is a refined and improved version of its already impressive predecessor, the Yoga 9 2-in-1 Gen 8. With an upgraded display, faster processor, and a stunning new "Cosmic Blue" colorway, this laptop delivers a premium experience for those who value style and performance.

During my testing, I found that the Yoga 9 2-in-1 Gen 9 excelled in several areas. The vibrant OLED display, with its 120Hz refresh rate and Dolby Vision support, provided an immersive visual experience, while the Intel Core Ultra 7-155H processor and Intel Arc graphics offered a noticeable performance boost over previous generations. The laptop's design and build quality were also top-notch, with a sleek aesthetic and premium materials that felt great to use.

However, there were a couple of areas where the Yoga 9 2-in-1 Gen 9 fell short. The battery life, in particular, was disappointing, failing to meet Lenovo’s claims and lasting less than half of the advertised 12.5 hours in my real-world usage. Additionally, while the laptop's performance was strong overall, more RAM would have been helpful for a heavy tab user like me.

At a starting price of $1,329, the Lenovo Yoga 9 2-in-1 Gen 9 is competitively priced compared to other premium 2-in-1 laptops like the HP Spectre X360 Laptop 14-eu0097r ($1,649). However, it is more expensive than similarly specced clamshell laptops such as the Dell Inspiron 14 Plus ($999) and the ASUS Zenbook 14 OLED (Q425) ($1049). That said, the Yoga 9's unique design and included Lenovo Slim Pen help justify its higher price point.

If you're in the market for a powerful and stylish laptop that can handle your work and entertainment needs, the Lenovo Yoga 9 2-in-1 Gen 9 is well worth considering. Its impressive display, strong performance, and thoughtful design make it a compelling choice. Just be prepared to manage your expectations regarding battery life, and you'll find that this laptop delivers a premium experience that's hard to beat.

Check price on Lenovo button

[Image credit: Suzanne Kantra/Techlicious]

For the past 20+ years, Techlicious founder Suzanne Kantra has been exploring and writing about the world’s most exciting and important science and technology issues. Prior to Techlicious, Suzanne was the Technology Editor for Martha Stewart Living Omnimedia and the Senior Technology Editor for Popular Science. Suzanne has been featured on CNN, CBS, and NBC.

]]>
0 computers computers computers top-picks
7487 <![CDATA[Lenovo Tab P12 Review: Big Features, Budget-Friendly Price]]> lenovo-tab-p12-review 2024-04-18T00:17:39Z 2024-04-18T00:17:41Z computers/lenovo-tab-p12-video-calling-100px.jpg computers/lenovo-tab-p12-pen-table-1200x675px.jpg Sherri L. Smith slsmith@dreamsmithllc.com 1 open The Lenovo Tab P12 proves a surprisingly capable tablet for work and play. Sleek design, powerful audio, and solid battery life. There are just a few caveats.

]]>
Lenovo Tab P12 Review: Big Features, Budget-Friendly Price 4 I’ve got more than 15 years of reviewing consumer tech products under my belt. During that time, I’ve reviewed a little bit of everything – from $10,000 smartphones to $300 Chromebooks and everything in between. So, it’s safe to say that I’ve seen and reviewed my fair share of tablets. And it’s no secret that I’m not a big fan. It’s not that tablets aren’t powerful or even cool, but we live in a world where smartphones unfold, so what’s the point of a slate?

But as many family members and friends have told me, tablets still have their uses. So here I am, in a world of massive smartphones, once again reviewing a tablet, and I have to say, I’m not hating it – far from it.

The Lenovo Tab P12 is a slick combination of metal and glass that is great for work, play, and multitasking. Priced at $349, the MediaTek-powered system isn’t the most powerful tablet out there, but it can get the job done. I found that out first-hand after spending a week reacclimating myself to the way of the tablet: reading, listening to music, watching movies, gaming, and, yes, a little bit of work.

Lenovo Tab P12 shown with its pen.

The tablet delivered solid performance, surprisingly loud audio, and good battery life. I particularly enjoyed reading books and comics on the tablet’s large 12.7-inch display, as well as going down a few YouTube video holes. And as I’m a sucker for a good stylus, I definitely took advantage of the bundled pen and brainstormed a few ideas with some of the preinstalled notetaking software.

Read moreWrite Better and Faster with Chrome's Free AI Writing Assistant

But I couldn’t be fully seduced by the tablet's allure. The Lenovo Tab P12 has a couple of flaws that give me pause, namely a dim display and audio so powerful that it overwhelms the speakers and can become distorted at higher volumes. However, these caveats are minor, and I found the Tab P12 to be an affordable mid-tier tablet that won me over as a useful second display.

 + Pros  – Cons
  • Sleek, lightweight chassis

  • Loud, powerful audio

  • Good performance

  • Solid battery life

  • Easy-to-use pen

  • The screen could be brighter

  • Audio gets distorted at max volume

Techlicious Editor's Choice award logo "Color me impressed. The Tab P12 won me over as a versatile second display."

Specs and pricing

The P12 tablet I reviewed has a 2.6-GHz MediaTek Dimensity 7050 processor with 8GB of RAM, 256GB of UFS storage (expandable to 1TB via microSD card slot), and a 12.7-inch 2944 x 1840 (3K) touch display. For connectivity, you have WiFi 6 and Bluetooth 5.1. My model was also bundled with the Tab Pen Plus stylus.

When looking at its competitive set, the $349 Tab P12 is a solid mid-tier product. It's more expensive than Samsung’s entry-level 11-inch Galaxy Tab A9+ ($209.99 on Amazon). However, it’s cheaper than the higher-speced 11.6-inch OnePlus Pad ($399.99, Amazon), 11-inch Pixel Tablet ($492.89, Amazon), and 10-inch iPad Air M1 ($499.99, Amazon).

Design

Despite its relatively low price, the P12 has all the trappings of a premium device. The rear panel has a two-tone metal finish. The camera and flash are embedded in a glossy transparent casing that juts out ever so slightly from the panel. A small, shiny silver Lenovo tag is embedded in the top left of the slate. Finally, a black oval located in the top center designates where the magnetic stylus pen will rest when not in use.

Lenovo Tab P12 shown from the back. The pen is magnetically attached at the top.

The entire front panel is made of glossy, durable Corning Gorilla Glass 3. Although Lenovo says the touch panel is anti-fingerprint, it took no time for my fingers to leave their mark, leaving me to reach for a microfiber cloth. Still, it’s about as fingerprint-resistant as the next tablet, so take the anti-fingerprint claims with a grain of salt. A 13-megapixel camera sits in the top bezel.

You have a few buttons, a single port, and a slot with some connectors along the sides of the tablet. There’s a pair of volume buttons on the top with the power button and the embedded fingerprint reader on the left with the microSD card slot. On the right, you have a USB-C charging port. On either side, you’ll find a pair of JBL speakers. A set of pogo pins reside at the bottom of the slate for use with Lenovo’s wireless keyboard.

The tablet measures 11.6 x 7.5 x 0.27 inches and weighs 21.7 ounces, which is light enough to slip into a medium-sized purse or book bag. However, it’s heavier than the Pixel Tablet (17.4 ounces), Samsung Galaxy Tab A9+ (17.4 ounces), OnePlus Pad (19.5 ounces), and iPad Air (16 ounces). If you add its pen and optional keyboard, the P12’s weight jumps to 37.1 ounces.

Display

The color on the P12’s 12.7-inch display is nice and vibrant, which made watching the new “Fallout” series that much more enjoyable. Lucy’s Vault-Tek suit was the exact color blue I’m used to seeing in the game. But while I was reveling in the ruddy red and orange explosion clouds, I noticed the blacks looked a little washed out, and the contrast could have been better. In darker scenes, it was hard to discern finer details.

Despite an average of 382 nits, which isn’t so far from Lenovo’s 400-nits claim. I would have loved for the display to be a tad bit brighter, especially if you’re considering taking the slate outside for some reading. A dim, glossy display doesn’t stand a chance against direct sunlight.

Pen

The Tab P12 ships with the Lenovo Tab Pen Plus, which has 4,096 pressure levels and tilt detection. Weighing 0.49 ounces, with a thickness of 0.35 inches, the stylus feels nice in the hand. The pen easily slides across the screen, delivering quick and accurate pen strokes. It worked well in both the Notepad and Nebo note-taking apps.

Lenovo Tab P12 shown with its pen and a note taking app.

However, the Tab Pen Plus is more than a pen. It also acts as a remote control for video, music, and slideshows. Depending on the app, a click of the button on the side of the pen can advance a slide in a presentation, skip forward on a streaming music app, snap a pic, or play or pause a movie. The pen can also be used for screen capture or magnification.

Lenovo estimates the Tab Pen Plus can last 35 hours on a charge. When it’s time to recharge, you can do so via the USB-C on the side.

Read moreQuick Share is like AirDrop for Android and Windows

Audio

The quad speakers on the Tab P12 are loud. How loud, you ask? Loud enough to wake my boyfriend up from a deep slumber in our bedroom while I was in our living room. Thanks to the Dolby Atmos tuning, the audio from the quad speakers sounds pretty good, at least for a tablet.

However, at maximum volume, the audio would get a bit distorted, and the French horns on Camp Lo’s “Luchini Aka This Is It” were a little hollow compared to the trumpets. The bass and percussion fell flat, but the vocals sounded good.

Performance

The Tab P12 isn’t going to knock your socks off in the performance arena, but with a mid-tier processor like the MediaTek Dimensity 7050 processor, you can get the job done. I spent several days surfing the web, using the pen to outline a few ideas, watching movies, and dying over and over again in Dead Cells. The P12’s processor took everything in stride, launching and switching between apps with zero slowdowns.

The only time I ever saw any lag was when I was gaming, as it pushed the processor to its limit. I went to watch a YouTube video to get pointers on how to potentially get through a tricky area on Dead Cells. When I switched back, I noticed a slight slowdown. I had a similar instance of sluggishness as I fought Beezelbub and his falling, rotting limbs.

Cameras

The 8MP rear camera and the 13MP front shooter on the Tab P12 can take social-media-passable photos. If you’re looking for anything better, you’ll need to check out a premium smartphone or a DSLR. I took the P12 on a walk to take a few shots with the rear camera. Although the shooter did a good job on color accuracy, detail was another story. I could see the fuzziness before I started zooming in on any of my shots.

Lenovo Tab P12 image sample from rear camera

The front camera did a better job, capturing the individual threads in my couch instead of turning it into a grayish blob, as I’ve seen some cameras do. It also did a great job of capturing my skin tone and the color in my locs.

Picture taken by the Lenovo Tab P12 of a gray couch with a gray dog.

Pre-installed software

The P12 runs on Android 13. As far as apps go, I was surprised to discover that Lenovo only pre-installed its Vantage app. The app can be used to check the slate’s diagnostic health and warranty, access usage guides, and send feedback to Lenovo in case of an error or other issues.

While the Lenovo apps may be lacking, plenty of bloatware can be found. In addition to Booking.com, there’s Fish Solitaire, Cat Tile, Doll Dress Up: Sweet Girl, and Water Sort Puzzle, to name a few. I played a few of the games, only to find that after each level you complete, you need to sit through an ad. Take my advice and uninstall the games as soon as humanly possible.

Battery life

Lenovo has the P12’s battery life at an estimated 10 hours. It took three days before I had to recharge the Tab P12’s 10,200 mAH battery, and that was after spending time reading through “The New Confessions of an Economic Hitman” on Google Books, perusing social media, watching a couple of episodes of “Fallout” and making my way through the first castle in “Castlevania: Symphony of the Night.” The tablet is quick-charge capable via its 30W charger and can recharge 25% of the battery life in only 15 minutes.

Bottom line

Lenovo Tab P12 showing a video chat onscreen

Color me impressed. The Lenovo Tab P12 overcame my tablet aversion through its sheer force of awesome. It did everything I wanted, even if it’s not the most powerful slate on the block. It allowed me to read emails, watch videos, listen to music, and even get some gaming in with little to no fuss. And I’m a sucker for a good stylus. Plus, I’m never going to say no to a pretty display, especially if it’s bigger.

Now, there are some flaws. The quad speakers are impressively loud, but at max volume, what should be sweet music can become tinny and distorted. And as pretty as the display is, it could be a little brighter. But for $349, the Tab P12 is a solid investment for anyone looking for a second display.

Check price on Lenovo button

[Image credit: Techlicious]

Sherri L. Smith is a tech and games journalist with a passion for reporting on and reviewing the latest and greatest the tech world has to offer with a lot of flair and just a little snark. Over the course of her 15-year career, Sherri has reviewed everything from laptops to mobile hotspots to VR headsets and $10K smartphones. An avid gamer, audiophile, and lover of extra-large phones and super-fast gaming laptops, she’s considered an expert in her field and has made appearances on CNN, Fox News, Cheddar, and numerous panels discussing the joys and pitfalls of tech and gaming.

]]>
0 computers top-picks
7457 <![CDATA[Samsung S800D Soundbar Review: Big Sound, Ultra Slim Profile]]> samsung-hw-s800d-ultra-slim-soundbar-review 2024-03-28T13:22:43Z 2024-03-28T13:31:44Z av/samsung-hw-s800d-soundbar-profile-100px.jpg av/samsung-hw-s800d-soundbar-1200x675px.jpg Suzanne Kantra suzanne@techlicious.com 1 open Looking for a premium soundbar that won't dominate your space? Samsung's S800D delivers impressive Dolby Atmos audio in an ultra-slim package. Read our review.

]]>
Samsung S800D Ultra Slim Soundbar (model HW-S800D) 4 When Samsung introduced its first ultra-slim model, the HW-S800B, it impressed me with its audio engineering, combining a 3.1.2 Dolby Atmos soundbar with a wireless subwoofer in an astonishingly slim package. Now, the next-generation Samsung HW-S800D Ultra Slim Soundbar ($899.99) is here, and I've had the opportunity to test it firsthand. I can confidently say that Samsung has built upon the solid foundation of the S800B, refining the design and adding features that make the S800D an even more compelling choice for those seeking a sleek, high-performance soundbar.

The S800D takes the ultra-slim form factor to a new low (in a good way). It measures just 1.4" in height, 45.6" in width, and 1.5" in depth. This incredibly thin profile allows the soundbar to blend seamlessly with your TV, virtually disappearing beneath the screen. When I placed the S800D under the 65-inch Samsung Neo QLED N90C I used for testing, it was remarkable how much space remained between the top of the soundbar and the bottom of the TV. This setup avoids the cramped look often associated with soundbars, and when mounted on the wall, the S800D has a minimal visual impact.

Samsung S800D shown in profile under a TV

One of the notable upgrades from the S800B is the inclusion of an HDMI eARC port, enabling lossless audio transmission for an even more immersive sound experience. The S800D also offers wireless connectivity through WiFi and Bluetooth, including the ability to receive Wireless Dolby Atmos from compatible Samsung TVs. During my testing, I found that the wireless connection was stable and easy to establish, with no noticeable lag or sync issues.

Read more: The New Samsung S800B Defines the Ultra-Slim Soundbar Category

Throughout my hands-on experience with the Samsung HW-S800D, I was consistently impressed by its ability to deliver room-filling, immersive sound despite its ultra-slim profile. Whether watching movies, streaming music, or gaming, this soundbar proved to be a versatile and capable performer, elevating the audio experience far beyond what most built-in TV speakers can offer.

+ Pros – Cons
  • Ultra slim design
  • 3.1.2 channels with up-firing speakers
  • eARC for lossless audio
  • Adaptive Sound+ for scene-by-scene audio calibration
  • eARC via micro-HDMI is the only wired input
  • Requires a compatible Samsung TV for some features
  • Premium price
Techlicious Editor's Choice award logo "The incredibly thin S800D makes movie-watching immersive and listening to music a joy."

Features and specifications

The S800D is a 3.1.2-channel system featuring three front channels, one subwoofer channel, and two up-firing channels for Dolby Atmos height effects. In total, it delivers 330W of power, with 200W in the subwoofer and 110W from the soundbar. This configuration enables the soundbar to create a convincing 3D surround sound experience, immersing you in the action.

As a high-end soundbar, it's no surprise the S800D is compatible with Q Symphony, a technology that syncs the soundbar with select Samsung TV speakers to create an expanded, more immersive soundstage. In my experience, this feature worked seamlessly, elevating the overall audio experience when paired with a compatible TV.

Read moreSamsung Music Frame Review: An Innovative Blend of Sound and Style

The SmartThings app, available for both Android and iOS devices, provides access to a wide range of customization options and advanced features. SpaceFit Sound Pro (upgraded from SpaceFit Sound on the S800B), for example, analyzes your room's acoustics and automatically optimizes the soundbar's performance to suit your space.

The S800D also offers a range of sound modes. Adaptive Sound+ (upgraded from Adaptive Sound on the S800B) analyzes and optimizes audio content scene-by-scene, ensuring clear dialog and rich, detailed sound. Game Mode Pro optimizes the soundbar's settings for immersive gaming, while the Active Voice Amplifier (AVA) ensures clear and intelligible dialog even during action-packed scenes.

Unpacking and setup

When I first unboxed the Samsung HW-S800D Ultra Slim Soundbar, I was shocked by just how thin the main soundbar unit is. It's so slim that when wrapped in its protective white sleeve, it nearly disappears into the packaging. The compact wireless subwoofer, on the other hand, is more substantial, hinting at its potential for delivering deep, powerful bass.

Installing the S800D in my living room was a breeze. I positioned the soundbar beneath my 65-inch Samsung Neo QLED N90C, which I used for testing purposes. The soundbar's ultra-slim profile allows it to blend seamlessly with the TV, almost disappearing from view.

For my initial setup, I opted for a wired connection using the included micro-HDMI to HDMI cable, which plugs into the soundbar's HDMI eARC port. This single-cable solution simplifies the installation process and ensures high-quality, lossless audio transmission. However, I also tested the S800D's wireless capabilities by connecting it to my TV via WiFi. The wireless setup was equally straightforward, and I experienced no noticeable latency or synchronization issues during my testing.

Samsung S800D eARC input

Read more: How to Pick the Best Surge Protector

One of the features I was eager to try out was Q Symphony, which synchronizes the soundbar with compatible Samsung TV speakers to create a more expansive and immersive soundstage. The S800D seamlessly integrated with my N90C, and the results were impressive. The combined audio from the soundbar and TV speakers added an extra layer of depth and dimensionality to the sound, creating a more engaging and lifelike experience.

To fine-tune the S800D's settings and access its full range of features, I downloaded the Samsung SmartThings app on my smartphone. The app automatically detected the soundbar once it was connected to my WiFi network and guided me through the setup process. I found the app to be intuitive and user-friendly, offering a wide array of customization options. One feature I particularly appreciated was SpaceFit Sound+, which analyzed my room's acoustics and optimized the soundbar's performance accordingly. This ensured that I was getting the best possible sound tailored to my specific listening environment.

Samsung SmartThings app showing the S800D connected via WiFi to my Samsung N90C TV

The S800D also offers built-in Amazon Alexa and Samsung's Bixby voice assistants (Google Assistant is not a choice during setup). So, you can control your soundbar hands-free, adjust settings, and even access information like weather reports or news headlines.

The included remote control is well-designed and easy to use, with dedicated buttons for key functions such as volume control, sound mode selection, and subwoofer level adjustment. I also liked the small LED lights on the soundbar itself, which provided clear visual feedback during setup and operation.

Samsung S800D shown with its remote control

Audio performance

As someone who values high-quality audio, I was eager to put the Samsung HW-S800D Ultra Slim Soundbar through its paces. Despite its remarkably thin profile, I was curious to see how well it would perform across a range of content, from movies to music.

I began my testing with some Dolby Atmos-enabled content, starting with the film The Old Guard. The S800D's ability to create a convincing 3D surround sound experience was noticeable. The up-firing speakers did an excellent job of rendering height effects, adding a sense of verticality to the soundstage. In a particular scene set in a church next to an airport runway, the realistic rumble of jet engines filled my living room, creating the illusion that the planes were flying directly overhead.

Read more: Samsung OLED S95D: The Best OLED Big Screen Yet?

Another standout moment came during a market scene in the film. The S800D masterfully reproduced the background chatter and ambient sounds, enveloping me in the bustling atmosphere of the marketplace. Despite the complex soundscape, the main dialog remained clear and intelligible, never getting lost in the mix.

If you find dialog hard to hear, the Active Voice Amplifier (AVA) feature ensures that voices cut through the background noise. However, I'd advise using it sparingly because dialog can sound artificially loud and detract from the rest of the soundtrack.

The included wireless subwoofer delivered deep, powerful bass that lent weight and impact to action sequences and explosions without overpowering the other elements of the soundtrack.

Subwoofer that comes with the Samsung S800D soundbar.

To further test the S800D's capabilities, I experimented with various sound modes. I found that the Adaptive Sound+ mode consistently delivered the best results, dynamically adjusting the audio to suit the content without the need for manual tweaking. However, for those who prefer a more customized experience, the S800D offers a range of sound modes, including Surround, Game, DTS Virtual:X, and Standard, each optimized for different types of content.

As a music lover, I was pleasantly surprised by the S800D's performance when streaming my favorite tunes. The soundbar delivered a well-balanced, detailed sound signature with crisp highs, clear mids, and tight, punchy bass. The inclusion of Dolby Atmos Music support added an extra layer of immersion, creating a more spacious and enveloping listening experience.

Read more: Review of the Samsung Music Frame: An Innovative Blend of Sound and Style

While I didn't personally test the S800D's gaming performance, the soundbar features a dedicated Game Mode Pro, which optimizes the settings for an immersive gaming experience. The soundbar's ability to deliver precise, directional audio and powerful bass makes it an attractive option for gamers looking to enhance their setup.

The bottom line

The Samsung HW-S800D Ultra Slim Soundbar is a remarkable feat of audio engineering, delivering impressive sound quality and immersive features in an astonishingly slim package. As a second-generation product, it builds upon the success of its predecessor, the S800B, while introducing several upgrades to its sound processing and upgrading its input to eARC.

Samsung S800D soundbar shown under a 65-inch TV.

The soundbar's ultra-slim design may limit its overall maximum volume and bass output compared to larger, more conventional soundbars. However, for most living room setups, the S800D provides more than enough power and presence to create an engaging and immersive listening experience.

The Samsung HW-S800D Ultra Slim Soundbar is a compelling combination of sleek design, impressive audio performance, and advanced features. It's the perfect choice for anyone looking to upgrade their TV's sound without sacrificing style or space.

Check price on Samsung button

[Image credit: Suzanne Kantra/Techlicious]

For the past 20+ years, Techlicious founder Suzanne Kantra has been exploring and writing about the world’s most exciting and important science and technology issues. Prior to Techlicious, Suzanne was the Technology Editor for Martha Stewart Living Omnimedia and the Senior Technology Editor for Popular Science. Suzanne has been featured on CNN, CBS, and NBC.

]]>
0 home-entertainment home-audio home-audio top-picks
7458 <![CDATA[Samsung Music Frame Review: An Innovative Blend of Sound and Style]]> samsung-music-frame-review-stylish-blend-of-sound-and-style 2024-03-28T13:00:46Z 2024-06-17T18:47:47Z av/samsung-music-frame-100px.jpg av/samsung-music-frame-1200px.jpg Josh Kirschner joshkirschner@gmail.com 1 open The Music Frame is an innovative and stylish speaker, combining the functionality of a wireless speaker with the aesthetic appeal of a customizable photo frame.

]]>
Samsung Music Frame 4 Integrating wireless speakers into a well-designed living space can be a challenge, as the aesthetic appeal of the room often clashes with the practical need for high-quality audio. The Samsung Music Frame solves this problem by combining a wireless speaker with a customizable photo frame, providing a solution that blends well with most home decor.

Samsung Frame on table showing custom picture of a dog

The Music Frame's unique design allows you to personalize it with your favorite photos or artwork – whether a family photo or a majestic beast, as in my photo above. There is also the potential for further customization through interchangeable bezels in the future. This design flexibility is coupled with an overall enjoyable sound, which I discovered in my testing. The Music Frame also offers advanced features like Dolby Atmos and Q-Symphony. These aspects make the Music Frame an intriguing product for those seeking a balance between form and function in their smart speaker.

 + Pros  – Cons
  • Unique design
  • Enjoyable sound quality with Dolby Atmos support
  • Q-Symphony enables synchronization with TVs and soundbars
  • Easy setup and control
  • May not satisfy audiophiles
  • Requires a 2024 Samsung TV or soundbar for some features
  • No Google Assistant support
Techlicious Editor's Choice award logo "The Samsung Music Frame is an innovative and stylish addition to the smart speaker market."

Design and customization

Taking it out of the box, I was surprised by the music frame's 9.3lb weight. This is a solid piece of audio gear. And when placed on the included stand, it's quite sturdy.

Everything looks and feels like a premium product. The 13.8 (H) x 13.8 (W) x 2.1 (D) inch frame is well-constructed out of high-quality plastic, as is the mat around the photo. The plastic photo cover has a matte finish, which dramatically reduces glare.

Customizing your photo is a simple process; the mat is attached to the frame using four plastic pegs that hold firmly yet are easy to remove. Behind the mat, there is a back plate that can be pulled off to change out the photos. The plate accommodates 8x10-inch photos, although only a square 8x8-inch portion is visible when the mat is in place.

During my testing, I used the Music Frame with its included stand, but it can also be wall-mounted using the provided hardware. Wall mounting is an attractive option for those considering purchasing a pair of Music Frames to use as rear speakers in a surround sound system. Keep in mind that the Music Frame requires external power, so you'll need to manage the thin power cord when wall-mounting the device.

In terms of visual appeal, the Music Frame blends seamlessly with various home decor styles, adding a touch of elegance to any room. If the current black-and-white color combination doesn’t suit your taste, Samsung has announced plans to release more frame color choices, with a white frame option already slated for release in the summer of 2024.

When comparing the Samsung Music Frame to other picture frame speakers on the market, it becomes clear that Samsung has limited competition in this niche. The Ikea SYMFONISK is one alternative, but it offers very limited customization options unless you purchase expensive custom panels from third-party vendors.

Audio performance

Under the hood, the Samsung Music Frame is equipped with a 2.0-channel speaker system, consisting of six speakers in total, arranged in a three-way configuration. The Music Frame's total power output is 120W, providing ample volume to fill medium-sized rooms.

Samsung Frame rear showing two speakers

I found that the Samsung Music Frame delivers a satisfying audio experience across a wide range of music genres. I put the device through its paces with a diverse selection of tracks, from the soul-penetrating vocals of Chavela Vargas' "La Llorona" to the driving guitars of Mongolian heavy metal band The HU, as well as tracks specifically mastered for Dolby Atmos music by The Beatles and Pink Floyd.

As a supplemental speaker for casual listening or paired with your surround sound system, most people should be pretty satisfied with both the sound quality and volume, which can get surprisingly loud without getting muddy. This is definitely not an audiophile's speaker, as I often found tinkering with the equalizer in the Smart Things app was necessary to bring out hollow mids or up the base for specific tracks. But it's not trying to be, so I'm okay with that.

When it comes to reproducing Dolby Atmos music, the Music Frame performs admirably, given its size limitations. Tracks from Apple Music, such as The Beatles' "Hey Jude" and Pink Floyd's "Time," exhibited a noticeable level of atmospheric enhancement. However, it's essential to keep realistic expectations, as a single speaker of this size can only do so much in terms of creating an immersive Dolby Atmos experience.

Unfortunately, I was unable to test the Music Frame's performance with Dolby Atmos movie content, as it requires a 2024 Samsung TV for pairing via the Q-Symphony feature. My current setup includes a 2023 Samsung Neo QLED N90C, which is not compatible.

Read moreSamsung OLED S95D: The Best OLED Big Screen Yet?

When comparing the Samsung Music Frame to typical smart speakers like Amazon Echo devices, it's clear that the Music Frame offers significantly better sound quality. Users who prioritize audio performance in their smart speaker setup will appreciate the Music Frame's superiority in this regard.

Connectivity and streaming

The Samsung Music Frame offers a seamless connection process through the Samsung SmartThings app, allowing users to pair the speaker with their other devices using either Bluetooth or WiFi. During my testing, the initial connection process for both Android and iOS devices was smooth and straightforward. Throughout my use of the Music Frame, I did not encounter any issues with streaming glitches or unexpected drops in connectivity.

One of the standout features of the Music Frame is its compatibility with other 2024 Samsung devices through the Q-Symphony feature. This functionality enables the Music Frame to operate as part of a surround sound system when connected to a compatible Samsung TV. Additionally, the Music Frame can work in Group mode when paired with compatible soundbars, allowing for an extended or multi-room music experience.

Unfortunately, I was unable to fully test the Q-Symphony and Group mode features during my review period. As mentioned above, my 2023 model Samsung TV is not compatible with the Q-Symphony feature. Furthermore, while I had access to the new Samsung S800D soundbar, which is supposed to be compatible with the Music Frame, I encountered difficulties getting the two devices to work together in Group mode. It's important to note that both the Music Frame and the S800D soundbar are pre-release test units, and Samsung told us that this compatibility issue should be resolved through a firmware update in the near future.

Read more: Samsung S800D Soundbar Review: Big Sound, Ultra Slim Profile

The Music Frame supports a wide range of popular streaming platforms, including Spotify, Apple Music, and Tidal. During my testing, the streaming experience was consistently high-quality, with no noticeable lag or interruptions.

Smart features

The Samsung Music Frame comes equipped with a choice of Alexa and Bixby voice assistants. Setting up and using these voice assistants is a straightforward process – it’s mainly just a matter of selecting which you want to use in the app. Users can expect the standard set of features and capabilities associated with Alexa and Bixby.

It's worth noting that when the Music Frame was first announced at CES 2024, Samsung mentioned Google Assistant support as an option. However, as of March 1, 2024, Samsung removed Google Assistant from their TVs, and it is not available through the SmartThings app for the Music Frame.

Controlling the Music Frame through the Samsung SmartThings app is a user-friendly experience. After connecting the device to your phone via Bluetooth, you can easily select your input source and begin playing music. The app offers a sound-mode control, allowing you to choose between Standard, Music, and Adaptive Sound+ modes. In my testing, I found that Standard mode provided the best overall sound quality across a variety of music genres and allowed access to the full set of equalizer controls. The Adaptive Sound+ mode, which is designed to optimize sound based on content and your viewing space, did not noticeably improve music sound quality in my experience.

Other settings available in the SmartThings app include voice enhancement and a night mode. The voice enhancement feature is intended to improve dialogue clarity when watching movies or TV shows, but due to the Q-Symphony limitations I encountered with my 2023 Samsung TV, I was unable to fully test this feature. The night mode compresses volume peaks, making it easier to enjoy audio content without disturbing others during late hours.

In addition to its music playback capabilities, the Samsung Music Frame can also be integrated into your SmartThings hub to control various smart home devices. This allows you to create automated routines and control your connected devices through the SmartThings app or using voice commands with the supported voice assistants.

Wrapping it up

The Samsung Music Frame is an innovative and stylish addition to the smart speaker market, successfully combining the functionality of a wireless speaker with the aesthetic appeal of a customizable photo frame. And Samsung did an admirable job making it both look and sound like a premium offering.

While the Music Frame delivers impressive sound quality for its size and offers a range of smart features, it may not be the ideal solution for everyone. The lack of Google Assistant support and compatibility requirements for certain features, such as Q-Symphony, may be drawbacks for some potential buyers.

For those who prioritize style, customization, and integration with the Samsung ecosystem, the Music Frame is a compelling choice. Its premium look and feel, combined with its solid audio performance, make it a worthwhile investment for the right user. I suspect there will be many homes that end up purchasing two of these to use as rear surrounds (provided they have a compatible 2024 TV and soundbar), as well as for general listening in a bedroom or living space. And at a $399.99 launch price, it's not budget-busting, either.

Check price on Samsung button

[Image credit: Techlicious]

Josh Kirschner is the co-founder of Techlicious and has been covering consumer tech for more than a decade. Josh started his first company while still in college, a consumer electronics retailer focused on students. His writing has been featured in Today.com, NBC News and Time.

]]>
0 home-entertainment home-audio home-audio top-picks
7456 <![CDATA[Samsung S95D Review: The Best OLED Big Screen Yet?]]> samsung-77-inch-oled-s95d 2024-03-27T13:35:32Z 2024-03-29T16:26:33Z av/samsung-tv-100px.jpg av/samsung-77s95d-1200x675px.jpg John R. Quain johnq@techlicious.com 1 open The 77-inch Samsung OLED S95D is quite simply a no-compromises premium TV that edges out the competition with its innovative anti-glare glass.

]]>
Samsung OLED S95D (Model Q77S95DA) 4.5 When you choose a top-of-the-line TV, you expect its picture to not only provide hours of enjoyment for you and your family but also suitably impress all your friends. On that score, Samsung's 77-inch OLED S95D (Q77S95DA) certainly delivers, impressing even those in my jaded household, which has seen scores of big screens come and go over the years.

Samsung OLED S95D 77-inch model

The Samsung OLED S95D starts with a crisp 4K OLED (organic light emitting diode) panel, which delivers a picture that is generally more intense and sharper than LCD TVs. Samsung has added a quantum dot layer to give colors an extra boost, and then – new for this generation of quantum dot OLEDs – it has added anti-glare glass to reduce annoying reflections. As seen in the image above, the glare from a bright light reflected off the screen is heavily muted compared to a standard glossy OLED panel.

Typically, OLED displays eschew anti-glare glass because it can diminish the overall brightness of the picture. However, Samsung has figured out a way to make it work, delivering one of the most impressive OLED pictures I've seen while virtually eliminating all distracting reflections. The only downside? It comes with an equally impressive price tag: $4,599.

 + Pros  – Cons
  • Super crisp quantum dot OLED picture
  • Effective anti-glare glass eliminates reflections
  • Faithful color reproduction
  • Good upscaling
  • Premium price
Techlicious Top Pick award logo "The Samsung OLED S95D is a no-compromises premium TV that edges out the competition with its beautiful matte finish."

Setup and design

To match its beautiful picture, Samsung has created an equally attractive design. Rather than relying on a pair of spindly legs, the QN77S95DA rests on a heavy Z-shaped center pedestal that makes the set appear to hover above a tabletop. It's an elegant design, if a little tricky to install and set up.

Most big-screen TVs come with instructions that admonish you not to maneuver them around your living room on your own. But usually, you can get away with setting them up single-handedly. Not so with the Samsung OLED S95D.

First, even though the Samsung OLED is skinny at just 0.4 inches deep, it is still a very substantial set. The 77-inch picture (measured diagonally) means the display is 68 inches wide. In addition, it weighs a challenging 88.2 pounds with the stand. Indeed, when the 26-pound stand is attached to what is essentially one gigantic piece of glass, it becomes unwieldy for a single person to position the TV. Even with two people moving the Samsung S95D, if you're not careful, the base can flex the glass of the set, threatening to damage the screen.

Once you've got it upright, making all the necessary source connections is a snap. That's because the Samsung OLED S95D conceals all the connecting cables by using an external box, where you can plug up to 4 HDMI sources (including one eARC device, such as a soundbar) and 3 USB devices. There's also an Ethernet port, optical audio output, and a coaxial connection for an antenna. The box then connects to the back of the TV using a single cable (Samsung calls it One Connect). Then, you can hide the box itself by hanging it on the back of the center-mounted pedestal or placing it off to the side. (The One Connect cable is flat, so it can also accommodate a flush wall mount.)

Closeup of the Samsung OLED S95D shown from the back. You can see the single cable.

Picture performance

To put the Samsung OLED S95D into its best picture mode, I recommend using its preset Movie Mode, which I used for the majority of the testing period. For serious movie nights, the TV's Filmmaker Mode can be even better under the right circumstances. It is designed to turn off digital video enhancements to display the picture as the director intended. However, it can be too dark for everyday viewing.

Also noteworthy is the fact that Samsung's OLED S95D boasts the Pantone logo. This means that the TV has been tested and validated for adhering to the color standards set by Pantone, which art directors and designers have used for decades. So, in Movie and Filmmaker modes, skin tones, the deep greens of tropical scenes, and vibrant reds of precious stones look realistic and lifelike.

All this was evident during our testing, whether it was the fiery red of Ferrari in Formula 1: Drive to Survive or the azure waves of Avatar: The Way of Water. And no matter how fast the action was, the Samsung OLED S95D's 120-Hz native panel had no trouble keeping up without blurring objects or stuttering elements.

Samsung OLED S95D showing Formula 1: Drive to Survive

The 77-inch screen size means this set is really about movies – big, sprawling, blockbuster movies. In Movie Mode, raging storms with massive waves whipped across the screen with impressive detail so that you could see every drop of salty spray. Lightsaber fights on the flight deck of a Republic ship had a clarity that was unsurpassed by other TVs and was truly cinematic. And in the serpent's tunnel in Star Wars: The Rise of Skywalker, there was no posterization or banding of shadows. Yet, all the ribs of the cave walls were visible.

Switching the Samsung OLED S95D into 4K Filmmaker Mode, I couldn't resist returning to Alfonso Cuarón's movie Gravity. With the sprawling space shuttle, there were no stray edges or artifacts. The colors were solid and true, the earth's penumbra was a wondrous blue, and there were no artificial halos around the astronauts moving against the inky black of space. Indeed, perfectly deep blacks are one of the unmatched strengths of OLED sets, and the Samsung OLED S95D has demonstrated this again and again.

Samsung does tout a setting it calls Intelligent Mode, and some owners may find it preferable. It uses sensors to automatically adjust the picture depending on the light levels in your room and the type of programming you are watching. In general, Intelligent Mode tends to boost highlights like the white of a spacesuit and increases the contrast in pictures. It can also look cooler, which means whites tend toward the blue end of the spectrum rather than yellow. Intelligent mode also revealed more stars in the Milky Way and brought out a spinning flashlight with more sharpness. But, in the process, it sacrificed details in other highlights.

Some of this is a matter of taste and how faithful you want to be in reproducing what the original movie or video was intended to look like. For example, using Movie Mode to watch Cocaine Bear (not destined to become a movie classic, I'll grant you), the expansive green vista of the Tennessee Valley, and the Great Smokey Mountains looked stunning. But then, it was too dark to make out all the details in the Ray Liotta and the bear scene on the cliff. Switching to Intelligent Mode revealed all the details and facial expressions (of Liotta, not the bear) in a low, blue light.

One feature premium sets like the Samsung 77-inch OLED S95D excel at versus less expensive models is the ability to display lower-resolution pictures, a skill known as upscaling. Here again, the Samsung OLED S95D did not disappoint. A considerable amount of broadcast TV is only in 720p HD (as opposed to 4K). Yet the Samsung OLED S95D, which is equipped with a second-generation NQ4 processor, managed to upscale the picture without introducing any significant picture artifacts or making the image look flat, as if actors and talking heads were up against a green screen. That said, don't expect the TV to perform magic on old-school, low-rez music videos from the '80s. No set can make Rick Astley look young again.

Gamers can also use the Samsung's sprawling screen to wage war against their favorite zombies. The native 120-Hz panel is fast enough for the most demanding gamer, with minimal lag, and it can even accommodate 144-Hz games. However, you'll need a compatible PC for the latter feature (future consoles may also take advantage of the faster frame rate).

Audio performance

To complement the picture, the Samsung OLED S95D has eight active radiators built into the back of the chassis to produce sound. Backed by 70 watts of amplification, it does a much-better-than-average job filling a large living room or den with roaring guitars and reverberating explosions. It also supports Dolby Atmos soundtracks with object tracking, which makes the sound follow particular images like a train going across the screen.

The set has two main preset audio modes, Standard and Amplify. The latter is intended to help with the perennial problem of struggling to hear the dialogue on muddy soundtracks. It boosts that particular vocal range and worked marginally well. The aforementioned Intelligent Mode also includes real-time audio adjustments based on the programming and the acoustics of your room (Samsung calls it Adaptive Sound Pro). It also helps with dialogue, but if you find it annoying, it can be turned off in the Intelligent Mode settings.

In Standard Mode, music had a more pronounced top-end, which emphasized vocals over bass drums. Instruments were clearly defined, and there was a very centered sound stage. The treble bias, however, meant I missed some midrange notes, like the saxophone work on some Roxy Music tracks.

On the other hand, you can pump up the volume on movie soundtracks without causing distortion on the Samsung OLED S95D. With the volume levels set at roughly 85 percent, I measured 77 db at about 12 feet from the TV. That should be plenty of sonic impact for most viewers. However, if you really want to achieve an audio experience that matches the rather spectacular picture of the OLED S95D, I suggest adding a sound bar like Samsung's HW-Q800C Soundbar. It also features an option called Q-Symphony, which coordinates the built-in speakers of the OLED S95D with the soundbar to deliver an even more immersive surround sound effect. However, the Q-Symphony feature only works with newer Samsung sound bar systems. (LG and Sony offer a similar sound experience, which also only works with their own equipment.)

Read more: Samsung HW-Q800C Soundbar Review: Serious Sound, Unobtrusive Design

Smart TV Features and Remote Control

To round out the premium experience, Samsung includes all the smarts and streaming options you could want in an easy-to-follow series of on-screen menus and displays. For example, it is comparable to the Roku and Google TV smarts offered on TCL and Hisense sets. Samsung's software is straightforward, and you can stream all the major and most minor streaming services on the set, from Netflix to the Criterion Channel. Convenience features, such as the instant on, which is truly instant on, are thoughtful without becoming overly complex.

Samsung OLED S95D onscreen menu

For personal or private listening, you can connect a pair of Bluetooth earbuds or stream via Apple AirPlay. Those addicted to barking orders at smart devices around the house will be pleased to discover that you can configure the set to react to Amazon Alexa voice searches or use Samsung's own voice assistant, Bixby. You can also set the voice assistants to work when the TV is off. Just say, "Hi Bixby," to wake it up and ask for the weather forecast.

Read moreHow to Connect a Bluetooth Speaker or Headphones to Your TV

With a Samsung account, which is free, owners can also open Ambient Mode. So rather than seeing floating dots as a screen saver, you can choose from a score of different options, such as a forest glade with background music reminiscent of Satie to animated graphics of skipping stones with rain susurrating in the background. Samsung also offers a raft of its own free content. If you want to do some lateral ski hops, for example, there are free exercise videos that go with your Samsung account. Other features include allowing you to control compatible smart home devices like Philips Hue from the TV. Lastly, the Samsung Gaming Hub site is part of the smart TV experience. Pair up a Bluetooth controller of your choice, and you can start playing free games online.

In the "if it ain't broke, don't fix it" category, Samsung includes the same rechargeable remote from last year's top-of-the-line set with the OLED S95D. The small remote – just under 1.5 inches wide and only 5.5 inches long – is rechargeable thanks to a tiny solar panel on its backside. So you never have to plug it in or change the batteries. And you don't need to leave it tanning in a window. Indoor lighting is sufficient to keep it powered up. 

Samsung eco-friendly remote control

The bottom line

The 77-inch Samsung OLED S95D ($4,599.99) is quite simply a no-compromises premium TV. As such, it compares well to the other contenders in the OLED category, including LG's 77-Inch evo G4 Series TV ($4,599.99) and Sony's Bravia XR 77-inch A95L QD-OLED ($4,999.99). All three top-of-the-line sets deliver the deep blacks and intense highlights OLEDs are famous for. All three sets also appeal to movie lovers, first and foremost. Still, the Samsung OLED S95D has an edge over the other two thanks to its anti-glare glass. I found it extremely helpful in typical viewing situations where lamps and other light sources were on while watching TV.

If you can't accommodate a 77-inch TV or want similar features in a less expensive set, Samsung's next model down is the 65-inch QN65S95DA for $3,399. That's a $1,200 savings for an equally impressive picture.

Check price on Samsung button

[Image credit: John R. Quain/Techlicious]

John R. Quain has been covering science and technology for over 20 years. His work has appeared in Rolling Stone, PC Magazine, Esquire, and U.S. News & World Report. He was the on-air technology contributor to the CBS News Up to the Minute television show for 17 years and is a regular contributor to The New York Times.

]]>
0 home-entertainment tvs top-picks
7432 <![CDATA[Laifen Wave Review: A Serious Challenger to Oral-B and Sonicare]]> laifen-wave-review-challenger-to-oralb-sonicare 2024-03-12T16:31:56Z 2024-04-10T14:41:57Z health/laifen-wave-toothbrush-hand-100px.jpg health/laifen-wave-toothbrush-hand-logo-1200x675px.jpg Josh Kirschner joshkirschner@gmail.com 1 open If you're in the market for a premium electric toothbrush, the Laifen Wave delivers performance that justifies every penny of its price tag – and then some.

]]>
Laifen Wave 4.5 As someone who has been testing electric toothbrushes for years, I am well-acquainted with the top brands in the market: Oral-B and Philips Sonicare. Both provide excellent cleaning performance and a range of useful features. However, after testing the Laifen Wave for two months, I discovered a new contender that surpassed my expectations and outshined the industry leaders.

Laifen Wave Toothbrush shown held in the writer's hand.

During my use, the Wave provided the same quality brushing experience as Oral-B and Sonicare, while offering exceptional battery life, whisper-quiet operation, and lower ongoing costs. These factors, combined with its customizable settings through the refreshingly useful app, make it a standout product.

 + Pros  – Cons
  • Cleaning technology on par with Oral-B and Sonicare
  • Exceptional battery life
  • Intuitive companion app for customization
  • Whisper-quiet operation under 55 decibels
  • Affordable replacement brush heads
  • Higher upfront cost compared to some entry-level electric toothbrushes
  • No included travel case
  • Some users find the oscillation and vibration combination too intense, even at lower settings
Techlicious Top Pick award logo "Delivers performance that justifies every penny of its price tag – and then some."

Design & ergonomics

The Laifen Wave has a simple yet elegant minimalist design. Despite packing in powerful technology, the toothbrush feels solidly built without being bulky. The handle's shorter 4.7-inch length makes it more compact and travel-friendly than the elongated designs from brands like Oral-B and Sonicare. The Wave's IPX7 waterproof rating allows worry-free use in the shower.

While the overall design is minimalist, Laifen offers a choice of premium finish options – stainless steel, aluminum alloy or ABS plastic.

In terms of ergonomics, the handle's grip is comfortable and non-slip, even when wet. The single pressure-sensitive button to toggle between modes is intuitive and ergonomically placed for easy operation.

Cleaning performance

The marquee feature of the Laifen Wave is its dual-action oscillation and vibration brushing technology. Laifen claims that this proprietary combination positions the Wave to achieve a higher level of cleaning power than sonic vibration alone can provide. In practice, after using the Wave for about two months, I found that its cleaning performance is roughly on par with the numerous Oral-B and Sonicare models I've tested over the years – which is very good.

The Gum Care (gray), Super-Clean (blue), and Ultra-Whitening (purple) brush head options that come in the box provide flexibility for users' needs.

Laifen Wave toothbrush shown with the

Where the Laifen Wave really shines is its highly customizable cleaning intensities through the companion app. If you want a more gentle cleaning, the settings can be adjusted for a softer oscillation range and vibration strength. Conversely, for a more aggressive clean, you can crank up both oscillation and vibration to maximum levels.

However, the Laifen Wave underperforms the Oral-B when it comes to comfort. Unlike the two-piece brush head design of the Oral-B, which directs full vibration to the head of the brush but not the portion of the neck that holds it, the Wave brush head is a single piece of plastic that the bristles mount into. This doesn’t make a difference for normal brushing, but if you manage to hit your teeth with the side or back of the Wave brush head, you get a pretty distinct vibration shock. This can be lessened, if it is an issue for you, by toning down the vibration level in the app.

Read more: Review: Panasonic Multishape is a Surprisingly Functional Grooming Kit

User experience

Beyond just cleaning performance, the overall user experience is a crucial factor in how satisfying an electric toothbrush is to use multiple times on a daily basis. The Laifen Wave excels in this area.

Ease of use

With just a single pressure-sensitive button, the Wave is simple to operate. A short press turns it on or off, while a long press allows you to cycle through the various cleaning modes. The button's ergonomic placement makes it easy to control with your thumb while brushing.

Sound level

Many electric toothbrushes can be unpleasantly loud during use, but the Wave is significantly quieter than even premium models like the Oral-B iO Series. Operating at under 55 decibels, more than 10dB quieter than the Oral-B iO in my measurements, Laifen accurately describes the noise level as "gentle on the ears."

Cleaning maintenance

Another highlight is how easy the Wave is to keep clean compared to other electric toothbrushes. Its seamless design means there are no nooks or crannies around the brush head for gunk and mildew to accumulate over time; an issue I was constantly facing with my Oral-B models.

Travel convenience

The Wave's outstanding battery life (which I get into more below) makes it a great travel companion. My Wave lasted over six weeks on medium-intensity mode on a full charge, so I would never need to worry about bringing yet another charger along on trips. The only drawback is the lack of a dedicated travel case included in the box.

Battery life & charging process

One area where the Laifen Wave truly separates itself from competitors is its outstanding battery life and convenient charging process. On the medium settings, the lithium-ion battery lasted over six full weeks before requiring a recharge during testing – exponentially longer than many Oral-B and Sonicare models I’ve tested, which struggled to make it through a couple of weeks.

When it's finally time to charge, the included USB-C magnetic charging cable quickly tops up the battery in just 2.5 hours. The magnetic cable connects firmly to the Wave's handle with a satisfying snap, allowing it to charge wherever is most convenient for you. No more having to find space on your bathroom counter for a clunky charging dock.

To help you monitor battery status, the Wave's single-button LED indicator will flash red when it's time to recharge. During charging, the LED pulses to show progress. A solid green light indicates a full charge has been reached.

Read more: Microwave Ovens with Inverter Technology Really Cook

App capabilities

While the Laifen Wave delivers an excellent core brushing experience, its companion app unlocks the toothbrush's full customization potential.

Setting up and using the app

Getting started with the Laifen app is a straightforward process. After downloading it on your smartphone, simply follow the prompts to connect to the Wave over Bluetooth. The connection process was stable during my testing without any dropped signals. Once paired, the app serves as your full control center for personalizing the Wave's brushing modes and intensities.

Adjusting modes and intensities

The app allows you to extensively fine-tune brushing across three main settings – Vibration Strength, Oscillation Range, and Oscillation Speed. Each can be adjusted from 1-10 intensity levels to find your ideal combo.

There's also a High-Frequency Mode that effectively doubles the vibration intensity range from 11-20 for a deeper, more powerful clean when desired.

Brushing customization

One of the app's most impressive capabilities is the ability to change the Wave's settings in real time while you're brushing. If you want to increase the intensity halfway through a session, for example, just tap to adjust. The customized settings automatically save for your next brush.

Two screenshots of the Laifen app. On the left, you see the connection screen for the toothbrush. On the right, you see the controls for managing the toothbrush operation, including oscillation speed and range, vibration strength, and frequency.

Additional features

Beyond the core customization options, the Laifen app includes other useful features like:

  • Quadrant timing reminders to ensure even brushing
  • Ability to set preferred brushing duration from 1-5 minutes
  • Flight mode to turn on during travel

Read more: Reviewed: The Massive Typhur Dome Air Fryer is Perfect for Families

Value proposition

At the end of the day, an electric toothbrush is an investment in your oral hygiene. So, it's important to look at both the upfront costs as well as the long-term ownership value the Laifen Wave provides.

Price comparison

The Wave is positioned as a premium electric toothbrush with pricing to match:

  • $69 for ABS plastic model
  • $79 for aluminum alloy
  • $99 for stainless steel

While not the cheapest option out there, these price points are very competitive with top-tier models from Oral-B and Sonicare, which can cost $100-$300. Given the Wave's advanced dual oscillation/vibration technology, the pricing feels appropriate for the capabilities.

Replacement brush head costs

Over months and years of use, replacement brush heads are a significant ongoing cost for any electric toothbrush. Here, the Laifen Wave provides excellent value:

  • $9.99 for a 3-pack of brush heads
  • $16.99 for a 6-pack

In comparison, a 3-pack of Oral-B or Sonicare replacement heads typically costs around $15-20. The Wave's brush heads represent a solid 30-50% cost savings over time.

Long-term cost analysis

Factoring in both the initial toothbrush price and replacement brush head expenses, the Laifen Wave provides a compelling long-term value proposition when compared to the competition:

Laifen Wave (1 year)

  • $99 stainless steel model
  • $34 for 2 brush head 6-packs Total: $133

Oral-B iO Series (1 year)

  • $200 iO Series 9 model
  • $60 for 4 brush head 3-packs Total: $260

Over the first year of ownership, the top-end Laifen Wave configuration saves you nearly $130 versus Oral-B's premium iO series. Those savings continue stacking up every year due to the lower brush head pricing.

The bottom line

After extensively testing the Laifen Wave for two months, I can conclusively say it sets a new bar for what an electric toothbrush should be capable of in 2024.

The Wave's dual oscillation/vibration technology and a multitude of brush head options provide a powerful, personalized clean that can be fine-tuned down to the smallest detail through the intuitive companion app. Battery life is best-in-class, with the added convenience of fast magnetic charging. Simply put, the Laifen Wave matches or outperforms rivals like the Oral-B iO and Philips Sonicare across nearly every category that matters in an electric toothbrush. At the same time, the lower long-term costs make it an excellent overall value.

If you're in the market for an electric toothbrush, the Laifen Wave deserves to be at the very top of your shortlist. It delivers performance that justifies every penny of its price tag – and then some.

Check price on Laifen button

Check price on Amazon button

[Image credit: Techlicious]

Josh Kirschner is the co-founder of Techlicious and has been covering consumer tech for more than a decade. Josh started his first company while still in college, a consumer electronics retailer focused on students. His writing has been featured in Today.com, NBC News and Time.

]]>
0 home health-fitness
7431 <![CDATA[Review of the ThinkPad X1 Fold 16: A Leap Forward with a Few Stumbles]]> lenovo-thinkpad-x1-fold-16-leap-forward-with-a-few-stumbles 2024-03-12T01:30:09Z 2024-03-12T01:31:11Z computers/lenovo-thinkpad-x1-fold-16-all-in-one-100px.jpg computers/lenovo-thinkpad-x1-fold-16-laptop-1200x675px.jpg Suzanne Kantra suzanne@techlicious.com 1 open The ThinkPad X1 Fold 16 is an attention-grabbing and transformative device that offers a combination of laptop and all-in-one PC functionality with a few flaws.

]]>
Lenovo ThinkPad X1 Fold 16 3 When Lenovo introduced the ThinkPad X1 Fold in 2020, it was an ambitious attempt at creating the world's first foldable PC, but suffered from its diminutive size. Now, with the new Lenovo ThinkPad X1 Fold 16, they've made it significantly larger, while creating new head-scratching issues.

During my testing, I was delighted by the ThinkPad X1 Fold 16's vibrant 16.6-inch OLED display and the sheer novelty of having a PC that could seamlessly morph from a 12-inch laptop into an expansive 16-inch all-in-one. However, I also struggled with the unreliable display stand in the all-in-one configuration and a problematic webcam experience when using the device in laptop mode. It is a case of taking the good with the bad - paying a premium price for innovative engineering accompanied by some rather significant usability flaws.

Lenovo X1 Fold 16 shown in all-in-one mode with the Bluetooth keyboard.

 + Pros  – Cons
  • Gorgeous 16.6-inch OLED display with rich, vibrant colors and 400 nits of brightness (600 nits peak in HDR mode)
  • Loud, full sound with a broad sound stage, ideal for watching videos
  • Comfortable backlit Bluetooth keyboard with precise trackpad and TrackPoint support
  • Webcam functionality is problematic in laptop mode for video conferencing apps like Zoom and Google Meet
  • Display stand does not securely hold the display in place in all-in-one mode
  • Display is too large for traditional handheld tablet tasks
  • Highly reflective display can cause glare issues

The ThinkPad X1 Fold 16 features a new hinge that enables it to open and close completely flat, with only a slight bend in the middle of the display when viewed off-axis. The 16.3-inch OLED touchscreen is a significant upgrade from the 13.3-inch display of its predecessor, providing ample screen real estate for productivity tasks. Folded in half, it becomes a 12-inch laptop. The foldable design is attention-grabbing but also adds bulk and weight compared to traditional laptops.

Lenovo ThinkPad X1 Fold 16 shown folded with keyboard folio stand.

The ThinkPad X1 Fold 16 is brighter than the original, with 400 nits typical and 600 HDR peak brightness, up from 300 nits typical brightness. This made it easy to use in sun-filled rooms and revealed details in dark scenes in movies.

The display supports the optional Precision Pen 2 for drawing with 4,096 levels of pressure sensitivity and tilt detection, making it suitable for creative work.

Lenovo ThinkPad X1 Fold 16 shown as a tablet with the Lenovo Precision Pen 2.

Read more: Need More Screen Space? Lenovo's New Portable Monitor Is Here to Help

Keyboard and trackpad

The included Bluetooth keyboard is surprisingly comfortable to use, with well-spaced keys and a backlight. The trackpad is large and responsive, and the iconic TrackPoint button is a welcome feature for ThinkPad enthusiasts.

Lenovo ThinkPad Fold X1 16 shown in laptop mode.

Performance

My review unit was equipped with a 12th Gen Core i7-1260U processor, 32 GB LPDD5-5200Mhz memory, a 1TB PCIe NVMe SSD drive, and Windows 11 Pro 64, with a retail price of $3,824. The entry-level comes with a 12th Gen Core i5-1230U processor, 16GB LPDD5-5200Mhz memory, a 256 GB PCIe NVMe SSD drive, and Windows 11 Home 64 for a retail price of $2,870.

Read more: AMD Unleashes Radeon RX 7900 GRE Worldwide: an Affordable Powerhouse

In my testing, I found the ThinkPad X1 Fold 16 easily handles everyday tasks. It is not optimized for resource-intensive tasks like video editing or gaming due to the limitations of the U-Series chips, but is still plenty powerful for most uses.

Lenovo cites battery life as "all day," with the MobileMark testing scores rating it from 6.5 up to almost 11.5 hours depending on your task, display brightness, and whether you're using WiFi.

The stereo speakers deliver loud and rich audio with a wide sound field, making the device suitable for watching movies.

Usability concerns

While the ThinkPad X1 Fold 16 offers a unique and innovative design, it has usability issues that need to be addressed by Lenovo.

The 5MP webcam doesn't work properly in laptop mode for video conferencing apps like Zoom and Google Meet, displaying a rotated and fuzzy image. Lenovo told me this is a known issue, so hopefully, this will be addressed in a software update. The only way to fix it for Zoom is to manually rotate the image in your Zoom settings, resulting in a narrow, portrait capture of your face with large black bars on the sides. There was no solution for Google Meet.

In addition, the display stand's instability presents significant issues, as it lacks a locking mechanism or magnetic attachment. Every time I used it in all-in-one mode, it fell over when I jostled the display or my desk. I found that magnetically attaching the keyboard to the stand and placing the display in between offers some stability. However, using the keyboard up against the display felt cramped.

Lenovo ThinkPad Fold X1 shown next to the optional Bluetooth keyboard Folio case.

The bottom line

The Lenovo ThinkPad X1 Fold 16 is an attention-grabbing device that offers a unique combination of laptop and all-in-one PC functionality. However, its high price tag (starting at $2,870 with the keyboard and pen and up to $3,824 as reviewed) and the current issues with the webcam and display stand make it challenging to recommend until these flaws are fixed.

Check price on Lenovo button

[Image credit: Suzanne Kantra/Techlicious]

For the past 20+ years, Techlicious founder Suzanne Kantra has been exploring and writing about the world’s most exciting and important science and technology issues. Prior to Techlicious, Suzanne was the Technology Editor for Martha Stewart Living Omnimedia and the Senior Technology Editor for Popular Science. Suzanne has been featured on CNN, CBS, and NBC.

]]>
0 computers computers computers
414 <![CDATA[Microwave Ovens with Inverter Technology Really Cook]]> microwave-ovens-with-inverter-technology-really-cook 2024-03-03T23:31:57Z 2025-03-10T21:46:58Z health/panasonic-inverter-microwaver-generic-100px.jpg health/panasonic-microwave-on-counter1200x675px.jpg Josh Kirschner joshkirschner@gmail.com 1 open Wouldn’t it be great if rather than just taking up a chunk of space in your kitchen, you could actually rely on your microwave for cooking meals? With inverter technology, you can.

]]>
Not rated Updated 3/3/2024 with improved chart, market information, and recommended models.

If you’re like most consumers, your microwave oven serves two main duties: boiling water and reheating leftovers. But wouldn’t it be great if rather than just taking up a chunk of space in your kitchen, you could actually rely on your microwave for cooking meals?

Cooking food successfully in a microwave is challenging because the magnetron, the element that cooks the food in most microwaves, can only deliver full power. Even when set to “50% power”, the microwave oven is going through cycles of delivering 100% power, followed by a period of no power.

Imagine if your regular oven worked this way. Instead of cooking a roast at 350 degrees, you’d cook it at 700 degrees for ten minutes, then take it out for ten minutes, and repeat over and over again until the meat is cooked. Good luck with that!

The microwave inverter solution

Originally developed by Panasonic, there are now multiple brands on the market offering “inverter” technology, which aims to solve this problem. The inverter modulates the level of energy being transmitted by the oven to achieve a consistent level. So when you set 50% power, for example, you get a steady stream of 50% power for the entire cooking time. The result is more evenly cooked food, defrosting without cooked edges, and even the ability to keep foods warm until mealtime.

Chart showing conventional microwaves cooking at full power with gaps for medium and low vs inverter microwave cooking continuously at the set power.

I spent weeks testing Panasonic inverter microwave ovens. Using recipes from Panasonic, including some produced by the prestigious Culinary Institute of America specifically for inverter microwaves, I made hollandaise sauce, fruit crisp, corn chowder, barbecued pulled pork, and other fun dishes.

What I found was that the microwave inverter performed surprisingly well for dishes that required slow cooking in moist environments, such as the hollandaise sauce (which can be tricky to do on the stovetop) and pulled pork. Corn chowder worked fine as well, though it would have been just as easy on the stovetop and we didn’t like moving large bowls of boiling liquid in and out of the oven. Perhaps not surprisingly, the fruit crisp was a flop, with a soggy, raw-tasting topping and overcooked fruit underneath. However, this could be fixed by finishing it in your oven or air fryer.

Final take on inverter technology 

Based on my experiences, I could easily see using an inverter microwave in addition to my standard cooktop and range, especially during busy holiday times when I am trying to cook many dishes at once, while also keeping everything warm until serving time. It is a fast and clean way to steam vegetables, melt chocolate, braise meats, or do any one of a number of occasional kitchen tasks that involve steady cooking and do not require browning.


Recommended models

If you are purchasing a microwave, I strongly recommend considering an inverter model. Various options are offered by Breville, Cuisinart, LG, Panasonic, Sharp, and Toshiba, among others. As the originator of inverter technology, Panasonic has been in the game for decades. They offer models to fit pretty much every space and budget. However, you’ll get a little more bang for your buck with Toshiba.

Panasonic NN-936B with editors choice award

Panasonic NN-SN936B: Best full-size inverter microwave

The Panasonic NN-SN936B excels in even cooking, user-friendliness, and power. With 1250W of power and a sizeable 2.2 cubic foot capacity, it’s perfect for families. Turbo Defrost and the Genius Sensor help to heat quickly, while avoiding overcooking. And 14 one-touch cooking options for popular items like popcorn, potatoes, and more, keep operation simple.

While I haven’t tested this model directly, it has the exact same inverter technology and features as the discontinued models I reviewed previously.

Specifications

  • Capacity: 2.2 cubic feet
  • Wattage: 1250 watts
  • Turntable: 16.5 inches
  • Dimensions: 23⅞" W x 14" H x 19 7/16" D
  • Finish: Black or White

Check Panasonic NN-936B price on amazon button


Panasonic NN-SN686S with editors choice award

Panasonic NN-SN686S: Best compact inverter microwave

The Panasonic NN-SN686S is an excellent choice for those seeking a reliable, mid-sized microwave featuring the precision of Inverter Technology.  If you have limited counter space or don't typically cook for larger groups, this model offers all the key benefits of the NN-SN936B in a more compact package.

Specifications

  • Capacity: 1.2 cubic feet
  • Wattage: 1200 watts
  • Turntable: 13.4 inches
  • Dimensions: 20.7" W x 12.2" H x 15.8" D
  • Finish: Stainless Steel

Check Panasonic NN-SN686S price on amazon button


Toshiba ML-EM456PIT with editors choice award

Toshiba ML-EM45PIT(BS): Best value inverter microwave

The Toshiba ML-EM45PIT(BS) is an excellent choice if you're looking for maximum bang for your buck. It offers a larger capacity (1.6 cubic feet) and slightly more power (1250 watts) compared to the Panasonic NN-SN686, while maintaining a very similar price point. A Smart Sensor adjusts power levels and cooking times automatically based on the food's moisture (similar to Panasonic's Genius Sensor), while 6 preset auto cook options cover the basics.

Specifications

  • Capacity: 1.6 cubic feet
  • Wattage: 1250 watts
  • Turntable: 13.6 inches
  • Dimensions: 21.8" W x 13" H x 19.2" D
  • Finish: Black Stainless Steel

Check Toshiba ML-EM456PIT price on amazon button

 
]]>
0 home kitchen-household time-savers
7365 <![CDATA[Orka Two OTC Hearing Aids Reviewed: Excellent Sound, Poor Battery Life]]> orka-two-otc-hearing-aids-excellent-sound-poor-battery-life 2024-01-31T14:40:15Z 2024-02-17T15:33:16Z health/orka-two-on-ear-100px.jpg health/orka-two-on-ear-1200x675px.jpg Stewart Wolpin sw@stewartwolpin.com 1 open We love the Orka Two for their natural, clear, and loud sound, but Orka Labs gets three major things wrong, including battery life that won't last the day.

]]>
Orka Two OTC Hearing Aids 3.5 Man, I so wanted to love the Orka Two RIC (receiver in canal) style hearing aids. Their hearing correction yields natural, clear, and loud results. You get better-than-expected Bluetooth for music streaming and hands-free conversation. Like the in-ear Eargo models and the Zepp Clarity Pixie, the Orka Two price includes product-life audiologist consultations. And, Orka’s three-year warranty is the longest in the business.

Orka Two shown with their case

Orka also got three things right that Sennheiser got wrong with its similar Bluetooth-equipped RIC-style All-Day Clear. One, Orka Two includes a full-blown hearing test, which means you don’t have to pay extra for an in-person audiologist test to get the best hearing correction results. Two, the Orka Two carry case can also recharge the hearing aids. And, three, the Orka Two carry case is relatively small enough to stick in a pocket.

But Orka also gets three major things wrong.

First, the Orka Two hearing aid is NOT an FDA-certified over-the-counter (OTC) hearing aid, which may not be as bad as it sounds. The Orka Two is still an FDA-certified Class II medical device, so it is a hearing aid an audiologist would prescribe. Orka Labs simply eschewed the FDA’s OTC certification bureaucracy and acts as an audiologist intermediary to sell the Orka Two directly, instead of through a retailer near you or via an audiologist.

Second, the Orka Two battery life, well, sucks. Orka Two are rated to run for 12 hours, already way shorter than the “all day” 16-18-hour life you’ll get from most OTC hearing aids. But in actual usage, I rarely got 10 hours, necessitating mid-day recharges. If not for this battery life short sheeting, the Orka Two would be my favorite RIC hearing aids.

Third, at $1,899, the Orka Two is too expensive, especially compared to the similarly featured and similarly performing Sennheiser All-Day Clear, even after you add in the cost of the All-Day Clear’s optional in-person audiologist visit. Orka has saved some dough by avoiding the FDA certification process, and it likely has padded its profit margin by selling directly to you, but it has not passed along any of these savings.

These three drawbacks, especially the second and third, keep me from what should have been a more full-throated recommendation of the Orka Two.

Note: The Orka Two is actually the first Orka hearing aid available in the U.S.; the Orka One had larger modules, were less feature-laden, and were available only in Canada.

+ Pros – Cons
  • Excellent sound and hearing correction
  • Wide volume range
  • Bluetooth music streaming and hands-free calling
  • Multi-device Bluetooth pairing
  • Product lifetime audiologist assistance
  • 3-year warranty
  • Poor battery life
  • Expensive
  • Not FDA-certified OTC

Design

At first glance, the white Orka Two look nearly identical to any other RIC hearing aids – a tear drop-shaped microphone/battery module sits behind each ear and the thin speaker wire hooks over your ear and terminates in the “receiver in canal” (RIC) speaker tip that sits in the outer edge in your ear canal.

Orka Two shown on ear

But on closer examination, you’ll notice there are no buttons on either of the Orka Two behind-the-ear modules. Instead, the Orka Two charging case features external remote-control volume up/down and preset program toggle buttons if whipping out your phone isn’t possible (such as when you’re driving) or appropriate (such as if you’re in a meeting or at a social event).

Close-up of the Orka Two case showing the buttons.

To answer an incoming smartphone call, you simply tap either of the buds.

The Orka Two charging case measures 3.25 x 2.25 x 1.12 inches – not as small as the Eargo or Zepp Clarity Pixie cases, but positively minuscule compared to Sennheiser’s inexplicably enormous and non-charging All-Day Clear case and the bulky and heavy Elehear Alpha Procase. Even better, the Orka Two case can be recharged via a USB-C connection or wirelessly on any Qi charging pad, although I’d reserve this option for overnight charging since wireless charging takes twice as long.

Inside the Orka Two box are a USB-C charging cable, a cleaning tool, and eight sets of small, medium, and large open, closed, and double-flanged ear tip domes. Determining which type and size of dome are best for you is one of the things you’d discuss with your assigned Orka audiologist. Also included are eight wax guard/filter replacement tools necessary to swap out the tiny wax guard filters that keep the receivers ear wax-free. You also get wire-sizing measuring tools, one for each ear.

Setting up the Orka Two

Orka’s app-based hearing test is the usual 5-10-minute “Can you hear this?” series of varying tones at varying frequencies and volume levels, the results of which are then fed into the Orka Two earpieces. You’ll also be asked if you hear “a whistle” – feedback squeal. If you choose “yes,” an algorithm is activated to help reduce feedback. You also get a graph illustrating your hearing condition that the Orka audiologist can also access to help you choose the most appropriate dome tip and other settings.

Two screenshots of the Orka Two hearing screening test.

Comfort and performance – especially reducing feedback – of an RIC hearing aid often relies not only on the right ear tip dome but also on the length of the thin translucent cable connecting the behind-the-ear module and the in-ear receiver in relation to the size of your ears and head. Orka is one of the few hearing aid vendors to include wire-sizing measuring tools for each ear. While there are simple instructions for using these wire-measuring tools in the included manual – acquiring the assistance of a second pair of hands and eyes is recommended – this is another thing I’d let your assigned Orka audiologist help you with.

Oh, and if/when you need an Orka audiologist’s help, the app helpfully lets you book a remote session by creating a “Schedule a New Remote Consultation” email request and keeps track of previous appointments for you.

Note that if you use a VPN on your phone, you will have to turn it off before installing the app and registering your Orka Two.

Sound amplification performance

Within the Orka app are two major ambient sound settings: Normal (program 1) and In-Noise (program 2). According to my Orka audiologist, “Normal is what we call an environmental classifier. The hearing aids will automatically adjust for some different environments. It’s automatically going to learn and adapt based on the environments that you’re in. This is typically only found in high-end hearing aids. And then [In Noise] is just much more aggressive noise reduction, like [Normal] but on steroids for noise.”

These automatic sound settings are all the Orka Two app includes. You get no other manual aural adjustments – no EQ, no situational presets such as “restaurant,” “meeting,” etc.

Quite frankly, however, you probably won’t need additional aural adjustments. The Orka Two sound slightly more natural, clearer, and fuller with a wider soundstage than the Sennheiser All-Day Clear, even with the latter’s often confusing array of extra audio adjustments, offered since the Sennheiser’s app hearing “test” is barely that. Even better, critical sounds – voices, mostly – remain crystalline at Orka’s Two’s highest volume settings ­– their volume range is 1-6 – and remain free of often-unnecessary incidental ambient noise that can mar the Sennheiser’s higher volume settings.

However, after a firmware update, Orka’s aural boosting seems to fade in and out on occasion. A firmware update could address both the uneven performance and battery life issues; I’ll update this review if and when that happens.

Comfort-wise, the Orka Two are as comfortable as RIC hearing aids can be. While they don’t sensorially “disappear” as in-ear models such as the Eargo and Zepp Pixie do after a few hours wear, they remain largely comfortable, depending on which ear tip domes you settle on – the larger domes will likely be more uncomfortable over several hours than small domes. Overall, the Orka Two are light and don’t clink against my glasses temples when walking as the Soundwave Sontro do.

Bluetooth audio

Orka Two uniquely enables multi-device Bluetooth connections – you can pair up to eight devices to them and operate two simultaneously, say your smartphone and your laptop. However, since Apple’s iOS is specifically built with integrated hearing aid-specific compatibility, this multi-device Bluetooth pairing works far better with iPhones, iPads, and Macs, and far less predictably with Android, especially older Android devices.

Music streaming through any Bluetooth-enabled RIC hearing aid should never be considered a severe alternative to standard in-ear, canal-sealing Bluetooth buds or headphones. Tiny RIC hearing aid speakers are not designed to reproduce music, and even if you mute the hearing aids, ambient sounds will mask or outright obliterate details at the high and low end. To get optimum aural results, you’ll have to turn the music volume up to max and the hearing aid volume to 0 when wandering about the noisy world. Therefore, using any Bluetooth-enabled RIC hearing aid for music listening should be your last listening option and should be reserved primarily for quiet situations.

With these caveats in mind, music streamed through the Orka Two sounds fuller with a surprisingly wider soundstage compared to the Sennheiser All-Day Clear.

Incoming conversation on hands-free calls is loud and mostly clear, with the usual ambient noise caveats. After firmware receiver and case updates in late December, co-conversationalists reported I sounded clear and loud as well. Just make sure you manually check for firmware updates for both the receivers and the case since I didn’t get any notification that these updates were available.

Of course, you don’t really need a Bluetooth connection to use or operate the Orka Two as hearing aids, as the case’s remote-control volume and program buttons so easily accessible. And since music listening will severely shorten the Orka Two’s already compromised battery life.

Battery life

As noted, Orka Two’s major operational shortcoming is its rated and relatively short 12-hour battery life, especially since its real-world battery life is far less. By comparison, the Sennheiser All-Day Clear live up to their name by providing up to 16 hours of true all-day battery life, with or without Bluetooth music streaming.

With the Orka Two, at best, you’ll get the rated 12 hours if you sit at home in a quiet room without streaming music or conducting hands-free calls during this duration. But higher volume settings and noisier environments both drain battery life more quickly, Bluetooth music streaming and hands-free conversations even more so.

I tracked battery usage over several weeks and rarely reached 10 hours of battery life. For instance, when I mixed in three hours of streaming music listening, the Orka Two lasted only nine hours. A full day wandering around a noisy Christmas-adorned and tourist-filled Manhattan mixed with an hour of music streaming and an otherwise typical busy workday, indoors and out, resulted in just 9.5 hours of power. On the last day of testing before submitting this review, I got only 8 hours of battery life with just 80 minutes of music streaming mixed in.

Plus, the power-remaining meters seem to be off, as reported in the app. With all these results, the left receiver died before the right, and the right showed 12%, 14%, and even 21% remaining battery life. But in each of these cases, the right receiver then died within minutes of the left. And there is no “low power” warning until just before the receivers blinked out.

Orka Two’s too short battery life means anyone leading a busy life and needing to constantly wear hearing aids will need to regularly set aside midday recharge time to avoid being caught short at the end of the day. Fortunately, the Orka Two fully recharge from zero to full in just an hour and a half; if the buds are only half drained, a midday recharge time will be much shorter.

But even then, Orka’s maximum 12-hour life is way shorter than the competition and inadequate for real-world usage.

Also, bear in mind that, as with all rechargeable hearing aids, over a few years of constant use and recharging, you’ll likely lose 10-20% of lithium battery capacity.

The bottom line

I can rationalize how Orka Two’s ($1,899) true self-fitting capabilities, its excellent corrective audio performance, its on-the-go recharging convenience, its easy access to audiologist support, and its longer three-year warranty could trump its poor battery life and higher price. I could even prefer the Orka Two over the more comfortable in-ear Zepp Clarity Pixie or Eargo models since the Orka Two delivers Bluetooth hands-free call convenience, equal aural performance, and higher volume.

But Orka Two’s poor battery life, high price, and occasionally inconsistent aural performance, are hurdles too huge to overcome to earn a recommendation over the longer-lasting, cheaper, and more operationally reliable Sennheiser All-Day Clear ($1,399).

Check price on Orka Labs button

[Image credit: Stewart Wolpin/Techlicious]

Stewart Wolpin has been writing about consumer electronics for more than 35 years, including news, reviews, analysis and history, and has attended and covered nearly 50 Consumer Electronic Shows and around a dozen IFA shows in Berlin. For the Consumer Technology Association (CTA), he is an elector for and writes the official biographies of the annual CT Hall of Fame inductees, and is the keeper of the industry’s official history.

]]>
0 home health-fitness otc-hearing-aids
7364 <![CDATA[Olive Union Max Review: A Mixed Bag in OTC Hearing Aids]]> union-olive-max-hearing-aids 2024-01-30T22:59:04Z 2024-02-19T20:06:05Z health/olive-union-max-case-open-100px.jpg health/olive-union-max-case-1200x675px.jpg Stewart Wolpin sw@stewartwolpin.com 1 open Chunky styling and sub-par audio amplification make it hard to recommend the Olive Max. Only the low price and therapy sounds make them a potential purchase.

]]>
Union Olive Max OTC Hearing Aids 2.5 You’re forgiven if, after seeing the photo of the Olive Union Max ($398, currently discounted to $199) accompanying this review, you rhetorically ask: “That’s a hearing aid?” When I first received my Olive Max review sample, that was pretty much my reaction. Hearing aids are literally meant to be heard and not seen, but the Olive Union Max are as physically obvious as Post Malone’s face tattoos, as a sports fan’s team colors face makeup, as anything Billy Porter wears. Except the conspicuous Olive Union Max design isn’t exactly as stylish as these other unique fashion choices; to me, the Max give off more of a Princess Leia cinnamon buns vibe, which even Carrie Fisher wasn’t wholly thrilled with.

Olive Union Max shown on ear

Olive Union can be forgiven for the Max’s ungainly aesthetic if they were aurally effective at boosting your hearing. Yes, the Max provide a LOT of volume – they provide more volume than any OTC hearing aid I’ve tried. But Max’s hearing aid aural effectiveness is not up to sonic snuff. Nearly every sound at even moderate volume levels, especially voices, is tinged with subtle distortion fuzz, making conversations sound akin to a loud speakerphone call.

However, I can see how the Max might be bought solely for its app’s selection of soothing therapy soundscapes. Or, because of their low price, the Max might have a place in an office drawer, to be pulled out and worn during a work day to highlight occasional conferences with co-workers inured to their unlikely looks, or otherwise provide Bluetooth music listening isolation.

But I can’t see how anyone would want to be seen wearing the Max as a hearing aid in public. Essentially, if I don’t want anyone to know you have hearing issues, it should be obvious that the obvious Olive Max are not for you.

 + Pros  – Cons
  • Inexpensive
  • Plenty of volume
  • Bluetooth music streaming, handsfree calls
  • Copious EQ adjustments
  • Plenty of soothing soundscape “therapy” sounds
  • Ungainly and unsightly
  • Not really “self-fitting”
  • Fuzzy sound
  • Below average battery life

Design

The Olive Max buds measure a clunky 1.90 x 1.63 inches and 1.28 thick and weigh a surprisingly light 0.35 ounces. Each bud is equipped with three mics along with up/down manual volume toggle switches, handy when your phone isn’t handy. Such large buds obviously require a large case – 4.64 x 2.28 x 1.47 inches, not anywhere near pocketable.

Olive Union Max shown with their case

Included are four pairs of XS, S, M, and L canal-sealing urethane ear tips – the medium tips are pre-attached; three pairs of slightly more open SpinFit ear tips; and a single pair of open silicon ear tips. I opted for the latter; while better for music listening, the urethane, and SpinFit tips simply created too much isolation and made the real world sound too artificial.

For charging, you get a USB-A to USB-C cable, and the case is Qi wireless chargeable. An external LED on the case provides charging status, but there are no internal LEDs to let you know if the buds themselves are properly positioned inside the case to be charged.

Setting up the Olive Max

First off, the FDA is getting sloppy certifying hearing aids as “self-fitting,” because the Max ain’t. There is no hearing test in the Max app. Instead, you’re asked nine questions about your age, gender, and about the type and length of hearing loss.

Three My Olive app screenshots showing the series of questions.

From these questions, the app chooses one of three sonic presets, A, B, or C. Just three. There are an estimated 35 million people in the U.S. with hearing loss, but Olive absurdly believes we all fall into one of three hearing profile categories. Maybe hearing loss profiles aren’t exactly as distinct as fingerprints, but three sizes sure don’t come close to fitting all. How Olive’s app questions qualify as “self-fitting” beggars the imagination, and how the FDA thinks the Max qualifies as meeting any reasonable “self-fitting” qualification beggars it more.

Of course, first, you need to download the My Olive app. Except, there are no instructions in the one-sheet paper guide about downloading an app, of which there are two in the Apple App Store. You want the My Olive app, not Olive Smart Ear.

The My Olive app Control screen fits all the basic adjustments you need on one screen. A unique on/off button turns off the hearing aids, effectively a “mute” button, but leaves the Bluetooth connection active for music streaming and phone calls. Turning the hearing aids back on results in a nearly instantaneous hearing aid re-activation.

You get individual left (blue) and right (red) 1-10 volume level controls, but you can’t combine the volume into a unified single control.

There’s a surprisingly effective three-level noise reduction slide paired with a feedback cancellation on/off. But why optimum noise reduction and automatic feedback cancellation aren’t simply built-in default settings is beyond my ken.

You also can choose between full 360-degree hearing or effective 90-degree focused front microphone settings.

Two screenshots of the My Olive app showing control panel on the left and sound cone control on the right.

While the “self-fitting” bud programming leaves everything to be desired, the app offers a dizzying plethora of supplementary EQ aural settings, starting with four ambient presets: TV, restaurant, meeting room, outdoor, and restaurant, each of which offers minimal real-world sound adjustments. There is no “normal” or default setting – you must choose one of the presets even if you’re indoors just living your life.

Behind the Hearing EQ icon on the Control screen is a nine-band slide EQ that can be adjusted separately for left and right ears individually or linked for a universal setting, and you can save your settings. Under the EQ itself are EQ presets for “clarify the voices around you,” “clarify the sound,” or “to keep your voice from ringing,” but the differences between each seem too subtle.

Under the separate Settings app icon, you get three more music-specific nine-band EQs: a manual My EQ, Special EQ that lets you name and save your EQ settings, or Basic EQ. The Special and Basic EQs each offer three presets, all of which vastly improve music reproduction quality.

Most impressively, under the separate Care+ home screen icon, you get access to a wonderfully wide variety of soothing ambient “therapy” soundscapes such as “bird in forest,” “waves on the seashore,” “frogs in the lake,” “calm morning in the forest,” and varying colored noises and frequencies. Unfortunately, the app isn’t always navigationally clear about how to access all the options. You also can set a length-of-play timer for the sounds or listen to tones at a variety of volumes and frequencies, the precise utility of which escapes me.

Audio performance

In a double whammy, not only are the Olive Max ungainly, but they don’t clean up sound as well as a hearing aid ought to, either.

While providing plenty of volume and decent clarity, I found it impossible to achieve the kind of natural world sound I got from more hearing aid-first in-ear OTC buds such as Eargo 7 or Zepp Clarity Pixie, or from receiver-in-canal (RIC) models such as the Sennheiser All-Day Clear, regardless of which Max tips I tried. Sounds are marred by slight distortion fuzz, even at low volume levels. In a group conversation, fuzzy voices seem aurally crowded, making it difficult to distinguish different speakers.

Plus, like a cheap personal sound amplification device, every sound is indiscriminately amplified. Running faucets and flushing toilets sound as if you’re next to Niagara Falls. Wood floors creak like a bad horror movie. Light switches sound like rifle shots. Okay, maybe I’m slightly exaggerating, but many noisy settings become a cacophony. Even in Restaurant or Meeting Room mode, and even with the noise reduction set at its optimum level, voices are often polluted by equally amplified ambient sounds such as airflow from vents, fans, air purifiers, or AC, even in a quiet room, or drowned by outdoor traffic and street sounds.

Music listening is actually pretty decent compared to RIC-styled hearing aids thanks to the Max’s included canal-sealing tips. But without noise cancellation, especially if you’re not wearing canal-sealing tips, music is mixed and is often washed out by loud ambient noise. Turning off the hearing aids in the app helps, and you’ll likely need to turn the music volume almost all the way up. In other words, the Max are certainly not comparable or preferable to music-first buds, or even Bluetooth in-ear OTC hearing aids such as the Sony CRE-E10 or the HP Hearing Pro.

Read more: Tested: Can Regular Bluetooth Earbuds Be Used as Hearing Aids?

As with many Bluetooth-enabled OTC RIC-styled buds, the Max aren’t great for phone calls; I got complaints from co-conversationalists that my end of the call wasn’t clear, even while I was in a quiet room.

From a comfort POV, while the Max may be physically clunky, they’re not uncomfortable. There’s a good balance struck, at least in/on my ears, between support from the hard ear hook and the in-ear bud, so they wore easy over several hours. The thin ear hooks accommodated my glass's temples, and the buds stayed in place regardless of how violently I shook my head. Just be careful while putting on and especially pulling off ski caps or scarves.

Battery life is better than its rating but still disappointing considering the Max’s size. Olive says you’ll get 10 hours of single-charge listening, and I regularly got 10.5 to 11 hours, but that's far less than the smaller and far less visible (and far more expensive) RIC-style Sennheiser All-Day Clear. Fortunately, the buds will quick-charge in just 30 minutes, not the multiple hours of recharging required by other OTC hearing aids.

The bottom line

Olive Union Max shown out of their case

As a Bluetooth-enabled hearing aid, the Olive Union Max don’t do anything much for me. However, I highly recommend the Max for those who enjoy their waking hours accompanied by soothing sounds, especially for those of us who need aural relief from tinnitus. I just wish the app made it easier to access some of the more arcane choices.

If I were to recommend the Max to anyone for their intended hearing aid usage, it would probably be for office workers who could just keep them in their desk for just-in-case usage. Once you let your coworkers know these ungainly Max are actually hearing aids, they’ll get used to the sight of them. Whether you will when you look in the mirror is another issue.

Check price on Olive Union button

[Image credit: Stewart Wolpin/Techlicious]

Stewart Wolpin has been writing about consumer electronics for more than 35 years, including news, reviews, analysis and history, and has attended and covered nearly 50 Consumer Electronic Shows and around a dozen IFA shows in Berlin. For the Consumer Technology Association (CTA), he is an elector for and writes the official biographies of the annual CT Hall of Fame inductees, and is the keeper of the industry’s official history.

]]>
0 home otc-hearing-aids
7360 <![CDATA[Reviewed: The Massive Typhur Dome Air Fryer is Perfect for Families]]> the-massive-typhur-dome-air-fryer-is-perfect-for-families 2024-01-29T18:40:55Z 2024-01-30T18:52:56Z health/typhur-dome-counter-100px.jpg health/typhur-dome-counter-1200x675px.jpg Josh Kirschner joshkirschner@gmail.com 1 open As an active home cook, this is the perfect solution for when I don’t want to heat my full-sized oven, yet it cooks far faster and browns beautifully.

]]>
Typhur Dome Air Fryer 4.5 As an active home cook who prepares dinners for my family 4-5 nights a week, I often use an air fryer to churn out beautifully roasted vegetables or smaller entrees quickly. It’s the perfect solution when I don’t want to heat my full-sized oven (or the oven is already in use) and does a better job – both cooking far faster and browning beautifully.

Typhur Dome Air Fryer shown a counter next to a stove

The challenge I have with most air fryers, though, is their limited cooking capacity. When all three kids are home, it can be difficult to fit enough food into the tray, even for a side dish.

Typhur recognized this dilemma when they launched their massive new Dome Air Fryer. While its total capacity is roughly equivalent to other larger air fryers at 5.6 qt, that space is spread over a wide 12.6” x 12.6” x 2” cooking tray (139.5 sq in because of the rounded corners), letting you fit more chicken wings, fries, or veggies in a single layer than with deep basket-style fryers or smaller toaster oven/air fryer combos. The trade-off is that while the two-inch height is perfect for those ingredients, taller items, such as a whole chicken, will need to be spatchcocked or broken down to fit.

 + Pros  – Cons
  • Fast, even cooking
  • Large surface area rack
  • Simple controls
  • Easy to clean rack and basket
  • Stylish design
  • Expensive
  • Takes up a lot of counter space
  • Requires app for cleaning mode
Techlicious Editor's Choice award logo "For pure air frying efficiency, the Typhur Dome absolutely excels. It’s easy to use, easy to clean, and even looks good doing it."

How it cooks

I put the Typhur Dome to the test over two months in my home to see how it faired. Overall, it was quite impressive. The Dome can churn out batches of beautifully browned dishes in almost no time.

Typhur claims its cooking speed is up to 30% faster than other air fryer models due, in part, to its “cyclonic” air distribution. In my experience, it was about 10% faster than my Cuisinart toaster oven/air fryer combo. Regardless, the Dome cooks plenty fast. Chicken wings are done in as little as 16 minutes (though I add a few minutes because I like mine extra crispy). And, I sometimes found myself burning dishes like brussels sprouts during my first attempt because the Dome is so unexpectedly quick.

With the timing nailed down, the Dome delivers evenly browned food across the entire tray surface, with no need to shift things around during cooking. Bottoms were also well-browned without flipping, though a little flip helps get things evened out. These chicken thighs came out with super crispy skin and perfectly cooked moist meat.

Typhur Dome Air Fryer with eight cooked chicken thighs

Beyond air frying, the Dome will also roast, broil, toast, and dehydrate. The broiling is equivalent to what you would expect from a good toaster oven but not on par with the nice char I can get from my full-sized gas oven’s broiler element. Toasting is even across the seven slices I fit on the tray surface, though mostly only browns the top, resulting in something halfway between toast and bagel mode. And while I can roast a whole chicken nicely in my Cuisinart toaster oven, it’s too tall to fit in the Dome.

For these reasons, the Typhur Dome isn’t a total replacement for your toaster or toaster oven, so it will either require shared counter space (19.7” x 15.6” x 9.6” external dimensions) or moving it in and out of storage when you want to use it.

Typhur Dome Air Fryer basket next to 10-inch skillet

Typhur Dome Air Fryer basket next to 10-inch Lodge cast iron skillet

Read more: GE Profile Smart Smoker Brings BBQ to Your Kitchen Counter

Controls are great, app is terrible

The controls on the Typhur Dome are simple and easy to use. There are five preset modes (Air Fryer, Broil, Dehydrate, Roast, and Toast) and five food presets (Bacon, Fries, Frozen, Steak, and Wings). Each corresponds to a default temperature and time, which can then be adjusted up or down to suit the recipe. The touch-sensitive adjustment buttons are large and well-lit, as is the display showing the mode, temp, and time.

I found the preset modes somewhat underestimated cooking times. For example, fries came out underdone on the Fries mode, but it was easy enough to throw them back in for a few more minutes.

Typhur Dome Air Fryer with french fries

The Typhur can also be controlled with its companion app. However, the app only offers a small range of recipes that can be sent to the air fryer via WiFi, along with the same five modes and food presets on the buttons and the ability to adjust for time and temperature. But you can’t turn the oven on remotely with the app – that requires standing next to it and manually pushing the start button on the oven. The app will notify you when your food is done, which is perhaps its most useful general feature.

You may be tempted not to load the app at all, EXCEPT that Typhur oddly chose to make the Dome’s cleaning mode – 60-minute standard or 120-minute deep clean – available exclusively through the app. Why they didn’t add a button for this on the oven itself is more than a little puzzling.

Read more: The Typhur InstaProbe Is Our New Favorite Instant-Read Thermometer

The Dome is nearly noise-free

Typhur rates the Dome between 50-55dB, and I found that the Dome is whisper-quiet during operation. Alright, maybe a loud whisper, but significantly quieter than other air fryers I’ve tested. I often had to lean in to confirm it was even running.

Cleaning is a breeze

The frying tray and basket benefit from both having a non-stick ceramic coating and being dishwasher safe. Food residue came right off, which is a big change from the metal baskets of typical air fryers, where I feel like I’m constantly scrubbing those little crispy bits from between the wires.

The bottom line

For pure air frying efficiency, the Typhur Dome absolutely excels. It has a large cooking surface and delivers the fastest, most even results from any air fryer I’ve tested. It’s easy to use, easy to clean, and even looks good doing it.

The flip side is that it takes up an awful lot of counter space. Unless it can replace your toaster oven, you may find it necessary to pull it out only when in use and then re-store it, as we do in our New York City kitchen. And the $499 retail price is targeted at well-heeled buyers.

That said, the cooking benefits for me far outweigh the storage hassles. If getting super crispy chicken wings on the table for my family in under 20 minutes means a little extra lifting, I’m all in. The Typhur Dome has earned the honor of a place in my standard routine, and that’s the highest praise I can give.

Check price on Typhur button

Check price on Amazon button

[Image credit: Techlicious]

Josh Kirschner is the co-founder of Techlicious and has been covering consumer tech for more than a decade. Josh started his first company while still in college, a consumer electronics retailer focused on students. His writing has been featured in Today.com, NBC News and Time.

]]>
0 home kitchen-household top-picks
7357 <![CDATA[BenQ LaptopBar Review: A Stylish Solution to Eye-Friendly Lighting]]> benq-latopbar-review-a-stylish-solution-to-eye-friendly-lighting 2024-01-26T21:53:44Z 2024-01-29T17:39:45Z computers/benq-laptopbar-monitor-100px.jpg computers/benq-laptopbar-monitor-1200x675px.jpg Suzanne Kantra suzanne@techlicious.com 1 open After months of testing, it's clear: the LaptopBar consistently delivers glare-free task and ambient lighting, ensuring comfort and visibility in any setting.

]]>
BenQ LaptopBar 4 When you spend hours in front of a computer, getting the lighting right can reduce eye strain and prevent headaches. While you can control the lighting at home or in your office, that's usually not the case when you're on the road. That's where BenQ's LaptopBar, a light bar for laptops and computer monitors, literally shines. It provides state-of-the-art lighting, delivering task lighting and backlighting to reduce contrast anywhere you set up shop.

BenQ LaptopBar on a laptop

After using the LaptopBar for the last three months in my home office and while traveling, I can't imagine working without it. It's easy to attach to my laptop or monitor, and once I've set my preferred light level and color temperature – from cool white to warm white – the light takes care of the rest, compensating for ambient light changes automatically.

My primary complaint is the cost. At $139, it's pricey for a laptop light bar. However, the quality of the light, the flexibility in setting it up, and the fact that it's battery-powered or can run off a USB-C port make it easy to recommend.

 + Pros  – Cons
  • Easy to use
  • Provides backlighting as well as task lighting
  • Battery and USB-C power
  • Auto-dimming
  • Expensive
  • Magnet-only attachment
Techlicious Editor's Choice award logo "The beautifully designed BenQ LaptopBar enhances any work environment with comfortable, glare-free light."

Design and build quality

The LaptopBar consists of two pieces – the light (measuring 9.3 x 4.5 x 0.3 inches) and the base (1.8 x 0.6 x 4.0 inches folded) that holds the light and houses the battery. Together, they weigh 6.35 ounces. Simply place the light on the base, and you're ready to go. The design is simple and elegant.

Appearances can be deceiving with the LaptopBar, which is a good thing in this case. Cleverly integrated into the base is an arm that nearly doubles the lamp's available height. This extra elevation allows you to easily use the LaptopBar on a computer monitor and cast light over a full-size keyboard and mouse setup. When you use only the base with the arm tucked in, the light focuses narrowly on your laptop's keyboard.

BenQ LaptopBar shown on a computer monitor.

The LaptopBar is held together with magnets that secure the light to the base and the base to your laptop or monitor. For monitors and laptops that aren't magnet-friendly, BenQ includes two Magnetic Patches, one black and one silver, in the box. However, if your monitor or laptop has a special coating, texture, or is curved, it may not be compatible with the LaptopBar.

LaptopBar Magnetic Patch applied to the back of a laptop

Ease of use

Once you have the light attached, you can make further adjustments by tilting the light bar to focus the light where you want it. And if you're using the arm, you can raise or lower it as well. The farther the light is from the surface, the more diffuse it becomes.

Sensors and controls built into the LaptopBar's light allow for adjusting the brightness and color temperature. Touch the button on the front of the light to activate the slider to change the color from a warm 2700K to a cool 5700K in seven steps. Tap again to adjust the brightness. Once you've set your preferred brightness, a top-mounted sensor adjusts the light to maintain consistency throughout the day. Another sensor detects a wave gesture to turn the light on or off. BenQ has made the design elegantly simple.

Read more: How to Buy the Right Light Bulb

Light Quality

The LaptopBar's value lies in the quality of light it provides. In my testing, I found it easy to achieve the right color and intensity without any glare on my monitor or laptop display. I never felt the need to adjust the light's intensity throughout the day. Sometimes, I'd look up, surprised to find it was dusk.

The LaptopBar doesn't just illuminate your workspace; it also lights up the space behind your laptop or monitor. This backlighting reduces the high contrast between your well-lit workspace and the area behind it, which is easier on your eyes. The company claims a 79% contrast ratio, which matches my experience. It's one of the main reasons I consistently use the product.

When you're finished using the LaptopBar, disassembly is straightforward. Pull the light off your monitor, separate the pieces, and place them in the included carrying bag. The whole process takes a couple of seconds.

Read more: New Smart Monitors from LG and Samsung Are Almost Perfect Multitaskers

Battery life

As a product designed for mobility, the LaptopBar has a built-in battery for use away from power. The company rates the battery as lasting up to 160 minutes at 50% brightness. I found the light most comfortable at about 50% brightness and consistently got at least two hours of operation. However, I usually leave the light plugged into my laptop's USB-C port.

The bottom line

At $139, the BenQ LaptopBar is an investment. It's a premium task light for laptops and monitors, with a price tag, design aesthetic, and feature set to match. Available in black and ivory, it complements a variety of laptop finishes and has a sleek minimalist design that you won't mind showing off. But the primary reason I recommend the LaptopBar is that you'll always have an adjustable, glare-free light that provides both task and backlighting to meet your needs, whether you're in a dimly lit hotel room or your well-lit home office.

Check price on BenQ button

Check price on Amazon button

[Image credit: Techlicious]

For the past 20+ years, Techlicious founder Suzanne Kantra has been exploring and writing about the world’s most exciting and important science and technology issues. Prior to Techlicious, Suzanne was the Technology Editor for Martha Stewart Living Omnimedia and the Senior Technology Editor for Popular Science. Suzanne has been featured on CNN, CBS, and NBC.

]]>
0 computers computers top-picks
7316 <![CDATA[Soundwave Sontro OTC Hearing Aids: Average Performance, Decent Price]]> soundwave-sontro-otc-hearing-aids-review 2024-01-03T14:27:03Z 2024-01-03T14:28:04Z health/soundwave-sontro-with-case-100px.jpg health/soundwave-sontro-1200x675px.jpg Stewart Wolpin sw@stewartwolpin.com 1 open The Sontro OTC hearing aids do a good job of un-muddying sounds, especially voices; however, they can't quite compete with the alternatives.

]]>
Soundwave Sontro OTC Hearing Aids 3 After testing a large bulk of the available OTC hearing aids over the last year plus, I believe models powered by single-use batteries are, well, stupid, especially with the wealth of rechargeable alternatives now available. Tiny hearing aid batteries are awkward to swap, and the ongoing replacement cost soon makes up for any savings in the original device price. It’s hard to imagine many OTC hearing aid vendors continuing to make or sell single-use battery models for very long.

Soundwave Sontro OTC Hearing Aid shown in ear.

Trying to stay objective in the face of my admitted single-cell prejudice, the Soundwave Sontro receiver-in-canal (RIC) style self-fitting OTC hearing aids ($749) are perhaps the last of a dying breed. Like other RIC hearing aids, the Sontro store their batteries in packs that sit behind the ear; in Sontro’s case, standard #312 1.45-volt hearing aid batteries you can find in any drugstore. As a result, the Sontro are slightly less expensive than rechargeable RIC competitors, such as the similarly self-fitting RIC Lexie B2 Powered by Bose ($999, currently discounted to $899). In the small single-use battery self-fitting OTC hearing aid product universe, however, Sontro has only one true competitor, the in-ear bud Sony CRE-C10 ($999, also currently discounted to $899).

Like the Sony C10, the Sontro uses only Bluetooth Low Energy (BLE) for connection to its app – no music streaming or hands-free phone calls. The Sony C10, of course, offers an additional aesthetic advantage: it’s an in-ear bud that is nearly invisible. Ultimately, your purchase choice will largely depend on your convenience, aesthetic, and budget considerations.

 + Pros  – Cons
  • Below average price
  • Self-fitting
  • Long battery life
  • Suppresses extraneous noise
  • Single-use batteries
  • Below average volume
  • Feedback problems

What's in the box

Inside the Sontro box is a four-pack of Rayovac Extra 312 batteries to power your first week of ownership. Also included are five sets of dome tips: the pre-installed domes are medium open, which can be swapped out for small open, small “power,” large open, or double-flanged “tulip” domes. The larger “power” or “tulip” domes are designed to diminish potential feedback. You can buy replacement domes in packs of ten ($19) on the Soundwave site.

Also included are two “sport locks,” essentially small plastic ties, which keep the behind-the-ear receiver module and the speaker dome more firmly in place when exercising. A receiver measurement tool is included in case you’ve got a big head and need a longer connecting receiver wire ($49). Also in the box is a pair of standard Cerustop wax guards and a cleaning/wax guard replacement tool. Replacement wax guards (32 pieces, $14) can be purchased on Amazon. Finally, there is a reasonably compact 3.75 x 2.75 x 1.25-inch zippered carrying case with netted compartments to hold the hearing aids and spare batteries.

Soundwaver Sontro show with carrying case. The hearing aid on the left has the battery door open.

Setup

As with all self-fitting buds, Soundwave’s otoTune smartphone app includes a self-administered hearing test, which can be completed in three minutes or so in a quiet room. The app lets you retake the test if needed and keeps track of previous test results.

The app has three primary ambient settings: Automatic, Quiet, and Noise. The latter two include a three-band slide equalizer (bass, mids, treble) and Settings with on-off toggles for noise reduction and feedback cancellation – although, why would anyone NOT want these two features on?

Two screenshots of the Soundwaver otoTune app. On the left you see Noise Reduction and FeedBack Cancellation toggle for Quiet mode. On the right, you see a three-band equalizer

You can set and control volume for both left and right simultaneously or individually. Under the Devices icon, you can see how much battery life remains in each receiver bud.

Audio performance

Once the results of the app hearing test were applied, the Sontro did a good job of un-muddying my hearing to provide crisper, clearer sounds, especially voices. However, the improvement was not quite as audibly startling, crystalline, or as loud as the clarity and volume improvement I got from the Sony C10 or other self-fitting RICs I’ve tested, such as the Orka 2 or the Sennheiser All-Day Clear, which are, admittedly, around twice the price of the Sontro. Also, it takes about 30-60 seconds once you close the battery cover for the receivers to power up, kick into aural clarifying gear, and connect to the otoTune app.

Once powered and operating, some higher-pitched sounds periodically produced short-sharp whistling feedback squeals, endemic with many RIC-style hearing aids. It took a good deal of trial-and-error futzing with the app volume and EQ settings and dome swapping to alleviate, but not completely eliminate, the occasional squealing.

For instance, lowering the treble in the Quiet and Noise modes helped alleviate the feedback. However, this is a case of the cure being worse than the disease; lowering the treble drastically reduces voice clarity, defeating the Sontro’s purpose.

Switching from the “open” to the “power” and then finally to the “tulip” domes also helped to reduce the squeals while being able to maintain acceptable treble levels. Surprisingly, the double-flanged “tulip” dome did not completely clog or seal my ear canal – I still experienced a semblance of open ambient soundscape compared to ear-sealing buds.

Some of the feedback squeal I experienced would no doubt be alleviated by the longer – and unfortunately not included – receiver wire. While the Sontro’s receiver wire is the same length as those on the Lexie B2 and Elehear Alpha Pro, both of which also gave me minor feedback problems, it’s about a fifth of an inch shorter than the Sennheiser All-Day Clear and the Orka 2, both of which gave me far fewer feedback problems. A fifth of an inch may not sound like a lot, but since feedback is caused by microphone-to-speaker proximity, that fifth of an inch moves the receiver module, which houses the microphones, a smidge further behind your ear and would seem to reduce feedback significantly.

I really couldn’t detect much difference in the sound with Noise Reduction toggled on or off. Both ways, I often annoyingly and unnecessarily heard boosted incidental sounds such as light switch flipping, creaking floorboards, running water faucets, and keyboard key clacking.

As far as the pre-sets are concerned, “Quiet” slightly increased the middle frequencies, including voices, and “Noise” suppressed some additional noise missed by the Settings’ Noise Reduction toggle and increased treble to make voices sound sharper and slightly shriller. You get a barely audible voice confirmation as you switch modes.

I also physically “felt” the Sontro after a few hours of wear. One reason may be that the receiver module is slightly bulkier than the modules on the Sennheiser All-Day Clear. The Sontro don’t necessarily become uncomfortable, though some might say they do, but I didn’t forget I was wearing them as I often did with other in-ear and RIC models I’ve tested. Also, the Sontro’s behind-the-ear receiver modules seemed to audibly clink against the back of my glasses more than other RIC hearing aids I’ve tested. However, the clinking is barely noticeable; I only noticed it because I always listen for it when testing RIC hearing aids.

Battery pros and cons

OTC hearing aids powered by single-use batteries, such as the Sontro and the Sony CRE-C10, present sharp pros and cons.

On the pro side, the Sontro are cheaper than their rechargeable competitors; they are $250 less than the rechargeable Lexie B2 and Alpha Pro and about half the price of the Orka 2 and Sennheiser All-Day Clear. Sontro’s single-use batteries can last around four 16-hour days, assuming you remember to open the battery compartment to turn them off before you go to bed, compared to the 12 to 16-hour lifespan of rechargeable models that require nightly recharging. And with single-cell batteries, you’ll always get full battery life; rechargeable lithium batteries eventually lose 10-20% of their power capacity after a year or so.

On the con side of single-use batteries, you have to carry spare batteries with you just in case your batteries unexpectedly die. Else, you’ll have to suddenly hunt for a retail location that sells them. The pinhead-sized batteries can be awkward to swap out – I can’t tell you how often I’ve dropped one and was forced to grab a flashlight and get on my hands and knees to find it. It’s even more embarrassing if you’re on the street and worse if you drop a battery in your car and it rolls God-knows-where.

Another problem, unique to Sontro, is the fact that the battery readings in the otoTune app are hard to trust. For instance, when the left battery died, the app said the right battery still had 95% power remaining, which made no sense. A few minutes later, despite showing 95% battery life, the right battery died. After replacing the batteries using them for a full day, the app illogically told me I had 99% power remaining in each battery. After two days, though, the meters read a more accurate 50% remaining power. At the end of their life, you get a faint low-power alert just as the cell dies.

Finally, there’s the ongoing cost. Single-use batteries will cost you around $50-$60 a year; in anywhere from three to five years, the cost of buying single-cell replacement batteries could even out any original device purchase savings.

The bottom line

If you want the longer battery life single-use batteries provide, I recommend the Sony CRE-C10 instead of the Soundwave Sontro ($749), especially if you can buy the Sony at its $899 sale price. The C10 provide a bit more volume, rarely squeal, and are nearly invisible because they’re in-ear buds and have no behind-the-ear module to clink against your glasses.

If you're looking to spend less than $899 for the Sony CRE-C10, your choices come with compromises. If you want single-use batteries, the Sontro is the best choice. Otherwise, I'd recommend the Elehear Alpha Pro ($999, currently on sale for $499). The Elehear have the same RIC design and add music and hands-free calling, but they aren't self-fitting. As I said, you can't have it all at this price, so the best OTC hearing aids are the ones that prioritize what's important to you.

Check price on Soundwave button

[Image credit: Stewart Wolpin/Techlicious]

Stewart Wolpin has been writing about consumer electronics for more than 35 years, including news, reviews, analysis and history, and has attended and covered nearly 50 Consumer Electronic Shows and around a dozen IFA shows in Berlin. For the Consumer Technology Association (CTA), he is an elector for and writes the official biographies of the annual CT Hall of Fame inductees, and is the keeper of the industry’s official history.

]]>
0 home health-fitness otc-hearing-aids
7293 <![CDATA[Zepp Clarity Pixie OTC Hearing Aid Review: Eargo’s Worthy Competitor]]> zepp-clarity-pixie-otc-hearing-air-review 2023-12-14T01:55:18Z 2024-02-23T20:11:19Z health/zepp-clarity-pixie-in-ear-100px.jpg health/zepp-clarity-pixie-case-1200x675px.jpg Stewart Wolpin sw@stewartwolpin.com 1 open The Pixie delivers excellent natural hearing clarity in a nearly invisible in-ear bud form, but the price needs to drop to more strongly recommend it.

]]>
Zepp Clarity Pixie OTC Hearing Aids 3.5 With the Zepp Clarity Pixie, Eargo now has a worthy competitor. The Pixie delivers nearly the same excellent natural hearing clarity in the same nearly invisible in-ear bud form factor as the Eargo 7, my pick for the best OTC hearing aids, with a slightly wider variety of sonic tailoring options.

Zepp Clarity Pixie shown in ear

But I can’t help but think that Zepp missed an opportunity where price is concerned.

Yes, at $1,999 – discounted down to $1,799 for at least the holiday season – the Pixie is around $1,000 less than the Eargo 7 and around $250 less than the Eargo 6. These significant savings make it easy to recommend the Pixie over the Eargo 7 or 6. They all similarly and excellently correct your hearing, offer a variety of other hearing and operational enhancements and customizations, and offer nearly identical operational battery life. Plus, the Pixie fully recharge in just 2.5 hours vs. the four-hour Eargo recharge time and use a smaller case.

But it’s hard to recommend the Pixie over the less expensive and still comparatively excellent Eargo 5 (now discounted to $1,550) or a less expensive RIC (receiver in canal) alternative such as the Sennheiser All Day Clear or the Orka Two, which I am currently testing. Both these RIC models include Bluetooth music streaming and hands-free calling capabilities the Pixie and lack lacks, and both RIC models can be boosted to higher volume levels to overcome noisier situations than the Pixie or Eargo. And the Eargo 5 offers an audiologist’s help during setup and Eargo proactively checks in during the first months of use. While Zepp has excellent lifetime customer service, you're not immediately guaranteed an audiologist’s help.

Also, a few gnawing issues keep me from issuing a more full-throated recommendation for the Pixie.

+ Pros – Cons
  • Excellent self-fitting hearing improvement
  • Nearly invisible
  • Long battery life
  • Noise, wind reduction
  • Expensive
  • No Bluetooth
  • Minimal volume range
  • Annoying “low power” prompts

Ergonomics

If you’re unfamiliar with Zepp, or its full name, Zepp Health, the 10-year-old company makes not only hearing aids and other consumer and commercial health products but also the popular Amazfit smartwatch.

Physically, the Clarity Pixie in-ear buds are nearly twins to the varying Eargo models. Buds from both companies measure less than three-quarters of an inch long. Each Eargo bud weighs .03 ounces/.85 grams, each Pixie weighs .039 ounces/1.1 grams, which, believe it or not, I could feel in my hand, although the nearly incidental weight difference disappears once you place the Pixies in your ears. Pixie’s added weight is a result of its titanium alloy construction, and they do feel a bit more substantial than the Eargo, which does not impact performance or comfort. Both include a translucent pull cord wire to make the buds easy to remove. Both the Pixie and the Eargo buds are 1PX7 water resistant, and both carry two-year warranties and 45-day no-worry returns.

Zepp Clarity Pixie shown with case

Pixie includes only small and medium open and closed silicone dome tips along with a cleaning tool. Why no large-sized domes? Zepp says it has found that “99% of the users we have had fit into the domes we currently make,” which makes sense since you don’t want to seal your ear when wearing non-Bluetooth hearing aids.

Deciding between open or closed domes is a personal aural preference. The open provide a more natural sound but allows in extra ambient noise, while the closed do somewhat clog your canal but are better for conversations in noisy situations since they tend to dampen ambient noise and reduce feedback.

Charging

The oval beige Pixie recharging case is about a third smaller than the round black Eargo case, but both are flat and less than three-quarters of an inch thick, so equally pocketable. Both are recharged via a USB-C connection.

/Zepp case on the left and the Eargo case on the right

Eargo’s bud charging ports in the case are magnetized, so its buds snap and stay confidently in place for recharging and portage. The Pixie case lacks these magnetized ports. As a result, I often had trouble placing the Pixie buds back into the case securely. When trying to place the buds into the case, the first bud often fell out when I was placing the second, necessitating a flashlight floor search. On a couple of occasions, I opened the case in the morning to find one bud hadn’t recharged because I hadn’t pushed it firmly enough into place the night before.

Set up & controls

Eargo justifies its higher price by its inclusion of proactive post-purchase video audiologist setup and programming handholding. Rather than Eargo’s proactive audiologist aid, Zepp promises that a “team of specialists is here to help you every step of the way, from setup to checkout.” Do these “specialists” include audiologists or other hearing care practitioners (HCPs), or merely trained customer service representatives? “All the above,” the company told me. “We get you to the best person to handle whatever questions you may have.”

Like all self-fitting OTC hearing aids, the Zepp app includes a self-administered hearing test, which takes only around five minutes to complete. Once completed, the app recommends one of three program/volume settings, but you can switch between the three program levels in the app once you start wearing the hearing aids.

In addition to the self-fitting customization and program level, the Pixie app also provides acoustic situational presets: General, TV, Phone, Meeting, Restaurant, Music, Crowd, and Theater. Each preset allows you to adjust for both ears simultaneously or left and right separately. Also included are a customizable three-band EQ (Bass, Middle, Treble) and a Noise Filter (Off, Low, Med, High, Max), although I’m at pains to understand why someone wouldn’t always want maximum noise reduction. There is no specific wind reduction feature, however, but the Pixie’s seemed to naturally dampen whooshing amplification.

As with most self-fitting buds, you can adjust the overall volume for each ear or for both ears simultaneously.

You can also tap on your bud ear twice to activate a Clarity Mode to enhance conversation clarity, but I couldn’t hear much of a difference. There’s also a ‘Smart Phonecall’ toggle that, when turned on, cuts down on feedback when you hold a phone to your ear. You also can turn on reminders to either clean the buds or to replace the ear tips, which, like all ear tips, can get clogged with wax.

Pixie also comes with a Find Device feature that, while a great idea, barely works practically. For one thing, the feature will find your Pixies only if the bud or buds have a charge and are out of the case or if the case is open. In other words, if you misplaced the case with the buds inside or the buds have no juice, you’re SOL. If the Find Device does locate a misplaced bud, you can ask the app to make the bud beep – but the resulting beep is barely audible even when you’re right on top of it, exacerbated by the fact that you’re hard of hearing to begin with.

Performance

Overall, the Pixie crystalized sound and boosted volume as effectively excellently as the Eargo models. While the Pixie volume goes up to 11 (no, really) to provide plenty of sonic boost in most home and work scenarios, the aural difference between lowest and highest volume levels isn’t as wide as I’ve experienced with other OTC hearing aids, but similar to the Eargo.

By comparison, the RIC (receiver in canal) alternatives, which also have nearly invisible in-ear buds but with battery packs that rest behind the ear, can be boosted to higher volume levels to overcome noisier situations than the Pixie or Eargo models.

Unlike cheaper personal sound amplification devices (PSADs), you can hear differences between the varying Zepp acoustic presets. The TV setting, for instance, sharpens and increases treble levels, Crowd cuts down on ambient noise, and Theater audibly widens the soundstage. The difference between the varying Eargo models’ presets wasn’t quite as aurally noticeable.

Pixie battery life did not quite live up to its 17-hour bragging. I did manage to get to 16 hours and 45 minutes on one occasion, but usually, battery life settled in at around 15-16 hours, which still can be considered “all day” battery life. Zepp claims the Pixie charging case provides “about” 10 full recharges. It’s hard not to be skeptical about this claim since most earbud and hearing aid recharge cases usually provide 2-4 complete recharges, but I didn’t get a chance to test Zepp’s 10-charge assertion.

Even if they do deliver the same or slightly more operational life and case recharges than the Eargo, the last hour-plus of the Pixie battery life is marred by constant and annoying “low power” alerts voiced every 10 minutes. Since each bud drains power at slightly different speeds (in my case, the right bud always died around 5-10 minutes before the left) and each Pixie bud issues its own alert, you annoyingly hear alternating left-right “low power” twice every 10 minutes for more than an hour – with no indication via voice or the app of exactly how much operational time remains.

Also, bear in mind that, as with all rechargeable hearing aids, over a few years of constant use and recharging, you likely will lose 10-20% of the lithium battery capacity.

The bottom line

So – Pixie or an Eargo model? Or, something else?

If it’s Pixie vs. the Eargo 7 or the Eargo 6, and you think you need minimal audiologist aid, go with the Pixie. You get the same basic excellent hearing correction, but the Pixie is $1,000 less than the 7 and around $250 less than the Eargo 6. That, in the business, is what we call a no-brainer. And this comparison would boost my Pixie rating to 4 stars.

But I’d opt for the Eargo 5 over the Pixie. The Eargo 5 is around $250 less, plus you get Eargo’s proactive audiologist handholding, and you DON’T get Pixie’s annoying “low power” pronouncements for more than an hour. (Although, Zepp could curtail the “low power” pronouncements through a software update.)

This is why I think Pixie missed a pricing opportunity; the Pixie below $1,500 starts to become a compelling choice over all Eargo models.

However, you may want to look beyond the category of nearly invisible in-ear OTC models. RIC models, like the Sennheiser All Day Clear ($1,399) or the Orka Two ($1,899) RIC models that I’ve tested, provide higher volume-boosting and include Bluetooth music streaming and hands-free calling capabilities, which the Pixie and Eargo models lack. This decision is a personal one based on three factors: one, how much you’ll use Bluetooth for handsfree calling (since Bluetooth music through any Bluetooth RIC hearing aid is, well, technically, not good); two, how much volume you want/need; and, three how vain you are.

If you’re like me and you want the convenience of hands-free calling and higher ambient listening volume levels, then I recommend an RIC model. But if you care that people know you’re wearing a hearing aid, then the Eargo 5 should be your choice.

Check price on Zepp button

Check price on Amazon button

[Image credit: Stewart Wolpin/Techlicious]

Stewart Wolpin has been writing about consumer electronics for more than 35 years, including news, reviews, analysis and history, and has attended and covered nearly 50 Consumer Electronic Shows and around a dozen IFA shows in Berlin. For the Consumer Technology Association (CTA), he is an elector for and writes the official biographies of the annual CT Hall of Fame inductees, and is the keeper of the industry’s official history.

]]>
0 health-fitness otc-hearing-aids
7246 <![CDATA[Living with the Google Pixel 8 Pro vs 7 Pro: Real World Impressions]]> living-with-the-google-pixel-8-pro-vs-7-pro-real-world-impressions 2023-11-17T19:15:40Z 2023-11-17T19:37:47Z phones/google-pixel8pro-vs-pixel7pro-back-100px.jpg phones/google-pixel8pro-vs-pixel7pro-back-1200px.jpg Josh Kirschner joshkirschner@gmail.com 1 open Explore an in-depth, real-world comparison of Google Pixel 8 Pro vs Pixel 7 Pro. Uncover key differences and insights from a tech expert's experience.

]]>
Google Pixel 8 Pro vs Pixel 7 Pro Not rated As a tech reviewer, I get my hands on a lot of devices. But the Pixel 7 Pro has been my main phone for over a year, so I know its real-world plusses and minuses inside and out. When I received a review unit of the Pixel 8 Pro in early October, I swapped it in as my full-time device. After more than a month of intensive usage, here’s my analysis of how the two generations of Google Pixel phones compare.

Google Pixel 7 Pro on the left Pixel 8 Pro on the right.

The Google Pixel 7 Pro is shown on the left, and the Pixel 8 Pro is on the right.

Battery life – Winner: Pixel 8 Pro

The Pixel 7 Pro and the Pixel 8 Pro are specced with nearly identical 5000mAh and 5050mAh batteries, respectively. However, the new Tensor 3 processor on the Pixel 8 Pro clearly makes better use of that available juice. My Pixel 8 Pro consistently lasts me throughout a long day, no matter how much time I’m wasting playing games – even when I really should be doing something more productive. By contrast, my Pixel 7 Pro would often start gasping for air by around 9 pm.

Display – Winner: Pixel 8 Pro

Both the Pixel 8 Pro and 7 Pro have beautiful 6.7-inch OLED displays. The older Pixel 7 Pro is slightly higher resolution (1440 x 3120 at 512 PPI vs 1344 x 2992 at 489 PPI), but that isn’t noticeable to your eye. What was immediately noticeable to me was the significantly brighter display on the Pixel 8 Pro. At a peak brightness of 2400 nits vs 1500 nits, the Pixel 8 Pro is much easier to use in bright sunlight and other highly lit environments.

I also prefer the flat edges of the Pixel 8 Pro over the 7 Pro. Swipes and presses near the edge of the display work more consistently and just feel more natural.

Processor – Winner: Tie (for most people)

The new Tensor 3 chip in the Google Pixel 8 Pro is more powerful than the prior generation Tensor 2, but you won’t notice a difference in most real-world scenarios because, frankly, the old chip was already fast enough for most people. Every game I played or app I used ran smoothly on both devices. Sure, there will be edge cases where the processor difference may come into play. But if you’re “that person,” you might be leaning towards phones with the Snapdragon 8 Gen 2 processor, like the Samsung S23 Ultra.

Camera – Winner: Pixel 8 Pro

Comparing the two phones side-by-side, I found the camera performance to be pretty much identical in most scenarios. Oddly, sometimes the telephoto of the Pixel 8 Pro would offer more detailed shots, sometimes the Pixel 7 Pro would.

But where the Pixel 8 Pro really stood out is in low light. Using Night Sight mode, the Pixel 8 Pro delivers significantly more detail.

The Pixel 8 Pro also incorporates Google's newest AI technology for photo editing, which works very well for many situations (and less well for others). Want to remove people photobombing your vacation shots? Done. Want to move a subject around or make them larger/smaller for a better-composed shot? Done. The AI will automatically fill in the background to account for the changes.

Here’s an example from a press event we attended where I wanted to remove an errant body from a photo of our editor-in-chief testing out a product. A couple of quick touches in the Google AI photo editing feature and we have a perfectly acceptable result.

Original image taken by Google Pixel 8 Pro.

Original image taken by Google Pixel 8 Pro.

AI edited image created by Google Pixel 8 Pro.

AI-edited image created by Google Pixel 8 Pro.

But the AI can’t adjust for every background, and more complex scenes would often result in weird artifacts. Also, since the AI adjustments are done in the cloud, not on the device, you need to have an internet connection to use the feature and processing time is a little slow at around 12-15 seconds per adjustment.

Thermometer – Winner: None

The Pixel 8 Pro has a new thermometer feature that can read surface temperatures using a sensor on the back next to the camera. I found the app to be clunky and the temperature readings to be inconsistent and inaccurate.

Rather than a continuous temperature display, the app requires you to hold the phone and tap a button every time you want to take a reading. This wouldn’t be such a big issue if the thermometer weren’t so finicky. Often, taking readings while aiming at the same spot, the temperature could vary by as much as 20F. And when testing side-by-side against my trusty Typhus Instant Read Thermometer, the Pixel 8 Pro would often read 10-15F lower.

In short, the thermometer is a useless feature that only adds to the cost of the device.

Design – Winner: Tie

Unless you really know what you’re looking for, you would be hard-pressed to tell the difference between the Pixel 8 Pro and the 7 Pro. The size is nearly identical, as are the button placements (with minor variations for the SIM card slot). The one main design change is that the Pixel 8 Pro uses a matte glass back that is more resistant to fingerprints than the glossy glass of the Pixel 7 Pro. Style-wise, you may still prefer the glossy back (I do), or it may make no difference because you’re sticking your phone in a case, anyway.

Google Pixel 7 Pro on the left Pixel 8 Pro on the right.

The Google Pixel 7 Pro is shown on the left, and the Pixel 8 Pro is on the right.

Cost – Winner: Pixel 7 Pro

The Pixel 8 Pro carries an MSRP of $999, versus $899 for the Pixel 7 Pro. Google has a sale going on at the time of this writing for $799 and $649, respectively.

Overall – Winner: Google Pixel 8 Pro

When comparing the relative value of the Google Pixel 8 Pro and the Pixel 7 Pro, there’s no question that the Pixel 8 Pro comes out the winner. It offers better battery life, a much brighter display, better low-light camera performance, and some useful (if occasionally wonky) AI photo editing features. Google is also supporting the Pixel 8 Pro with seven years of OS and security updates (until October 2030), while the Pixel 7 Pro is only guaranteed updates until October 2027.

If you’re deciding between the two models, the Google Pixel 8 Pro is my strong recommendation.

Check price on Google button

Check price on Amazon button

[Image credit: Josh Kirschner/Techlicious]

Josh Kirschner is the co-founder of Techlicious and has been covering consumer tech for more than a decade. Josh started his first company while still in college, a consumer electronics retailer focused on students. His writing has been featured in Today.com, NBC News and Time.

]]>
0 tablets phones
7242 <![CDATA[Lenovo Legion Go Hands-on: A Powerful but Bulky Handheld Gaming PC]]> lenovo-legion-go-hands-on-a-powerful-but-bulky-handheld-gaming-pc 2023-11-16T02:16:25Z 2023-11-16T16:25:26Z computers/lenovo-legion-go-100px.jpg computers/lenovo-legion-go-1200x675px.jpg Suzanne Kantra suzanne@techlicious.com 1 open The Legion Go stands out in the handheld gaming PC market with its unique design, doubling as a gaming device and a full Windows 11 PC, but there are drawbacks.

]]>
Lenovo Legion Go Handheld Gaming PC Not rated Lenovo has a new entrant in the handheld gaming PC market, the Legion Go (starting at $699). It competes directly with the ASUS ROG Ally (starting at $599) and Valve's Steam Deck OLED (starting at $549), and offers a unique blend of features that make it stand out. After using the Legion Go for the past week, my impressions are mixed: there’s a lot to like about it, but there are also a couple of key drawbacks.

Lenovo Legion Go shown with the controllers attached.

 + Pros  – Cons
  • Bright, fast display
  • Detachable controller design
  • Serves as a Windows 11 computer and a game system
  • Heavy and awkward to hold
  • Controller doesn't work well as a mouse
  • Easy to accidentally touch the screen while playing, interfering with gameplay
  • Some games don't size properly to the display

Design

The Legion Go distinguishes itself in the handheld gaming PC market with its large 8.8-inch LCD display and unique detachable controllers. However, this large display comes with a drawback: the device is thick and heavy, making it cumbersome to hold for long periods. This bulkiness is more pronounced when compared to the slimmer Steam Deck OLED and ROG Ally. Despite this, the large screen and detachable controllers enhance its versatility.

Users can remove the controllers for independent use or place the Legion Go on a surface for tabletop gaming, thanks to its built-in kickstand. The right controller can even transform into a mouse when docked into the provided base. While innovative, I found this mouse functionality somewhat challenging to use.

Lenovo Legion Go shown with the right controller in the base acting as a mouse.

In contrast, the ROG Ally (7-inch) and Steam Deck OLED (7.4-inch) are more compact and lighter, offering a more traditional handheld experience with integrated controls.

Display and processor

The Legion Go's 8.8-inch 144Hz IPS LCD screen is bright and responsive. However, the ROG Ally's 7-inch 120Hz IPS LCD with a variable refresh rate can deliver a superior gaming experience in certain situations. Neither matches the Steam Deck OLED’s OLED, which provides superior contrast and more vibrant colors.

Powering the Legion Go and the $699 ROG Ally is the AMD Ryzen Z1 Extreme processor. The Steam Deck OLED uses a proprietary 6nm AMD processor, which I expect to be slightly slower when it comes to market.

Battery Life

Both the Legion Go and ROG Ally consume more power than the Steam Deck OLED, resulting in shorter battery life. Although the Legion Go has a marginally larger battery than the ROG Ally, its larger screen size likely levels the battery life between the two.

Ease of use

The Legion Go, as a Windows 11 PC, provides the flexibility of a traditional computer, allowing connections to external devices such as monitors, keyboards, and mice.

Gaming, however, presents some challenges. For instance, games like Rocket League do not fit the screen properly, leading to awkward stretching. Additionally, during gameplay, it's easy to accidentally touch the screen due to the controller's placement, which disrupts the game.

Navigating the standard Windows environment with the controllers is cumbersome. The touchpad, meant to aid navigation, often falls short in performance, forcing reliance on the controller's scroll wheel for tasks like scrolling.

The takeaway

Lenovo Legion Go shown with controllers detached.

The Lenovo Legion Go stands out in the handheld gaming PC market. It's particularly appealing for those seeking a device that can double as a computer. However, the associated larger size and weight will be drawbacks for some people.

Check price on Lenovo button

[Image credit: Techlicious]

For the past 20+ years, Techlicious founder Suzanne Kantra has been exploring and writing about the world’s most exciting and important science and technology issues. Prior to Techlicious, Suzanne was the Technology Editor for Martha Stewart Living Omnimedia and the Senior Technology Editor for Popular Science. Suzanne has been featured on CNN, CBS, and NBC.

]]>
0 computers computers
7232 <![CDATA[Reviewed: Elehear Alpha Pro – Affordable Multi-Function Hearing Aids]]> elehear-alpha-pro-review 2023-11-10T15:21:24Z 2024-12-10T18:57:25Z health/elehear-alpha-pro-dime-100px.jpg health/elehear-alpha-pro-with-dime-1200x675px.jpg Stewart Wolpin sw@stewartwolpin.com 1 open Unlock clearer sound without breaking the bank: The Alpha Pros deliver robust amplification plus Bluetooth music and hands-free calling at a low price.

]]>
Elehear Alpha Pro OTC Hearing Aids 4 The new Elehear Alpha Pro OTC ($999, now heavily discounted to $499) hearing aids capably amplify and clear up otherwise muddy sounds, especially voices, for those with mild to moderate hearing loss. With its Bluetooth music streaming and hands-free calling capabilities, the Alpha Pros provide a cheaper (if slightly less precise) alternative to the similarly styled and featured Sennheiser All Day Clear, my current pick for the best hearing-first multi-function OTC hearing aid.

As a non-self-fitting device, audio customization with the Alpha Pros is trickier to do on your own. However, the reason the Alpha Pros excel in audio amplification is that you get free – yes, free – post-purchase handholding by an audiologist to help set them up. Eargo, Sennheiser, and Jabra, amongst others, charge extra for an audiologist consultation or include the audiologist cost in the hearing aid price, which jacks up the cost.

While the Elehear audiologist won’t tune your Alpha Pros to match your specific hearing loss, they’ll help correctly set the app’s tuning options so you can get the best hearing enhancement from them. As a result, the Alpha Pros are an exceptional value if you buy them at their $499 discounted price.

Elehear Alpha Pro OTC heading aids with a dime for scale. The Techlicious Editor's Choice award logo is in the lower right corner.

+ Pros – Cons
  • Ample, natural sound amplification
  •  Bluetooth for phone calls and music
  •  Long battery life
  •  Free setup help from audiologist
  • Not self-fitting, limiting audio personalization
  • Poor quality sound with music and calls
  • Large charging case

Ergonomics

The Elehear Alpha Pros are traditional behind-the-ear hearing aids that hook over your ears. A teardrop-shaped battery/control module sits behind your ear, and the “receiver in canal” (RIC) thin speaker rests on the outer edge of your ear canal. This design makes the Alpha Pros – and similarly styled hearing aids such as the Sennheiser All Day Clear and Lexie B2 – nearly invisible unless viewed from behind. I found the Alpha Pros completely comfortable for all-day wear, and they juggled only occasionally with violent head shakes. However, putting your glasses on might require a bit of adjusting.

Elehear Alpha Pro shown in ear from the back

On the rear base of each control/battery module is a multi-function toggle button that uses short, multiple, or long presses to raise or lower the volume, power each bud on or off, or switch between the four ambient preset modes – General, Restaurant, Outdoor, and TV.

Included with the Alpha Pros are two sets of small, medium, and large silicone ear caps – one standard and one double-flanged. Also in the box are six pairs of extra wax caps and a cleaning tool.

For some reason, the Alpha Pro's case is unusually large – at 4 x 2.5 x 1.25 inches, it’s around three times the size of the Lexie B2 case and not really pocketable. But the Alpha Pro’s extra-large case may be justified by its ability to recharge the Alpha Pros up to seven times. Once charged for just 1.5 hours, the Alpha Pros are rated to run for 16 hours, with hands-free phone calls and music streaming slightly shortening overall listening time.

Setup

Before you do anything, you should take the Elehear online hearing test. No, the results will NOT be programmed into the Alpha Pros, but will let you know if you need hearing aids to begin with, and, more importantly, how to initially setup the Elehear.

During set-up, you’re asked to select the level of your hearing loss: Mild, Mild-to-Moderate, Moderate I, and Moderate II. Unfortunately, none of these terms are clearly defined, and the odds are you’ll pick the wrong one, which could result in poor Alpha Pro performance or even excessive feedback squealing.

Taking the online hearing test provides a decibel number and hearing level rating, but these results don’t seem to correspond with anything in the app. For instance, my hearing test resulted in a “Moderate” rating, but after suffering excessive feedback squealing and my own audiologist consultation, I switched from my initial Moderate I rating to Mild-to-Moderate, which eliminated all my feedback squealing problems.

Choosing the right-sized tips is also critical. The smaller-sized, single-flanged tips will result in a more natural, open-hearing soundscape. The double-flanged tips created a better canal seal for music listening and hands-free calling, but you get a more enclosed, some would say claustrophobic ambient aural experience. You’ll hear only what the microphones hear, and your own voice will be slightly muffled. If hearing better is your primary goal, choose smaller, single-flanged tips. But be prepared to experiment.

Once you get the initial hearing level set correctly and you’ve picked your tips, the Elehear app gives you control over each bud’s volume from 1-7. You also get two key sound/tone customization options: Speech Focus narrows the microphone to an about 180-degree range in front of you rather than 360 degrees, which muffles some ambient sound, and a Noise Reduction slider that effectively eliminates unwanted ambient sound when slid from “mild” to “strong.” You’ll also see icons for the four ambient presets: General, Restaurant, Outdoor, and TV.

Two screenshots of the Elehear app: On the left you see the volume sliders for each ear with presets for General, Restaurant, Outdoor and TV. On the right, you see the Noise Reduction slider.

You also can re-adjust your initial hearing level rating, as well as high-low situational effects adjustments: Ocean Wave to adjust for low male voices or engine roar, World Sound to adjust for speaking voices, TV, and radio sounds, and Birds Chirping to adjust for high-pitched melodies or phone ringtones.

In the settings menu (those three parallel horizontal lines), you’ll find an adjustable bass/middle/treble music EQ for each bud. There’s also a unique “real-time listening” mode that, when activated, funnels sound from a distant source through the buds to supplement the actual sound. However, the “real-time” sound lagged around a half second behind the actual real-life sound and created more of an annoying echo effect than improving the sound.

Collectively, all of these options offer a higher level of granular hearing adjustments than any other OTC hearing app I’ve used.

You can use the Alpha Pros sans Bluetooth or smartphone and simply use the multi-function toggle on each bud to change volume or switch between the pre-sets.

Each time you insert the Alpha Pros into your ears, you’ll hear a short activation tone consisting of a synthesizer version of “Deck the Halls” – why this Christmas chestnut, I have no idea – before a female voice informs you that “you’re connected” to Bluetooth. If you wander too far from your phone, you’ll be told you’re “disconnected.” You may have to return the buds to the case for a few seconds, then re-insert them to reconnect them to Bluetooth successfully.

Performance

How well the Alpha Pros perform for you will depend on the initial hearing level settings, along with the size of your ear canal, and what ear tips you choose.

If the Alpha Pros aren’t initially set correctly, feedback, as it is with many hearing aids, becomes a problem. But no hearing aid maker really warns you against potential feedback squeal – until Elehear. A third of the included Alpha Pro Quick Start Guide is devoted to ways of reducing feedback squeal. However, once the Elehear audiologist helped me correctly set my hearing level, feedback squeal ceased to be a problem.

Without the buds being precisely self-tuned with the results of the hearing test, you will have to futz with the varying and sundry settings a bit until you’re happy with the overall sound, and you may need additional minor tweaking or to choose a different preset depending on your aural situation.

For instance, the Speech Focus feature cut out some sound to my sides and behind me, and the presets did provide some minor changes, especially Restaurant and TV, which slightly emphasized voices.

Sliding the World Sound control up a notch improved my ability to hear talking heads when watching TV clearly.

Adjusting the Noise Reduction, which I assume is what the company refers to as its AI Noise Cancellation, dramatically lowered the volume for unwanted ambient sounds such as floor creaks, flowing water, and air conditioning or fans, and was the most effective way to heighten voices. The Noise Reduction also allowed me to clearly hear folks around me at public events while minimizing more distant conversation buzz.

In often deafening movie theaters, I could easily turn down or even mute the Alpha Pros volume. I just ended up leaving the settings on TV mode with “strong” noise reduction.

Not only was the sound clear and natural, I got plenty of volume. I didn’t have to turn the Alpha Pros up any higher than 2 or 3 for most situations – any higher volume resulted in distortion or feedback squeal.

Thanks to their multitude of adjustments and despite their lack of self-tuning, I was pleasantly surprised at the amplified aural improvement and volume the Alpha Pros provided.

As a product primarily designed for amplified hearing, the Alpha Pros are surprisingly serviceable as headphones, though the music sounds a bit thin. They’re not quite as good as the Sennheiser All Day Clear and certainly not anywhere near the sound quality from pure Bluetooth buds. But they’ll do in a pinch. For phone calls, I could clearly hear my end of the conversation, but my co-conversationalist complained of garble reception at their end, which is a major drawback. Elehear admitted to me that, for phone calls, the Pros perform better in quieter situations, a bit of an understatement.

Battery life is rated at 16 hours if you’re just amplifying your hearing. Elehear reps told me that just 20 minutes of listening to music shortens hearing aid listening battery life by a whopping two hours. So, a late-day recharge will likely be required if you listen to music.

The bottom line

Elehear’s Alpha Pro OTC hearing aids provide surprisingly effective sound amplification, abundant aural adjustments and volume, and hands-free calling for a non-self-fitting OTC hearing aid. For most folks with mild to moderate hearing loss, the Alpha Pros, at their discounted $499 price (usually $999), represent a great value.

They’re slightly less customized and precise, but the Alpha Pros are also less expensive than pricier self-fitting Bluetooth-enabled OTC hearing aids, such as the Lexie B2 ($999, discounted to $899) and the Sennheiser All Day Clear ($1,399.95). However, if the Alpha Pros are only available at their full $999 price, the Sennheiser All Day Clear (with optional tuning) would be my recommendation.

Check price on Elehear button

[Image credit: Stewart Wolpin/Techlicious]

Stewart Wolpin has been writing about consumer electronics for more than 35 years, including news, reviews, analysis and history, and has attended and covered nearly 50 Consumer Electronic Shows and around a dozen IFA shows in Berlin. For the Consumer Technology Association (CTA), he is an elector for and writes the official biographies of the annual CT Hall of Fame inductees, and is the keeper of the industry’s official history.

]]>
0 home health-fitness otc-hearing-aids
https://www.techlicious.com/json/reviews/50 7224 <![CDATA[Review: Sennheiser All-Day Clear - High-Quality Sound with a Catch]]> sennheiser-all-day-clear-otc-hearing-aids-review 2023-11-06T22:07:15Z 2024-01-02T21:41:16Z health/sennheiser-all-day-clear-in-ear-100px.jpg health/sennheiser-all-day-clear-in-ear-editors-choice-1200x675px.jpg Stewart Wolpin sw@stewartwolpin.com 1 open The All-Day Clear offer excellent hearing amplification plus Bluetooth music streaming, but comes up short on personalized tuning and its subpar case.

]]>
Sennheiser All-Day Clear OTC Hearing Aids 4 Sennheiser’s All-Day Clear over-the-counter (OTC) self-fitting hearing aids ($1,399), developed with Swiss hearing aid maker Sonova, present a conundrum. They have the potential to be the best OTC hearing aids that can also serve as Bluetooth headphones, producing excellent sound quality untuned out of the box. However, the All-Day Clear can’t reach their full potential without you paying to visit a Hearing Care Professional (HCP) to tune them for you.

Sennheiser All Day Clear shown with a dime for scale and the Techlicious Editor's Choice logo in the lower right corner.

 + Pros  – Cons
  • Ample sound amplification
  • High-quality Bluetooth music, phone calls
  • Long battery life
  • Need to visit a Hearing Care Professional for ‘optional’ $250 bud tuning
  • Poor app-based hearing test
  • Large case that doesn’t re-charge

Yes, the All-Day Clear are FDA certified as self-fitting OTC hearing aids, which implies they include a full hearing test to optimize and customize the buds to your particular hearing deficiencies. However, the app's hearing test resembles a sound preference questionnaire more than a diagnostic tool. That means you must opt to pay an additional $250 for an In-Clinic Care Package, a physical visit to one of the company’s 500-plus authorized HCPs in the U.S., for a hearing test and bud tuning to get the best-customized improvement and performance.

With only about 500 authorized Sennheiser HCPs nationwide, many potential buyers will find them inaccessible. I live in Manhattan, for instance, and there is only ONE authorized HCP in New York City – in Queens. I did searches on the Sennheiser In-Clinic Package site in other major metro areas and found a similar dearth of Sennheiser-authorized HCPs; there is only one in Chicago, only one in LA, and one in San Jose, only two in Miami, none in Houston, and none in Phoenix (but six in Scottsdale).

Without this extra audiologist visit, you are left with just Sennheiser’s inadequate app-based hearing test, which consists of just three questions that set preferred volume, clarity, and left-right balance levels. Without the optional HCP visit, the All-Day Clear delivers excellent hearing improvement but at a far higher price than other, more customized, self-fitting models.

All of which is unfortunate. Styled as old-fashioned behind-the-ear RIC (receiver in canal) aids, the All-Day Clear(All-Day Clear) provide plenty of loud, clear, and customizable volume, tone controls, better-than-expected Bluetooth music listening, long battery life, and a minimal amount of feedback squeaking or squealing, even though I didn’t have my review sample tuned by an audiologist.

Ergonomics

Sennheiser sells two All-Day Clear models: regular and Slim; I tested the regular model. The feature set is the same between the two styles, but the Slim model is notably sleeker, potentially offering more comfort for individuals who wear glasses and featuring a more traditional canal-sealing Bluetooth earbud-style earpiece with a more optimally-placed microphone.

Sennheiser All Day Clear shown in ear.

As noted, the All-Day Clear are traditional behind-the-ear hearing aids. A teardrop-shaped microphone/battery/control module sits behind each ear, the thin speaker wire hooks over your ear, and the “receiver in canal” (RIC) speaker tip sits inside the outer edge of your ear canal.

Included with the All-Day Clears are small, medium, and large silicone ear caps, eight wax guards, and a cleaning tool. While the larger ear tips better seal your canal for enhanced music listening, they also muffle your own voice when talking and magnify the sound of food chewing. I found the small ear tip a better all-around choice for more naturally sounding conversation at both ends.

I found the All-Day Clear light and comfortable for all-day wear, with the mic/battery module only jiggling occasionally with violent head shakes. But, like many RIC-style hearing aids, the All-Day Clear suffer a bit from microphonics – they slightly amplify the sound of the behind-the-ear nodule rubbing against your head or glasses temples, even when simply wiggling your ears. However, the All-Day Clear are virtually free of feedback squeal compared to all other similar models I’ve tested, a pleasant surprise.

On the rear of each behind-the-ear nodule is a multi-function toggle that provides most of the most common controls you’d need without having to use your phone. You can answer/reject/end a phone call, switch between sound modes, and manually raise and lower the volume when your phone isn’t handy or you disconnect the Bluetooth connection. I often disconnected Bluetooth when I didn’t want to hear sounds from the phone, such as sounds from social media posts, website videos, or games. While, say, watching TV or if I wanted to use my phone’s speaker to share my audio. Disconnecting from Bluetooth does not impact the All-Day Clear sound amplification, and you can use the behind-the-ear module toggle to control their volume manually.

In perhaps Sennheiser’s most curious ergonomic and functional misstep, the All-Day Clear round-ish charging case is HUGE, nearly four inches wide, two inches thick, and three inches wide. I found you can only carry it in a bag – in a pants pocket, it will look like you’re carrying a tennis ball. Even more shockingly, the All-Day Clear charging case doesn’t incorporate a battery to recharge the All-Day Clears on the go. The All-Day Clear case only charges the buds via a mini-USB power connection (yes, its connecting jack isn’t even USB-C). Why the All-Day Clear charging case needs to be so large – it just feels hollow – while lacking an integrated battery baffles me.

Sennheiser All Day Clear shown with the case.

The All-Day Clear buds are rated to run for 16 hours, which includes 2-3 hours of streaming music listening, thereby justifying their “all-day” label.

You can also buy a compatible but expensive TV Connector ($349.99) to feed TV sound directly to the All-Day Clear, but I didn’t get one to test. By comparison, the Linner Nova includes a TV sound connecting box.

Setup

After creating an account, answering a lot of what I thought were unnecessary personal/demographic questions, agreeing to Sennheiser’s anonymous data collection, and agreeing (or not) to get notifications, you are asked whether you opted to buy the In-Clinic Care Package and have had your All-Day Clears programmed by an audiologist or other HCP. If you haven’t, you’ll take the Sennheiser All-Day Clear app “hearing test.”

All app-based, self-fitting OTC hearing aid tests I’ve taken take around 5-10 minutes. These self-administered app hearing tests evaluate each ear separately by playing and asking when you can hear a series of different tones played at various frequencies and volume levels. These test results are then programmed into the hearing aids to tailor their aural corrective performance to your needs. This self-test approximates, if not duplicates, the tests and tuning you’d get from an audiologist or HCP.

The Sennheiser/Sonova All-Day Clear app hearing test, however, comprises just three total screens for both ears simultaneously – a 1-7 ranking of volume, a 1-6 ranking of “sound clarity,” and a thumbs-up thumbs-down ranking of balance. The Nuheara IQbuds2 Max and Apple AirPods Pro, which are standard Bluetooth earbuds that can double as hearing aids, offer far more customized settings for ambient hearing preferences. Considering the insufficiency of this hearing test, I can’t imagine why and how the FDA classified the All-Day Clear as “self-fitting.”

Sennheiser app screenshots of the hearing test: on the left its asking for sound clarity, on the right, it's asking about volume.

Performance

Since there are no authorized HCPs anywhere near me, I could not get the HCP test and tuning that might make the All-Day Clear worth their premium price. So, I can only judge the All-Day Clear performance without the benefit of tuning, comparing them to other RIC-style OTC hearing aids, self-fitting or not.

Without fine-tuning, the All-Day Clear indiscriminately amplifies sounds. This includes unwanted ambient noise, like creaking floors, keyboard key clacking, running water, etc. The Sennheiser app doesn’t include a voice-enhanced setting, noise reduction, or microphone directional focus. Many other OTC hearing aids, self-fitting or not, and non-hearing aid Bluetooth buds such as the Apple AirPods Pro and Nuheara IQbuds2 Max use these tools to help compensate for the lack of a personalized test and tuning and improve overall performance. Their inclusion would have aided the All-Day Clear’s non-tuned performance.

The Sennheiser app does include a slide-adjustable three-band equalizer (bass, mid, treble) and the always curious wind-noise reduction toggle – why would anyone NOT want wind reduction? You also get three sound modes: automatic, Live Music, and Bluetooth Streaming; the latter automatically triggers when you start streaming music.

Sennheiser app showing adjustments for the equalizer, ambient awareness and wind noise reduction.

You can adjust the volume for each ear or combine the left-right slide controls into a single control in the app. In the app, volume can be adjusted up from 0 to 5, which provides plenty of clear, distortion-free amplification, or down from 0 to -5. I was initially confused by the negative volume options; it took me a second to realize that 0 is the baseline volume likely based on your “hearing test” volume preference.

Sennheiser app screenshots showing volume adjustments. On the right you see single volume adjustment, and on the left you see separate volume for left and right ears.

While the All-Day Clear sounded clean and clear, they did not quite achieve the slightly more natural audio from other self-fitting hearing-only OTC models I’ve tested, such as any of the Eargos or the Sony CRE-C10. For instance, it almost seemed as if the All-Day Clear amplified the air flowing around my ears, and amplified sound occasionally warbled or wavered between left and right, as if I were moving my head in relation to a static sound source.

What might make the All-Day Clear worth their premium price is their Bluetooth music reproduction. No, the All-Day Clear do not produce anywhere near the audiophile experience you’d get from Sennheiser’s mainstream Bluetooth buds or headphones. But I was frankly surprised at the quality of the streaming sound, even if the sound was a bit thin and tinny compared to the larger, Bluetooth bud-style OTC hearing aids such as the HP Hearing Pro or the Sony CRE-E10.

For phone calls, my co-conversationalists reported I sounded “strange,” with a warbly voice, which is not unexpected. RIC-styled hearing aids place their microphones on the module behind your ear, which can block the sounds coming out of your mouth, as opposed to the microphones on in-ear buds, which are far closer to your mouth. I could hear perfectly well at my end, with no volume adjustment needed.

The bottom line

Sennheiser essentially forces customers to visit an HCP to get the optimal performance from the All-Day Clear when all other self-fitting OTC hearing aid vendors make their wares all-inclusive as intended by the legislation that created the product category. This is a shame because I can only imagine how much more natural and cleaner the All-Day Clear would sound with proper personalized tuning.

As it stands, the All-Day Clear ($1,399) offer the best hearing-first multi-function compromise, providing above-average performance for hearing assistance, Bluetooth music, and hands-free calling, though they are not the best in any of these functions. For single-function hearing aids, I recommend the Eargo 7 ($2,655), while the Sony CRE-E10 ($1,299) are my top choice for Bluetooth music listening-first hearing assistance.

I can only hope that Sennheiser has a change of heart and adds a more extensive hearing test and personalized bud programming capability – and a more pocket-friendly recharging case – to its next-gen All-Day Clear to eliminate the need and added expense of an HCP visit.

Check price on Sennheiser button

Check price on Amazon button

[Image credit: Stewart Wolpin/Techlicious]

Stewart Wolpin has been writing about consumer electronics for more than 35 years, including news, reviews, analysis and history, and has attended and covered nearly 50 Consumer Electronic Shows and around a dozen IFA shows in Berlin. For the Consumer Technology Association (CTA), he is an elector for and writes the official biographies of the annual CT Hall of Fame inductees, and is the keeper of the industry’s official history.

]]>
0 health-fitness otc-hearing-aids top-picks